If you want to save money and get creative, creating your own sandbox is a great option. Learn how to build a sandbox with these 25 homemade diy sandbox ideas and free step by step instructions plans that can help you craft the perfect spot for your little ones to play. From wooden sandbox plans with covers to personalized designs, you'll be sure to find something that meets your family's needs. With the right supplies, creating a homemade sandbox could be much easier than you'd expect. Once it's complete, all that's left is to fill it up with sand and let the fun begin!
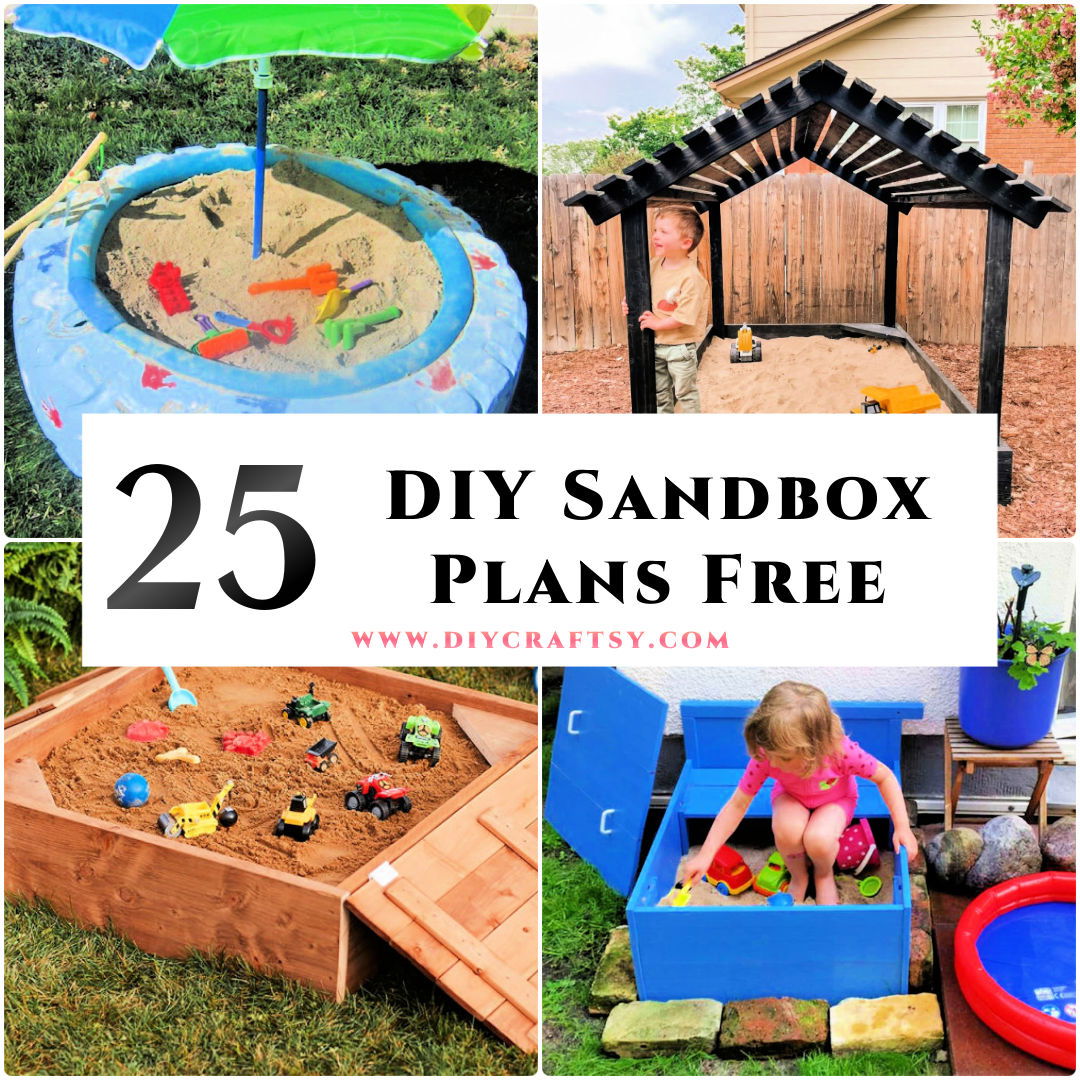
25 Easy DIY Sandbox Ideas and Free Plans
Looking for inexpensive, creative diy sandbox plans for your kids to play and have fun with? These 25 cheap diy sandbox ideas include step-by-step instructions and pdf plans designed to help you make a diy sandbox on your own. Whether you're looking for simple sandbox ideas on how to build a sandbox using recycled material, diy sandbox cover or ways to build your own sandbox from scratch, you can find them all here. You can explore diy sandbox ideas ranging from cheap diy sandbox ideas with lids to unique homemade covered sandbox plans that your kids will love – all with detailed instructions and free plans included!
What is a play sandbox?
A play sandbox is an enclosed area of sand where children can play and explore. It provides a safe place for kids to use their imaginations, build castles and towers, dig in the dirt, sift through it and search for treasures. Sandboxes also provide physical activity as well as educational benefits such as developing language skills, problem-solving skills, and social interaction. Sandboxes are an excellent way for kids to have fun while learning.
What are 4 styles of sandboxes?
The four main styles of sandboxes are sensory, play/activity, water and outdoor. Sensory sandboxes use a variety of textures and materials such as rice, beans or shells to stimulate the senses. Play/activity sandboxes offer different shapes and colors for children to explore with toys. Water sandboxes allow children to interact with water in a safe environment. Outdoor sandboxes are usually a large area with a long-lasting, durable material like pea gravel or sand. All styles of sandbox provide fun and engaging opportunities for children to explore and play.
3 factors to consider before building a DIY sandbox?
1. Budget: Consider the budget required to build a sandbox and whether it is feasible for your project.
2. Size: Decide on the sandbox size depending on your project's requirements.
3. Location: Select a suitable location for building the sandbox easily accessible by your team members or other stakeholders.
How to make a cheap sandbox?
Making a cheap sandbox is easy! To begin, find an area in your yard that is large enough for the sandbox. After that, purchase wood planks or a plastic liner to fill the space; use sand to fill it up. Put some toys inside and you have yourself a great play area for children without breaking the bank. Enjoy!
What can be used for a building a sandbox?
A sandbox can be built with a variety of materials including wood, sand, gravel, soft mulch, and rubber mats. It's best to use materials that are free of splinters and chemicals that could harm kids. Clean sand is the most popular choice as it is safe and easy to manipulate. Make sure the bottom layer is firmly packed and consider adding a protective liner for added durability. Finally, create edges and sides with wood or plastic to contain the sand. Enjoy building your sandbox!
Can you build a sandbox using recycled material?
Yes, it is possible to build a sandbox using recycled material. Some materials that can be used for this project include old pallets, plastic containers, old tires and even large cardboard boxes. With a little creativity you can create an eco-friendly sandbox for your backyard.
How can I make my sandbox more fun?
There are lots of ways to make a sandbox more fun! Consider adding sand toys such as buckets, shovels, and rakes. You could also add colorful items like balls or inflatable dolphins. Little ones will enjoy painting the sand with watercolors, or creating an outdoor obstacle course around the sandbox. Finally, don't forget about imaginative play - find ways to spark creativity and encourage kids to use their imagination!
How to make a cheap sandbox?
To make a cheap sandbox, you’ll need some wood, nails and sand. Cut the wood into four equal pieces for the walls of your sandbox. Nail them together to form a square shape and then fill it with sand. Finally, decorate it however you like to complete your homemade sandbox! Have fun playing in it!
Is a sandbox a good idea?
Yes, a sandbox can be a great idea for kids. It allows them to explore and stimulate their creativity in a safe environment. Sandboxes are also relatively inexpensive and easy to maintain. They provide an opportunity for children to play with friends, practice hand-eye coordination, learn about physics and mathematics, and express themselves through art. Sandboxes can be a wonderful way to bring children together, have fun and foster development.
Does a DIY sandbox need drainage?
Yes, it is important for a sandbox to have drainage. This will help prevent water from building up and the sand from becoming soggy. A hole should be dug at one corner of the sandbox, which can be connected to a drainpipe or simply covered with gravel. This will allow water to seep away and keep the sand dry. Proper drainage will also help prevent the growth of mold and mildew.
How deep should a sand box be?
The depth of a sand box depends on the size and use. Generally, it should be at least 6 inches deep for small children to play in safely. For larger children or adults, you can go up to 12-18 inches deep. If using the sand box as a garden bed, the depth should be 8-12 inches. Regardless of the depth, make sure to line the bottom with a tarp or fabric liner and use safe, clean sand. Enjoy!
How Long Will it take to build the sandbox?
The time it takes to build a sandbox depends on a variety of factors, such as the size and complexity of the project. Generally speaking, building a basic sandbox can take anywhere from 4-6 hours; more complex projects can take up to 16 hours or longer. Remember that the amount of work required may also depend on soil conditions, the type of materials being used, and the available tools. Therefore, it is important to plan ahead before starting this project.
What wood is the best to build a sandbox?
Cedar is the best wood for building a sandbox, as it is naturally resistant to rot and insects. It is also lightweight and easy to work with, making it ideal for building projects. Cedar is also cost-effective and available in a variety of sizes, shapes, and styles. To maximize its lifespan, be sure to treat the wood with a sealant or stain before assembly. Additionally, use stainless steel screws to increase durability and make cleaning easy. With proper care, cedar can last for years of outdoor fun!
Selecting a suitable location for the sandbox
When choosing a spot for your sandbox, consider the surrounding area. Make sure it is flat and level and away from any hazardous objects such as trees or shrubs. The playground should also be in an open space where children can move around freely without being restricted by walls or fences. Finally, look out for nearby sources of shade, as this can help keep the sand cool during hot days.
Is it cost-friendly to build a sandbox?
Building a sandbox can be relatively cost-friendly, depending on the materials used. Sand and gravel are generally inexpensive, while more decorative options such as bricks or pavers will increase the cost. Additionally, buying ready-made kits is often the most affordable option. With careful planning and budgeting, creating your own backyard oasis doesn't have to break the bank.
Are there other modifications for a sandbox?
Yes, many other modifications can be made to a DIY sandbox. These include adding shade, using weather-resistant materials, increasing the sandbox size, incorporating seating and play elements such as bridges or slides, or even creating a "water table" feature with waterproof containers. The possibilities are nearly endless for customizing a sandbox for your family's needs. With some creativity and a little DIY spirit, you can make a unique and fun-filled playground in your own backyard.
Safety and maintenance about sandbox?
To ensure a safe and enjoyable sandbox experience, it's important to maintain the area. This includes regularly checking for any sharp objects or debris, as well as making sure there are no holes or depressions that can trap little fingers or toes. To keep sand clean, be sure to cover the sandbox when not in use, and replace old sand with fresh sand. Regularly sweep away debris to keep the sandbox clean and hygienic. Lastly, adding shade over the area can help prevent overheating and sunburns.
How to calculate how much sand to fill a sand box?
To calculate how much sand to fill a sandbox, measure the length, width, and depth of the sandbox. Multiply these three figures together to find the volume of the sandbox. Next, convert this figure into cubic feet or yards depending on your preference. Finally, purchase enough loose-fill material (e.g., playground sand) to fill this volume. For safety, allow for 10-15% extra sand to account for settling over time.
How to build a sand box table?
To build a sand box table, you will need some wood, screws, drill, saw and sand. Start by measuring the area you want to use for the sandbox and cutting out the pieces of wood to fit. Attach them together with screws or nails and put sand in the created space. Secure it with a tarp if needed so that it does not blow away. Enjoy your homemade sandbox table!
What kind of sand should I use for a sandbox?
For a sandbox, it is best to use play sand that is specifically made for children's sandboxes. This type of sand is cleaned and sifted to remove debris and large particles, so it won't scratch up your kids’ skin or get into their eyes. Check the label for any allergies before purchasing this kind of sand. Additionally, add some baking soda to the sand in order to help keep it clean and free of bacteria.
How many bags of sand do I need for Sandbox?
The amount of sand you need for your sandbox will depend on the size and shape of the box. Generally, a medium sized square sandbox requires about 10 bags of play sand which is equivalent to 1 cubic yard. If you are using larger or irregularly shaped boxes, make sure to measure it out accurately to get an accurate estimation of how much sand you need. Additionally, if your sandbox is deep, you may need more sand.
How to keep your sandbox safe and sanitary?
Keep your sandbox clean by regularly washing it with soap and water to eliminate bacteria and germs. Make sure the sand is dry before covering the sandbox when not in use. Keep it away from areas that may have been contaminated, such as pet waste or garbage. Inspect the sand for insects or debris and remove any if present. Cover the sandbox when not in use and store toys or other items inside to keep it from being disturbed by animals or the elements. Keep your sandbox safe and sanitary for all who use it!
Is pressure treated wood safe for DIY Sandbox?
Yes, pressure treated wood is safe to use for building a sandbox. Pressure treatment involves forcing chemicals into the wood that help protect it against decay and insect damage. However, be sure to buy timber with a label indicating it has been pressure-treated with an appropriate chemical preservative. Furthermore, cover the sand surface with landscape fabric or other non-porous material to ensure wood remains free from moisture.
Can you build a sandbox with bench boards?
Yes, you can build a sandbox with bench boards. To do so, you will need to cut the boards into evenly sized pieces and assemble them together in the desired shape of your sandbox. You should also use screws or nails to ensure the boards don't fall apart easily. Once assembled, fill it up with sand, and your sandbox is ready for play! If you have enough space, you can also build a cover for your sandbox using the same boards. That way, you can keep it clean and safe from the elements.
Can you make a sandbox with wheels?
Yes, it is possible to make a sandbox with wheels. You will need to buy or build a sandbox frame with four caster wheels that can hold the weight of the sand and then simply fill it up with play sand. The advantage of having wheels is that you can easily move it around your yard, allowing kids to carry out their creative play wherever they want. This also makes it easier to store away when not in use.
How to build a sandbox out of pallets?
Building a sandbox out of pallets is relatively easy. First, select 4-6 pallets and arrange them in a square or rectangular shape, depending on the desired size. Secure the pallets together with screws or nails. Fill the sandbox with sand and secure it by stapling fabric to the bottom of each pallet or anchoring the structure to the ground. Finally, decorate and enjoy your new sandbox!
1. DIY Sandbox with Slatted Roof
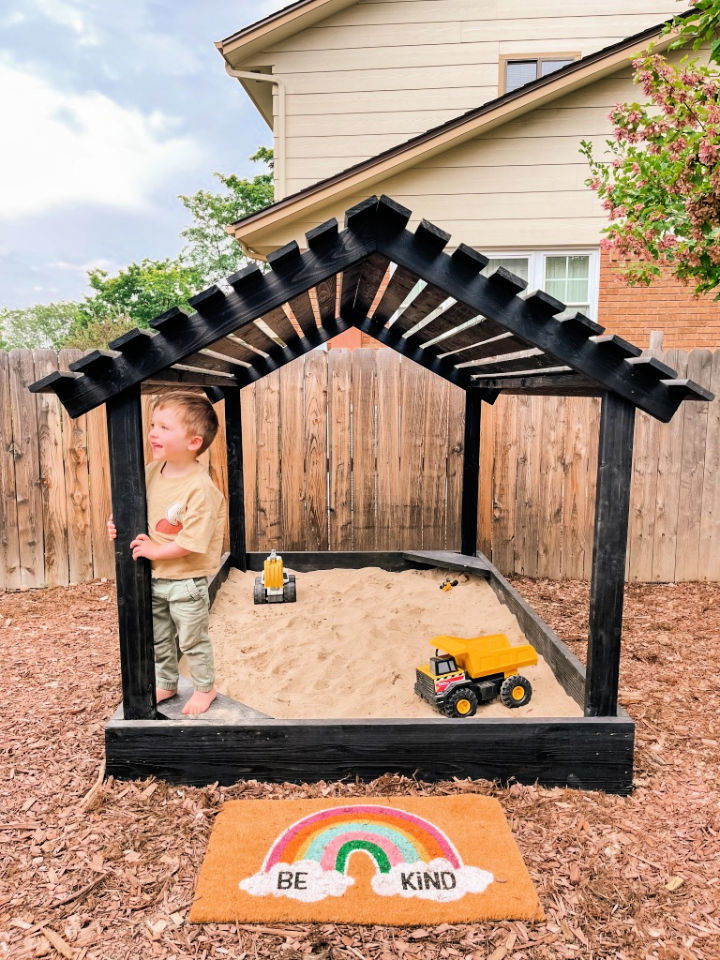
This DIY sandbox with a slatted roof is a great way to entertain kids in your backyard. It's a simple project that anyone can do in just one day, using readily available materials such as Fir Boards, play sand, exterior Screws, Varathane Classic Black Wood Stain and landscape fabric. Here's how to build it:
Start by cutting the fir boards to size. Assemble the frame of the sandbox using 3" screws, making sure to predrill the holes first. Cover the frame with landscape fabric, stapling it in place. Then, fill the sandbox with play sand. Finally, stain the slatted roof using Varathane Classic Black Wood Stain. For a more detailed tutorial, please see the attached easy DIY tutorial. sprucingmamahood
2. Homemade Hexagon Sandbox
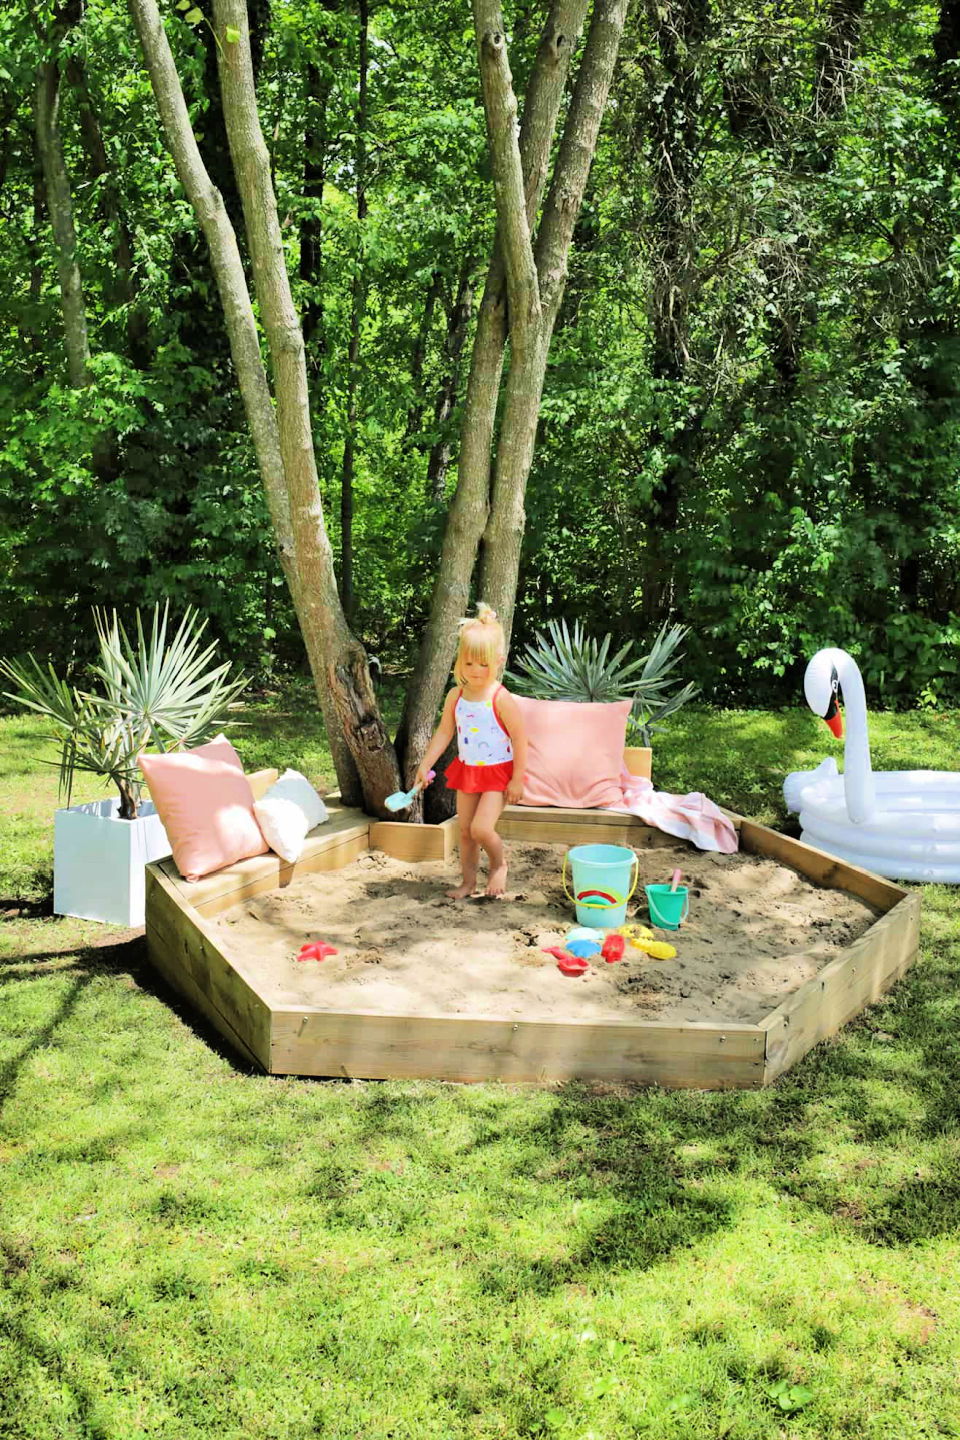
This Hexagon Sandbox DIY With Built-In Benches is a great project for your kids to enjoy on those hot summer days. This easy tutorial provides all the supplies and steps needed to complete this fun project. You will need some simple materials listed in the tutorial to put it up. After getting your supplies on hand, let's get started with the simple steps below:
Step One-Cut and Attach Lumber Boards. To create the hexagon shape for your sandbox, you'll need to cut six 2″x 8″ boards into equal lengths (based on the size of the sandbox you want). Once they are all cut, use deck screws to attach them together at each corner, creating a hexagon shape.
Step Two- Add Seats and Stain the Sandbox. To create seats around the perimeter of your sandbox, cut two 2″x 4″ boards for each seat into equal lengths and attach them perpendicularly to the inside of your hexagon frame using deck screws. For added stability, you can also screw in a 1/2″ galvanized pipe horizontally along each 2″x 4″ board. Finally, stain or paint your sandbox if desired and let it dry completely before adding sand.
Step Three – Add soil to level the ground. If your sandbox isn't going to be on level ground, you'll want to mound up some soil in the center so that everything will be level when you lay down your landscape fabric and sand.
Step Four- Add Landscape Fabric and Sand. Once the ground is dry, lay down a piece of landscape fabric big enough to cover the entire area of your planned sandbox. Secure it to the sandbox with landscape pins placed every few inches around the perimeter. Next, add a layer of sand over the landscape fabric. You want the sand to be about 6 inches deep. Level it off as best you can. That's it! Your Hexagon Sandbox is now complete and ready for hours of fun in the sun! abeautifulmess
3. How to Build a Sandbox for Kids
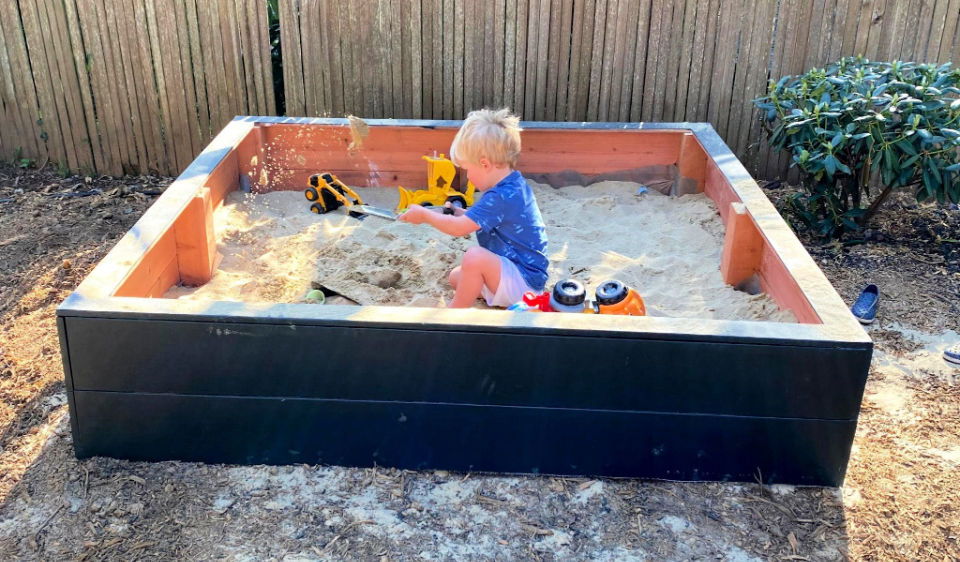
Building a DIY kids' sandbox is a great way to bring more play into your backyard. This easy tutorial will direct you on how to build a sandbox that provides plenty of play areas for kids and can be completed quickly. All you need is some redwood boards, wood screws, wood filler putty, outdoor primer, outdoor paint, and sandbox sand. To get started, follow the easy tutorial below. With just a few basic materials and a little creativity, you can create a DIY kids' sandbox that your children will enjoy for years to come. coda
4. Upcycled DIY Sandbox Plans
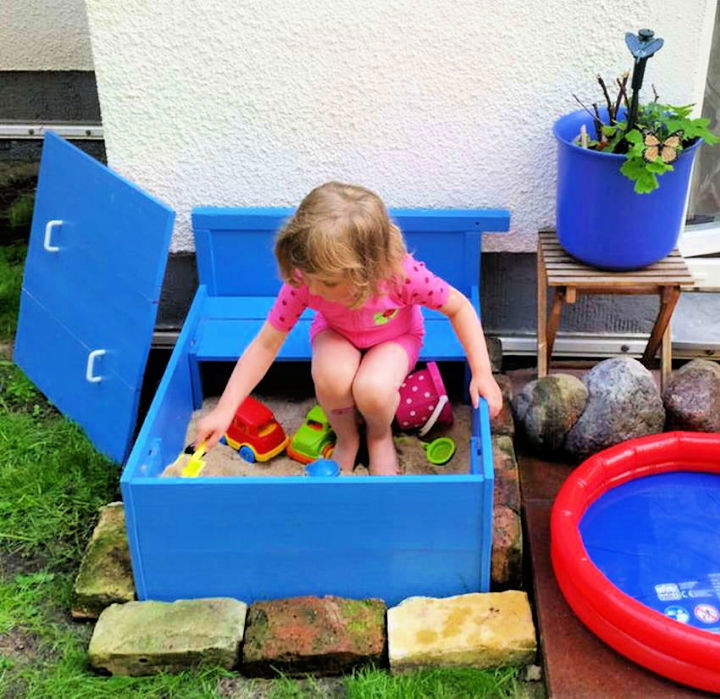
Upcycling is a fantastic way to give new life to old things. It's also a superb way to save money. That's why you will sure to love this Upcycled DIY Sandbox. It's made from an old, squeaky dresser, but it's been given new life as a kids' play spot. Plus, it has a mini bench inside, so your little ones can comfortably sit and play.
Best of all, it's easy to build and relatively cheap. So if you're looking for a fun project that won't break the bank, this is the perfect option. Check out the tutorial below and get started today. instructables
5. DIY Wooden Sandbox With a Lid
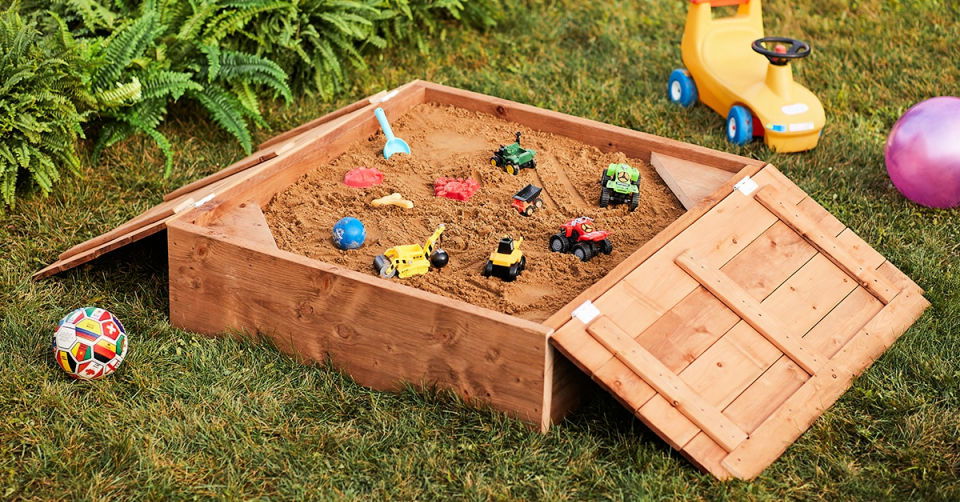
A DIY Wooden Sandbox with a Lid is a great way to protect your sand from getting polluted. It's also an easy way to close your sandbox when your kid has done playing. This project will take about 4 hours to complete and requires intermediate skills.
You will need treated wood, treated wood screws, outdoor hinges, outdoor handles, exterior paint, satin finish, play sand, landscape fabric, and staples. Follow the easy tutorial below to build your own DIY Wooden Sandbox with a Lid to provide your kids with unlimited fun. rona
6. How to Make a Sandbox for Two Kids
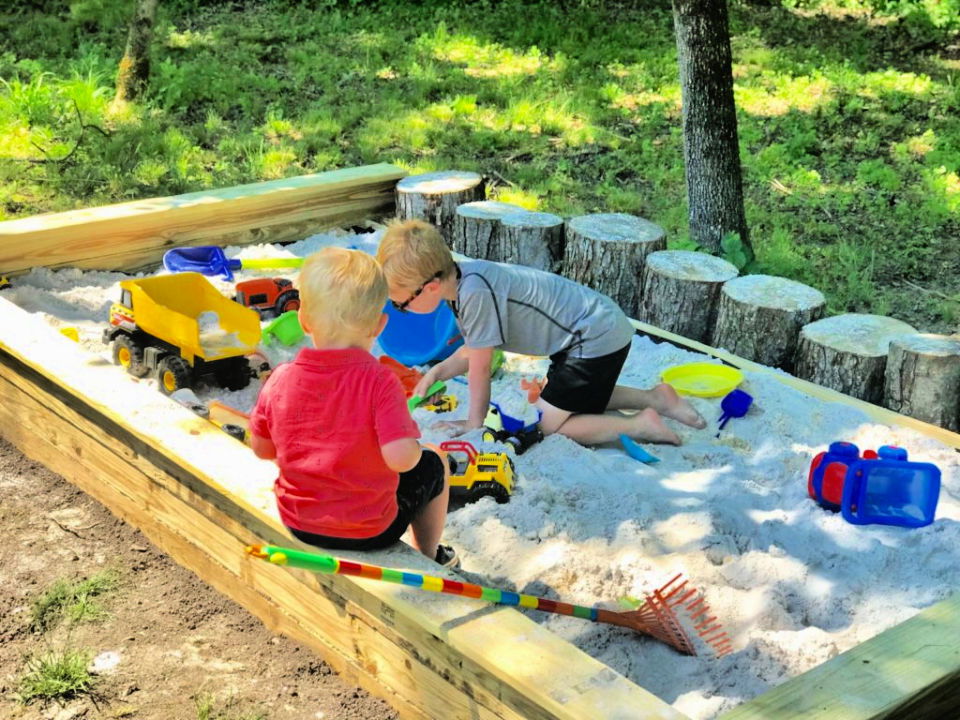
DIY Sandbox for Boys is a fantastic project that will give your boys or any kid a fun spot to explore their creativity. This easy tutorial will instruct you on creating a quick and cheap sandbox that your boys will love.
All you need is some tree logs, 4x4s, 5/4" x 6" decking boards, screws, landscape fabric, staples, and play sand. Follow the simple instructions in the tutorial, and you'll have a great sandbox in no time! sweettoothlife
7. Building a Sandbox With Cover
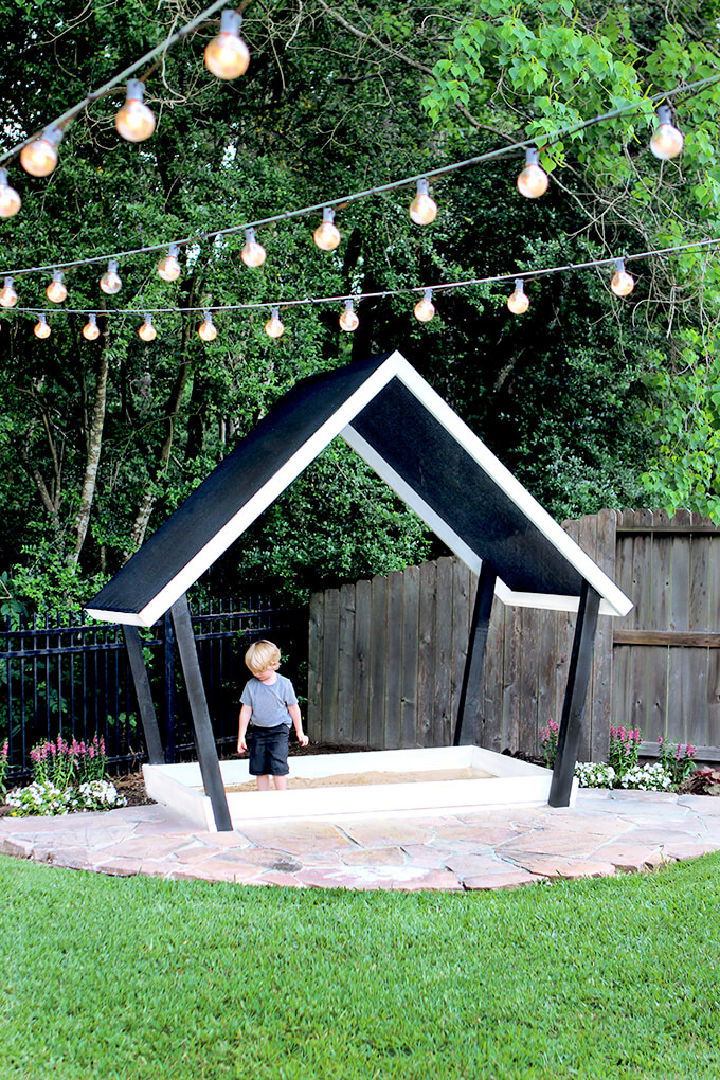
Building a DIY Sandbox House is a fun and easy project for the whole family. With just a few supplies, you can build a beautiful and unique sandbox house that will be the envy of your neighbors. This tutorial will help you through the easy steps to build a stunning black and white sandbox house that will add interest to your backyard, using pressure-treated pine, exterior paints, and a black heavy-duty sunscreen fabric shade roll. You will also need a miter saw, drill, and staple gun. With this easy DIY Sandbox House Build Plan, you'll have your own backyard oasis in no time! grayhousestudio
8. DIY Color Block Sandbox Ideas
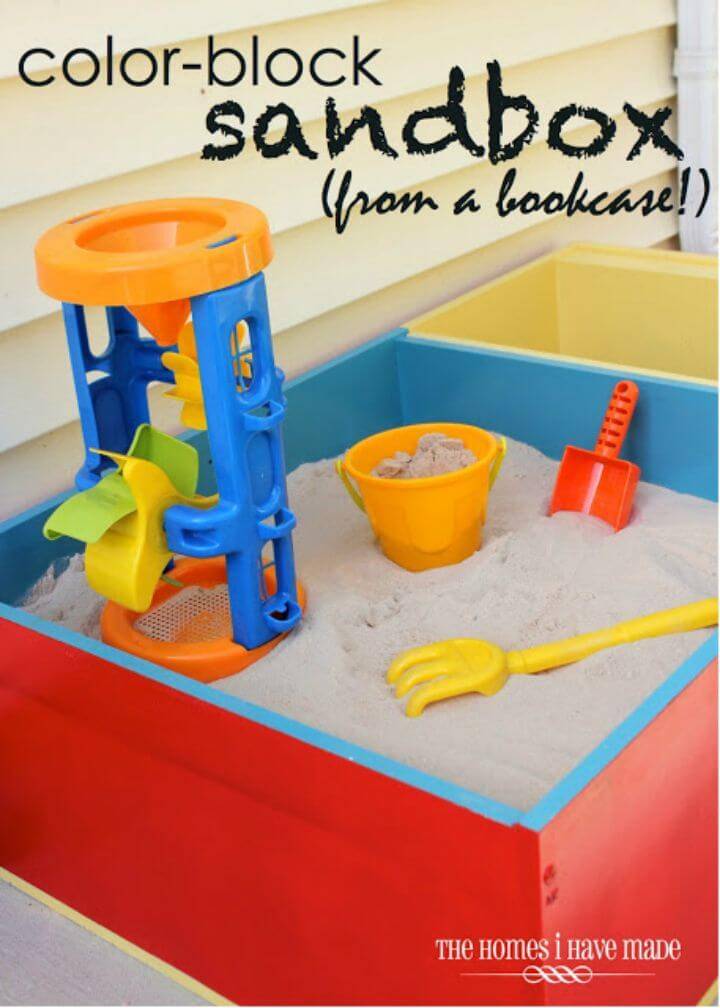
This DIY Color Block Sandbox is an easy and fun way to add an element of play to any backyard! The nominal size and cute design make it perfect and handy for your kids. It is also a superb way to upcycle an old bookcase, and the lovely transformation will impress any guests. Super quick and easy to build, this sandbox can be built in a few hours! To build your own DIY Color Block Sandbox, you will need the simple materials mentioned in the guide.
Follow these step-by-step instructions to build your own DIY Color Block Sandbox:
- Prime the bookcase with Zinsser 123 primer. This will help the paint to stick better and prevent rust.
- Paint the bookcase with yellow spray paint. Allow the paint to dry completely.
- Use painter's tape to create a block pattern on the bookcase. Use two rows of three blocks, but you can create any design you like!
- Paint the exposed areas with blue spray paint. Allow the paint to dry completely.
- Remove the painter's tape to reveal your color block design!
- Paint the outside of the sandbox with red Rustoleum paint.
- Reinforce all the junctions with screws. This will help to keep your sandbox sturdy and safe for playtime!
- Cut pieces of 3/4″ plywood to fit as a base, end panel, and lid for your sandbox. This will provide extra sturdiness and protect little fingers from getting splinters. Add a castle stencil on your lid using a Cricut machine, and follow the steps in the guide to make it more appealing.
- Attach the plywood pieces with screws, and you're finished!
Now it's time to fill your sandbox with sand and enjoy some backyard fun! - Add some toys or accessories like sun umbrellas or buckets so your kids can make the most out of their new backyard playground! homesihavemade
9. How to Build a Raised Sandbox
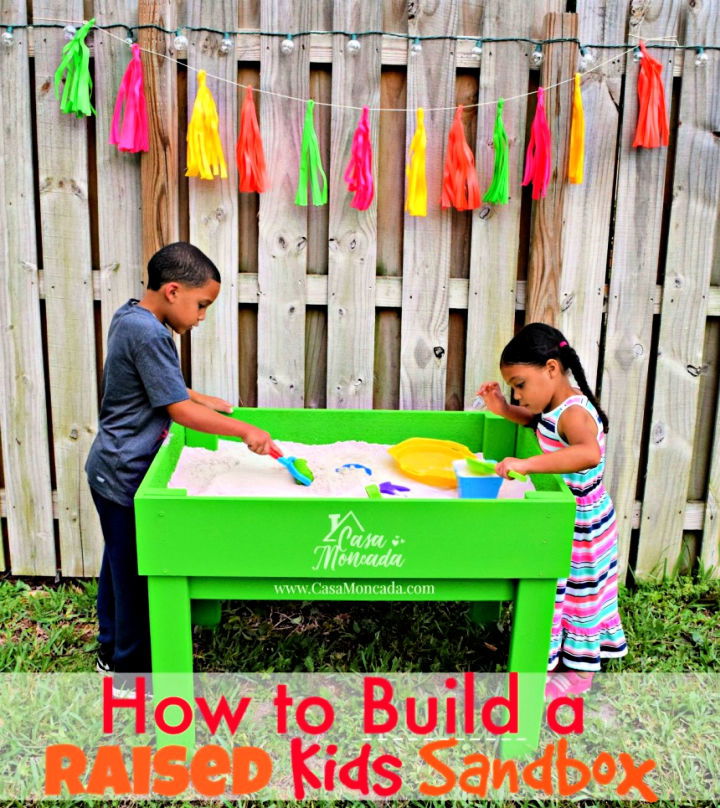
A DIY Raised sandbox is the perfect backyard addition for kids of all ages. Not only will it keep them entertained for hours on end, but it will also enhance their gross motor skills and creativity. Best of all, it can be built in a few hours using simple supplies readily available at most hardware stores.
To get started, you'll need to gather your supplies. You'll need wood (1x8x12, 3x4x8, and one pre-cut plywood board 2ft x 4ft), screws, play sand, paint, a paintbrush, and liquid nails clear sealant. Once you have your supplies, follow the step-by-step instructions below to build your own DIY Raised sandbox.
Cut the 1x8x12 and 3x4x8 boards into equal lengths using a miter saw or jigsaw. Assemble the boards into a rectangular frame using screws and liquid nails. Then, clamp the plywood board onto the frame and cut out a doorway using a jigsaw. Once the door is cut out, remove the clamp and sand down any rough edges. Finally, paint the sandbox your desired color and let it dry completely before adding sand. Fill the sandbox with play sand and enjoy! sprinklediy
10. Making Sand Box with Built-In Seats
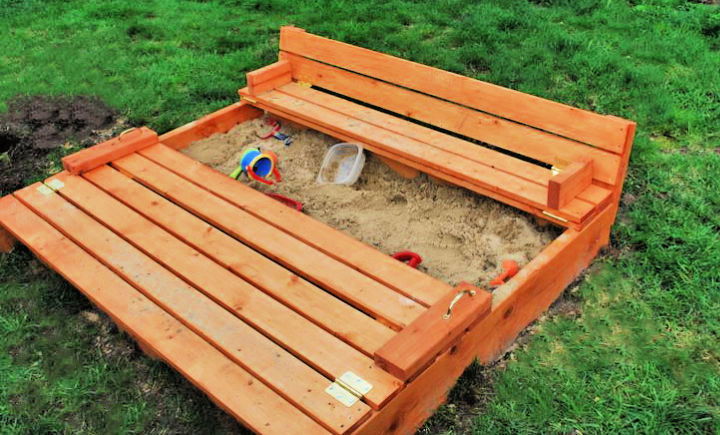
This DIY Sand Box with Built-In Seats will be a perfect project for the beginner DIYer. It's a simple build that can be completed quickly, and it's dandy because the lid doubles as a seat! The lid is also hinged so it can be opened and closed easily - no more wrestling with a heavy lid! Plus, the seats are built right in, so there's no need to haul around extra chairs.
Simply pull up a seat and enjoy! Follow the step-by-step instructions below to bring some convenience to your space with loads of fun by building your own DIY sandbox with built-in seats. ana-white
Rock Painting Ideas: With just some paint, rocks, and creativity you can create beautiful works of art. These easy rock painting ideas will help you to make: floral painted rock designs, animal faces, mandalas, abstract patterns, landscapes, custom quotes or messages and more!
11. Build Your Own DIY Covered Sandbox
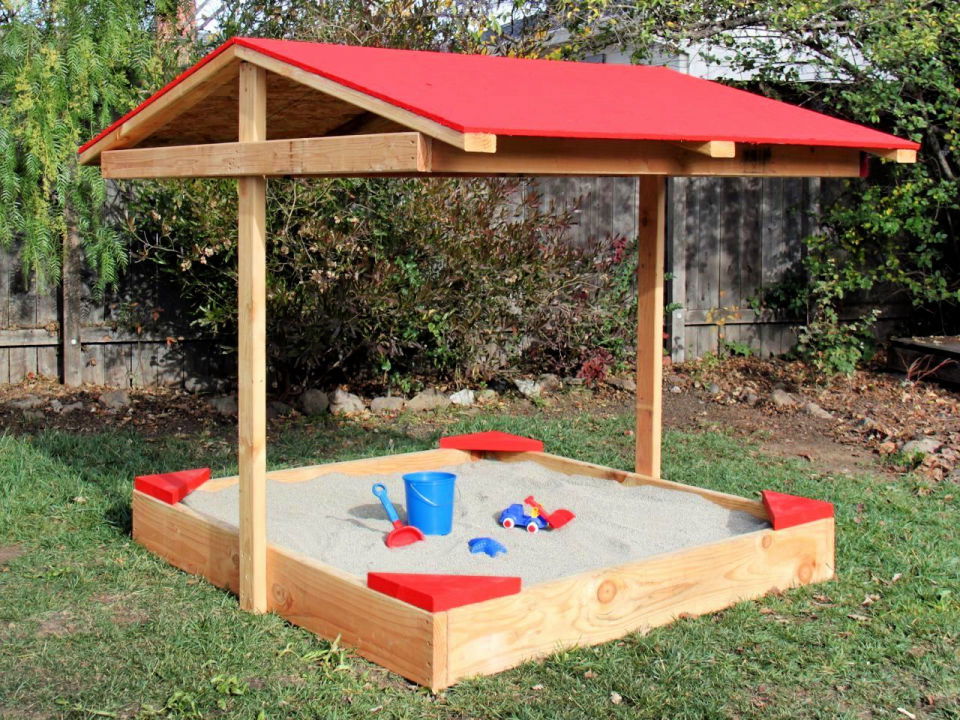
This DIY Covered sandbox will be a great addition to any backyard play area. Not only is it functional, but it also has a roof that will keep the play area well-shaded. Plus, it will keep it free from dirt and rain. The best part is that corner seats provide seating for kids or adults. And it's easy to build! Just follow the step-by-step instructions below.
You'll need (2) sheets 4' x 8' x 1/2" plywood, (2) 2x8 x 12' pressure-treated boards, (7) 2x4 x 10' pressure-treated boards, trim-head screws, a staple gun, galvanized staples, landscape fabric, paintbrush, roller and painter's tape, exterior-grade paint and kid-safe sand. Once you have all your materials sourced, follow the instructions, and you'll have a DIY Covered sandbox in no time! hgtv
12. DIY Sandbox With Lid Seats
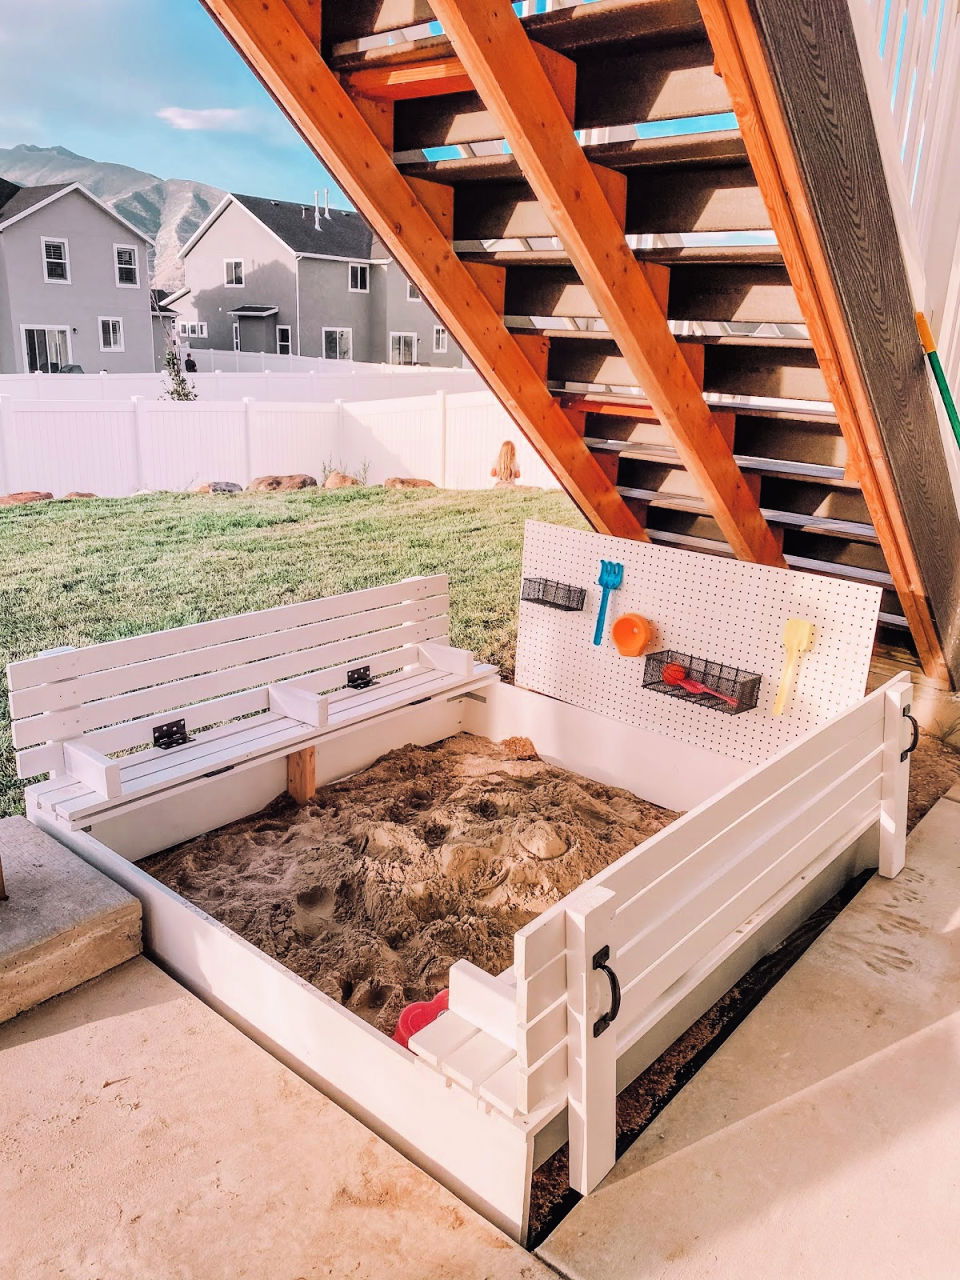
Building a DIY Sandbox With Lid Seats is an easy project that will create an awesome, shaded sandbox that is a perfect way to use an unused space while costing a little. It also features a lid that can be doubled as seating and protect from dirt and rain and has storage for kids' playing tools.
You will need the following materials to build one or four
1x10x8 boards, twenty 1x3x8 boards, 2- 2×4's, exterior screws, Kreg screws, Corner supports, Hinges, and gate handles.
Follow these step-by-step DIY sandbox instructions:
- Cut all your boards according to the list of materials needed.
- Create seats by attaching the 1x3s to the two outside boards using the Kreg Jig on all four sides, as shown in the image below. Make sure the distance between each seat is no more than 19 inches so that it can support an adult.
- Sand it to smooth.
- Paint or condition the wood however you'd like. Once dry, add your hinges to the lids as
directed in the tutorial below. Attach handles to make it easier to open and close the lids. - Position your sandbox where you want it to go and fill 'er up!
Now you have successfully built a DIY Sandbox With Lid Seats! huntersofhappiness
13. Sandbox With Folding Lid and Seat
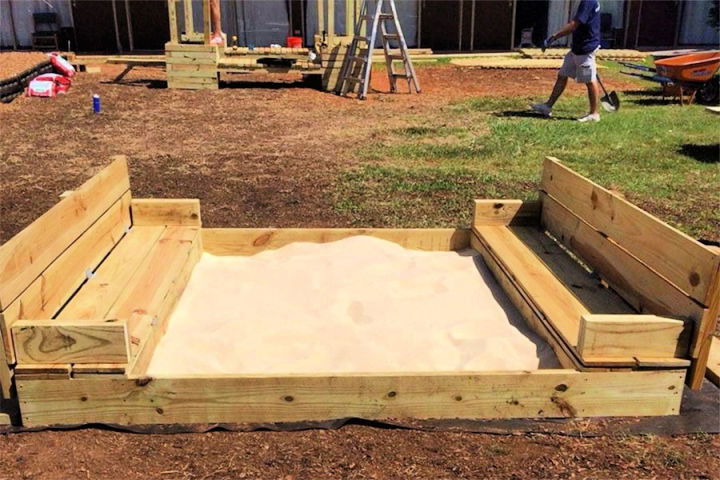
This DIY Sandbox With Folding Lid and Seat can be an excellent entertaining and playing element for kids. It can enhance healthy development, social skills, and coordination. This great sandbox has certain qualities, like being easy to build and maintain. This particular sandbox has many benefits that make it a great addition to any backyard.
The DIY Sandbox With Folding Lid and Seat is very easy to build with step-by-step instructions provided in this guide. The only materials you need are 1x8x8' boards, 2x8x8' boards, 2x6x8' boards, heavy gate handles, duty strap hinges, screws, deck screws, sandpaper sheets, and Play sand. This sandbox will provide hours of fun for kids while being a great value for the money. Build your DIY Sandbox With Folding Lid and Seat today! kaboom
14. DIY Backyard Sandbox Design
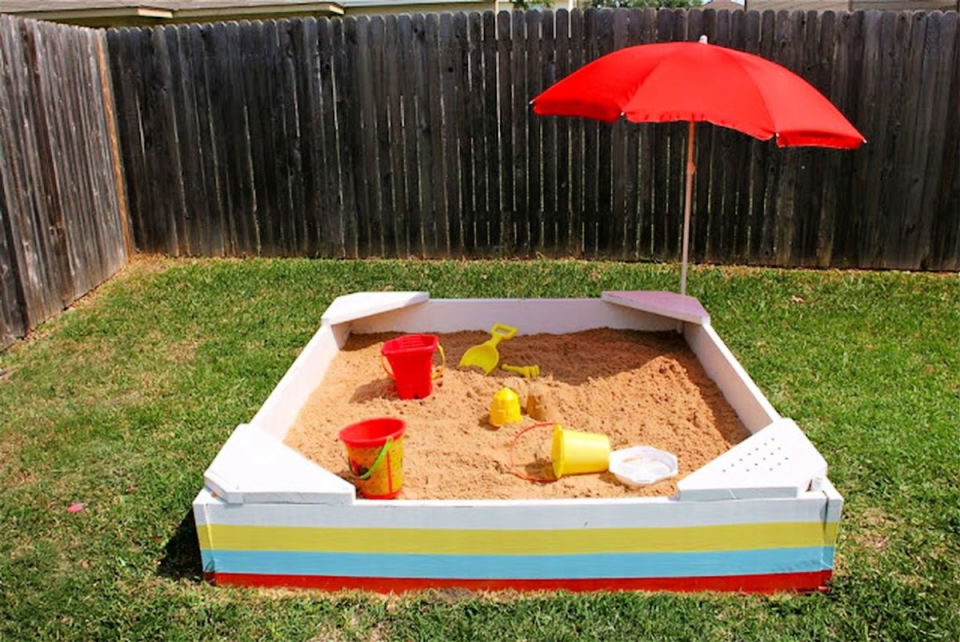
This DIY backyard sandbox is a great way to bring the beach to your backyard. Not only will it give your backyard a fresh, bright look, but it will also add a practical beauty element. Plus, it's a great way to keep the kids entertained! Here's how to build your own DIY backyard sandbox.
You'll need some wooden slats for the bottom of the sandbox, leftover wood for seats or benches, screws, PVC pipe for two corners to adjust a beach umbrella, and sand. The first step is to build the frame of the sandbox. Then, you'll need to add the bottom slats. Once the bottom is in place, you can add the sides. Make sure to screw everything in place, so it's nice and sturdy. Then, add your sand and enjoy a beachy vibe in your own backyard! madeeveryday
15. Easy DIY Pallet Sandbox
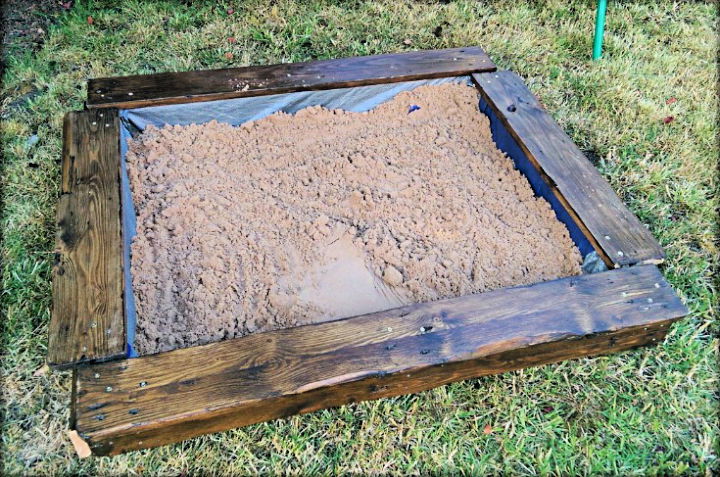
This DIY pallet sandbox project is a simple and easy way to provide entertainment for kids while spending quality time with them. It can be built in the afternoon with little money spent on materials as it is made from upcycled pallets. Any wood pallet will do, but ensure they are in good condition and not too splintered.
Yellow zinc passivated screws and nails will help prevent rust. Once the sandbox is assembled, it can be stained or left as is. Add some sand and toys, and DIY Pallet Sandbox is ready for hours of fun! These step-by-step instructions will help you create your own DIY pallet sandbox in no time. upcyclethisdiy
16. Cheap DIY Sandbox at Home
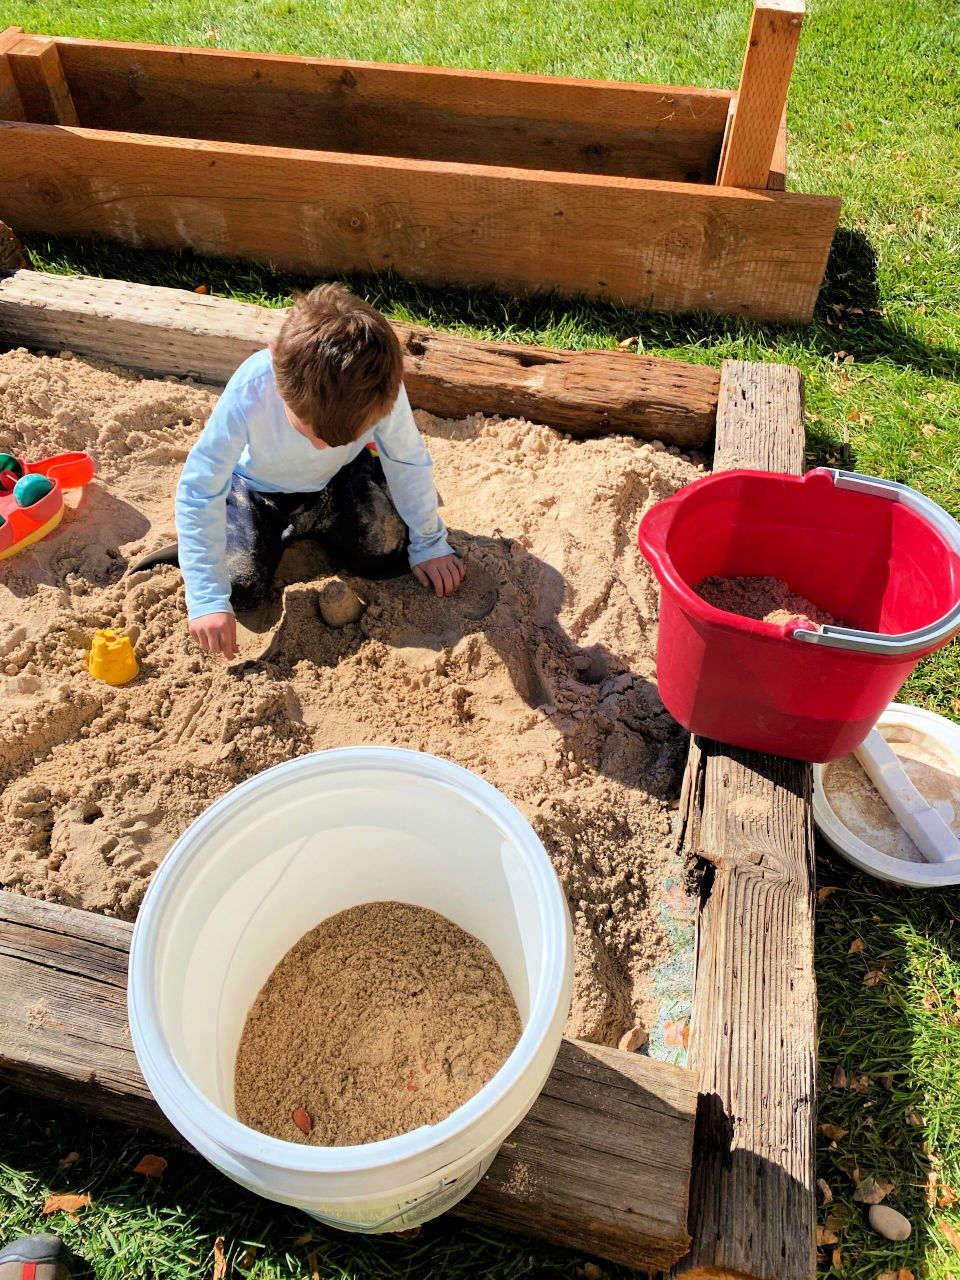
This Cheap Rustic DIY Sandbox is the perfect project for thrifty parents who want to provide their kids with a fun spot to play. This project is easy to build the piece and can be done in a few hours. Plus, it's very inexpensive; you can easily build this sandbox for less than $25.
To build your Cheap Rustic DIY Sandbox, you'll need Barn wood ties, plastic lining, sand, brackets, and a few basic tools. Once you have all of your materials, follow the step-by-step instructions. In no while, you'll have a beautiful and functional Cheap Rustic DIY Sandbox that your kids will love. nonightlights
17. Upcycled Tire Sandbox Ideas
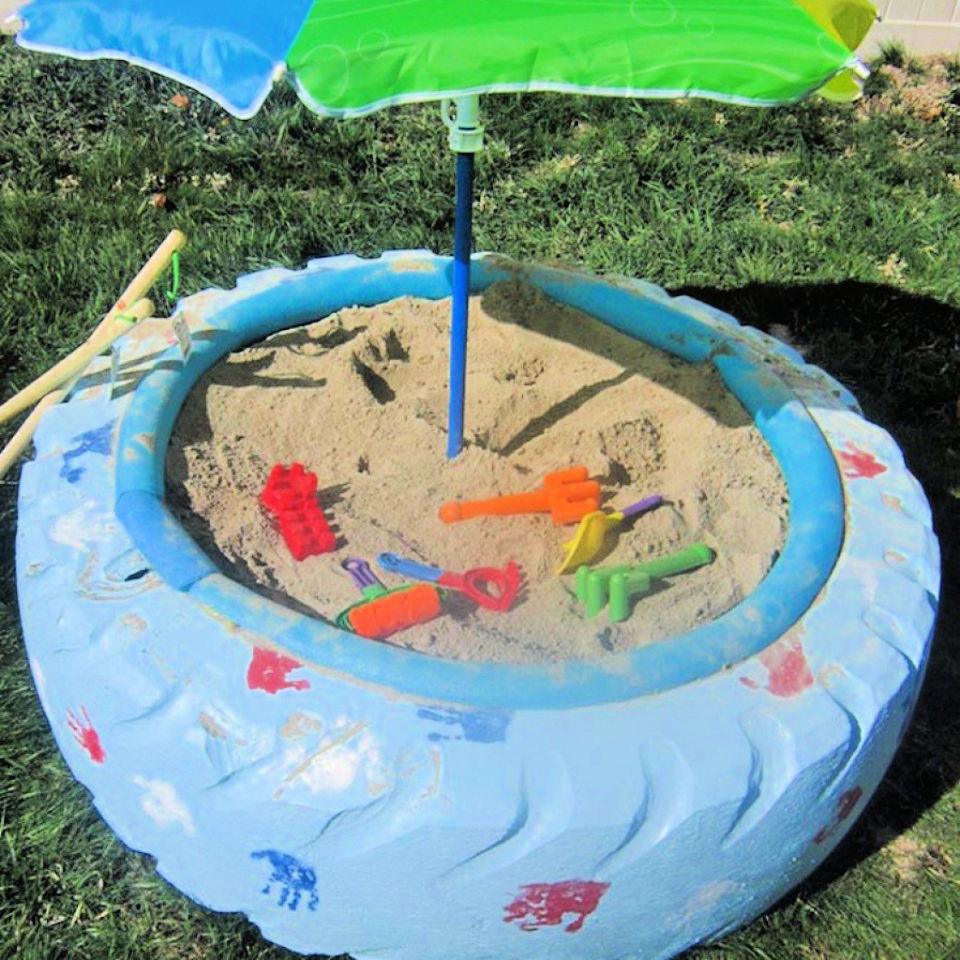
A DIY upcycled tire sandbox is a great way to bring fun and excitement to your backyard while being eco-friendly and frugal. Building a sandbox is an easy project that can be completed quickly with some basic supplies and a blast of fun. Plus, having a sandbox will keep your kids healthy and happy as they enjoy the outdoors.
To build your own tire sandbox, you will need an old tractor tire, a pool noodle, an old sheet or weed guard, sand, plywood for a sandbox cover, and a reciprocating saw. You can find most of these items around your house or at a local hardware store. Once you have all of your supplies sourced, follow these simple steps:
- Cut the pool noodle into thirds with the reciprocating saw and place them evenly around the tire's perimeter. This will act as a cushion for the sand.
- Place the old sheet or weed guard inside the tire on the pool noodles. This will help keep the sand clean and free of debris.
- Fill the tire with sand using a shovel or bucket. Pack it down as you go to prevent it from spilling out.
- Place the plywood on top of the tire and cut out a hole in the center that is big enough for your child to crawl through.
- That's it! Your DIY upcycled tire sandbox is now complete and ready for hours of fun! ideas2live4
18. DIY Sandbox Picnic Table
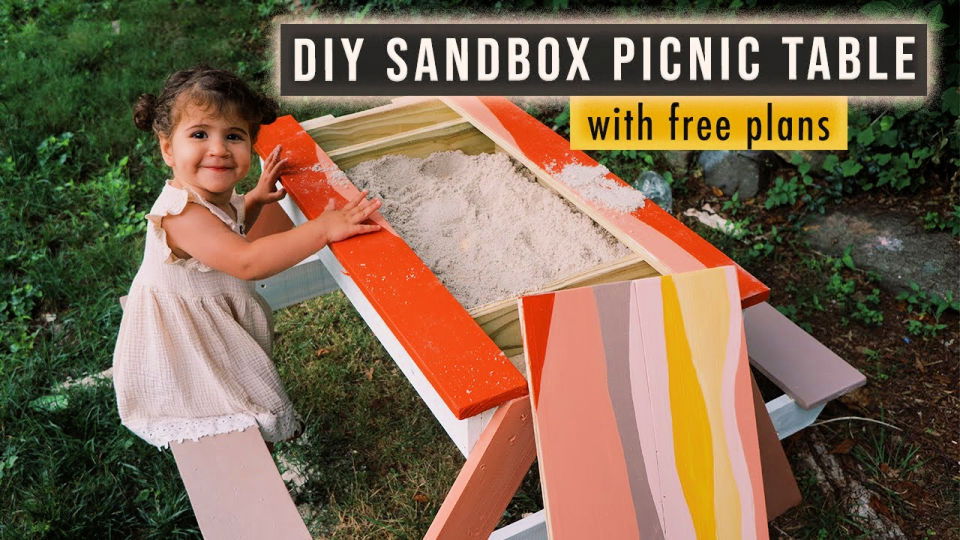
The DIY Sandbox Picnic Table is the perfect project for the beginner builder. This fun and functional picnic table will provide endless hours of enjoyment for little kids during the summertime. And it's a great way to create something unique and practical! It is a versatile piece that can serve as a storage, sandbox, and picnic table.
This picnic table sandbox can be built in just 2 hours with a few dollars worth of materials. So, gather up your supplies and follow the step-by-step instructions below to build your own DIY Sandbox Picnic Table sandbox to give your kids a blast of fun and engaging activity. hometalk
19. Simple DIY Sand Table
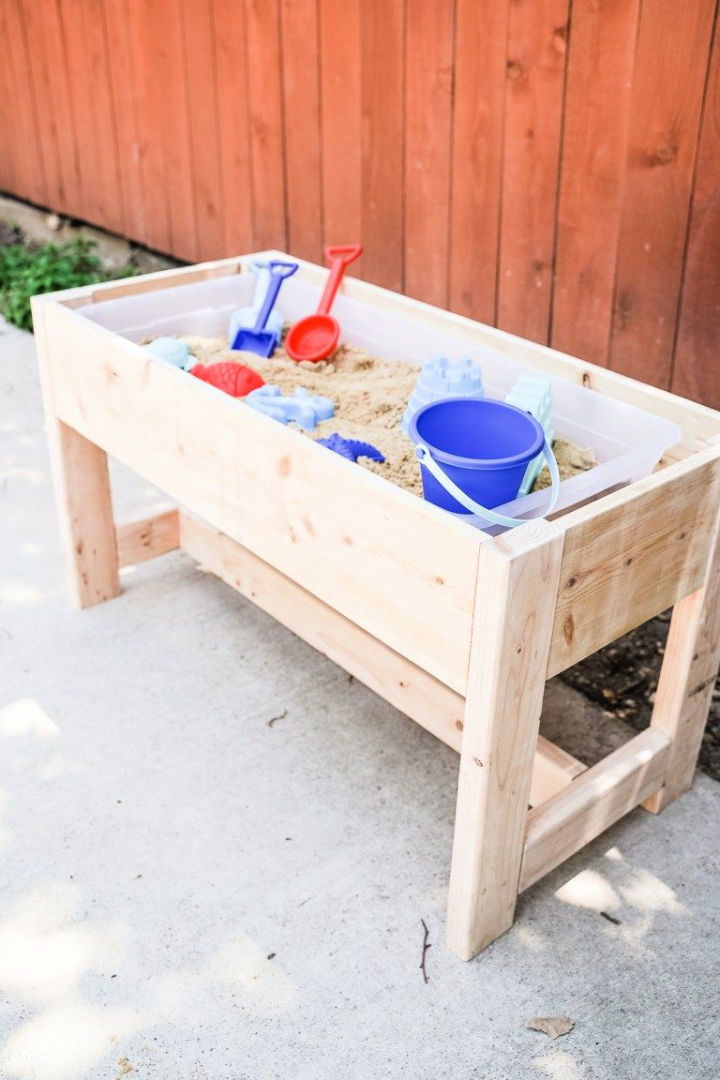
This Simple DIY Sand Table is a great way to add an enchanting look to your backyard while providing endless fun for your kids. You can add a removable top to convert it into a kid-friendly outdoor table when the sand isn't in use. Building a sand table is easy and requires only a few supplies you may already have around the house.
Gather wood boards of different dimensions and sizes, screws, spar varnish, deck stain, and play sand. Then follow the step-by-step instructions below to build your own Simple DIY Sand Table to enjoy the versatility of this project. lifeonbeacon
20. How Do You Make a Large Sandbox
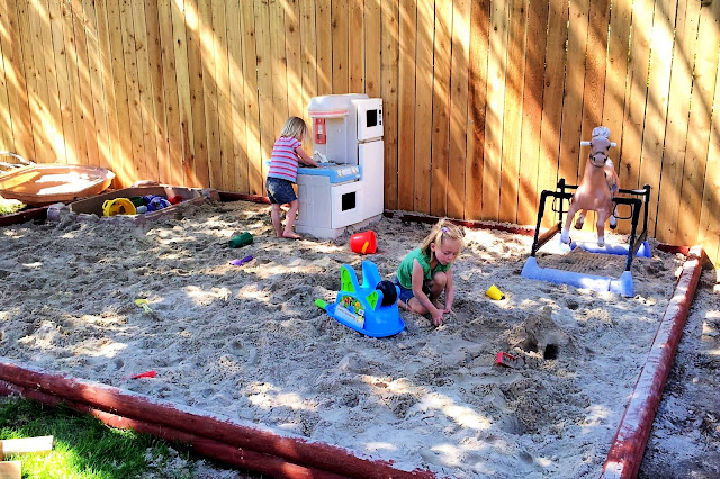
A DIY Giant Sandbox can bring a beachy delight to any backyard or outdoor space. By following some easy steps, you can create a stunning sandbox that will provide ample space for children (and adults!) to play and have fun. Plus, with a little bit of care, this DIY sandbox will last for many years to come. Here's what you'll need to get started with diy sandpit:
- 14 Red landscape beams
- Rebar to hold the frame together
- Heavy-duty filter fabric
- Sand
Once you have all of your materials, simply follow the step-by-step instructions below to put your masterpiece together:
- Assemble the beams into a rectangular frame using the rebar to secure them in place.
- Cover the frame with the filter fabric. Make sure that there are no gaps or openings.
- Pour sand into the frame until it is approximately 6 inches deep.
- Enjoy! finditmakeitloveit
21. Wooden Sandbox Plan With Seating
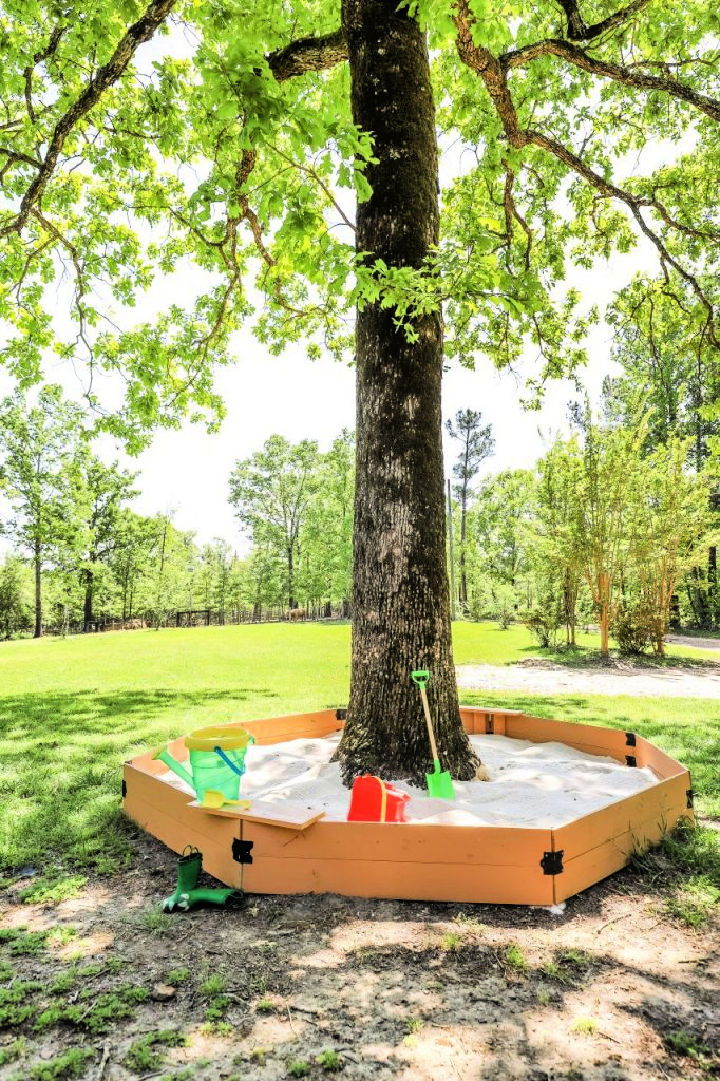
With this DIY wooden sandbox with seating, your kids can enjoy playing in the sand without leaving the comfort of their own backyard! This sandbox is easy and short to build and can be customized to your liking.
All you need are a few wood boards, some brackets, stain, gardening fabric and some sand, and you're good to go! Plus, the sandbox comes with built-in seating, so your kids can stay comfortable while they play. Follow the step-by-step instructions below to build your own DIY wooden sandbox with seating. southernyankee
22. Making Your Own DIY Sandbox
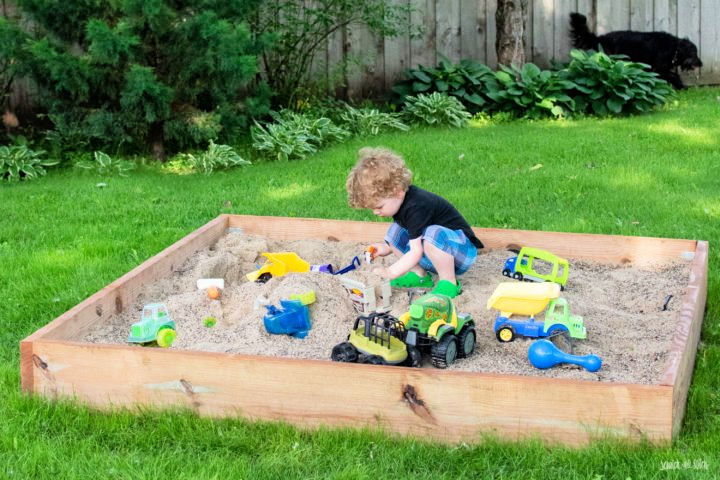
This Easy DIY Sandbox will be a great addition to any backyard, and it can be a fun project to build with the family. This Easy DIY Sandbox only requires a few hours to complete and costs less than $20. The first step is to cut two treated "cedar-toned" boards into six-foot lengths.
Next, attach four 2 in. X 10 in. corner braces to the boards with decking screws. Then, line the sandbox with landscape fabric. Once the sandbox is lined, fill it with play sand. That's it! Your Easy DIY Sandbox is now complete. scratchandstitch
23. How to Build a Boat Sandpit
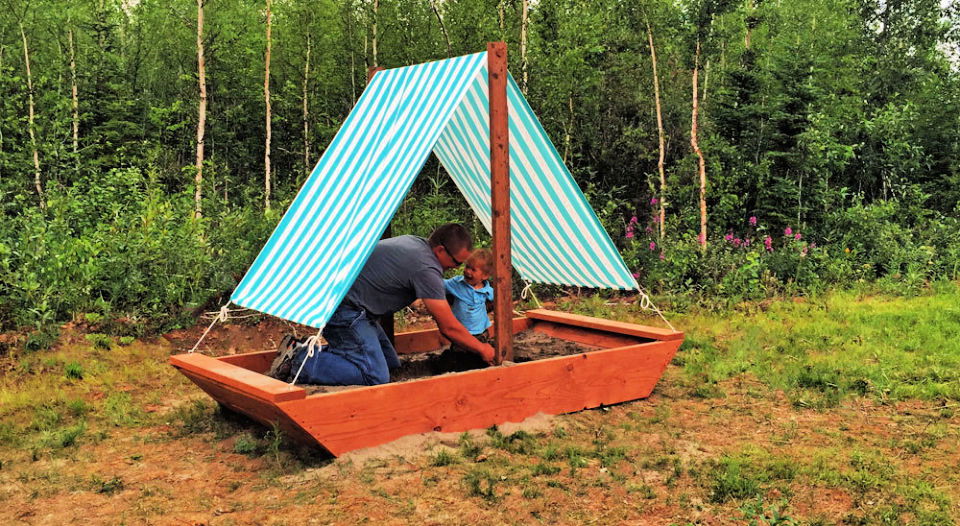
DIY Boat Sandpit is great entertainment for kids or toddlers. You can build this DIY project without any difficulty. This DIY project is easy to build and requires only a few materials you may already have around the house.
A sailboat sandbox inspires the design of this DIY project. This project is perfect for beginners and can easily be completed in a few hours. Follow the simple instructions below to learn how to build your own DIY Boat Sandpit. ana-white
24. DIY Cedar Outdoor Sandbox
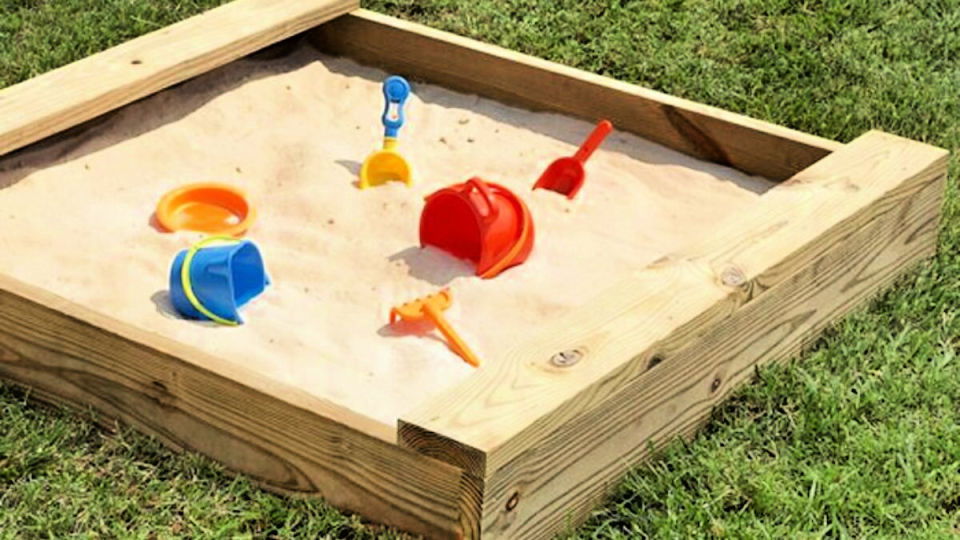
A DIY cedar sandbox can provide hours of enjoyment and entertainment for your kids and family. This DIY sandbox is a great project for anyone with basic woodworking skills. All you need to make one is cedar boards, deck screws, construction adhesive, landscape fabric, play sand, sandpaper, landscape fabric pins, exterior stain, mason line and landscape stakes. It's a relatively straightforward project that can be completed on the weekend, providing years of enjoyment for kids and families. The following easy steps will instruct you on how to build a DIY cedar sandbox. lowes
25. How to Create a Portable Sandbox
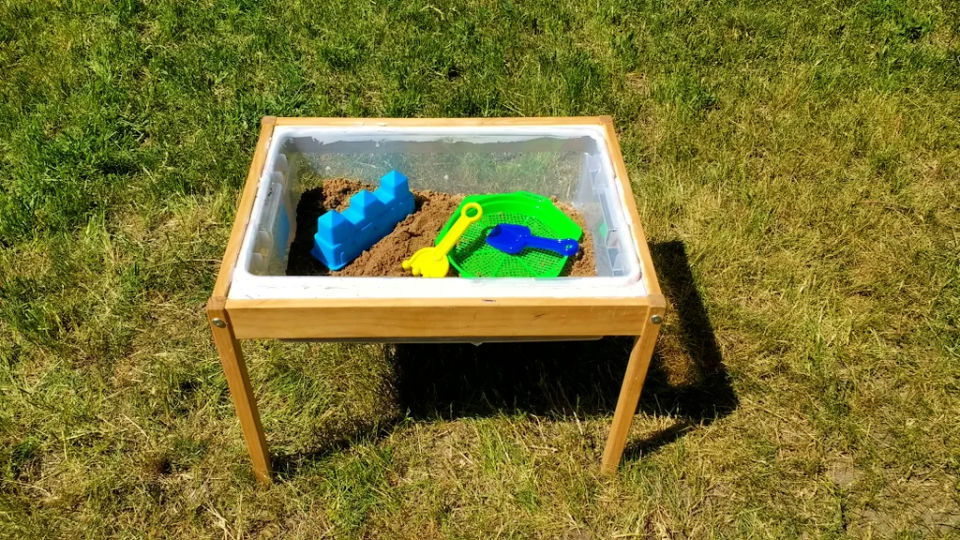
This DIY Portable Sandbox is a fantastic way to keep your kids relaxed and engaged during summertime. You can use it as a sandbox or add some water to create a water table. Best of all, it's cheap and easy to build. Simply get a small kid's table and a shallow plastic tote smaller than your table.
To make it more sturdy, you can caulk around the edge of the plastic tote. Then, fill it with sand and toys, and you're good to go. If you want to move it around, simply lift the tote off the table. When you're done using it, just store the tote inside the table until next time. With a DIY Portable Sandbox, your kids will have endless fun. instructables
Related DIY Projects and Ideas
DIY Play Kitchen: We found the most original, fun, and easy to make DIY play kitchen Ideas to inspire you. Make a play kitchen out of a cardboard box or create an entire kitchen out of recycled materials.
Pallet Playhouse: You can make a playhouse for your kids out of pallets and other materials you have around the house. These DIY Pallet playhouse plans are perfect for kids who love to play outside and have their own space.
Cardboard Playhouse: There are so many ideas for cardboard houses out there, we've compiled the best and most creative cardboard playhouse to inspire you.
DIY Cornhole Board: Learn how to build cornhole boards with these free plans and ideas. You'll find all the details you need to get started, including materials, tools, and techniques.
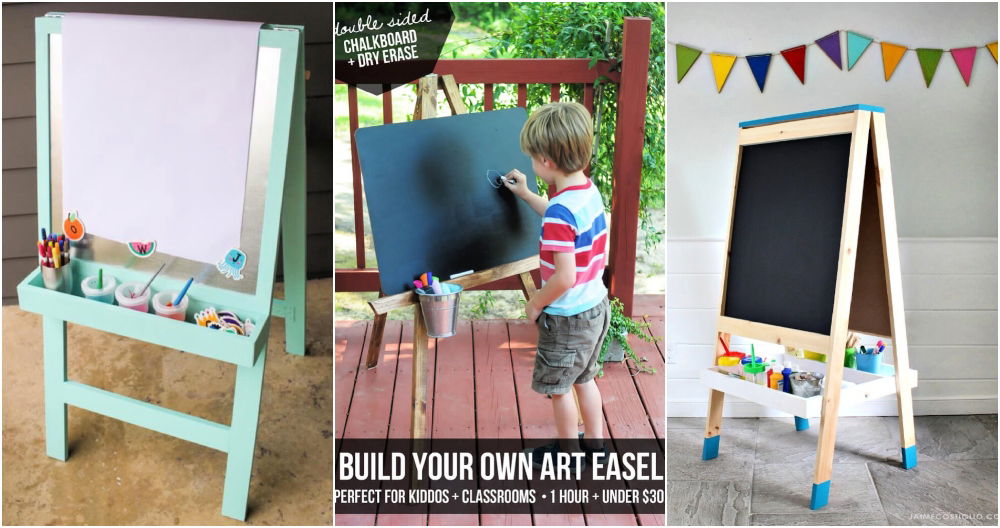
Homemade DIY Easel: Easels are a great addition to your home and studio. This list offers free DIY easel plans, each with step-by-step instructions, so that you can build your own easel.
DIY Chalkboard Ideas: Here are easy DIY chalkboard ideas that are perfect for the kids room, kitchen, office, or just about anywhere. You can find all sorts of styles and colors to suit your needs.
DIY Ball Pit: A ball pit is a perfect way to keep your kids entertained. Check out these cheap and easy DIY ball pit ideas that will have your kids will love to play with.
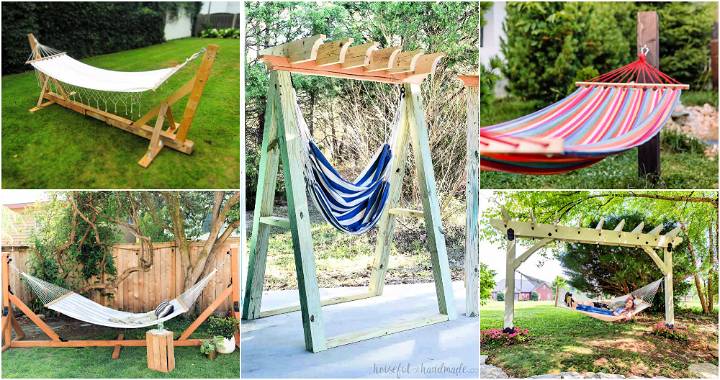
Easy DIY Hammock Stand: Build a hammock stand from the ground up with these easy DIY hammock stand ideas. Learn how to make your own hammock stand for a variety of different uses and styles.
Homemade Electric Skateboard: If you're looking for a creative project to do on the weekends, why not consider building your very own electric skateboard?Find easy DIY electric skateboard ideas you can make with a little time and patience.
DIY Gaming Table: If you want to get the gaming experience in your living room or basement, then why not have a gaming table? Build your own with these cheap DIY gaming table plans with complete instructions to save your time and money.
Related DIY Projects for Kids
DIY Twin Bed Frame: These DIY twin bed frame plans will help you save money and build your own at home cheaply. From bunk beds to loft beds, there's a plan for your needs.
Free Bed Plans for Kids: Find compilation of free DIY bed plans for kids bedroom with detailed instructions and pictures, if you are looking to build beds for your children this is a perfect place to find ideas, save time and money.
DIY Loft Bed: If you're looking for the perfect bed for your child, check out these DIY loft bed plans! All the instructions are here with a pdf guide. Build a safe and sturdy bed for your youngster with these free designs!
Build a DIY Toddler Bed: These DIY toddler bed plans are easy to follow, and will show you how to make a bed for a toddler. Great for those with limited space, or for those that want to save money on furniture.
DIY Bunk Bed Plans: Find cheap DIY bunk bed plans with detailed instructions to upgrade your kids room that will create a functional space and also comfortable for growing kids.
Easy DIY Baby Gate Plans: Build a baby gate to keep your child safe and secure with one of these free DIY baby gate plans. Learn the best way to build a baby gate for your home and family.
Kids Art Display Ideas: Save money and enjoy your kid’s creativity with these creative kids art display ideas in your home. There are tons of ways to display children's artwork that don't need to be expensive.
DIY Slingshot: Learn how to make a simple slingshot with these different DIY slingshot ideas that can be made with household items around the house.
Conclusion:
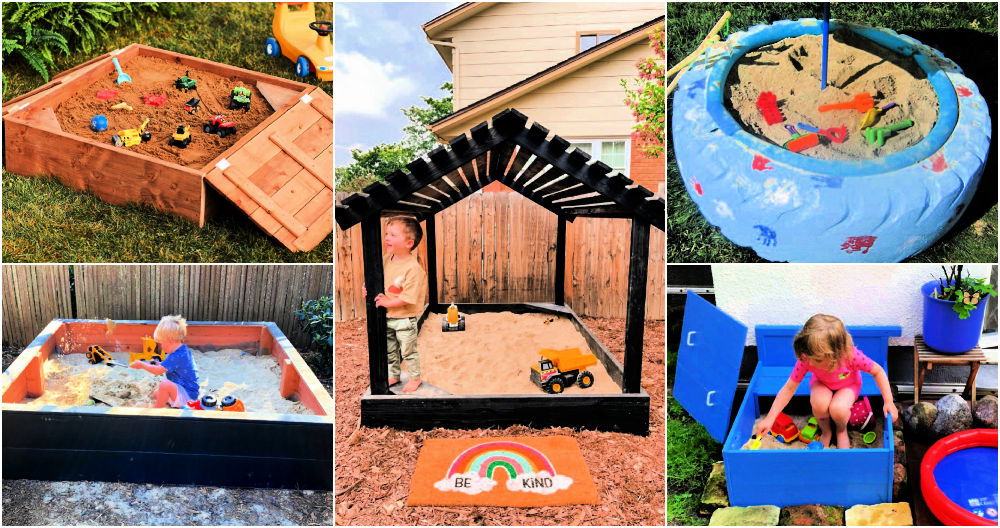
With 25 different DIY sandbox designs and ideas available above, it's easy to find one that will fit your needs. Building a homemade DIY sandbox may be the best option for you and your family if you have the time and want to save money. With these 25 easy DIY sandbox ideas, there are sure to be several that will catch your eye. Consider all aspects of each diy sandbox plan before beginning your build. And most importantly, have fun!


