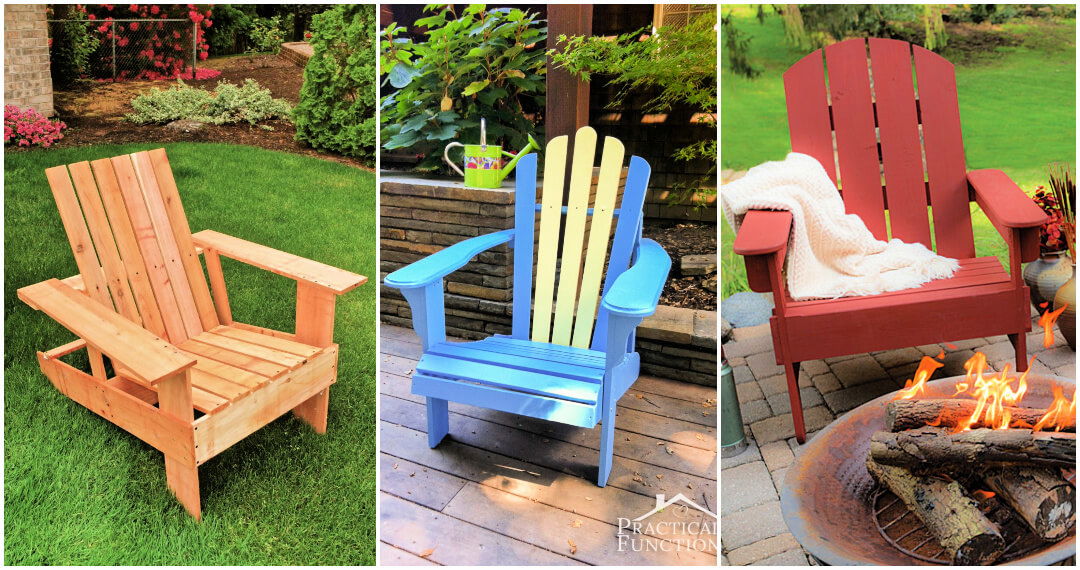
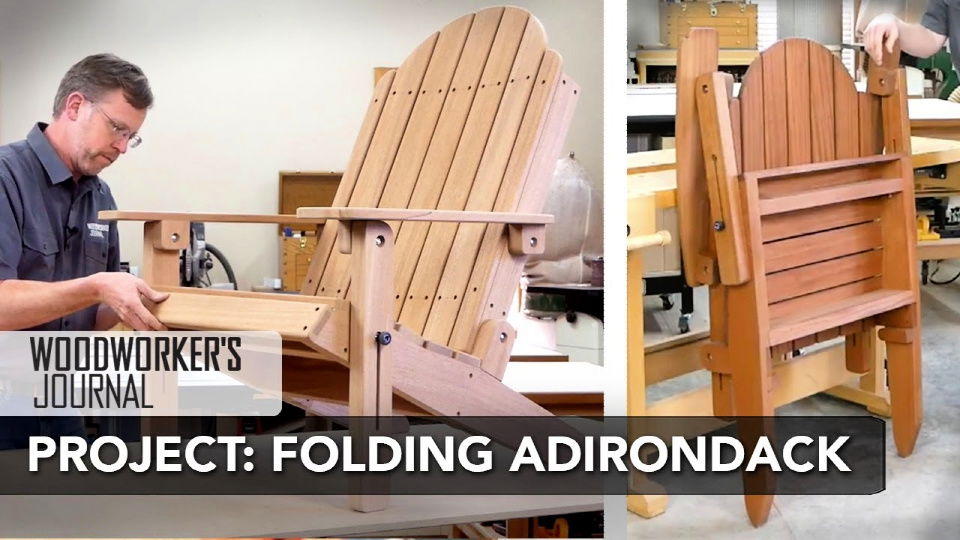
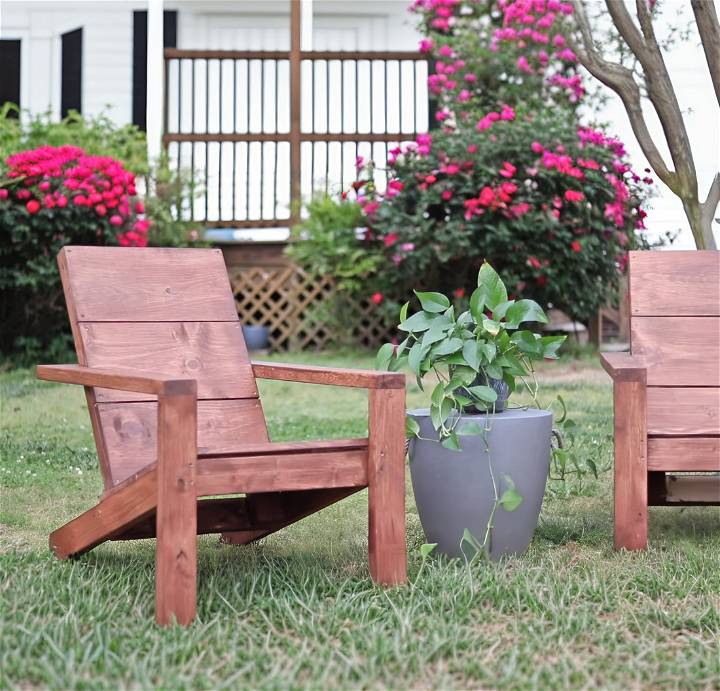
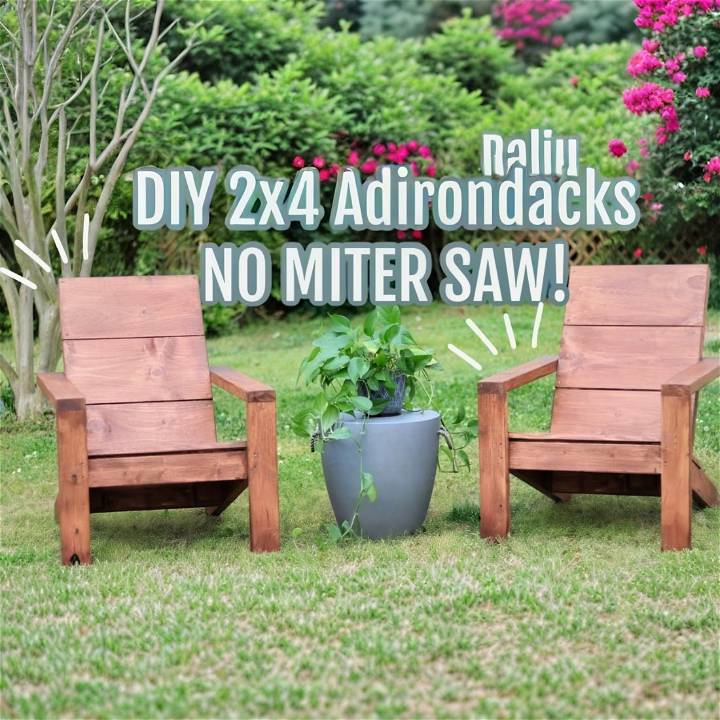
Embarking on a DIY project like building a 2x4 Adirondack chair can be a fulfilling venture. This type of chair is not only an attractive addition to any outdoor space but also offers a comfortable seating option. Our guide presents comprehensive DIY 2x4 Adirondack chair plans that detail how to build your very own 2x4 Adirondack chair with ease and precision. These steps will guide you through everything from selecting the right materials to the final touches, ensuring a smooth process for DIY enthusiasts of all skill levels.
The key to a successful project lies in the details, such as choosing the right materials and understanding the importance of accurate cuts and proper assembly. Whether it involves picking the best wood, knowing which tools to use, or applying the finishing touches, our guide ensures you are well-equipped. Moreover, we address common issues and provide tips for the maintenance and enjoyment of your chair, ensuring its longevity.
We invite you to explore the next sections to dive deeper into the process and discover helpful tips and best practices for building a beautiful, durable 2x4 Adirondack chair.
Choosing the Right Materials for Your DIY 2x4 Adirondack Chair
Understanding Wood Options
When it comes to building an outdoor Adirondack chair, selecting the right type of wood is crucial for durability, cost-efficiency, and maintenance ease. Here's a breakdown of popular wood choices:
- Pressure-Treated Wood: Known for its durability and resistance to rot, insects, and weather conditions, pressure-treated wood is a cost-effective choice for outdoor furniture. However, it may contain chemicals that require careful handling and specific finishes.
- Cedar: Cedar is naturally resistant to decay, rot, and insect damage, making it a great option for outdoor use without the need for chemical treatment. It has a distinct aroma and a beautiful, natural color, but is more expensive than pressure-treated wood. Cedar requires regular maintenance to preserve its color, or it will gradually turn to a silvery-gray.
- Redwood: Highly durable and resistant to rot and insects, redwood is an excellent material for outdoor furniture. It boasts a beautiful natural color and grain. However, redwood is among the more expensive wood options and may require regular maintenance to maintain its appearance.
Selecting the Right Grade of Lumber
Your choice between construction grade and select grade lumber should be guided by both aesthetics and functionality:
- Construction Grade: More affordable and with a rougher appearance, construction-grade lumber may have knots and imperfections. It's suitable for projects where the finish and appearance are less critical but still offers good durability.
- Select Grade: This grade offers a smoother finish with fewer knots and imperfections, making it ideal for projects where aesthetics are important. Select-grade lumber is more expensive but can significantly enhance the visual appeal of your Adirondack chair.
The Importance of the Right Screws
For any outdoor project, choosing the right screws is as crucial as selecting the appropriate wood. Galvanized or stainless steel screws are recommended for outdoor furniture due to their resistance to rust and corrosion. Regular screws can quickly rust when exposed to outdoor conditions, leading to staining of wood and potential structural failure. Although galvanized or stainless steel screws might be more expensive upfront, they ensure the longevity and durability of your Adirondack chair, making them a wise investment.
By carefully selecting the right materials for your DIY 2x4 Adirondack chair, you ensure its durability, aesthetic appeal, and longevity, allowing you to enjoy the fruits of your labor for years to come.
Cutting Tips and Alternative Methods
Building your own Adirondack chair from 2x4s can be an incredibly rewarding project. Getting your cuts right is crucial for a professional-looking final product. Here's how you can achieve precise cuts, even if your tool collection is limited.
For Those Without a Miter Saw
Using a Speed Square and Circular Saw:
- Straight Cuts: First, mark your cutting line clearly on the 2x4. Place a speed square along the line, offering a perfect guide for your circular saw. Keep the saw base against the speed square to ensure a straight cut.
- Angled Cuts: When you need to make an angled cut, a speed square can still be your guide. Mark the angle on your wood, align the speed square to these marks, and then follow the edge with your circular saw. It might take a bit of practice to master, but it's a highly effective method.
- Using a Miter Box: A miter box is another excellent tool for those without a miter saw. It's essentially a manual method for making both straight and angled cuts. Simply place your 2x4 in the box, select the appropriate angle slot, and use a handsaw to cut through the wood. It's slower but precise.
Safety Precautions
- Eye Protection: Always wear safety glasses or goggles to protect your eyes from dust and debris when cutting wood.
- Securing the Wood: Using clamps to secure your 2x4 to a stable surface can prevent the wood from shifting as you cut, making the process safer and the cuts more accurate.
- Power Tool Safety: Always ensure your power tools are in good working condition. Check for frayed cords, damaged blades, and ensure all safety guards are in place before starting your project.
Practice makes perfect. Improvement takes time and patience. Choose the right method for a rewarding DIY project.
What You Need
- Circular saw
- Tape measure, pencil, and speed square
- Drill, with ear and eye protection
- Kreg jig and clamp (optional but recommended)
- 2x4 and 1x10 lumber (untreated is fine; just make sure to seal)
- Pocket hole screws (1* ½ - 2 inch), self-tapping deck screws (2½ inch), and sanding block or orbital sander
- Level working surface
Step by Step Instructions
Learn how to build a DIY 2x4 Adirondack chair with our free plans below:
Cutting the Pieces
Stringers and Legs
- Mark and cut the stringers to length with a 20-degree angle at the ends using the circular saw and speed square for precision.
- For the base of the stringers, mark 2* ½ inches from the end, draw a perpendicular line to the 20-degree end, and cut.
- Cut 2x4s for the legs, arms, and back supports. Follow the Ana White plans for precise measurements.
Seat and Back
- Cut 1x10s for the seat and back. Ensure the back pieces are exactly 19* ½ inches for a perfect fit between the armrests.
Drilling Pocket Holes
- On the 19* ½ inch seat and back pieces, drill two pocket holes on each end. Set your Kreg jig to the 1½ inch setting.
Assembly Steps
Building the Frame
- Attach an arm piece to a leg using 2* ½ inch screws. Pre-drill to avoid splitting.
- Measure and fix the stringer 13* ¾ inches up from the bottom of the leg.
- Build a mirror frame for the other side.
Attaching the Seat and Back
- Flip frames upside down and connect with the 19* ½ inch pieces using pocket hole screws.
- With the chair upright, attach the seat boards starting at the front, leaving a quarter-inch gap between them for drainage.
- Install the back support piece flush with the stringers and add the backboards, ensuring gaps for drainage.
Finishing Touches
- Sand rough edges and corners for a smooth, finished look.
- Apply a stain and sealer to protect the wood and enhance the chair's appearance.
Maintenance and Enjoyment
Regularly check and tighten any loose screws. Reapply sealant as needed to keep your chair looking great for years to come.
Video Tutorial
For a step-by-step video tutorial on building this Ana White 2x4 Adirondack Chair, make sure to watch the video here.
It pairs well with this written guide, enhancing the learning experience with visual demonstrations and tips.
Building your own Adirondack chair is not just about adding a piece of furniture; it's about taking pride in building something beautiful and functional with your own hands. Enjoy the process, and relax in comfort knowing you buildd something truly unique for your outdoor space.
Customization Options for Your 2x4 Adirondack Chair
Building a DIY 2x4 Adirondack chair offers not just a sense of accomplishment but also the flexibility to add personal touches. Here are some ideas to make your chair uniquely yours:
Add-Ons for Comfort and Convenience
- Cup Holders: Carve out spaces or attach additional pieces on the armrests to secure your beverages. This small addition can significantly enhance your relaxation experience.
- Side Tables: Construct a matching side table using the same 2x4 construction principles. It's perfect for holding books, snacks, or decorative items, keeping everything you need within arm's reach.
- Ottomans: For the ultimate relaxation, build a matching ottoman. This can be a simple, flat design or something more elaborate, mirroring the angles of the chair for comfort.
Achieving a Smooth Finish
A smooth finish not only looks professional but also protects your skin from splinters. Here's how to ensure a smooth surface:
- Sanding is Key: Start with coarser grit sandpaper (around 60-80 grit) for rough sanding to remove any major splinters or unevenness. Progress to medium grit (100-150) for smoothing out the surface, and finish with a fine grit (220 or higher) for a polished feel.
- Consider a Power Sander: For larger surfaces, a power sander can save time and energy. Just be careful not to over-sand, as this can build dips or uneven surfaces.
Choosing Paint or Stain
Protecting your Adirondack chair from the elements is crucial, especially if it will live outdoors. Here's what to consider when selecting finishes:
- Weather Resistance: Look for products specifically designed for outdoor use. These will have additives that protect against UV rays and moisture.
- Color Options: Stains offer a more natural look, enhancing the wood's grain, while paints provide a wide range of color options for a more personalized touch.
- Application Methods: Brush-on options might offer more control for intricate areas, while spray-ons can provide a more even coat on larger surfaces. Always follow the manufacturer's instructions for the best results.
Remember, DIY projects are great because you can customize them to your liking. Have fun and be creative!
Troubleshooting and Common Mistakes
When building a DIY 2x4 Adirondack chair, even small mistakes can affect the final product's aesthetics and durability. However, most errors are fixable, and knowing how to address them can turn a frustrating experience into a valuable learning opportunity. Here are common pitfalls and how to correct them:
Inaccurate Cuts
Issue: Inaccurate cuts can lead to pieces not fitting together correctly, affecting the chair's stability and appearance.
Solution: Always measure twice before cutting. If a piece ends up too short, unfortunately, you'll need a new one. However, slightly longer pieces can often be trimmed down. For future projects, consider investing in a quality saw and a reliable measuring tape.
Uneven Assembly
Issue: An uneven assembly can result from not checking the alignment as you go, leading to a wobbly chair.
Solution: Periodically check for level and squareness during assembly. Use clamps to hold pieces in place before finalizing any connections. If the chair is already assembled, loosen the screws or bolts, realign, and then retighten, checking for level as you go.
Wrong Type of Screws
Issue: Using the wrong type of screws, such as those not suitable for outdoor use, can lead to rust and degradation.
Solution: If you've used the wrong screws, replace them with outdoor-rated ones. For future projects, ensure you're using hardware marked for exterior use, typically stainless steel or coated screws, to prevent rust.
Fixing Small Gaps
Issue: Small gaps can appear between pieces due to minor measuring or cutting inaccuracies.
Solution: Use wood filler to fill in these gaps, then sand the area smooth once the filler dries. Choose a filler that matches your wood or can be painted or stained over.
Re-Drilling Misaligned Holes
Issue: Misaligned screw holes can cause pieces to not fit together properly or be under unnecessary stress.
Solution: If the misalignment is slight, you may be able to enlarge the hole slightly with the drill to adjust. For larger issues, fill the hole with a wood filler or dowel and glue, then re-drill the hole in the correct position once it's dry.
Importance of Checking Level and Squareness
Highlight: Regularly checking for level and squareness throughout the assembly process cannot be overstated. This practice ensures the chair will be stable and aesthetically pleasing. Use a carpenter's square and a level to check your work after assembling each section and before the final tightening of all connections.
Remember, making a DIY chair involves learning from mistakes and improving. Practice will help you make a strong, attractive chair.
Caring for Your DIY 2x4 Adirondack Chair
Ensuring your DIY 2x4 Adirondack chair lasts for many enjoyable seasons involves regular maintenance and protection from the elements. Here's how you can keep your chair in tip-top shape.
Regularly Apply Stain or Paint
Over time, weather conditions can wear down the finish on your Adirondack chair. To maintain its appearance and integrity, apply a fresh coat of stain or paint every two to three years. This not only refreshes its look but also adds an extra layer of protection against moisture and sun damage. Choose a high-quality outdoor paint or stain for the best results, and remember to clean the chair thoroughly before applying any new coats.
Proper Storage During Harsh Weather
Harsh weather conditions can significantly shorten the lifespan of your Adirondack chair if it's not properly cared for. Here are some steps to take:
- Covering: When not in use, especially during off-season months, consider covering your chair with a waterproof cover. This helps protect it from rain, snow, and sun, reducing the risk of moisture damage or fading.
- Indoor Storage: If possible, bring your Adirondack chair indoors during extreme weather conditions like heavy snowfall or torrential rains. Storing it in a shed, garage, or under a deck will shield it from direct exposure to harsh elements.
- Elevation: Keep the chair elevated off the ground, even when covered or stored. This prevents moisture from seeping into the wood from the ground, which can lead to rot and decay.
By following these simple maintenance tips, your DIY 2x4 Adirondack chair will continue to be a comfortable and attractive addition to your outdoor space for years to come. Remember, a little bit of care goes a long way in preserving the life and beauty of your handmade furniture.
FAQS About Building a DIY 2x4 Adirondack Chair
This section covers the most commonly asked questions related to building a DIY 2x4 Adirondack Chair, providing clear and useful answers.
What materials do I need to build a 2x4 Adirondack chair?
To build a 2x4 Adirondack chair, you will need:
- 2x4 and 1x10 lumber (untreated is recommended, but ensure to seal it afterward)
- Pocket hole screws (1 ½ - 2 inches)
- Self-tapping deck screws (2 ½ inch)
- Sanding block or orbital sander
- Drill, with ear and eye protection
- Tape measure, pencil, and speed square
- Circular saw
- Kreg jig and clamp (optional but recommended)
Can I build an Adirondack chair without a miter saw?
Yes, you can build an Adirondack chair without a miter saw. Use a circular saw with a speed square for straight cuts and a miter box for both straight and angled cuts. Ensure precise measurement and marking for accuracy.
How do I protect my Adirondack chair from the weather?
To protect your Adirondack chair from the weather, apply a stain or paint that is designed for outdoor use. This should be reapplied every two to three years for best results. Additionally, consider covering your chair during off-season months or storing it indoors to protect it from harsh weather.
What type of wood is best for an outdoor Adirondack chair?
For outdoor Adirondack chairs, pressure-treated wood, cedar, and redwood are popular choices due to their durability and resistance to rot, insects, and weather conditions. Cedar and redwood offer a more natural look but may require more maintenance to preserve their color, while pressure-treated wood is more cost-effective but may contain chemicals.
How do I fix inaccuracies or mistakes during the building process?
If you make a mistake, such as an inaccurate cut or misaligned hole, there are several ways to correct it:
- If a piece is too short, you'll need to replace it. If it's slightly longer, you may be able to trim it down.
- Use wood filler to fill in small gaps and sand smooth once dry.
- For misaligned holes, either enlarge the hole slightly to adjust or fill it with wood filler and re-drill once dry.
- Always measure twice and cut once to minimize mistakes.
How do I ensure my Adirondack chair is comfortable?
To ensure your Adirondack chair is comfortable, pay attention to the angle of the back and the height of the seat during construction. You may want to adjust these based on personal preference. Additionally, sanding all surfaces smooth and adding cushions or pillows can enhance comfort.
Can I customize my Adirondack chair?
Absolutely! There are many ways to customize your Adirondack chair, including:
- Adding cup holders or side tables for convenience.
- Building a matching ottoman for added relaxation.
- Choosing a unique color or finish to match your outdoor decor.
- Adjusting dimensions for a perfect fit.
Building a DIY 2x4 Adirondack chair is not only a fun project but also a great way to add a personalized touch to your outdoor space. With these FAQs, you're well-equipped to tackle this rewarding DIY endeavor.
Conclusion:
In conclusion, crafting your own DIY 2x4 Adirondack chair is not only a rewarding project but also an opportunity to add a personalized touch to your outdoor space. Throughout this guide, we've navigated through selecting the perfect materials, mastering the cutting and assembly process, and applying the finishing touches that will make your chair stand out. Moreover, we discussed the importance of regular maintenance to ensure your Adirondack chair withstands the test of time.
Whether you've followed our step-by-step instructions or watched our video tutorial, you're now equipped with the knowledge to build a comfortable, sturdy, and stylish Adirondack chair. Don't forget to explore customization options to make your chair truly unique. Happy building, and enjoy the fruits of your labor in the comfort of your newly crafted 2x4 Adirondack chair.


