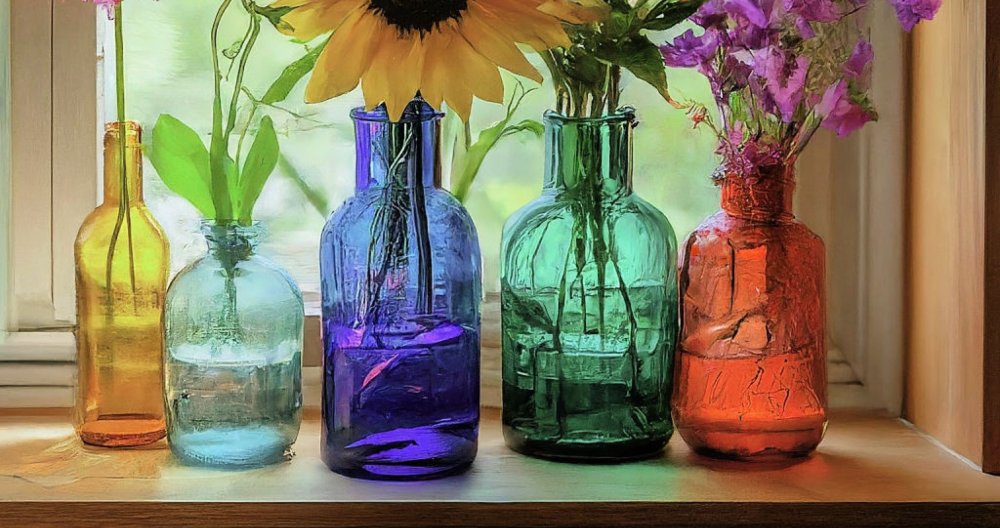
Glass painting is a captivating and vibrant art form that allows artists to transform simple glass surfaces into stunning works of art. Whether you're decorating a vase, a mirror, or making stand-alone artwork, glass painting provides endless opportunities for creativity. For those new to this medium, the glass painting guide for beginners offers valuable insights to get you started. The shimmering transparency of glass combined with bright, often semi-translucent colors makes beautiful effects that change with light and angle, making glass paintings dynamic and engaging.
What is Glass Painting?
Glass painting refers to the technique of applying colors and designs directly onto glass surfaces using specialized paints, liners, and tools. Unlike traditional canvas painting, where the surface absorbs color, glass painting involves the careful application of pigments that sit on top of the smooth, non-porous glass. This makes a luminous, semi-transparent effect, making the painting appear to glow when light shines through it.
One of the main appeals of glass painting is its versatility. You can paint on a variety of glass surfaces, including mirrors, windows, bottles, vases, and even textured glass. This makes it an excellent choice for home décor projects, personalized gifts, or simply a fun hobby.
Materials Required for Glass Painting
Before diving into the painting process, it's essential to gather the right materials. Here's a comprehensive list of what you'll need to start your glass painting project:
- Glass Surface: You can choose any glass surface, from vases and windows to textured glass sheets. Textured glass adds an extra dimension to the final piece, as the light interacts with both the texture and the colors.
- Glass Colors: These are specialized paints designed for use on glass. There are two primary types of glass paints:
- Water-based glass paints: Easy to use and clean, these paints can be thinned with water and are ideal for beginners.
- Solvent-based glass paints: These paints have a longer drying time but offer more durability and a glossy finish. For this guide, we will be using water-based glass colors from the Ficil brand, but you can also use brands like Camel for high-quality results.
- Glass Liners: Liners are essential for outlining your design. They come in various colors such as metallic gold and silver, which add detail and precision to your painting. For our project, we'll use Camel metallic gold and silver liners.
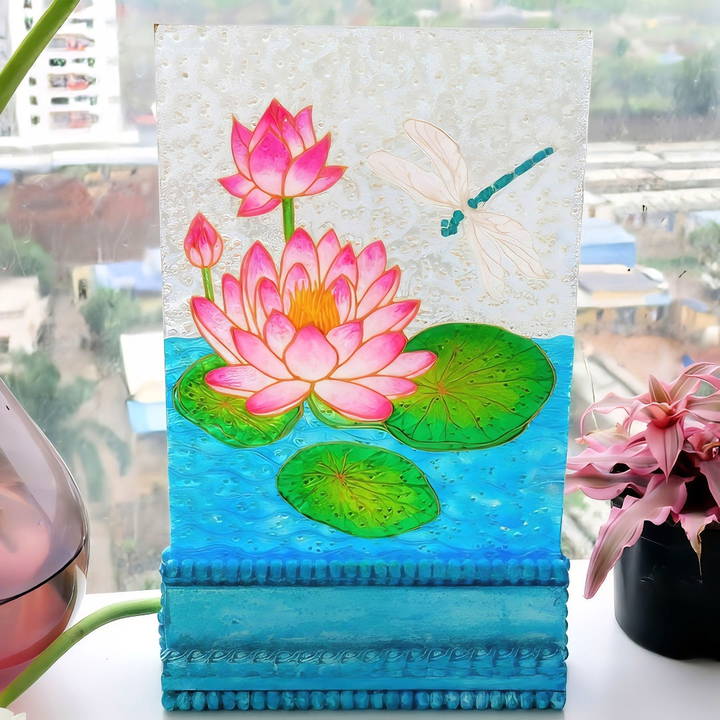
- Reference Design: Before starting your painting, it's helpful to have a reference design to guide your work. For this tutorial, we will use a lotus and dragonfly design.
- Wooden Base: If your project involves a standalone piece, like a decorative glass panel, you may need a custom-made wooden base to hold the glass.
- Glass Cleaner: Clean the glass thoroughly to ensure that the paint adheres well and the final result looks clean and polished.
- Tape: To secure your design or reference onto the back of the glass while you paint.
- Cotton Buds: These are used to clean up any mistakes, remove bubbles from the paint, and tidy up the lines.
Step by Step Instructions
Learn how to master glass painting with our step-by-step instructions from preparing the surface to displaying your artwork. Perfect for beginners!
Step 1: Preparing Your Glass Surface
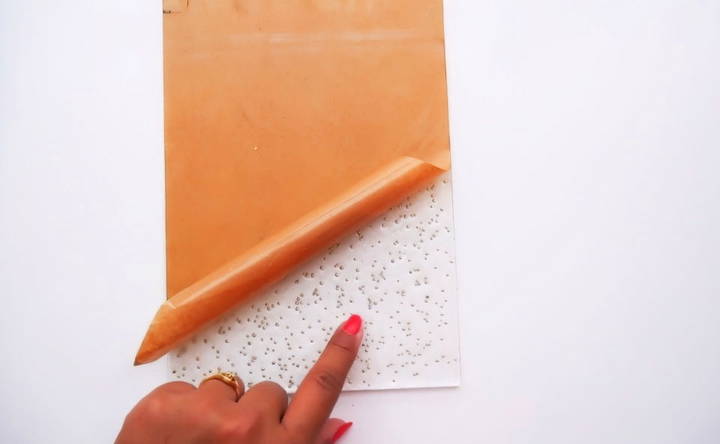
The first step is to clean the glass surface thoroughly. Any dirt, dust, or oil on the glass can prevent the paint from sticking correctly. Use a glass cleaner and a lint-free cloth to ensure the surface is spotless.
In our example, we're using a textured glass panel, which provides a unique background for the lotus and dragonfly design. Be sure to clean both sides of the glass, but remember, you will be painting on the smooth side of the glass.
Step 2: Securing the Design
Once the glass is clean, place your reference design underneath the glass. Secure it with tape to prevent it from moving. Make sure the smooth side of the glass is facing up, as this is where you will apply the paint.
Using metallic gold and silver glass liners, carefully trace the outline of the design on the smooth side of the glass. This will serve as the foundation of your painting. The liner outlines act like the "lead" in stained glass, separating different color sections and adding definition to your design.
Let the liner dry for at least 24 hours before proceeding to the next step.
Step 3: Applying the Glass Colors
Once the liner is fully dry, it's time to start applying the colors. Glass colors come in small bottles with pointed tips, making it easy to apply them directly onto the glass. For best results, shake the bottles well before use.
Here's a breakdown of the colors used for the lotus and dragonfly design:
- Lotus Flower: Use a combination of white, light pink, and dark pink to achieve a beautiful gradient effect. Start with white at the base of each petal, then gradually blend into light pink and finish with a touch of dark pink at the tip of each petal.
- Dragonfly: For the dragonfly's wings, use glittering white, and for its body, apply blue.
- Water: The water beneath the lotus is painted using a sea blue color.
- Leaves: Use a mix of pea green and crystal green for a natural, vibrant look.
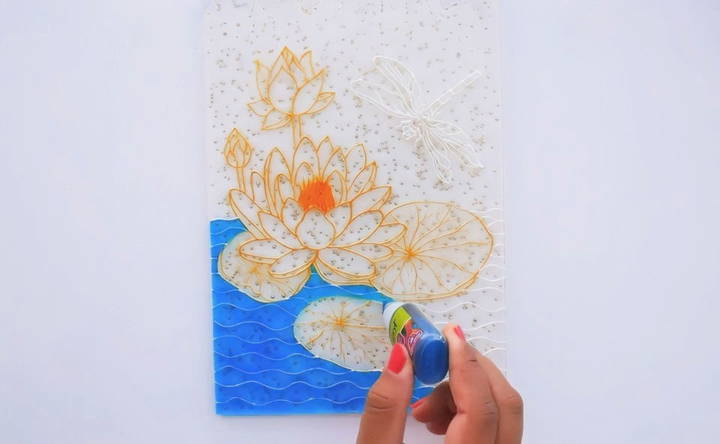
Apply the paint carefully, and use cotton buds to pop any bubbles that may appear. If you want to make a smooth gradient, you can mix colors in a separate container before applying them to the glass.
Step 4: Adding Shading and Depth
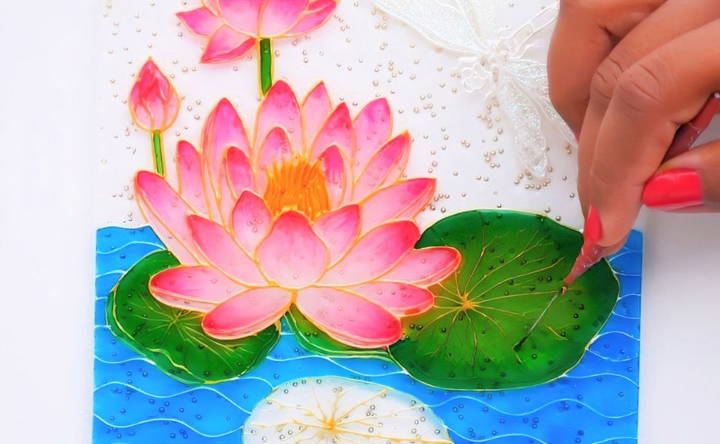
One of the most attractive aspects of glass painting is the ability to layer colors and make depth. For example, when painting the lotus petals, you can blend the dark pink and light pink colors while the paint is still wet, using a pin or toothpick to mix the colors smoothly. This technique adds a professional, polished look to your painting.
Step 5: Drying Time
Glass paint takes time to dry, so patience is key. Allow your painting to dry for at least 24 hours. Keep it in a dust-free environment where it won't be disturbed. Once dry, you can go over the outlines again with the liner to sharpen any areas that may need it.
Step 6: Displaying Your Glass Painting
Once your painting is completely dry, it's time to display it. If you've painted on a textured glass sheet, you can place it in a wooden base for a stand-alone display. The beauty of glass painting is that it changes with the light, so placing your piece where it will catch sunlight will enhance the colors and make a luminous effect.
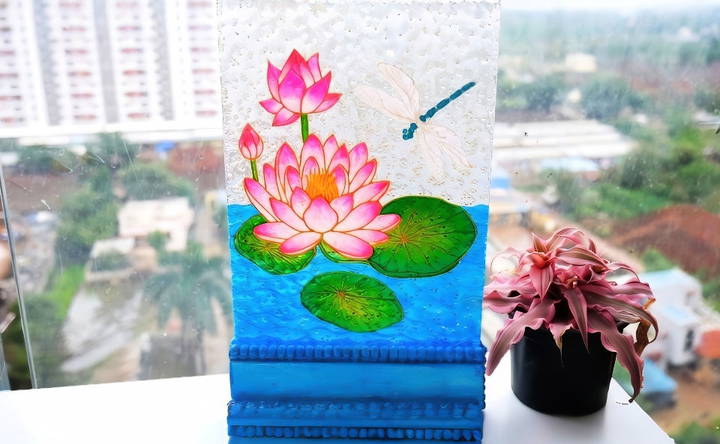
For the lotus and dragonfly painting, the textured side of the glass adds a unique layer to the final piece, making the dragonfly seem to hover and the lotus appear to float on water. Depending on the light and angle, different parts of the design will become more prominent, making the artwork come alive.
Tips for Success in Glass Painting
- Start Small: If you're new to glass painting, begin with small projects like glass bottles or vases. As you gain confidence, you can move on to larger pieces.
- Practice Your Lining Technique: Glass liners can be tricky to control at first, so practice on a scrap piece of glass before starting your main project.
- Mix Colors for Custom Shades: Don't be afraid to mix colors to make custom shades and gradients. Glass painting is all about experimentation and creativity.
- Use a Lightbox: If you're working on a design with intricate details, placing your glass on a lightbox can help you see the lines more clearly as you paint.
- Be Patient with Drying: Glass paints need ample drying time. Rushing the process can cause smudges or uneven finishes.
Conclusion
Glass painting is a rewarding and enjoyable hobby that offers endless creative possibilities. By following the steps outlined in this guide, you can make beautiful glass paintings that will add a touch of elegance and color to any space. Whether you're making a decorative piece for your home or a personalized gift, glass painting allows you to express your creativity in a unique and visually stunning way.
Now that you have the tools and techniques, it's time to gather your materials and start painting!
FAQs About Glass Painting
Discover answers to common questions about glass painting, from techniques to materials, in our comprehensive FAQs guide. Learn more now!
Beginners can use any smooth, clean glass surface. Textured glass adds a unique look but requires more skill. Many artists use leftover window cutouts for practice, as they are often available for free.
Yes, but it’s challenging. Choose free-flowing designs with minimal lining, such as rain effects, to reduce complications with dripping colors.
Varnish is optional. If the painting is in a dusty environment or not framed, varnish can protect it. Otherwise, it's not necessary.
To create an embossed effect, apply glass liner twice: once before coloring and again after the paint dries.
Mix colors like pink and white in equal portions to make smooth gradients. Use a pin to blend colors directly on the glass for shading.
To remove bubbles, use cotton buds to pop them as soon as they appear while the paint is still wet.
Allow at least 24 hours for the paint and liner to dry completely before handling or displaying the glass.
Yes, you can add more lining or details after the paint has dried. This can sharpen outlines or enhance certain elements of your design.


