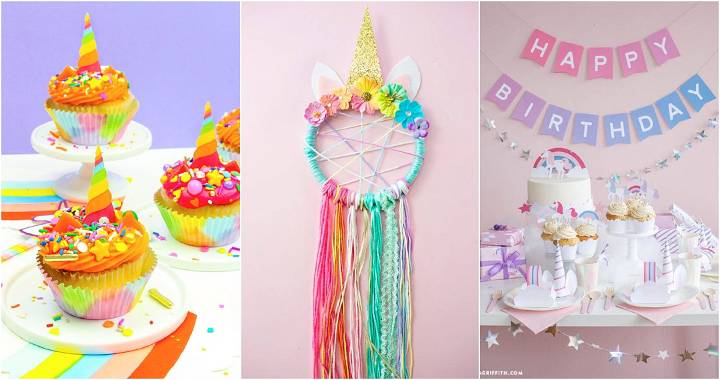
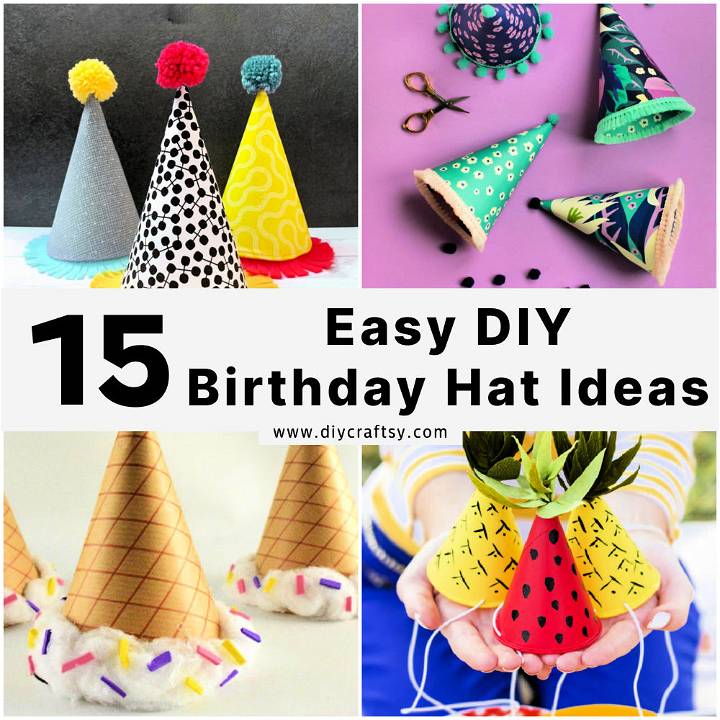
Looking for the perfect way to add a unique touch to your kids' or pets' birthday celebrations? Look no further than 15 homemade DIY birthday hat ideas! Not only do these handmade creations allow for unlimited customization, but they also infuse your celebrations with a personal touch. From selecting materials to the final touches, the process is both rewarding and fun. With our step-by-step guide, you'll discover how easy it is to craft DIY birthday hats that stand out.
This introduction to making birthday hats highlights everything you need to get started, including a list of materials and a detailed guide for preparing, decorating, and ensuring the perfect fit. Plus, with added sections on customization, safety, and troubleshooting, you're well-equipped to tackle any challenges along the way.
Ready to make your next birthday party unforgettable? Join us as we dive into the colorful world of 15 cheap DIY birthday hats for your beloved kids and furry friends.
How to Make Birthday Hats - Step by Step
Making birthday caps at home is a fun and easy craft project that adds a personalized touch to any birthday celebration. Here's a simple guide on how to make your own birthday caps using basic craft materials. Follow these steps to make colorful and festive caps for your next party.
Materials Needed
- Hard paper (preferably cardstock or any sturdy paper)
- Glitter paper cuttings
- Color paper cuttings
- Rubber band or elastic string
- Glue
- Scissors
Step-by-Step Guide
Preparing the Base
- Form the Cap Shape: Begin by taking a piece of hard paper and cutting it into a large circle. The size of the circle will determine the height and width of your cap, so you can adjust it according to your preference.
- Make the Cone: Cut a straight line from the edge of the circle to the center. Then, overlap the cut edges to form a cone shape. Adjust the overlap until you are happy with the cone size, which will be your cap.
- Secure the Cone: Use glue to secure the overlapped edges of the cone. Hold the edges together for a minute or two to ensure the glue dries and the shape holds firmly.
Decorating Your Cap
- Add Color and Sparkle: Take your glitter and color paper cuttings and start decorating the cap. You can glue these decorative pieces all over the cone or make a specific design or pattern.
- Personal Touch: Feel free to customize the designs based on the birthday person's preferences. You can add their name, age, or favorite colors and shapes.
Attaching the Elastic
- Prepare the Elastic: Cut a piece of rubber band or elastic string long enough to comfortably fit under the chin of the person who will be wearing the cap.
- Attach the Elastic: Using a hole punch or the tip of your scissors, carefully make two small holes on opposite sides of the cone's base. Tie each end of the elastic to these holes. Double knot the ends to ensure the cap stays securely on the head.
Final Touches
- Review your cap for any loose edges or decorations and secure them with additional glue if necessary.
- Let your birthday cap dry completely before wearing it to ensure all decorations are firmly attached.
Video Tutorial
For a step-by-step video tutorial on how to make birthday caps, check out Orthy Art & Crafts on YouTube.
This tutorial pairs well with our written guide, offering a visual perspective of the crafting techniques in a clear and comprehensible manner. Watching the video further enhances the crafting experience and provides additional tips and tricks for making the perfect birthday cap.
Making birthday caps with paper adds a special homemade touch to celebrations. Follow these steps and video tutorials to craft unique caps for parties.
Customization Ideas for DIY Birthday Hats
Making a DIY birthday hat is not just about crafting an accessory; it's about infusing it with personality and making it a memorable part of the celebration. Here are some unique and fun ideas to help you customize your birthday hats:
1. Theme Your Hat: Match the hat to the party's theme. Whether it's a superhero, princess, or jungle adventure, let the theme guide your choice of colors, patterns, and embellishments.
2. Add a Personal Touch: Use fabric paint or markers to write the birthday person's name or initials on the hat. You can also add their age or a sweet birthday message.
3. Play with Textures: Mix and match different materials like felt, sequins, pom-poms, and tulle to make a hat that's fun to touch and look at.
4. Incorporate Interests: Decorate the hat with symbols of the birthday person's hobbies or favorite things, such as musical notes for a music lover or paw prints for an animal enthusiast.
5. Make It Sparkle: Glitter and metallic elements can add a festive sparkle to your hat. Use glue to make patterns or shapes, then sprinkle glitter over the top for a dazzling effect.
6. Attach Fun Toppers: Instead of the traditional pom-pom, try using a small stuffed toy, a bouquet of artificial flowers, or a funny figurine as the hat's topper.
7. Use Photos: Print out small photos of the birthday person or memorable moments and make a photo collage around the hat.
8. Interactive Elements: Add elements like small bells, ribbons, or feathers that move when the wearer does, adding an interactive aspect to the hat.
9. Seasonal Flair: If the birthday is near a holiday, incorporate seasonal decorations like mini pumpkins for fall or snowflakes for winter.
10. Go Eco-Friendly: Use recycled materials and natural elements like leaves or flowers to decorate the hat, promoting sustainability.
The key to a great DIY birthday hat is creativity and personalization. Don't be afraid to experiment and have fun with the process. Your unique creation will surely be a hit at the party and a cherished keepsake for years to come.
Safety Tips for Crafting DIY Birthday Hats
When crafting a DIY birthday hat, safety is paramount, especially if children are involved in the process. Here are some safety tips to ensure that everyone can enjoy the crafting experience without any mishaps:
1. Choose Safe Materials: Always opt for materials that are non-toxic and safe to handle. Avoid materials that could cause allergic reactions or are small enough to be a choking hazard for young children.
2. Supervise Children: Never leave children unattended with crafting materials. Always supervise them to prevent accidental ingestion of small items or misuse of tools.
3. Use Child-Friendly Tools: Select scissors with rounded tips, glue sticks instead of hot glue guns, and washable markers. These tools are safer for little hands to use.
4. Keep Work Area Clean: Maintain a tidy workspace to avoid accidents. Ensure that there are no loose materials on the floor that could cause someone to trip.
5. Be Mindful of Sharp Objects: If using pins, needles, or other sharp objects, keep them out of reach of children and be cautious when handling them.
6. Avoid Flammable Materials: Stay away from materials that could easily catch fire, such as certain types of paper or fabric, especially if candles will be used at the birthday celebration.
7. Test Fit Regularly: As you craft the hat, periodically test its fit to ensure it's comfortable and secure. A hat that's too tight can be uncomfortable, and one that's too loose may fall off and cause a trip hazard.
8. Educate on Proper Use: Teach children how to wear and remove the hat safely. Explain that it's not a toy and should be worn only on the head.
9. Dispose of Waste Properly: After crafting, dispose of any waste materials like paper scraps or plastic packaging to prevent littering and potential hazards.
10. First Aid Kit: Keep a first aid kit nearby in case of any minor accidents. It's always better to be prepared.
By following these safety tips, you can make a fun and secure environment for everyone participating in the DIY birthday hat project.
Troubleshooting Common Issues in DIY Birthday Hat Crafting
Making a DIY birthday hat can be a fun and rewarding activity, but sometimes you might encounter a few hiccups along the way. Here's a helpful guide to troubleshoot common issues and ensure your crafting success:
1. Hat Too Flimsy: If your hat isn't holding its shape, reinforce it with a thicker cardstock or add an extra layer of paper. You can also use a stapler for additional support at the seams.
2. Decorations Falling Off: Make sure you're using the right adhesive for your materials. For heavier decorations, consider using double-sided tape or a hot glue gun for a stronger bond.
3. Hat Size Adjustments: If the hat is too big or small, make an adjustable closure. Add a strip of Velcro or make slits in the base of the hat to allow for size changes.
4. Uneven Brim: To achieve a uniform brim, use a compass or a round template to trace a perfect circle before cutting. This will help you get an even edge all around.
5. Color Bleeding: When using paints or markers, test them on a scrap piece of your hat material first. If they bleed, switch to a different brand or type that's suitable for your paper or fabric.
6. Difficulty Attaching a Topper: For toppers like pom-poms or figurines, make a flat surface on the top of the hat or use a strong adhesive like epoxy to keep them in place.
7. Wrinkles or Bubbles in Paper: Smooth out the paper before gluing it down. If you're using glue, apply it evenly and press out any air bubbles as you go.
8. Glue Drying Too Quickly: Work in small sections and have all your materials ready to go. This way, you can attach decorations before the glue sets.
9. Hat Not Standing Straight: Ensure the base of the hat is level when you're assembling it. If it's still wobbly, add a cardboard ring at the bottom for stability.
10. Allergic Reactions: Be mindful of materials that may cause allergies, such as latex. Always check the labels and opt for hypoallergenic options when possible.
Make a beautiful DIY birthday hat with these tips for tackling common issues. Stay patient and creative to craft a celebration masterpiece!
Sustainability and Upcycling in DIY Birthday Hats
When crafting DIY birthday hats, considering sustainability and upcycling can not only reduce waste but also add a unique touch to your creations. Here's how you can make your birthday hats eco-friendly:
1. Choose Recycled Materials: Start with a base made from recycled cardstock or paper. Look for materials that have been used before or can be easily recycled after the party.
2. Reuse and Repurpose: Before buying new decorations, see what you have at home. Old ribbons, buttons, fabric scraps, and even pages from magazines can be transformed into creative adornments.
3. Natural Decor: Use biodegradable items like dried flowers, leaves, or twigs to add a rustic charm to your hats. These can be composted after use.
4. Fabric Over Paper: Consider using fabric instead of paper for a more durable hat that can be worn multiple times. Choose natural fibers like cotton or linen for easier recycling.
5. Edible Embellishments: For a fun twist, decorate with edible items like small candies or cookies. This way, nothing goes to waste!
6. Avoid Single-Use Plastics: Steer clear of plastic glitter and stickers. Opt for paper-based glitter or make your own decorations from paper.
7. LED Lights: If you want to add lights, choose LED options as they are more energy-efficient and last longer.
8. Crafting Party: Host a hat-making party where guests bring and share materials. It's a great way to use up odds and ends while enjoying each other's company.
9. Upcycling Challenge: Encourage guests to make the most inventive hat using only upcycled materials. It's a fun activity that promotes creativity and sustainability.
10. After-Party Plans: Think ahead about how to reuse the hats. They can become part of a costume box, decorations for another event, or even a creative storage solution for small items.
By incorporating these sustainable practices into your DIY birthday hat project, you not only make a unique accessory for the special day but also contribute to a healthier planet. Happy crafting!
FAQs About DIY Birthday Hat
Get all your questions about making DIY birthday hats answered! Learn helpful tips and tricks for making the perfect party accessory.
What is the best material for making a sturdy birthday hat?
Cardstock is ideal for making a durable hat. It's thick enough to hold its shape yet flexible enough to work with easily.
How can I make sure the hat fits both kids and adults?
Design your hat with an adjustable closure, like a string tie or a strip of Velcro. This allows for quick size adjustments.
Can I make a birthday hat without using glue?
Absolutely! You can use staples or tape as alternatives to glue. They're quick, mess-free, and secure.
How long does it take to make a DIY birthday hat?
The time can vary, but on average, you can make a simple hat in about 15 to 30 minutes. More elaborate designs may take longer.
Are there any eco-friendly options for birthday hats?
Yes, consider using recycled paper or fabric. You can also decorate with natural elements like leaves or flowers.
What if I'm not good at drawing or designing?
No worries! Use templates available online or trace patterns from books or magazines to help with shapes and designs.
How can I involve my child in making their birthday hat?
Choose age-appropriate tasks like coloring, sticking on stickers, or applying glitter. It's a great way for them to express their creativity.
My hat keeps falling off. What can I do?
Ensure the base of the hat fits snugly. You can also attach a chin strap for extra security.
I want to add lights to my hat. Is that safe?
Use LED lights as they don't heat up. Make sure the battery pack is secured and inaccessible to young children.
How can I store the hat for future use?
Flatten the hat if possible and store it in a dry place away from direct sunlight. This will help preserve the colors and materials.
By providing clear answers to these FAQs, your readers will feel more confident and prepared to tackle their DIY birthday hat project. Remember, the goal is to have fun and let creativity shine!
15 Perfect Birthday Hat Ideas for Your Kids & Pets
Discover the top 15 perfect birthday hat ideas for your kids and pets! From fun themes to DIY options, find the perfect hat for your celebration.
1. DIY Birthday Party Hat Using Scrapbook Paper
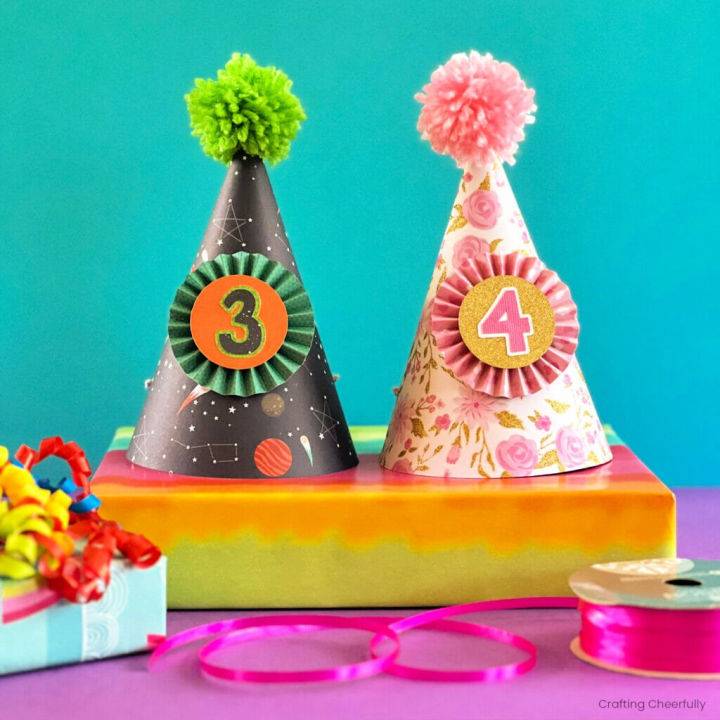
Learn how to make your own personalized paper birthday party hat with this engaging and straightforward tutorial from Crafting Cheerfully. Ideal for adding a unique touch to any birthday celebration, this DIY guide provides you with step-by-step instructions to craft a festive hat using scrapbook paper and yarn.
Included in the tutorial are a free PDF pattern and SVG cut file to ensure your crafting process is a breeze. Customize the hats with numbers or thematic decorations, and delight your guests with these handmade party favors that double as cherished keepsakes. With simple tools and a bit of creativity, you can design a hat that perfectly complements your party's theme.
2. Sewing Your Own Party Hat
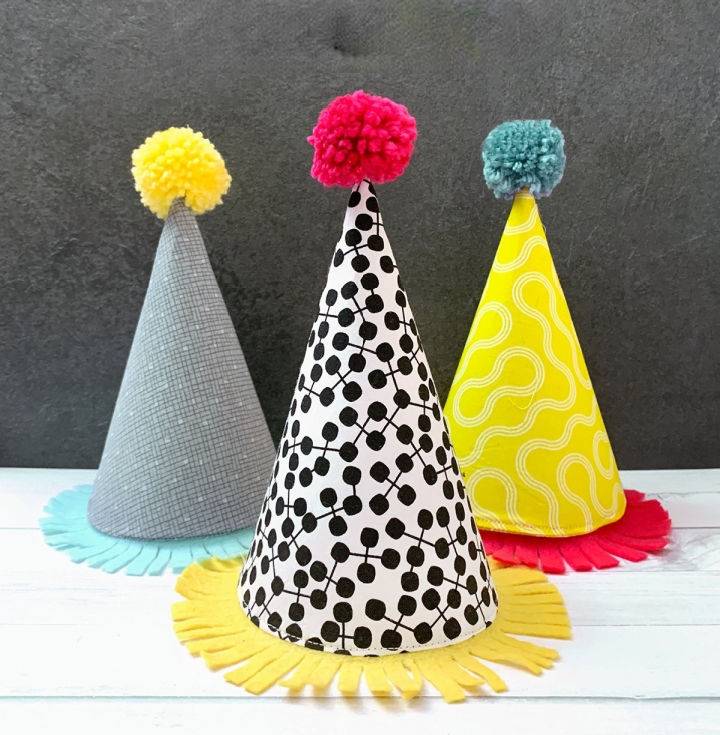
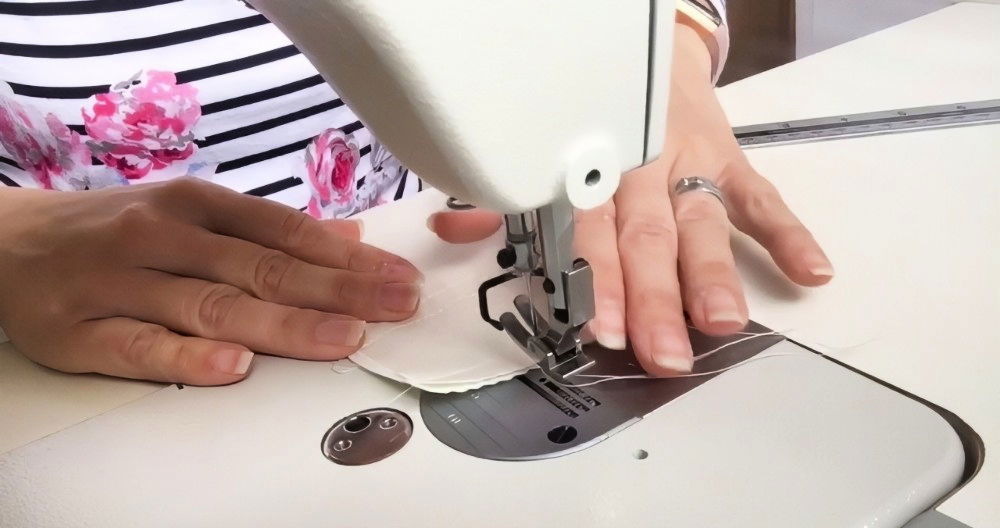
Making a festive atmosphere with handmade touches just got easier with this instructive guide on sewing a party hat from WeAllSew. The step-by-step tutorial promises a polished and durable result, with no raw edges, thanks to the fully lined interior.
Suitable for a fun crafting session, the process involves basic materials like fabric, card stock, and a few sewing essentials. With clarity and ease, this guide helps you craft charming party hats that add a personalized flair to any celebration. It's a rewarding project that delivers a delightful outcome, ideal for sprucing up birthday parties or special occasions.
3. Homemade Flower Power Party Hat
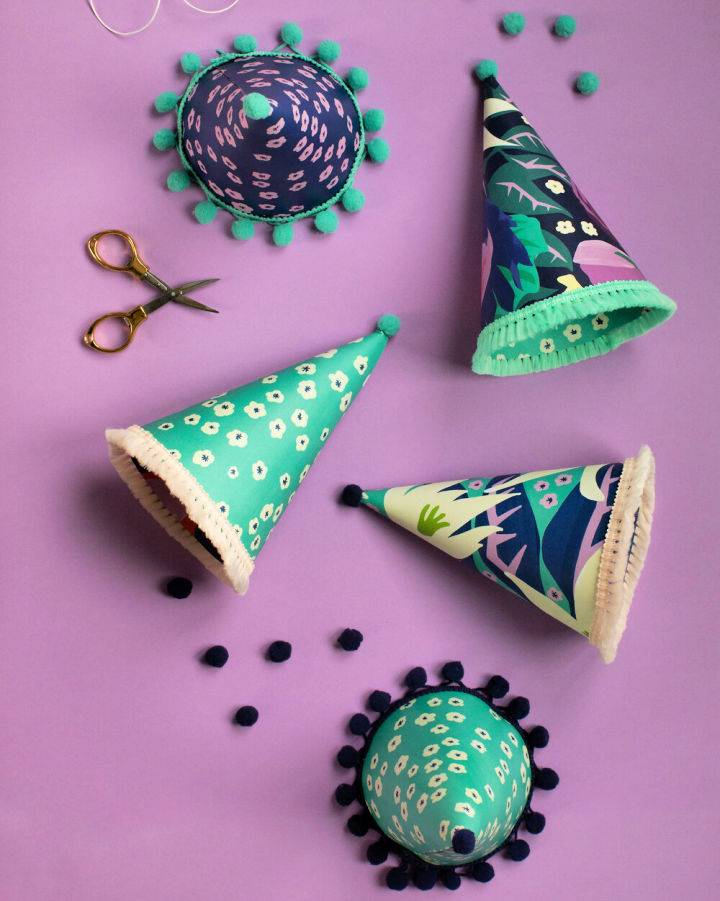
Get ready to elevate your next party with personalized flair by making DIY flower-power party hats using March's simple and engaging guide. Ideal for themed celebrations, these hats are fashioned from decorative gift wrap, ensuring your event is both cohesive and unique.
The process is straightforward: download the provided template, trace it onto your chosen paper, and assemble the hats into a cone shape. Add a dash of whimsy with pom-poms or tassels and secure them with a hot glue gun or double-sided tape. Finally, attach a thin elastic to fit around the chin, and voilà—your festive party hats are ready to charm your guests! March Party Goods
4. How to Make Birthday Party Hat
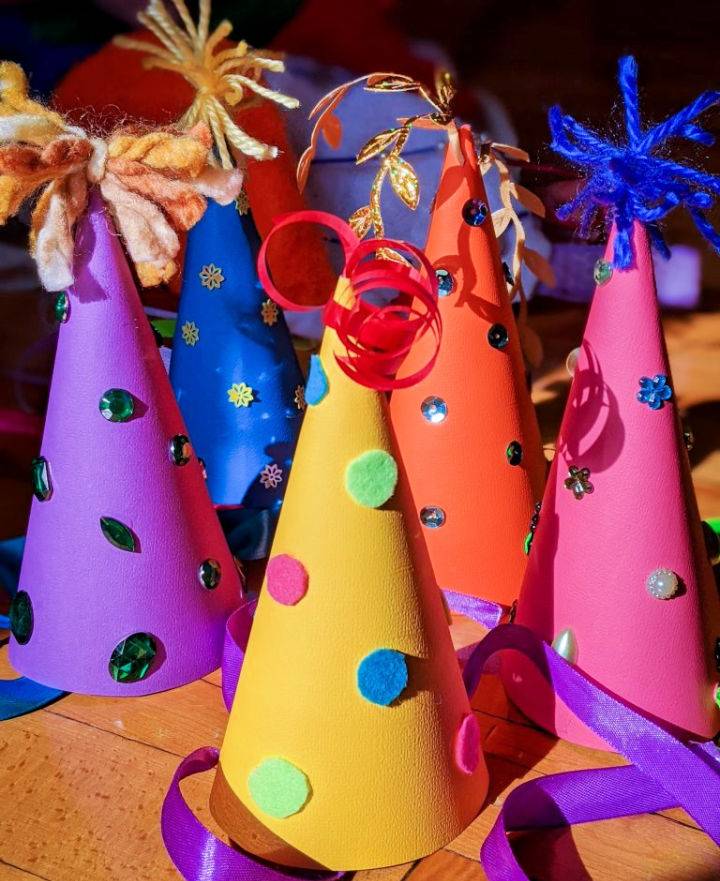
Are you ready to add a personal touch to your next celebration? Our DIY Party Hats guide offers a creative and engaging way to craft unique headpieces that are perfect for any festive occasion. With simple materials like card stock, sequins, and ribbons, you can design and decorate party hats that are as individual as your guests. This step-by-step tutorial is perfect for crafting enthusiasts and those who enjoy adding a handmade flair to parties.
Follow our easy instructions to cut, glue, and adorn your hats, making your next birthday or gathering extra special. Plus, making these hats can be a fun activity to involve older children, sparking their imagination and giving them the joy of wearing their own creations. Dive into this crafting adventure and make memories that last longer than any store-bought accessory. Eclectic Spark
5. Easy DIY Yarn Pom Pom Party Hat
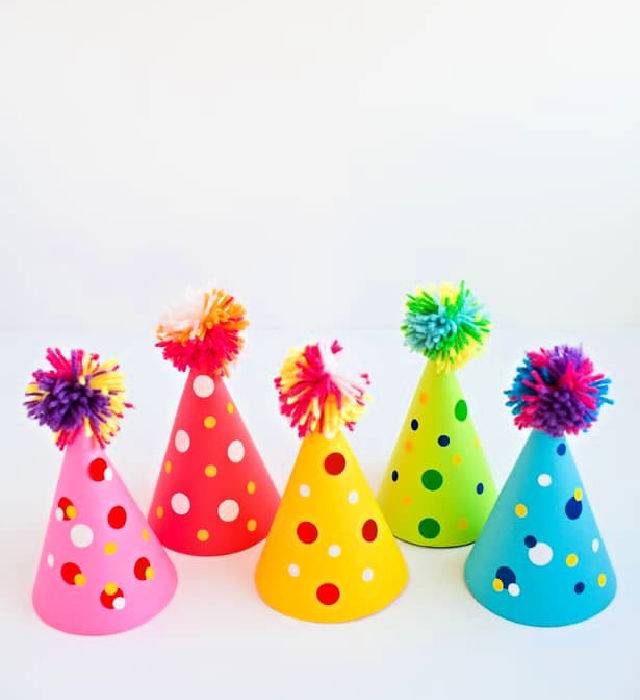
Get ready to add a festive touch to any celebration with DIY Yarn Pom Pom Party Hats. Hello, Wonderful brings you a fun and colorful craft that's perfect for partygoers of all ages. You'll need colored cardstock, yarn, scissors, a party hat template, hot glue, a hole puncher, and office round stickers.
The process is straightforward—assemble the hats, make or attach pom poms, decorate with sticker dots, and attach the yarn to wear. These hats can be customized to match any party theme, and the crafting experience is enjoyable for both kids and adults. Follow these easy steps, and you're set to ring in celebrations with a personal, handmade flair!
6. Make a Felt First Birthday Hat
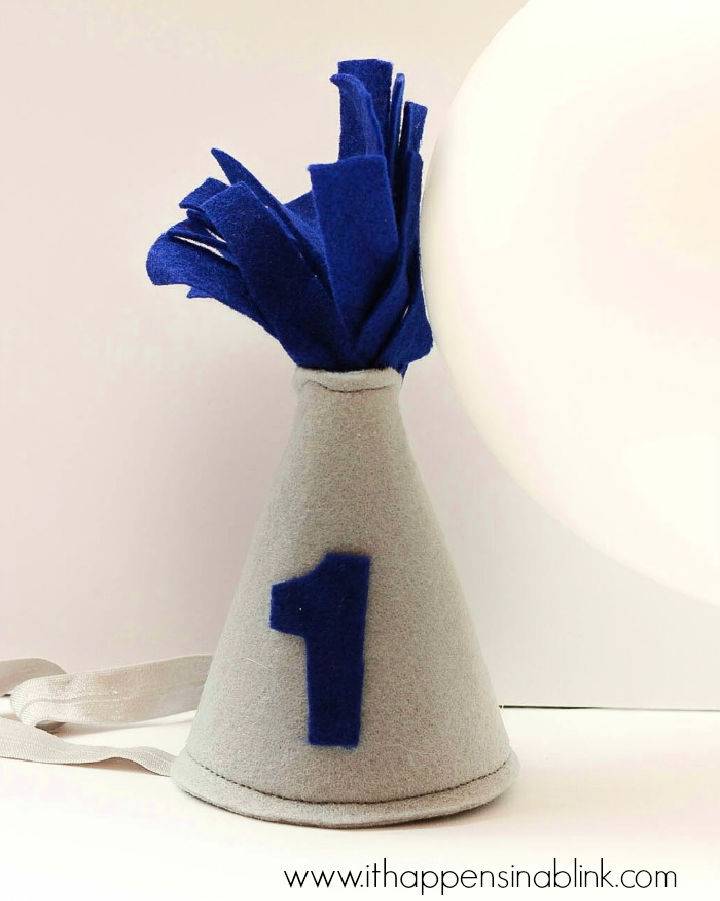
Making a personalized felt hat for your little one's first birthday is not only a charming touch to the celebration but also a treasured keepsake for years to come. ItHappensinaBlink offers a step-by-step guide to making a DIY Felt First Birthday Hat, perfect for party festivities or memorable photo sessions. You'll need simple supplies like felt, Pellon Peltex, sewing essentials or hot glue, an iron, elastic, and a hot glue gun.
With the provided patterns, you'll cut, iron, and assemble a delightful mini hat, complete with a number "1" and a cute tassel on top. The instructions are clear, making the crafting process enjoyable and accessible, ensuring your little one has a unique and adorable hat for their milestone celebration.
7. Free Printable Party Hat for Baby
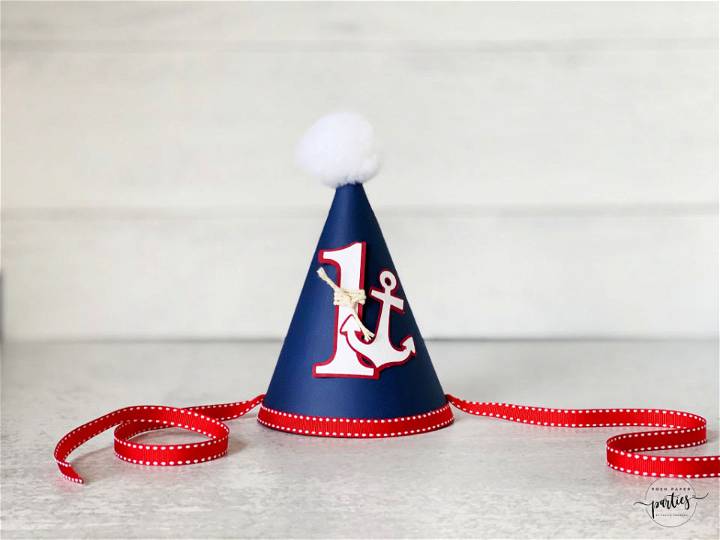
If you're keen on crafting a custom party hat for a baby's celebration, Neat House. Sweet Home® offers a comprehensive step-by-step guide that will walk you through the process. From selecting cardstock to adding the final embellishments, this tutorial ensures you have all the details to make a memorable and adorable accessory.
The instructions are clear and accompanied by images, making it easy to follow along. Moreover, the provided free template streamlines the creation process. Whether you're planning for a first birthday or another special occasion, this guide helps you personalize a party hat that's sure to charm both guests and the little honoree.
8. Fruit-Inspired Party Hat Ideas
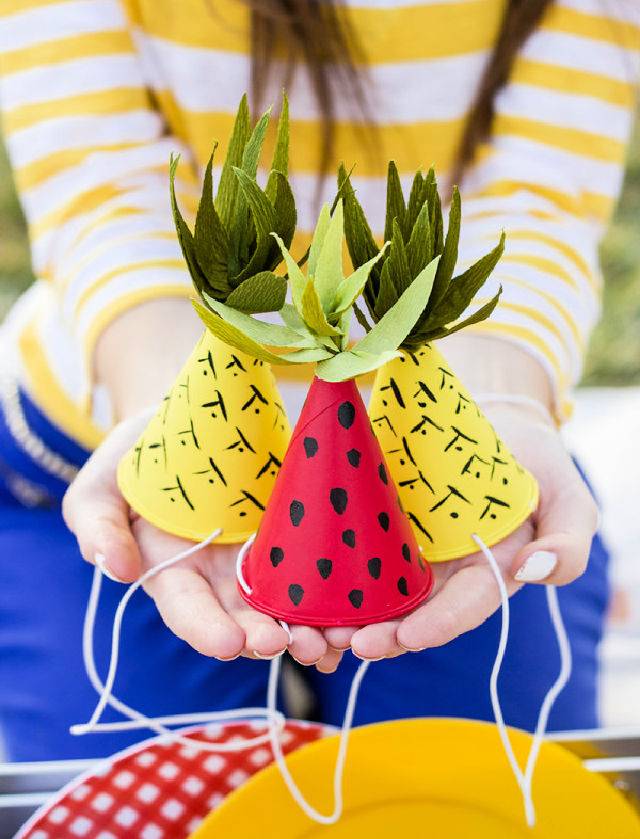
Add a touch of whimsical fun to your next picnic or fruit-themed birthday party with DIY Fruit-Inspired Mini Party Hats from Studio DIY. This creative project transforms simple paper cone cups into charming party accessories that resemble strawberries and pineapples. The step-by-step guide provides clear instructions on how to paint and assemble the hats, complete with green crepe paper leaves for added authenticity.
The materials needed are affordable, and the process is streamlined since the cones already have a hat-like shape. With a little bit of paint, scissors, and tape, you can make these cute hats that are sure to be a hit with kids and adults alike. Ready your brushes and let the summertime crafting begin!
9. Printable Pineapple Party Hat
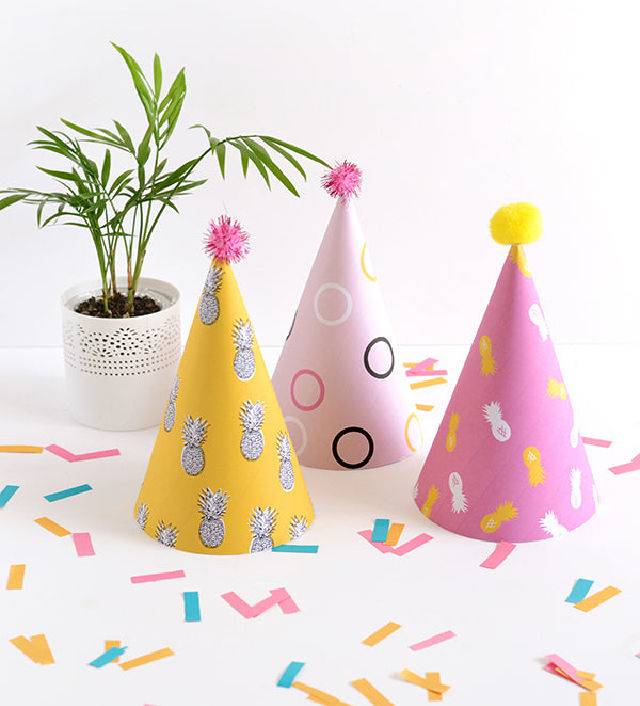
Celebrate DIY Crafts' 2nd anniversary with a fun crafting project! Dive into making festive pineapple party hats with a simple and engaging guide that will add a splash of color to any celebration. Download the provided template and follow the straightforward steps using basic materials like white card, scissors, a hot glue gun, elastic, and pom poms. Perfect for both personal enjoyment and party ambiance, these adorable hats promise a creative and joyful crafting experience. Visit DIY Crafts for this and many more inspiring crafting ideas. Make and Tell
10. DIY Confetti Birthday Party Hat for Kids
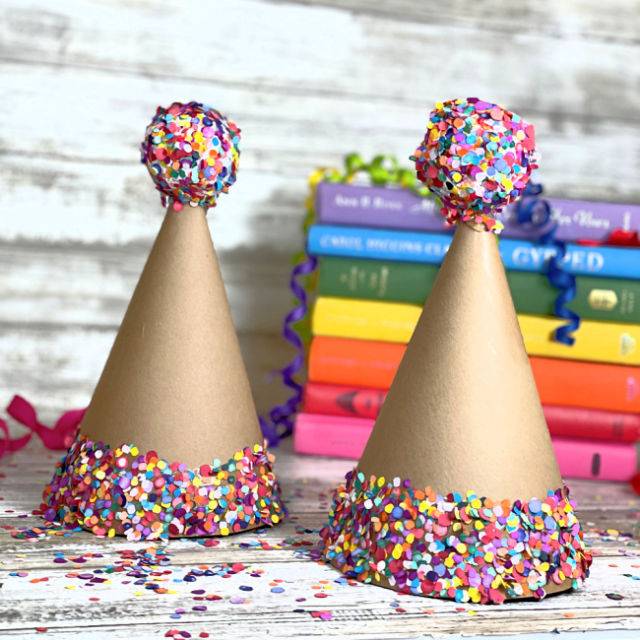
Planning a birthday party and looking for a unique touch? Laura Kelly's Inklings offers a creative guide to crafting your own DIY Confetti Birthday Party Hats that are sure to add a sparkle to your celebration. These hats are perfect for guests of all ages and can be personalized with your choice of cardstock and confetti.
The instructions are clear and straightforward, making it an enjoyable activity for both kids and adults. Not only will this craft make your party memorable, but it also gives you the opportunity to engage in a fun DIY project. Remember to prepare your space for the mess that comes with confetti and have all your materials ready for a smooth crafting experience. Enjoy adding a homemade touch to your festive occasions with these charming party hats.
11. Make Your Own Mini Party Hat
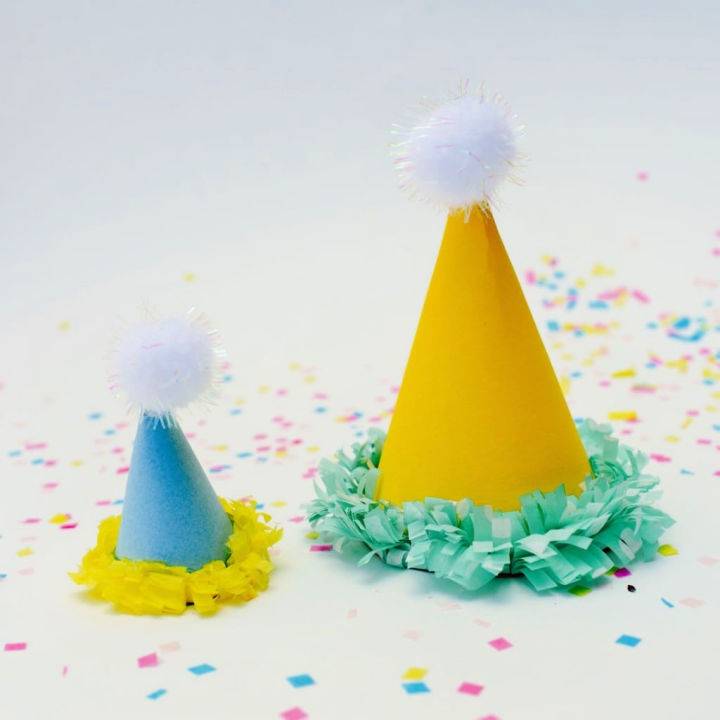
Transform any celebration into an enchanting affair with charming mini party hats, a whimsical addition you can easily make thanks to the instructive guide on Make Life Lovely. Crafting these tiny toppers involves a simple process of die-cutting, rolling, and adorning with playful pom-poms or fringed tissue paper.
Ideal for adorning headbands or embellishing cupcakes, these hats can be tailored in an array of colors and sizes to match your festivity's theme. With straightforward steps and room for creativity, you'll find joy in fashioning a set of these miniature hats that can elevate your party décor or become a delightful activity for guests. Engage in this craft and add a personalized touch to your next event.
12. DIY Happy New Year's Party Hat
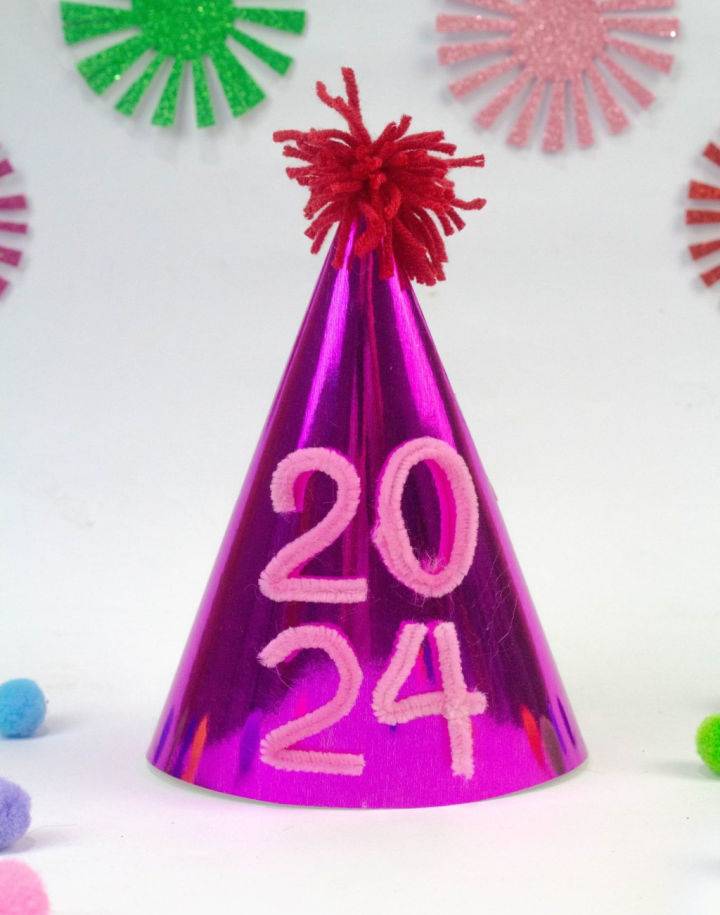
Ready to make a splash at your New Year's Eve bash? In The Playroom presents an easy DIY party hat project that's perfect for adding a personal touch to your festivities. Crafting your own party hat is a fantastic way to involve the whole family in celebration preparations, from little ones to adults.
With simple materials like metallic cardstock, pipe cleaners, yarn, and some glue or tape, you'll be on your way to making a festive accessory. Step-by-step instructions ensure your craft time is enjoyable and stress-free, allowing for a creative experience that's as memorable as the event itself. Gear up for the countdown with a colorful, handmade addition to your New Year's attire!
13. Handmade Party Hat Tutorial
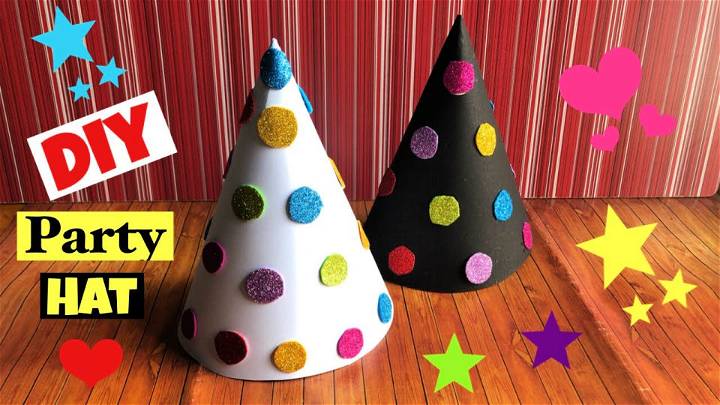
Making a handmade birthday cap can add a personal touch to any celebration. If you're interested in crafting your own party hat, SalmArts offers a helpful tutorial on YouTube that guides viewers through the process with simplicity and creativity. The video provides a step-by-step approach, making it easy to follow along regardless of your crafting skill level.
Using materials like paper, glitter sheets, or foam, you can design a unique cap that's sure to stand out. The process is quick, generally taking only a few minutes, and is a fun activity that can involve kids as well. For those who enjoy DIY projects and are planning a birthday party or festive event, learning how to make a birthday cap with SalmArts can be a rewarding and entertaining experience.
14. DIY Birthday Hats Using Household Items
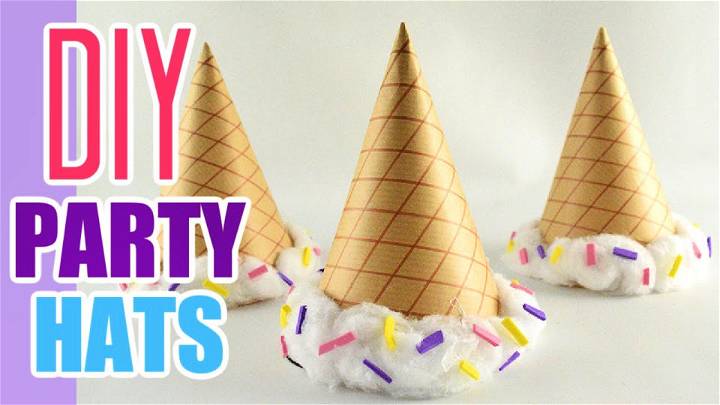
Planning a birthday party or festive event and want to add a personal touch? Making your own DIY party hats is a fun and simple activity that can bring an extra sparkle to your celebration. YouTube's video tutorial, titled "Easy DIY Party Hats - DIY Birthday Hat Tutorial (Free Printable Template)," offers a step-by-step guide on making charming birthday hats using basic household materials.
With a free printable template available for download, you can easily craft a unique party accessory that resembles a whimsical vanilla ice cream cone complete with colorful sprinkles. The instructions are clear and engaging, ensuring that your crafting experience is enjoyable and rewarding. Whether you're adding a creative flair to a birthday bash or just enjoying a crafty afternoon, this tutorial is perfect for those who love to make their special occasions even more memorable.
15. How to Make Your Own Birthday Party Hat
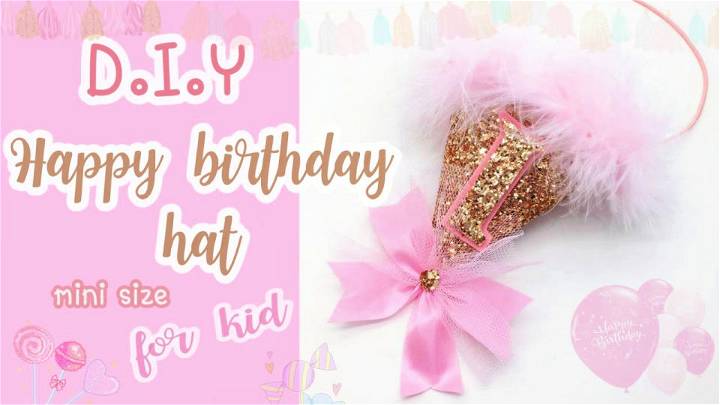
If you're gearing up to celebrate a special first birthday and want to add a personal touch to the festivities, making a DIY birthday party hat can be a fun and rewarding project. On YouTube, CHIRA Design's Episode 103 offers a step-by-step guide on crafting a unique and charming party hat perfect for your little one's milestone celebration.
The tutorial is easy to understand and follows a no-sew approach, using materials like felt fabric, hot glue, pom-poms, and ribbon, making it an accessible activity for anyone looking to enhance their party with a homemade touch. By the end of the video, you'll have a cute, handcrafted birthday hat that's sure to be a hit at the party and a wonderful keepsake for years to come. For more creative ideas and tutorials, explore CHIRA Design on YouTube.
Conclusion:
In conclusion, making the perfect birthday hat for your kids and pets is not just about crafting; it's about adding a personal touch of love and creativity. This guide has walked you through every step, from selecting the right materials to adding those final touches that make each hat unique. Whether it's a vibrant, fun design for a child's party or a cute, comfortable option for your pet, the possibilities are endless. Remember, safety should always come first, so follow our tips to ensure your DIY birthday hats are both safe and stylish.
By customizing and upcycling, you're not only making memorable birthday accessories but also promoting sustainability. If you ever run into any issues, refer back to our troubleshooting section for quick fixes. And don't forget—DIY projects like making birthday hats are an exceptional way to bond with your loved ones and make lasting memories. So grab your materials and get started on these 15 perfect birthday hat ideas for an unforgettable celebration!
You may also like these DIY Crafts for Kids:
- DIY Glue Gun Crafts: Transform everyday items into art with these glue gun crafts. Perfect for all skill levels.
- Crochet Baby Booties: Keep tiny toes warm with free crochet baby booties pattern for gifts or your own little one.
- Crochet Baby Pants: Dress your baby in style with adorable crochet baby pants, which are the perfect project for loving parents or as a gift.
- DIY Baby Closet Dividers: Organize your baby's closet with easy DIY dividers that bring order and style.
- Crochet Headband Patterns: Accessorize with style using free crochet headband patterns for personalizing outfits or as handmade gifts. Discover how


