Building a brick outdoor kitchen offers an incredible way to elevate your backyard or patio space into an entertainment haven. Brick kitchens are known for their durability, rustic charm, and ability to withstand weather elements, making them ideal for outdoor environments. In this guide, we'll cover everything you need to know about planning, building, and finishing a brick outdoor kitchen based on real-world insights from a successful project, covering every essential step from planning to final touches.
Why Choose a Brick Outdoor Kitchen?
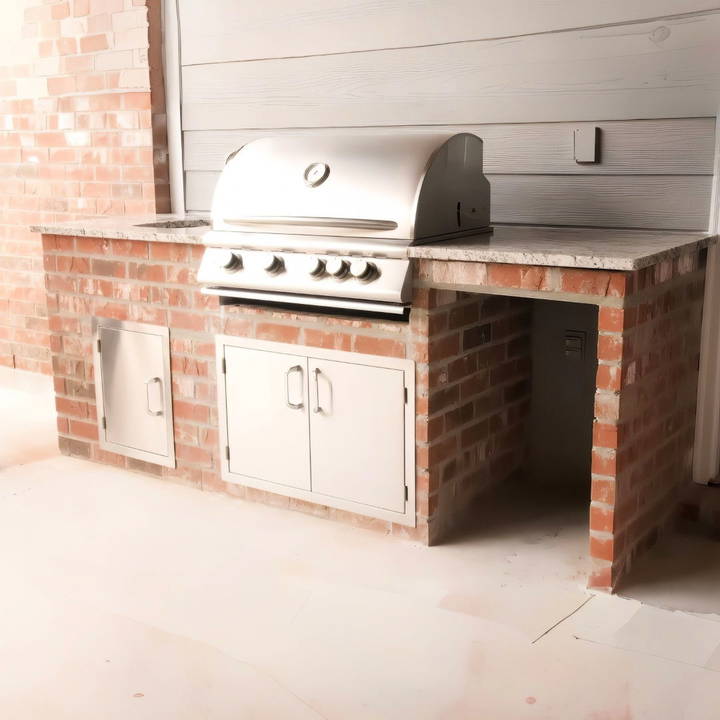
A brick outdoor kitchen adds more than just functionality to your outdoor space. Here are a few reasons why brick is a great choice:
- Durability: Brick can withstand various weather conditions, making it ideal for year-round use.
- Aesthetic Appeal: Brick provides a classic look that suits both rustic and modern aesthetics.
- Low Maintenance: Once installed, brick requires minimal maintenance and is resistant to both stains and damage.
- Value Addition: An outdoor kitchen boosts property value and appeals to potential buyers, especially those interested in outdoor entertaining spaces.
Whether you're building a simple grilling station or a fully equipped kitchen, brick will offer both resilience and a stylish look that blends well with natural surroundings.
Step by Step Instructions
Learn how to build a brick outdoor kitchen with step-by-step guidance on planning, budgeting, equipment, and layout to build your perfect outdoor space.
1. Planning Your Outdoor Kitchen
Optimize your outdoor kitchen with expert tips on defining space, setting budgets, and understanding permits. Plan your outdoor kitchen effortlessly!
Define Your Space and Goals
Consider the space available on your patio or backyard. The Watson family, whose project serves as our example, planned for an 8-foot island in their spacious patio, making ample room for essentials without overcrowding the area. Think about how much space you'll need to accommodate family gatherings or events.
Set a Budget
Determine the budget early on, factoring in:
- Appliances and fixtures
- Utilities (water, gas, electric)
- Building materials
- Labor costs (especially for brick masonry and utility professionals)
Permits and Regulations
Check local regulations for outdoor kitchen installations. Some areas may require permits, especially when running utilities like gas and plumbing.
2. Choosing the Right Equipment
Discover top tips for choosing essential and optional appliances to optimize your kitchen with the perfect equipment for home efficiency.
Essential Appliances
Here's a list of the core appliances typically included in outdoor kitchens:
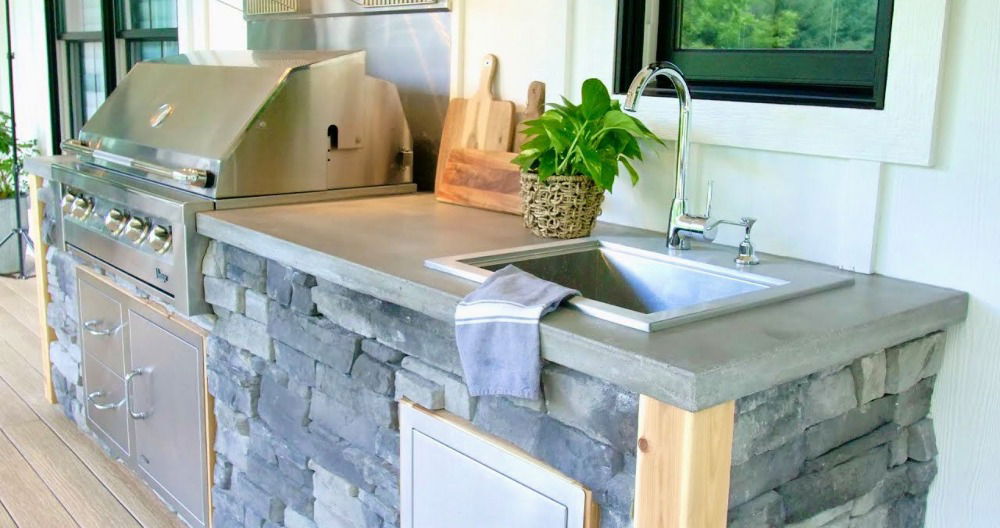
- Grill: The centerpiece of most outdoor kitchens. The Watsons opted for a gas grill, a popular choice due to its convenience and control.
- Sink: Ideal for easy handwashing, rinsing ingredients, and cleaning dishes without needing to go indoors.
- Refrigerator: Outdoor-rated refrigerators keep beverages and perishables cool. The Watsons planned to use an indoor refrigerator temporarily but intended to upgrade to an outdoor model.
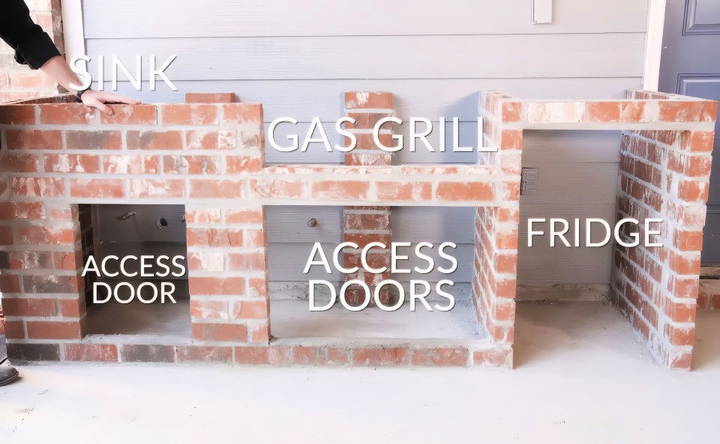
- Access Doors: Essential for accessing utilities under the grill and sink, while also providing extra storage.
Optional Appliances
Consider adding other amenities like:
- Pizza Ovens
- Vent Hood: Important if the kitchen is under a roof, to keep smoke away from guests.
- Outdoor Ice Maker: A luxury feature that keeps ice on hand for refreshments.
3. Designing the Layout and Structure
Discover essential tips on designing the layout and structure, including sketching your layout and understanding standard measurements.
Sketch Your Layout
Start with a sketch to visualize the layout and measurements. The Watson family used an 8-foot by 30-inch island layout with 36-inch height, allowing for sufficient workspace and clearance.
Standard Measurements
- Height: 36 inches from the ground
- Depth: Around 30 inches for typical island builds
- Clearance: Ensure space for grill lid clearance, about 3 inches from walls or other surfaces.
These dimensions help ensure comfortable workspace and proper appliance fitting. It's helpful to have these blueprints handy for reference, especially for contractors who may assist in construction.
4. Utility Setup for Water, Gas, and Electricity
- Water Supply and Drainage: The sink was installed on the left side of the Watsons' kitchen island, so they ran water and drainage lines accordingly. This setup requires professional plumbing work to ensure that the installation is safe and leak-free.
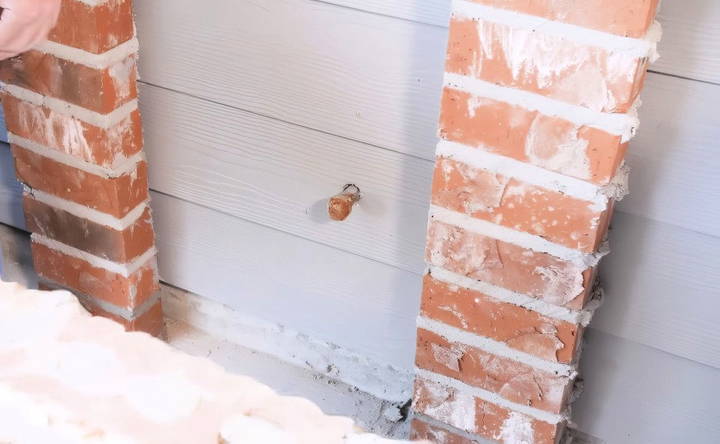
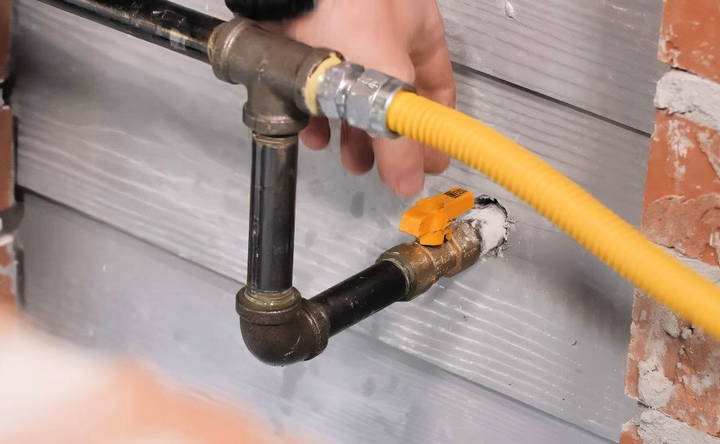
- Gas Plumbing: Gas lines should be placed under the grill area, and gas installation should be completed by a licensed professional for safety. The Watsons' kitchen utilized natural gas, but you may opt for propane as well. For propane, ensure the vents are installed low in the cabinet cavity.
- Electricity: Electricity powers essential appliances like refrigerators, and sometimes a rotisserie motor for grills. The Watsons added an outlet near the countertop for convenient access, and all electrical wiring should be installed by a qualified electrician.
5. Building the Brick Island Structure
For the brick island, hire a skilled mason who can follow precise measurements for appliance cutouts. Key steps for a successful build:
- Lay Brick Walls: Ensure correct placement for cutouts based on your equipment specs.
- Cutouts: Each cutout (for access doors, grills, and fridge) should be measured twice to guarantee an accurate fit.
- Ventilation: Follow appliance guidelines for spacing, especially for appliances like refrigerators that need airflow.
6. Countertops and Sinks Installation
Get expert tips on choosing the right countertop and professional installation advice for countertops and sinks to enhance your kitchen or bathroom.
Choosing the Right Countertop
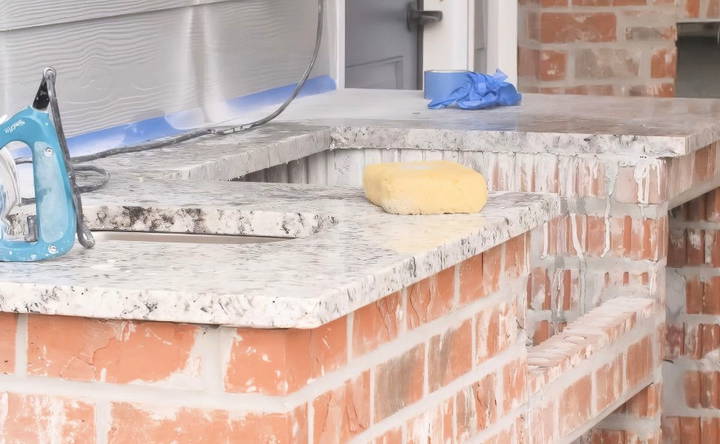
Granite is a durable and attractive choice for outdoor countertops. It's heat-resistant, easy to clean, and pairs well with brick.
- Measure Precisely: Ensure accurate dimensions, especially for the grill cutout, to align it perfectly with the brick structure.
- Install the Sink: The Watsons selected an undermount sink, which the countertop installers secured directly to the granite for a flush finish.
- Faucet Installation: Drill holes for the faucet, making sure the placement allows for comfortable access.
Installation Tips
- Measure Twice, Cut Once: Accurate measurements prevent costly mistakes.
- Countertop Setting: Once placed, allow the countertop to set for about 30 minutes before proceeding with other installations.
8. Installing Appliances and Safety Considerations
Learn about installing appliances and safety considerations with steps for setting up the grill, access doors installation, and refrigerator setup.
Setting Up the Grill
- Support: Most built-in grills are supported by a flange that rests on the countertop without additional bracing.
- Vent Panels: For propane setups, vents should be installed low to prevent gas buildup; for natural gas, place vents higher up in the cabinet.
Access Doors Installation
Access doors allow easy reach to utilities. For brick installations, use masonry screws with an impact drill to ensure a firm hold.
- Double Doors: Often placed under the grill, providing access to gas lines and storage.
- Single Door: Installed under the sink for plumbing access and additional storage.
Refrigerator Setup
An outdoor-rated refrigerator is ideal, especially for ventilation and weather resistance. Follow manufacturer specifications for proper cutout sizing and placement to avoid overheating.
9. Final Touches and Practical Tips
- Testing for Leaks: Before using the gas grill, conduct a leak test with a spray bottle filled with soapy water. Spray connections, and if bubbles form, there's a leak. Tighten the fittings and test again.
- Check Appliance Fit and Finish: Ensure all appliances fit flush with the brickwork and that all doors, drawers, and other components are aligned. This final adjustment phase will ensure the outdoor kitchen looks seamless and is fully functional.
- Weatherproofing: Brick is naturally weather-resistant, but consider applying a sealant to the countertop to prevent staining and damage over time.
Conclusion:
Building a brick outdoor kitchen, as demonstrated by the Watson family, combines planning, precise execution, and attention to detail. From laying out the utilities and building the brick island to installing appliances and adding final touches, every step is crucial for a safe, functional, and visually appealing result. Remember to:
- Plan extensively and select durable, outdoor-rated materials.
- Hire professionals for gas, plumbing, and electrical work to ensure safety.
- Take time with measurements, especially for cutouts and appliance installations.
With careful planning and high-quality construction, your brick outdoor kitchen will serve as a centerpiece for outdoor gatherings, family cookouts, and memorable events for years to come.
FAQs About Brick Outdoor Kitchens
Discover answers to common questions about brick outdoor kitchens, including design tips, maintenance advice, and durability information.
For colder climates like Canada, granite and concrete countertops are ideal choices due to their resilience against temperature fluctuations and weather elements. Both materials are durable, low-maintenance, and can withstand freeze-thaw cycles without cracking.
If your kitchen is under a roof or near enclosed spaces, a vent hood is strongly recommended. It helps to keep smoke and fumes away, reducing risks of smoke inhalation and damage to nearby structures. Vent hoods should exhaust smoke outdoors safely, often through a side wall or roof vent.
An insulated grill jacket is necessary if the grill is built into combustible materials like wood. Since brick and granite are non-combustible, the Watson family's kitchen didn't need an insulated jacket, but check your grill’s manual for specific requirements.
To install access doors in a brick kitchen, use masonry screws (like Tapcon screws) and an impact drill. These tools are specifically designed to handle the hardness of brick, ensuring the doors stay securely in place.
A 1-inch by 1-inch notch is often appropriate, but always verify with your grill’s manufacturer instructions. The notch helps the grill sit flush with the countertop, allowing for proper ventilation and support.
For safety, place your outdoor kitchen at least 10 feet away from any flammable structures. Gas grills should also meet specific clearance distances outlined in local fire codes to reduce risks from potential gas leaks or flare-ups.
Leaving cabinet interiors open allows for necessary ventilation, especially for gas setups. However, if you want to finish the inside, use non-flammable materials and avoid sealing it completely to allow free air movement and safe gas dissipation in case of leaks.
Google SketchUp is popular for making 3D designs of outdoor kitchens. It's user-friendly for visualizing layouts and dimensions, which you can share with contractors to ensure accurate construction.


