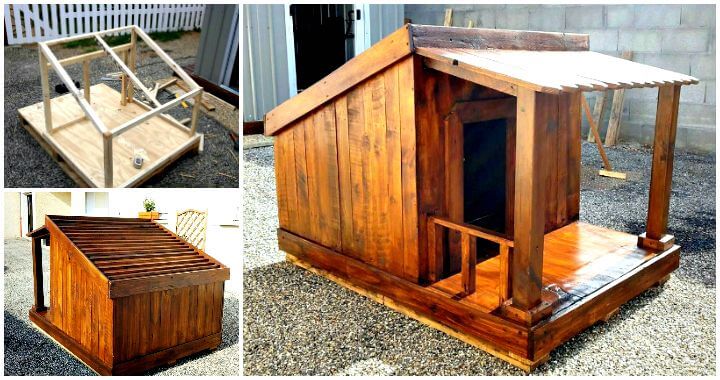
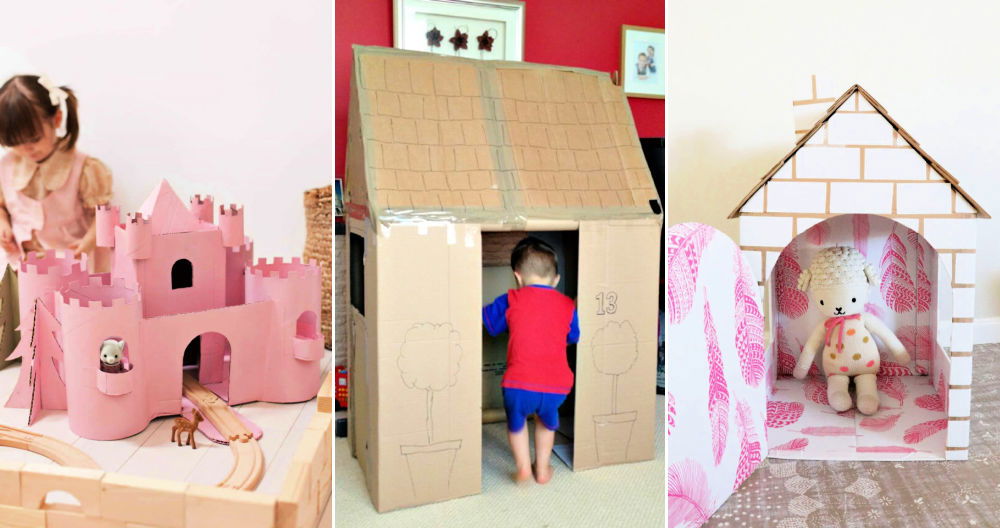
Building a dog house can be an exciting DIY project, especially when you decide to add extra features like a porch! Not only does it provide your pet with a cozy home, but it also gives them a shaded space to relax. In this guide, we will walk through a step-by-step process to build a DIY dog house with a porch, covering everything from gathering materials to final touches like painting and trimming.
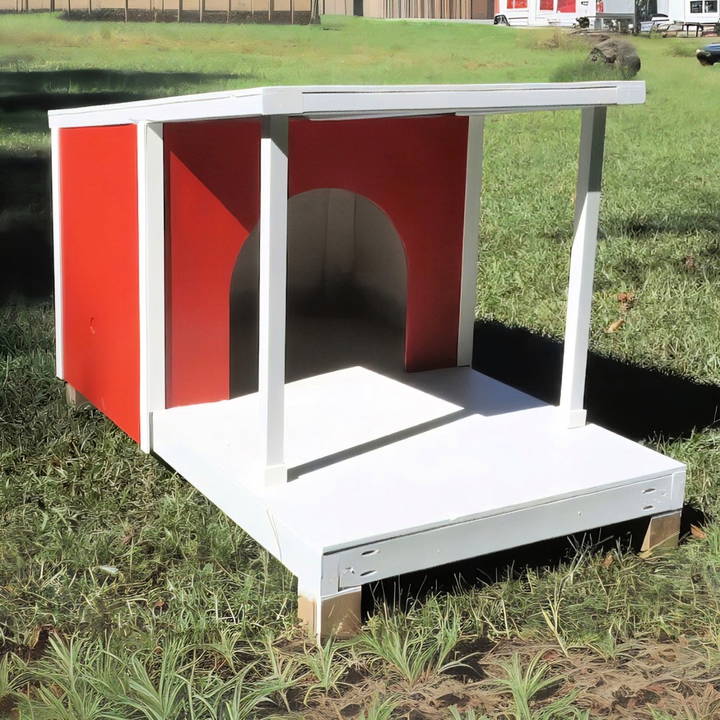
This tutorial breaks the process down into manageable tasks so you can follow along and complete the project even if you are new to woodworking.
Why Build a Dog House with a Porch?
Before diving into the actual building process, it's important to understand why a dog house with a porch is a fantastic option for your pet. Besides giving your dog a cozy shelter, it offers several additional benefits:
- Extra Comfort: The porch provides a shaded area where your dog can rest without being completely enclosed.
- Weather Protection: A porch offers protection from the sun and rain, ensuring your dog has a comfortable space to relax even in varying weather conditions.
- Aesthetic Appeal: Adding a porch gives the dog house a modern and stylish twist, enhancing its appearance in your yard.
Materials You'll Need
Here is a list of basic materials and tools you will need to complete this project:
Materials:
- 2x4 lumber for the frame
- Plywood for walls, floor, and roof
- Wooden dowels (optional for post supports)
- Deck screws or nails
- Wood glue
- Paint and primer
- Silicone caulk
- Trim wood for finishing
- Roofing material (optional if you're making it weatherproof)
Tools:
- Circular saw
- Miter saw
- Drill
- Pocket hole jig
- Tape measure
- Carpenter's square
- Clamps
- Caulk gun
- Paintbrushes or roller
- Hammer
Step by Step Instructions
Learn how to build a dog house with a porch step by step. Follow our detailed guide from planning and cutting to painting and finishing touches for a perfect pet haven.
Step 1: Planning and Gathering Materials
Before you start building, it's essential to have a clear plan. As seen in the project video, the creator starts by making sure all the necessary materials and tools are on hand, which is particularly important if weather conditions are unpredictable. Running out for extra supplies mid-project can be frustrating.
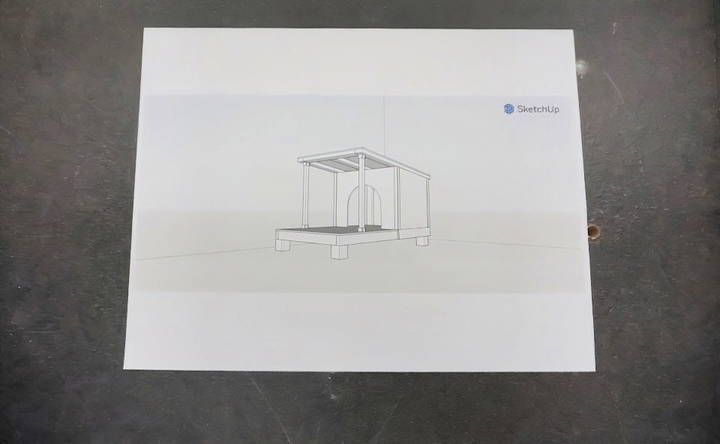
- Check Your Plans: Before purchasing materials, have a detailed plan. Either build one or find a ready-made blueprint (many DIY websites offer downloadable plans, including the one referenced in the transcript). Ensure the dimensions fit your dog's size.
- Gather Materials: Using your plan, gather all the materials you'll need. It's advisable to check that everything is in stock and available before you start. Make a checklist and verify against your plans to ensure nothing is missed.
- Measure Twice, Cut Once: Measure all your cuts carefully to avoid costly mistakes later on. Use a tape measure, a carpenter's square, and a pencil to mark your cuts clearly.
Step 2: Cutting the Frame and Base
With your materials ready, it's time to start cutting the frame for the dog house.
- Cut the 2x4s for the Frame: The first thing you need is the base structure, which consists of a simple rectangle. In the transcript, they mention cutting a “rabbit joint” where two boards meet, ensuring the 2x4s will sit flush and align properly.
Mark out the length and width of the base frame using your plans. Cut the 2x4s to size using a circular saw or a miter saw.
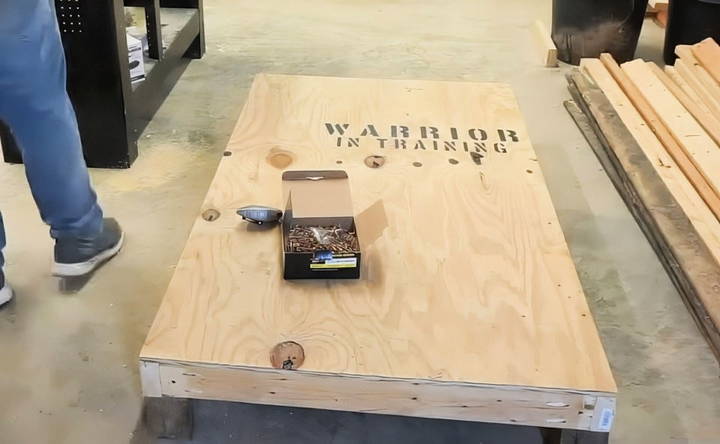
- Assemble the Base: Once your pieces are cut, assemble the frame using wood glue and screws. The base serves as the foundation of the house, so it needs to be sturdy. Ensure that everything is square and level before moving forward.
- Install the Floor: Attach the plywood to the frame to form the floor. Cut the plywood to the correct size using a circular saw and fasten it to the frame with screws or nails.
Step 3: Building the Walls
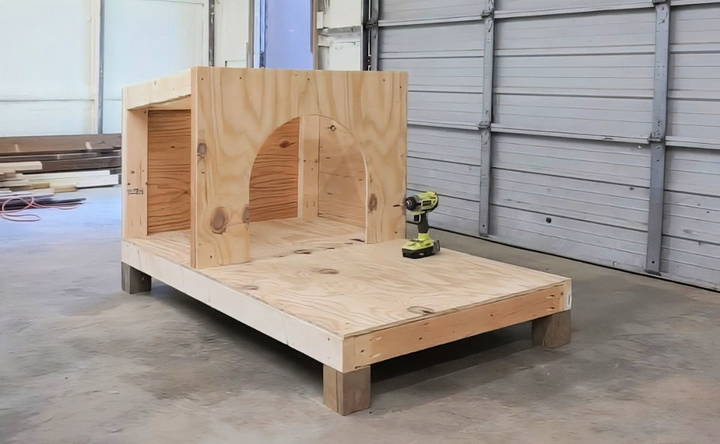
Once the base is secure, the next step is to build the walls of the dog house. The process includes framing out the walls and cutting plywood sheets to form the sides.
- Cut Wall Supports: Cut 2x4s to build vertical supports for the walls. You'll need one support for each corner of the house, as well as additional supports for the doorway.
- Angle Cuts for the Roof: In the transcript, the creator mentions cutting the wall supports at an angle to accommodate the sloped roof. Set your miter saw to the correct angle and cut the tops of each vertical support.
- Attach Wall Supports to the Base: Once your supports are cut, attach them to the base using screws or nails. Use a square to ensure each support is aligned properly.
- Cut Plywood for Walls: Next, cut the plywood panels for the walls. Mark out the dimensions using your plans and cut the sheets with a circular saw.
- Cut Out the Door: Once the plywood walls are cut, it's time to build the doorway. Use a jigsaw to cut a circular or rectangular hole in the front panel where your dog will enter.
- Assemble the Walls: After cutting out the door, attach the plywood panels to the vertical supports using screws or nails.
Step 4: Building the Roof
The roof is one of the trickiest parts of this project since it requires angled cuts and careful alignment to ensure the proper fit.
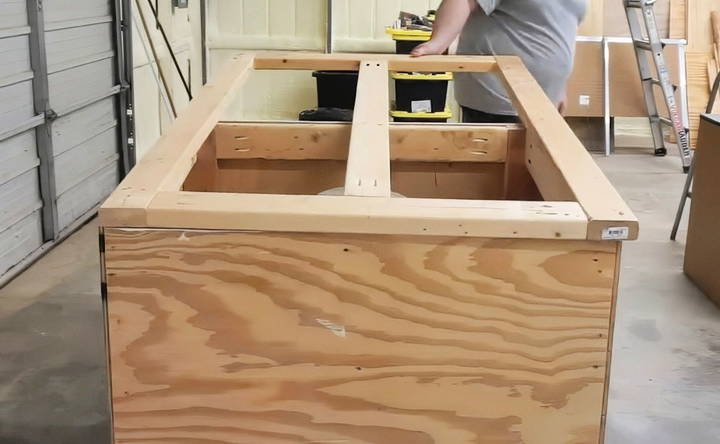
- Cut Roof Supports: The dog house will have a sloped roof, which means you'll need to cut roof supports (also called rafters) at the proper angle. Use a miter saw to cut these pieces, following the angle set in your plans.
- Install Roof Supports: Attach the roof supports to the top of the wall frames. Ensure they are securely fastened and at the correct angle to support the roof panels.
- Cut and Install the Roof Panels: Cut the plywood to size for the roof panels. Once cut, attach the panels to the roof supports using screws.
Step 5: Adding the Porch
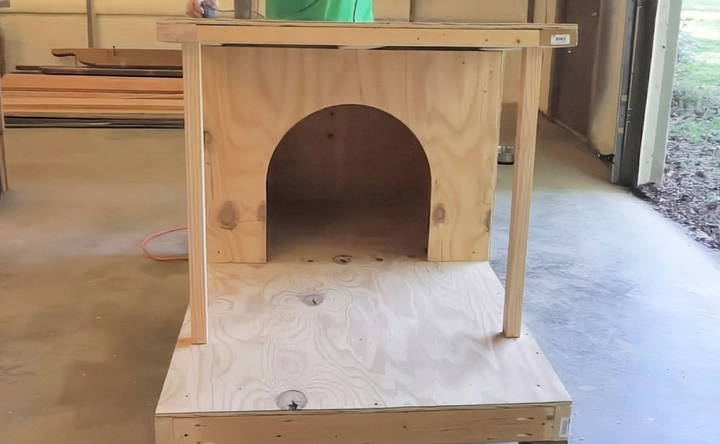
Now that the basic structure of the dog house is complete, it's time to build the porch. The porch will be an extension of the floor and will give your dog a shaded spot to relax.
- Cut the Porch Frame: Use 2x4s to build a simple rectangular frame for the porch. The size of the porch will depend on the dimensions of the dog house and how large you want the porch to be.
- Install Porch Supports: In the transcript, the creator discusses using dowels and nails to support the porch posts. These will serve as the pillars holding up the porch roof.
- Attach the Porch to the Dog House: Once the porch frame is built, attach it to the front of the dog house, ensuring it's level and secure.
Step 6: Finishing Touches
Once the structure is complete, you'll want to focus on the finishing touches. These include painting, trimming, and possibly weatherproofing the dog house.
- Painting and Priming: Prime the entire structure to protect the wood, and then paint it with exterior-grade paint to ensure it stands up to weather conditions. According to the transcript, they used two coats of paint, allowing proper drying time between each coat.
- Adding Trim: Attach wooden trim around the edges of the dog house and porch to give it a finished, polished look. The transcript mentions using silicone caulk to seal any gaps and nail holes, ensuring the house is weather-tight.
- Roofing (Optional): If you want to make the dog house fully weatherproof, consider adding shingles or a waterproof membrane to the roof.
Step 7: Final Assembly and Securing the Porch
Now that the majority of the dog house is built, it's time to ensure the porch is securely attached and the structure is stable for your dog to enjoy.
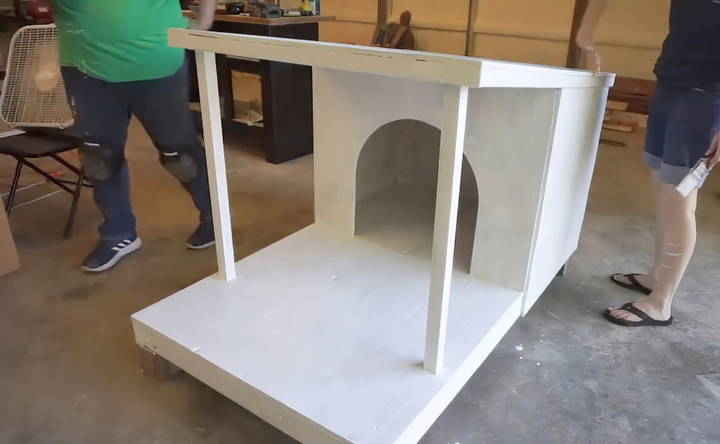
- Install Porch Pillars: The porch needs additional support in the form of pillars, which are attached between the base and the porch roof. As described in the transcript, they used wooden dowels to anchor the posts securely into the base of the dog house. Drill a hole into the bottom of each pillar and the corresponding base of the dog house, then insert the dowels with wood glue for added stability.
Pro Tip: You can use additional fasteners like finishing nails or screws to secure the porch pillars further. However, ensure that these fasteners are hidden, either behind trim or inside the joints, to maintain a clean look.
- Attach the Porch Roof: Once the porch pillars are in place, attach the porch roof. This is essentially an extension of the dog house roof but overhangs the porch area. Make sure it is securely fastened to the top of the pillars and anchored into the side of the dog house for maximum stability.
- Check the Structure for Stability: Before proceeding with finishing touches like painting and trim, double-check the entire structure to ensure everything is solid. Wiggle the porch and the dog house to make sure there are no loose joints or wobbly areas. If necessary, add additional screws or wood glue to reinforce any weak spots.
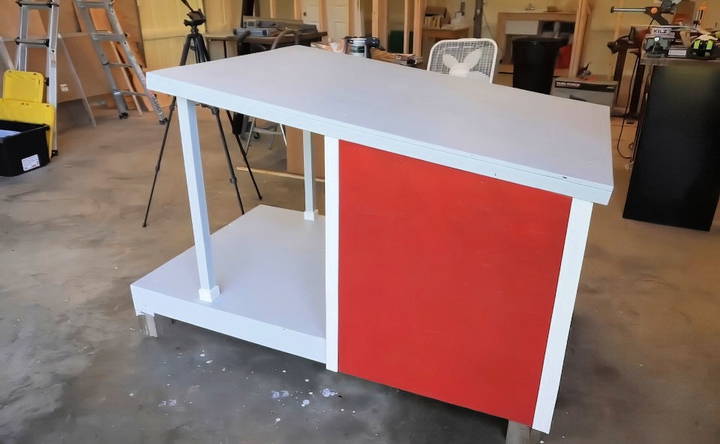
Step 8: Adding Trim and Finishing Touches
With the entire dog house structure securely assembled, it's time to focus on adding the decorative trim and final details.
- Cut and Install Trim: Trim is not only decorative but also helps cover any exposed joints or rough edges where plywood or other materials meet. According to the transcript, the builder used trim around the base, corners, and edges of the roof.
- Use a miter saw to cut the trim pieces at a 45-degree angle where they meet at corners. This will give a cleaner, more professional look.
- Attach the trim to the dog house using finishing nails. These are thinner than regular nails and will be easier to hide under a coat of paint or stain.
- Filling Nail Holes and Gaps: To achieve a polished look, fill any nail holes or gaps between the trim and the rest of the structure with silicone caulk. This step also serves a functional purpose by sealing the dog house from drafts or leaks.
- Apply the caulk with a caulk gun, filling in all small gaps and nail holes.
- Smooth the caulk with your finger or a damp cloth to build a seamless finish.
- Painting and Priming: With the trim installed and all gaps filled, it's time to finish painting the dog house. If you primed the house earlier, apply two coats of your chosen exterior paint, allowing adequate drying time between each coat as recommended in the transcript.
- Use high-quality, weather-resistant exterior paint that can withstand the elements.
- You may want to choose a color scheme that complements your yard or home. For example, the transcript mentions a classic red paint, which is always a nice, bold choice for outdoor projects.
- Optional: Weatherproofing the Roof: If you live in an area that experiences harsh weather, you may want to add an extra layer of protection to the roof. You can apply roofing shingles or a water-resistant membrane to make the roof more durable.
Step 9: Painting and Sealing
Painting is one of the final steps that can transform your dog house from a simple structure to a stylish home for your pet. Properly priming and painting the house will not only improve its appearance but also protect it from the elements.
- Choose Your Paint: As mentioned earlier, it's crucial to use high-quality, exterior-grade paint. This type of paint is designed to withstand rain, sun, and other outdoor conditions, ensuring your dog house lasts for years.
- Apply Primer: Before you begin painting, make sure to apply a coat of primer. This will help the paint adhere to the wood and provide a base layer that seals the material, keeping moisture out.
- Allow the primer to dry completely before moving on to the paint. Drying time typically ranges from a few hours to overnight, depending on the type of primer you use.
- Paint the Dog House: Once the primer is dry, apply your chosen paint color in even coats. As recommended in the transcript, they painted two coats of a bold red color. You can do the same or select a color that best matches your preferences or the outdoor environment.
- Use a roller or large brush for broad surfaces like the walls and roof, and a smaller brush for detailed areas like trim.
- Let the first coat dry completely before applying the second coat.
- Seal with a Clear Coat (Optional): If you want to add extra durability, you can apply a clear, weatherproof sealant after the paint dries. This is especially useful if your dog house will be exposed to heavy rain or intense sun.
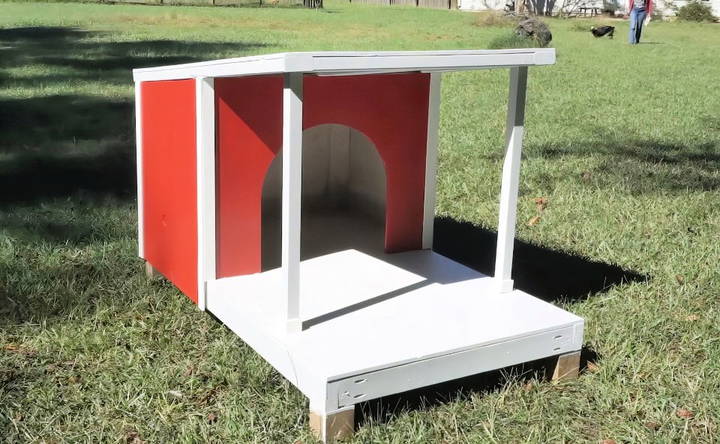
Step 10: Preparing the Interior for Comfort
Once the exterior of the dog house is finished, don't forget to make the inside cozy and comfortable for your dog.
- Floor Padding: Add a layer of bedding, a dog mat, or straw on the floor of the house to make it more comfortable for your dog. This is especially important if the house will be used in colder months or if your dog enjoys lying on a softer surface.
- Weather Considerations: If the dog house is intended for year-round use, consider insulating the walls or providing a wind barrier at the entrance to protect your dog from cold winds or drafts.
- You can also add removable panels or a flap door for added insulation during colder months.
Step 11: Let Your Dog Explore!
Finally, the moment you've been waiting for: it's time to introduce your dog to their new home!
- Familiarization: Encourage your dog to check out the new space by placing treats or their favorite toy inside the dog house. In the transcript, they mention coaxing the dog to explore the new home, but remember, some pets may need a little time to warm up to the idea.
- Monitor Initial Use: Keep an eye on your dog during the first few days of using the new house. Ensure that they are comfortable and that the house provides adequate protection from the elements.
Final Thoughts and Recap
Building a dog house with a porch is a rewarding project that combines practical woodworking skills with creativity. Not only does it give your dog a comfortable place to call their own, but it also adds a charming structure to your yard. Here's a quick recap of the steps involved:
- Plan and Gather Materials: Make sure you have everything you need before starting, including lumber, plywood, screws, and tools.
- Build the Frame and Base: Start by constructing a solid base and frame, then move on to the walls and roof.
- Assemble the Porch: Add a stylish porch to give your dog a shaded outdoor space.
- Finish with Paint and Trim: Prime, paint, and add trim for a professional, polished look.
- Make It Cozy: Add bedding and other comforts to the interior to make the house inviting for your dog.
By following these steps and the detailed instructions provided, you'll have a sturdy, weatherproof, and stylish dog house with a porch that both you and your dog will love.
FAQs About Building a Dog House with a Porch
Discover frequently asked questions about building a dog house with a porch, providing expert tips, materials needed, and step-by-step guidance.
In addition to screws, you can use metal brackets for extra roof support. These L-shaped brackets reinforce the connection between the roof and wall frame, providing better stability, especially in areas with strong winds.
If you don't have a jigsaw, you can use a hand saw or a circular saw for straight cuts. For rounded edges, try using a coping saw. Alternatively, mark the shape and carefully drill a series of holes along the outline, then finish with a saw.
To fix wobbling, double-check that your porch pillars are securely anchored. Use wood glue and dowels, or add metal brackets for extra stability. If the ground beneath is uneven, you can add shims under the base to level the structure.
Yes. While a miter saw helps with precise angle cuts for the roof pitch, you can use a handsaw or circular saw with a speed square to guide your angled cuts manually. This will still allow for accuracy without a specialized tool.
Use exterior-grade primer and paint to protect the wood from rain. Additionally, sealing all joints with silicone caulk will prevent water leaks. If you want full weatherproofing, consider adding roofing shingles or a waterproof membrane to the roof.
Elevate the dog house slightly off the ground by adding a few inches of clearance. This prevents direct contact with wet soil, which can lead to rotting. Additionally, apply a waterproof sealant to exposed wood surfaces to extend durability.
If silicone caulk isn't available, you can use wood filler or exterior-grade adhesive to seal gaps and nail holes. Make sure it's rated for outdoor use to ensure durability against weather conditions.
The porch, made from 2x4s, should comfortably support a small to medium-sized dog. For larger dogs, reinforce the porch frame with additional supports or thicker lumber, such as 2x6s, to ensure stability and prevent sagging.
Avoid painting in high humidity or wet conditions, as it can lead to uneven drying and peeling. Wait for a dry day, and ensure the structure is fully dry before applying primer or paint for the best results.
Yes, you can add insulation by lining the interior walls with foam boards or insulation panels. To prevent drafts, install a door flap, and consider adding an insulated floor mat for added warmth during winter months.


