Are you ready to dive into a project that merges sustainability, aesthetics, and personal satisfaction? Building a DIY natural swimming pool is not only about building a place to swim but also about establishing a vibrant ecosystem that benefits both people and the environment. This guide provides a comprehensive overview, from the first planning steps and excavation to installing green filtration options and adding natural plant life. This journey, while ambitious, promises rewards that are well worth the effort.
What Is a Natural Swimming Pool?
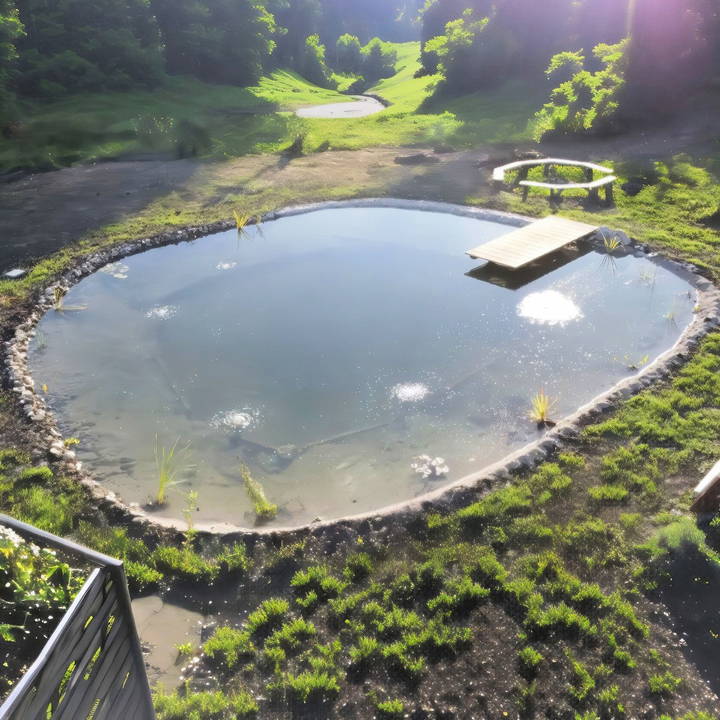
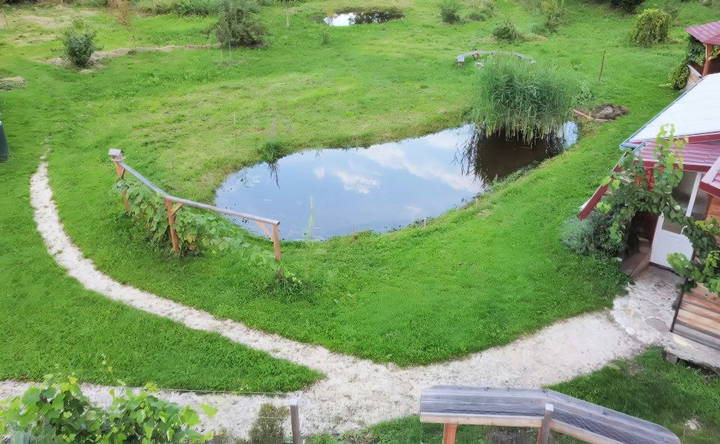
Natural swimming pools, or ponds, are unlike conventional chlorinated pools. They use biological filters and plants to keep the water clear and clean, rather than relying on chemicals. This eco-friendly method builds a space for swimming that mimics a natural pond, offering crystal-clear water without harsh additives. Unlike standard pools, a natural swimming pool harmonizes with the environment, providing a habitat for beneficial plants and wildlife.
Key Benefits of A Natural Swimming Pool
- Chemical-Free Water: These pools use plants and biological filters, which means no need for chlorine or other chemicals.
- Aesthetic Appeal: A well-designed natural pool can blend seamlessly into your landscape, often looking more like a garden pond than a swimming pool.
- Biodiversity Support: The plant life used for filtration attracts insects, birds, and even amphibians, making your pool part of a living ecosystem.
- Lower Maintenance: With fewer chemical treatments required, natural pools often require less upkeep, especially when properly established.
Step by Step Instructions
Learn how to build a DIY natural swimming pool with step-by-step guidance, from planning and digging to planting and water testing for an eco-friendly oasis.
Step 1: Planning Your Natural Swimming Pool
Learn how to plan your natural swimming pool with expert tips on choosing the right location, determining the size and depth, and preparing materials.
- Choosing the Right Location: Start by selecting a site with adequate sunlight. Sunlight is essential for plants that will act as natural filters, as it helps them grow and absorb nutrients from the water, keeping it clean. Additionally, a location with natural drainage helps in managing groundwater challenges.
- Determining the Pool Size and Depth: Consider your swimming needs and the pool's primary purpose. In this project, a pond depth of around 1.4 meters (about 4.5 feet) allows for standing space while still enabling natural filtration. Decide on a shape and size that complements your landscape, and think about including areas for plants, a beach area, and a central swimming zone.
Preparing Tools and Materials
Building a natural swimming pool involves a blend of landscaping tools and specific materials like:
- Wheelbarrow: Essential for moving soil and gravel.
- Shovel: Necessary for digging.
- Pond Liner: Vital for preventing water from seeping into the ground.
- Protective Fleece: To shield the liner from sharp rocks.
- Wooden Walls: Helps retain soil in planting zones.
- Filtration System Components: Air stones, pipes, and a compressor for an efficient filtration system.
Step 2: Digging the Pool – Breaking Ground
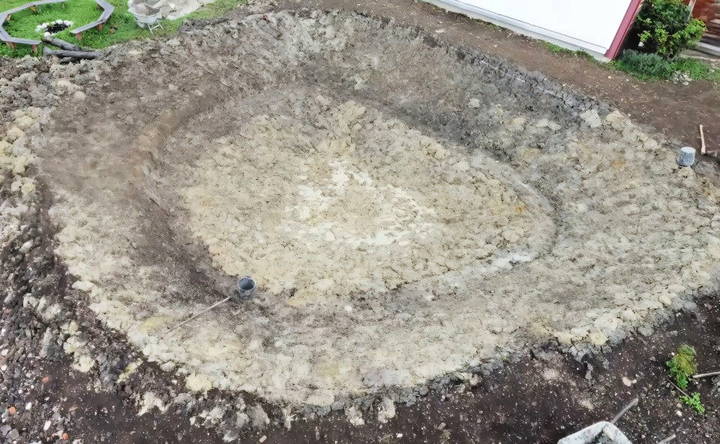
The excavation process is labor-intensive and requires careful planning. Start by marking the pool's outline with stakes. Then, gradually remove soil layer by layer. If your ground is clay-rich, as was the case in this project, it should make the digging easier. Aim to work in manageable shifts—five hours a day is a reasonable approach to avoid burnout.
- Handling Excess Soil: Rather than hauling all the excavated soil away, use it to raise the terrain around your pool. This not only reduces the depth you need to dig but also builds a slight elevation, adding dimension to the surrounding landscape.
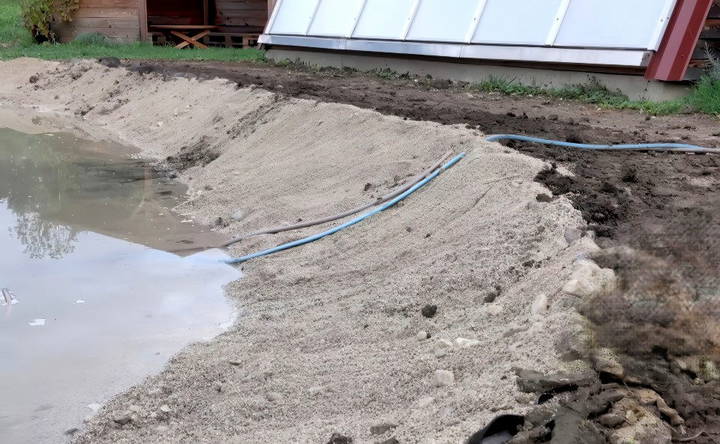
- Challenges with Groundwater: During digging, there may be challenges with groundwater accumulating in the pool. In this project, digging a drainage trench helped redirect excess water away, keeping the pool area dry during construction.
Step 3: Installing the Pond Liner
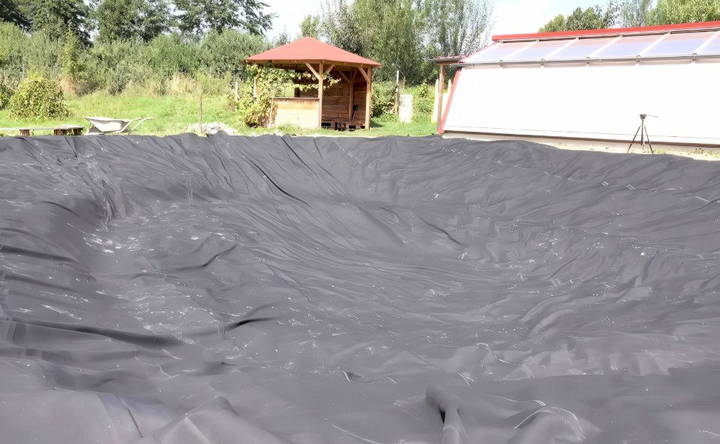
Once the excavation is complete, you'll need to lay down the pond liner to prevent water loss. Follow these steps:
- Layer Fleece on the Bottom: This provides a cushion that shields the liner from sharp rocks or roots that might puncture it.
- Roll Out the Pond Liner: Carefully spread it out, trimming it to fit while leaving extra material around the edges to secure later.
- Add a Second Fleece Layer (Optional): For added protection, especially in the swimming zone, place a second fleece layer on top of the liner.
- Is It Really “Natural” with a Liner? While a pond liner may seem artificial, it's necessary for structural integrity and to prevent water loss. The “natural” aspect comes from the filtration and cleaning processes rather than the materials used to seal the pool.
Step 4: Building the Wooden Wall
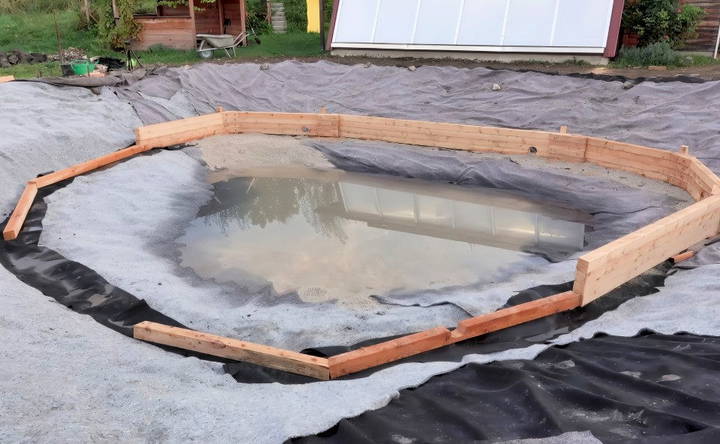
The wooden wall forms a sturdy barrier between the swimming area and planting zones, keeping soil and gravel from slipping into the pool. Here's how to go about it:
- Select Durable Wood: Hardwood is preferable as it withstands water exposure and decay. In this project, the builder used locally available hardwood.
- Dry-Fit the Pieces: Before permanently securing, fit each piece to ensure it aligns with the plan.
- Cut Holes for Filtration: If your filtration system requires tubing through the wall, cut precise holes to accommodate them.
- Assemble with Stainless Steel Rods: For durability, use stainless steel rods and wooden blocks to hold the wall securely in place.
Step 5: Setting Up the Filtration System
A standout feature of natural swimming pools is their low-energy filtration system. This particular system relies on air bubbles to move water instead of traditional pumps. Here's how it's done:
Filtration Process Overview
- Install Perforated Pipes Under Plant Zones: Lay pipes under the planting areas. These pipes will help draw water through plant roots for natural filtration.
- Attach Air Stones: Placed at the bottom of an upright pipe, air stones release small bubbles that build a gentle water flow.
- Connect to an Air Compressor: An air compressor outside the pool supplies air to the stones, allowing water to circulate through the plant zones without requiring a power-hungry pump.
This method, inspired by David Pagan Butler, uses minimal energy, making it an eco-friendly alternative to traditional pool filtration.
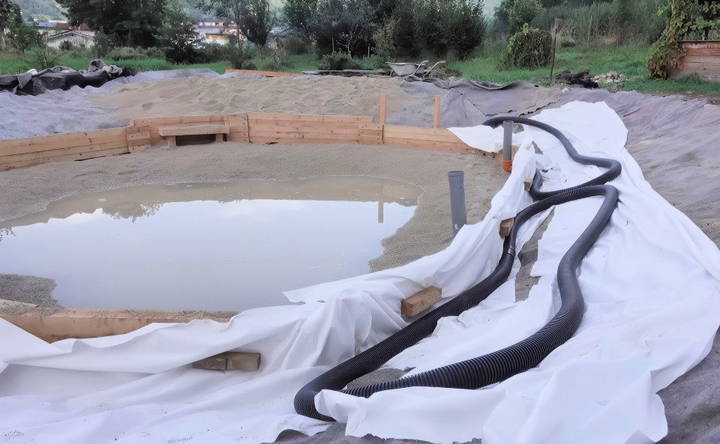
Troubleshooting Groundwater Intrusion
Heavy rains or high groundwater levels can cause water to accumulate under the pond liner, which may lift it. To resolve this, consider installing a drainage trench around the pool, filling it with gravel to channel water away effectively. This allows you to maintain control over the water levels in your pool.
Step 6: Adding the Substrate and Plants
Plants play a pivotal role in filtering and oxygenating the water, and they are a defining feature of a natural swimming pool. Here's how to prepare the planting zones:
- Build a Plant-Friendly Substrate: Use a mixture of earth, sand, and gravel as the base for plant roots. This substrate supports beneficial microorganisms and allows roots to anchor securely.
- Select the Right Aquatic Plants: Choose plants that can handle submersion or saturation, like water lilies, reeds, and swamp iris. These plants absorb nutrients from the water, reducing algae growth and improving water clarity.
- Install Planting Zones Around the Pool's Perimeter: Surround the central swimming area with these planting zones to maximize their filtering effect.
Choosing Plant Species for Optimal Filtration
- Water Lilies: Ideal for surface coverage, reducing sunlight penetration, and controlling algae growth.
- Reeds and Rushes: Excellent for filtering as they can absorb large amounts of nutrients.
- Swamp Iris: Adds color to the pool while aiding in filtration.
Each plant type has specific water and sunlight needs, so balance your selections based on your local climate and the sunlight exposure of the pool area.
Step 7: Constructing Additional Features – The Jetty and Strong Edge
With the main structural elements in place, adding thoughtful features like a jetty (or small dock) and a reinforced edge can enhance both the functionality and aesthetics of your natural pool. These additions make the pond more accessible and help maintain its shape over time.
Building the Jetty
A jetty offers a convenient entry point into the water, making your pool feel more like a lake. It's particularly helpful for families or people who enjoy sitting on the edge with their feet in the water.
- Build a Strong Foundation: Before constructing the jetty, build a solid foundation outside the pond. This builder used circular formworks filled with concrete, inserting stainless steel rods to secure the jetty frame.
- Assemble the Frame: Once the foundation is set, build a frame for the jetty using durable wood. Attach the frame securely to the rods embedded in the concrete.
- Install Decking Boards: Cut boards to fit the frame, round off the edges for comfort, and secure them in place. For added visual appeal, you can adjust the height of the jetty so it sits just above the waterline.
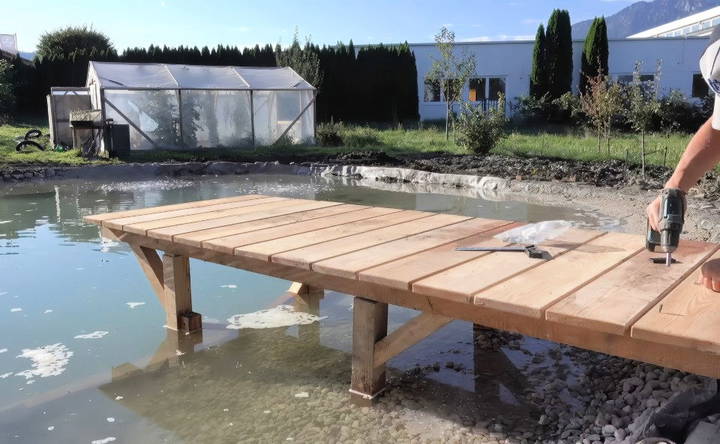
After construction, consider sanding and finishing the wood for a polished, water-resistant surface. This minimizes splinter risks and extends the jetty's lifespan.
Adding a Strong Edge
The edge of the pool—especially around entry points like the beach area—needs reinforcement to prevent erosion and maintain the pool's shape over time.
- Use Natural Stones: Line the edge with stones gathered during excavation or sourced locally. Stones build a robust, natural-looking border.
- Secure the Beach Area: This area gets the most foot traffic, so it's essential to stabilize it. Lay stones or other hard materials that can withstand wear, while ensuring they are smooth enough to walk on comfortably.
Step 8: Planting – Bringing Life to the Pool
After setting up the structure, liner, and filtration, it's time to plant your natural pool. Plants are vital for a natural pool's health as they filter impurities, prevent algae growth, and build a serene aquatic environment.
Selecting and Planting Aquatic Plants
Choose a variety of plants that are well-suited to your climate and pool design. Some popular choices include:
- Water Lilies: Their wide leaves provide shade, cooling the water and reducing algae growth.
- Reeds and Rushes: Tall, graceful plants that thrive on nutrient uptake, keeping the water clean.
- Swamp Iris: Adds color while improving water quality through nutrient absorption.
- Submerged Plants: Species like hornwort oxygenate the water, balancing nutrient levels to prevent murky water.
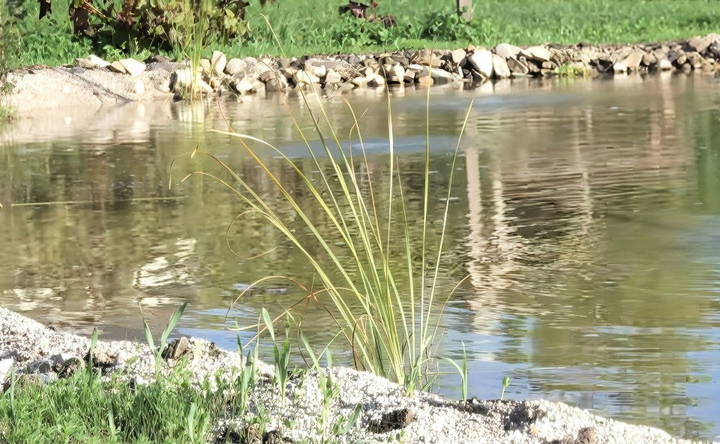
When planting, place species strategically around the pool. Water lilies and floating plants are ideal for open water areas, while reeds and rushes should be positioned along the perimeter to build natural filtration zones.
Establishing the Plant Zones
To enhance the pool's cleaning capabilities, establish distinct planting zones around the swimming area. These zones can be buildd using plant-friendly substrate layers that provide ample nutrients and anchorage for roots. Position plants with different heights and root depths to maximize filtration efficiency and visual interest.
Step 9: Testing the Filtration System
With plants in place, your filtration system will soon be ready to support the pool's ecosystem. Testing is a critical step to ensure everything is working smoothly before filling the pool completely.
How to Test the System
- Connect the Air Compressor: Attach the air compressor to the filtration pipes and observe the flow. Check that air stones are releasing bubbles, building water movement through the plant zones.
- Observe Water Movement: The rising bubbles should move water from the plant area into the swimming area. This circulation prevents stagnation and helps purify the water.
- Monitor Over Several Days: Once bubbles start, leave the system running for a few days. Check for consistent water clarity and circulation across the pond.
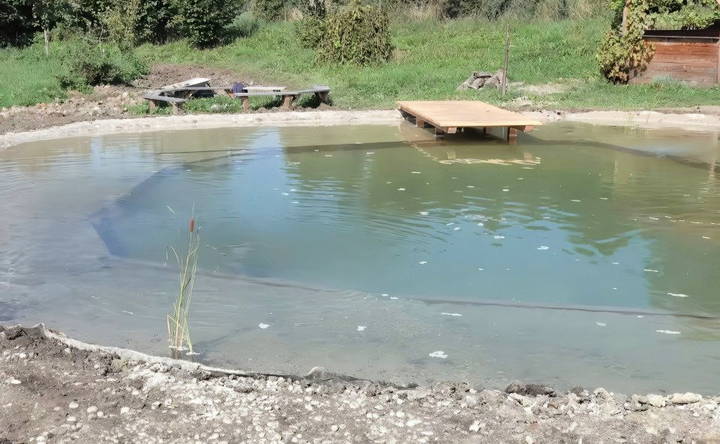
The filtration system's effectiveness will become evident over time as the water clears and takes on a balanced, natural state.
Troubleshooting Common Issues
If water clarity issues arise, check for potential blockages in the perforated pipes or air stones. Adjust the air compressor's power if needed, ensuring a gentle but continuous water movement. With minimal intervention, this low-energy system should keep the pool clear while consuming only a fraction of the energy used by traditional pool pumps.
Step 10: Landscaping Around the Pool
To complete the transformation, it's time to landscape the area surrounding the pool. A thoughtfully designed landscape enhances the pool's appearance and encourages biodiversity, making the pond feel like a natural part of the garden.
Grading the Surrounding Soil
- Shape the Landscape: Using topsoil from the excavation, shape gentle slopes around the pool to blend it with the existing garden terrain.
- Smooth the Surface: Level the soil with a rake and shovel, building an even surface that looks natural and is easy to plant in.
- Seeding and Planting: Plant a mix of perennial grasses, clover, and native plants. These will stabilize the soil, provide habitat for insects, and add lush greenery around the pool.
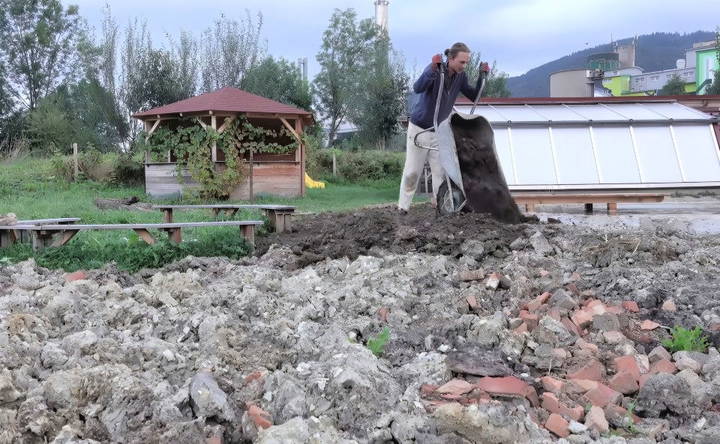
Seeding and Soil Enrichment
Scatter a mix of seeds for grasses and wildflowers to build a soft, green border around the pond. You may also spread compost or enriched soil to boost plant growth, building a vibrant natural landscape that extends the pool's ecosystem onto dry land.
Adding Trees and Shrubs
Consider planting trees or shrubs to provide shade and privacy around the pool. A well-placed tree offers a natural canopy, cooling the water and adding beauty to the surroundings. Just be mindful of leaf-dropping plants that might increase maintenance.
Step 11: Enjoying and Maintaining Your Natural Pool
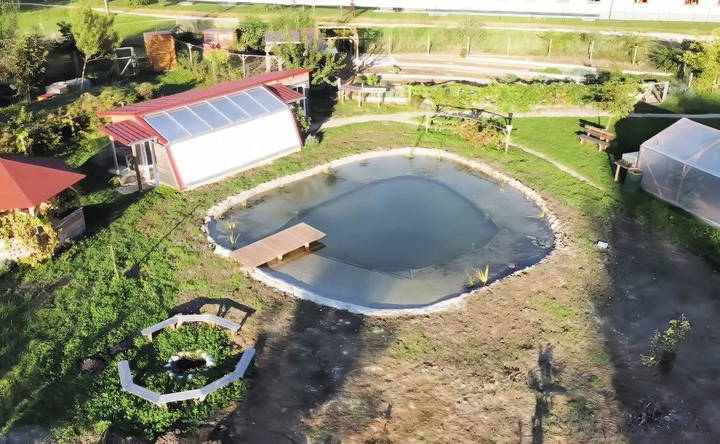
With the construction complete and landscaping in place, your natural pool is ready for its inaugural swim. Taking a dip in a natural pool is a unique experience—it's akin to swimming in a pristine lake but right in your backyard.
First Swim and Pool Balance
Take note of water clarity, plant health, and the function of the filtration system as you begin using the pool. The water may take a few weeks to fully balance as plants and bacteria establish themselves. During this time, monitor and remove any algae buildup if necessary.
Maintenance Tips for Your Natural Pool
A natural pool requires less upkeep than a conventional pool but still benefits from routine maintenance:
- Check Filtration Regularly: Ensure the air compressor is running smoothly, and that the air stones and pipes remain free of obstructions.
- Trim Plants as Needed: Prune aquatic plants periodically to prevent overgrowth, which can disrupt water circulation and reduce filtration efficiency.
- Remove Debris: Use a net to remove fallen leaves or floating debris from the pool. A skimmer can also help keep the surface clear.
- Seasonal Care: In autumn, prepare for potential plant dieback and clear dead vegetation to prevent decay in the water. In spring, add new plants or fresh substrate to restart growth after winter dormancy.
Benefits of a Natural Pool: A Reflection on Sustainability and Beauty
The eco-friendly nature of a natural pool brings endless benefits, from reducing chemicals in the environment to enhancing biodiversity in your garden. The pool attracts a range of wildlife, transforming your garden into a habitat for insects, birds, and amphibians. This eco-friendly pool is more than just a swimming spot; it's a sustainable oasis that promotes wellness for you and the environment alike.
Building a natural pool is an investment in both time and effort, but the rewards are long-lasting. It not only reduces reliance on energy-intensive systems but also offers a serene space that connects you with nature. Imagine swimming in crystal-clear water surrounded by vibrant plants, a refuge that reflects both your commitment to sustainability and love for the outdoors. Your natural pool will become a cherished part of your landscape, enriching your home and building a small haven of peace and beauty.
Final Thoughts: Is a Natural Pool Right for You?
A natural swimming pool isn't a conventional project, and it's not a one-size-fits-all solution. But if you value sustainability, enjoy hands-on projects, and seek a unique, tranquil retreat in your garden, this DIY pool may be the perfect fit. Embracing the journey—from digging to planting and testing the filtration system—can be as rewarding as the final product. The pool will transform not only your outdoor space but also your relationship with the environment, allowing you to enjoy all the benefits of nature, right in your own backyard.
FAQs About Building a DIY Natural Swimming Pool
Explore key FAQs about building a DIY natural swimming pool. Discover tips, costs, and benefits for an eco-friendly oasis in your backyard.
Running the air compressor continuously isn't always necessary. Many builders keep it running 24/7 during warmer months but reduce runtime during cooler months. In some cases, running it just at night is enough, as long as water clarity remains stable.
The fleece protects the liner from sharp stones that might puncture it. It's especially useful in pools where rocks or gravel will be used above the liner. The fleece layer also adds some cushioning, which enhances liner durability.
Groundwater pressure can sometimes lift the liner, especially during construction. To prevent this, a drainage trench filled with gravel can be installed around the pool. Once the pool is filled, water pressure inside should stabilize the liner, reducing the risk of groundwater intrusion.
Larch wood was selected for its durability and ability to withstand constant submersion without rotting, as wood decays much slower without oxygen. This hardwood can last up to 30–40 years underwater, making it ideal for pond projects.
Over time, the filtration fleece may clog, which can reduce its effectiveness. In this case, replacing or cleaning the fleece may be necessary. Laying the fleece in a removable position makes it easier to access and replace when required, typically every few years.
While fish can add visual interest, they introduce additional nutrients, making it harder to maintain water quality. Without a complex filtration system, fish may not be ideal, as they increase algae growth and require more frequent cleaning.
An overflow drainage system should be built to handle excess water. This can be as simple as an outlet at one side of the pool that directs overflow to another location, such as a secondary pond or garden area.
Bubble pumps build gentle water movement, which prevents mosquitoes from laying eggs on the water's surface. Additionally, maintaining water clarity and using aquatic plants helps keep mosquito populations in check.
A high-quality EPDM liner can last for 30-40 years if well-protected by fleece and sand layers. Ensuring proper installation and protection from sharp objects will prolong its life and reduce the need for early replacement.


