When it comes to building stone steps on a slope, I remember the time when I had to tackle one in my own backyard. The slope made it tricky, but my dream was to have an inviting path. I knew I needed to plan carefully and take it step by step. With some research and preparation, I managed to build a beautiful and functional stairway.
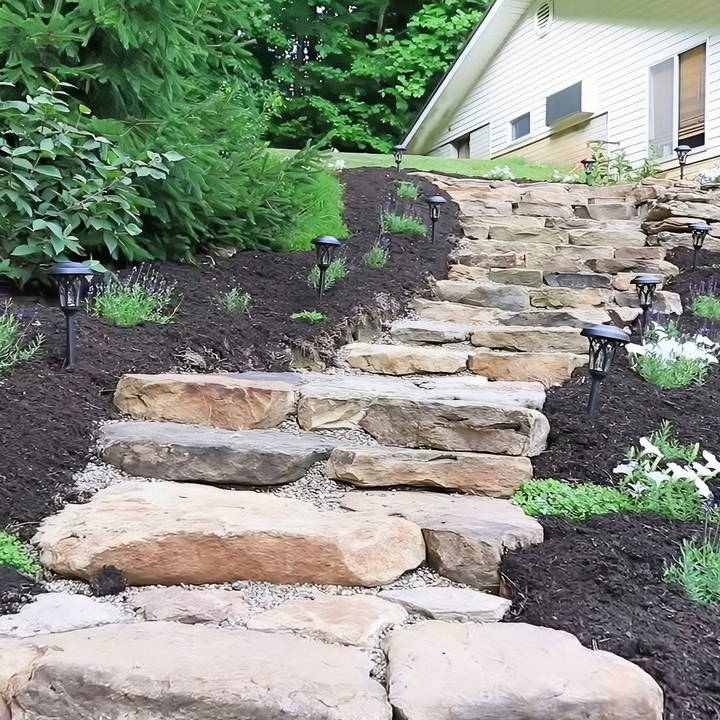
In this guide, I'll share my process on DIY stone steps on a slope. It might look challenging, but I'll explain it in easy steps. Following these instructions can help you transform any tricky slope into a stunning path. Get ready to learn the basics and turn your ideas into reality. These tips should make the task easier and achievable for you.
Knowing where to start is key. Follow the steps below to build your own stone steps on a slope, and it will help you achieve great results. Let's make this project rewarding and enjoyable.
Materials Needed and Why
- Flat Rocks/Stone Slabs: Essential for the steps themselves. We opted for rocks due to their natural aesthetic and because we had plenty available on our property.
- Gravel: Used as a base for the stones, gravel ensures proper drainage and helps to level the stones.
- Garden Hose or Marking Spray: To outline the area where the steps would go and the shape of adjacent flower beds.
- Shovel & Spade: For digging out the steps and flower beds.
- Rake: To smooth out gravel and soil.
- Landscape Fabric: For weed control in the flower beds.
- Cow Manure & Mulch: Enriches the soil and supports plant growth.
- Plants & Seeds: We chose ground covers, lavender, petunias, hydrangeas, and more for landscaping around the steps.
- Straw: To cover newly seeded areas, helping with moisture retention and protection from erosion.
- Solar Lights: For pathway illumination and added beauty at night.
Step by Step Instructions
Learn how to build stone steps on a slope with our step-by-step guide. From planning to final touches, we cover all aspects to build stunning stone steps.
Planning and Preparation
- Visualizing the Project: We sketched our vision, considering the natural curve of the land and the location of my Etsy shop above the slope.
- Collecting Materials: We gathered flat stones from our property, optimizing our resources and ensuring the project blended with the natural environment.
Building the Steps
- Marking the Path: Using a garden hose, we outlined the desired path for the steps and adjacent flower beds.
- Excavating: Starting at the bottom of the slope, we dug out each step, making each trench slightly deeper than the thickness of the stones.
- Laying the Foundation: We filled each trench with gravel, making a stable and level base for the stones.
- Placing the Stones: Each stone was carefully laid in place, ensuring they were level and stable. Stones were chosen for each step based on size and shape, making a natural, rustic look.
- Adjusting for Drainage: We slightly slanted the steps inward to prevent water accumulation and ensure stability over time.
Landscaping Around the Steps
- Preparing the Beds: After placing the steps, we outlined the flower beds with marking spray and cleared the area of grass and weeds.
- Soil Enrichment: We added a layer of cow manure to enrich the soil, followed by landscape fabric to prevent weed growth.
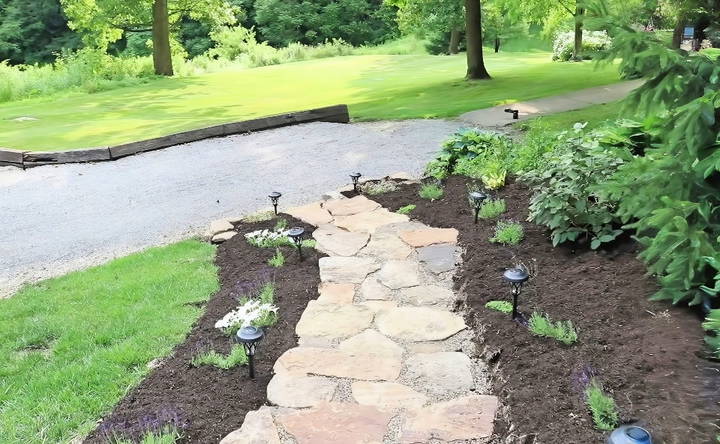
- Planting: We selected a variety of plants for visual interest and planted them along the steps and terraces.
- Mulching: A thick layer of mulch was applied to cover the soil, help retain moisture, and give the beds a finished look.
- Seeding Adjacent Areas: To integrate the stonework with the lawn, we seeded areas around the steps and covered the seeds with straw.
Final Touches
- Installing Lights: Solar lights were placed along the steps for night-time safety and aesthetics.
- Watering and Maintenance: Regular watering helped establish the new plants, and we planned for occasional reapplication of gravel in the steps' crevices to maintain stability.
Troubleshooting Common Issues
When building stone steps on a slope, you might encounter a few challenges along the way. Here's a helpful guide to identify and solve common issues, ensuring your project remains on track.
Uneven Steps
- Problem: The steps are not level, leading to potential tripping hazards. Solution: Use a spirit level to check each step as you go. Adjust the height by adding or removing the base material until level.
Loose Stones
- Problem: The stones wobble when stepped on, which can be unsafe. Solution: Ensure each stone is well-seated in its base. If a stone is unstable, lift it and add or remove sand or gravel until it's secure.
Water Pooling
- Problem: Water collects on the steps after rain, making them slippery. Solution: Build a slight incline on the surface of each step for water runoff. Consider installing drainage channels alongside the steps if the issue persists.
Material Shortage
- Problem: Running out of stones before the project is completed. Solution: Calculate the number of stones needed before starting, considering the size and number of steps. It's always wise to purchase a little extra to account for errors or breakage.
Erosion Under Steps
- Problem: Soil erosion under the steps can lead to instability. Solution: Install a sturdy landscape fabric under the base material to prevent erosion. Regularly check for signs of erosion and reinforce as necessary.
Vegetation Growth
- Problem: Weeds or grass growing between the stones can displace them. Solution: Lay down a weed barrier before constructing the steps. For existing growth, use a natural herbicide or manually remove the vegetation.
Aesthetic Inconsistency
Problem: The steps don't blend well with the surrounding landscape. Solution: Choose stones that complement the local environment. Plant ground cover plants or use mulch on the sides of the steps to integrate them with the garden.
Patience and attention to detail are key when troubleshooting. Don't rush, and consult a professional if it's too complex.
Maintenance and Upkeep
Keeping your stone steps in top condition is crucial for safety and longevity. Here's a straightforward guide to maintaining your stone steps effectively.
Regular Cleaning
Routine: Sweep the steps weekly to remove debris. Monthly, wash the steps with water and a mild detergent. Avoid harsh chemicals that can erode the stone.
Inspecting for Damage
Check-Up: Twice a year, inspect the steps for cracks or movement. Winter freeze-thaw cycles can cause damage, so it's best to check in spring and fall.
Weed Control
Prevention: Keep weeds at bay by pulling them out regularly or using a natural herbicide. Ensure the area between the stones is clear to prevent displacement.
Stabilizing Loose Stones
Fix: If a stone becomes loose, reset it promptly. Remove the stone, add or adjust the base material, and ensure it's level when replaced.
Sealing the Stones
Protection: Consider applying a sealant every few years to protect the stone from weathering and stains. Choose a breathable sealant designed for outdoor use.
Addressing Erosion
Safeguard: If you notice erosion around the steps, reinforce the affected area with additional soil or gravel. Planting ground cover can also help stabilize the soil.
Professional Assessment
Expertise: If you're unsure about any aspect of maintenance, consult a professional. They can provide advice tailored to your specific situation.
By following these steps, your stone steps will stay safe, functional, and attractive for years. Regular upkeep preserves their condition and enhances your landscape.
FAQs About How to Build Stone Steps on a Slope
Building stone steps on a slope can enhance accessibility and add aesthetic charm to your landscape. Here's a detailed FAQ section in plain language to guide you through the process.
Begin by:
Assessing the slope: Measure the height and depth to determine the number of steps.
Designing the steps: Plan the layout, ensuring each step is stable and even.
Preparing the site: Clear debris and lay landscaping fabric if needed.
Stability is key:
Foundation: Lay a gravel and sand foundation for drainage and a level base.
Laying stones: Start from the bottom, setting each stone firmly and leveling with a mallet.
Securing stones: Fill gaps with sand or soil to stabilize the steps further.
For safety and durability:
Overlap stones: Each stone should overlap the one below by at least 1 inch.
Compact soil: Use water to compact the soil behind the steps for added stability.
Check alignment: Ensure each step is aligned and level for safe use.
Finishing touches:
Sand: Sweep sand over the steps to fill any gaps.
Water: Lightly water the steps to settle the sand.
Inspect: Check for any loose stones and secure them as needed.
Proper maintenance ensures longevity:
Regular Inspection: Check for loose stones or erosion behind the steps.
Weed Control: Remove any weeds that grow between the stones to prevent displacement.
Cleaning: Sweep the steps regularly to remove debris.
Repairs: Reset any shifted stones and refill gaps with sand as needed.
Conclusion
In conclusion, learning how to build stone steps on a slope project can transform your outdoor space seamlessly. By following these steps and tips, you can build a beautiful, functional path that adds value and appeal to your home.


