Making your own lightsaber can be a fun and fulfilling project. This step-by-step tutorial guides you through the process to build your own lightsaber using easy-to-follow instructions. Whether you're making it as a display piece or for cosplay, the assembly can be both enjoyable and educational.

This tutorial helps everyone make their own lightsaber, offering detailed guidance from gathering materials to adding the finishing touches. The steps are clear and simple, ensuring you build a piece you're proud of.
Make your dream weapon with our build your own lightsaber guide. Customize every detail for the ultimate Jedi or Sith experience!
Gathering the Materials: Why Each Is Necessary
The quest began with a hunt for materials, a mix of "random junk," as the video described, that somehow would come together to form the hilt of my lightsaber. My list included:
- PVC pipes and attachments: These form the main structure of the hilt, providing both width and length.
- Flashlight: This would serve as the heart of the lightsaber, its light source.
- Black duct tape and electrical tape: Essential for securing components together and covering any unsightly joins.
- Paint (gold and black): To add those authentic touches of color to the hilt.
- Isopropyl alcohol: This is used to clean off any sticker residue from the PVC pipes.
- Hot glue: To firmly secure parts that wouldn't screw together.
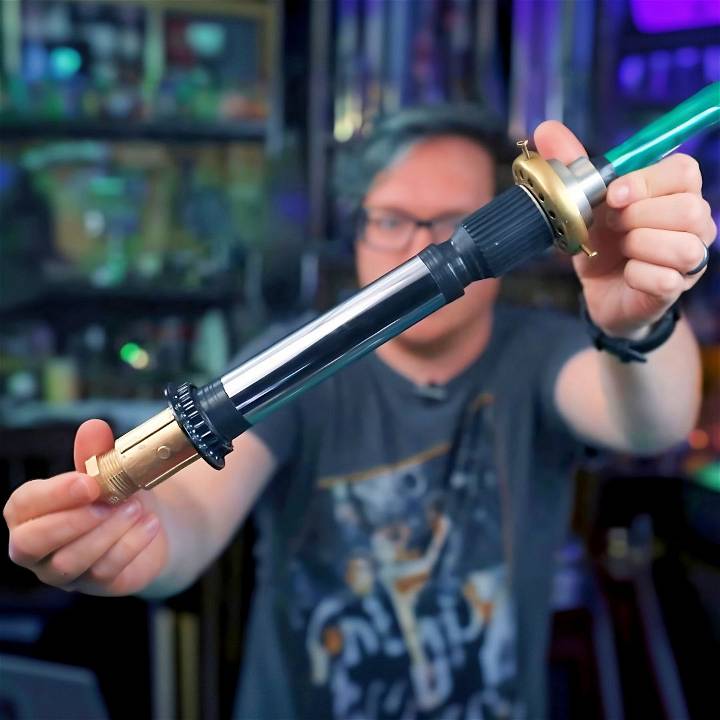
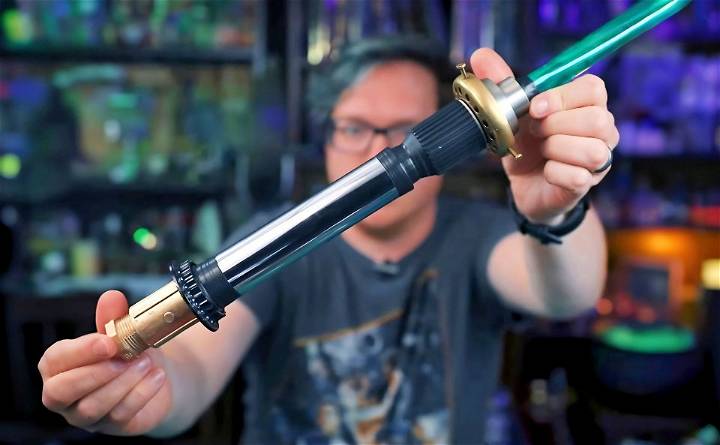
Each of these materials was chosen for its ability to mimic the parts of a typical lightsaber while being easy to find and affordable. The flashlight, for example, was not just a light source but also provided a solid core around which the rest of the hilt would be built.
Step by Step Instructions
Discover comprehensive step-by-step instructions for building a lightsaber: prepare the hilt, assemble the core, secure it, and enhance your creation.
Step 1: Preparing the Hilt
My first step was dealing with the PVC pipes and attachments. Using isopropyl alcohol, I cleaned off any sticker residues, ensuring a smooth, clean surface for painting. Painting the parts gold and black gave them that quintessential lightsaber look. It was crucial to allow these parts to dry thoroughly before proceeding.
Step 2: Assembling the Core
The flashlight was the next challenge. To secure it inside the hilt made from PVC pipes, I wrapped its lower end with black duct tape until it fit snugly within the tube. This step required patience and precision; too much tape and the flashlight wouldn't fit, too little and it would wobble insecurely.
Step 3: Securing Everything Together
With the core in place, I used black electrical tape to hide any visible threads on the PVC pipes, adding to the seamless look of the hilt. Then, to ensure all parts stayed together, I strategically applied hot glue and more tape, making a solid, unified hilt.
Facing Challenges: Tips and Tricks
Throughout this process, several challenges arose. For instance, ensuring a tight fit between the flashlight and the PVC pipes required a delicate balance of tape. Too much tape and the parts wouldn't fit together; too little, and they'd be loose.
Moreover, ventilation was crucial when dealing with paint and isopropyl alcohol to avoid inhaling fumes. Working in a well-ventilated area or outdoors was a tip I quickly learned to appreciate.
Enhancing the Lightsaber
Though the basic structure was now complete, I wanted my lightsaber to glow. The video suggested using transparency sheets colored with paint markers as a blade. Cutting these to size and rolling them tightly buildd a blade that could fit into the hilt. Illuminated by the flashlight, it mimicked the glow of a lightsaber, albeit not as brightly as I had hoped. Experimenting with different colors of transparency sheets might provide varying effects, offering the opportunity to customize the lightsaber further.
This DIY lightsaber was a lesson in patience and creativity. It may not survive a duel with Darth Vader, but it’s perfect for Star Wars events or as nerdy decor.
Customization Tips
Building a lightsaber that reflects your personal style is one of the most enjoyable parts of the building process. Here are some tips to help you customize your lightsaber for a unique and personal touch:
- Choose Your Color The color of your lightsaber blade is not just about aesthetics; it represents your character’s traits and alignment. Traditionally, blue signifies a Jedi Guardian, green for a Jedi Consular, and red for a Sith. However, feel free to choose any color that resonates with you.
- Design Your Hilt The hilt is like the handle of your lightsaber and is where you express your creativity. You can use various materials like metal, wood, or even 3D-printed components. Think about the weight, balance, and grip that feel right in your hand.
- Sound Effects: Adding sound to your lightsaber brings it to life. You can install a basic soundboard that plays a hum when idle and a clash when moved quickly. For a more advanced setup, consider a board that allows for different sounds for movements and impacts.
- Blade Effects For those who want their lightsaber to stand out, consider installing LED strips inside the blade for special effects like blaster deflects or a blade that powers up and down.
- Wear and Tear: A weathered look can give your lightsaber character and a backstory. Techniques like sanding, painting, and applying acid etching can build an aged effect.
- Personal Engravings: You can personalize your lightsaber by engraving your name, a symbol, or a phrase in a language from the Star Wars universe, like Aurebesh.
The key to a great custom lightsaber is that it feels right to you. It should be an extension of your personality and style.

Advanced Modifications
For those looking to take their lightsaber to the next level, advanced modifications can enhance both functionality and aesthetics. Here are some sophisticated tweaks you can apply:
- Soundboard Upgrades: Upgrade to a soundboard that supports multiple sound fonts for a variety of hums, swings, and clash sounds. Look for boards that offer smooth swing and force sensitivity for a more realistic experience.
- LED Configuration Instead of a single LED, use an RGB LED setup or a neopixel blade for a spectrum of colors and dynamic effects like color change on the fly or blade scrolling.
- Motion Sensors Incorporate motion sensors to make your lightsaber react to your movements more accurately. This can control sound and light effects, making your duels more immersive.
- Rechargeable Power System: Install a rechargeable battery system with a port for easy charging. This is more sustainable and convenient than replacing batteries.
- Wireless Control For tech enthusiasts, consider adding Bluetooth connectivity to your smartphone to control the features of your lightsaber.
- Haptic Feedback Integrate haptic feedback mechanisms to simulate the feeling of the lightsaber’s power and impact during a duel.
- Custom Firmware If you’re comfortable with programming, custom firmware can be written or modified to personalize how your lightsaber functions.
- Aesthetic Enhancements: Use electroluminescent wire or thin strips of LEDs to add accents to your hilt for a more futuristic look.
Understanding electronics and programming is crucial. Follow safety guidelines when working with electronic parts.
Legal and Ethical Considerations
When making a lightsaber, it’s important to be mindful of the legal and ethical considerations involved. Here’s a guide to help you navigate these aspects:
Intellectual Property Rights
- Lightsabers are trademarked by Lucasfilm Ltd., and while making one for personal use is generally fine, selling them or using them for commercial purposes without permission is not.
- Always credit the Star Wars franchise when sharing your creation online or in public spaces.
Safety Regulations
- If your lightsaber includes electronic components, ensure they meet safety standards to prevent electrical hazards.
- When attending events, check the rules regarding props that resemble weapons to avoid misunderstandings.
Responsible Use
- Treat your lightsaber as a prop, not a weapon. Use it responsibly, especially in public areas or around children.
- Avoid using materials that are harmful to the environment. Opt for sustainable and non-toxic options whenever possible.
Respect for Others
- Be considerate of others’ space and safety when displaying or swinging your lightsaber.
- Obtain consent before engaging in mock battles or demonstrations.
Community Guidelines
- Participate in fan communities with respect and follow their guidelines for prop creation and sharing.
- Engage in discussions and events that promote a positive and inclusive environment.
By adhering to these legal and ethical considerations, you can enjoy making and showcasing your lightsaber while respecting the rights of others and the integrity of the Star Wars universe.
Maintenance and Care
Taking care of your lightsaber ensures it remains in top condition, whether it’s for display or dueling. Here’s how to maintain your lightsaber with simple, easy-to-follow steps:
Regular Cleaning
- Wipe the hilt with a soft, dry cloth to remove fingerprints and dust.
- For the blade, use a microfiber cloth slightly dampened with water. Avoid harsh chemicals that can damage the polycarbonate.
Battery Care
- If your lightsaber uses batteries, ensure they are charged and stored properly.
- Remove batteries if you’re not using the lightsaber for an extended period to prevent corrosion.
Storage
- Store your lightsaber in a cool, dry place away from direct sunlight to prevent color fading.
- Use a padded case or mount it on a wall rack to avoid physical damage.
Blade Inspection
- Check the blade for cracks or scratches regularly, especially if you use it for dueling.
- Replace the blade if any significant damage is found to ensure safety.
Electronics Check
- Periodically test the lightsaber’s electronics, such as LEDs and sound components, for functionality.
- Tighten any loose connections and consider professional help for complex issues.
Software Updates
- If your lightsaber has programmable features, keep the software updated for optimal performance.
Hilt Maintenance
- Metal hilts may occasionally need to be polished to maintain their shine.
- For custom hilts with intricate designs, use a soft-bristled brush to clean hard-to-reach areas.
Maintaining your lightsaber ensures it's always ready and looks great in your Star Wars collection.
Safety Precautions
When embarking on the exciting journey of making your own lightsaber, safety is paramount. Here are some essential safety precautions to keep in mind:
Work Area
- Ensure your work area is well-lit, ventilated, and free of clutter. A clear space helps prevent accidents.
Protective Gear
- Wear safety glasses to protect your eyes from any flying debris or sparks.
- Use gloves when handling sharp objects or when soldering to protect your hands.
Tool Safety
- Familiarize yourself with all the tools before starting. Read the manuals and understand their proper use.
- Keep tools in good condition and replace any that are damaged or worn out.
Electrical Safety
- When working with electronics, make sure to disconnect any power sources before making adjustments.
- Use a non-conductive workspace mat to prevent accidental short circuits.
Chemical Safety
- If you’re using adhesives, paints, or other chemicals, follow the manufacturer’s instructions and safety warnings.
- Work in a well-ventilated area and consider wearing a mask if fumes are strong.
Heat Safety
- Be cautious when using a soldering iron or any other heat source. Allow tools to cool down before storing them.
- Keep flammable materials away from your work area when soldering.
Battery Safety
- Handle batteries with care. Use the correct type and size for your lightsaber.
- Store batteries properly and keep them away from metal objects to prevent short circuits.
Testing
- When testing your lightsaber, start with low power to ensure everything is working correctly.
- Avoid pointing the lightsaber at people or pets, and never look directly into the LED light source.
Follow these safety steps to build your lightsaber safely and enjoyably. Prioritize safety in any DIY project. Stay safe and have fun making your piece of the galaxy!
FAQs About How to Make a Lightsaber
Discover answers to the most common questions on how to make a lightsaber. Get expert tips, step-by-step guides, and essential tools you need!
Yes, you can customize your lightsaber to resemble those from Star Wars by:
Choosing specific colors for the LED to match your favorite character’s lightsaber.
Adding details to the handle with paint, grips, and metal pieces to mimic the iconic designs.
Incorporating sound and light effects for a more authentic feel.
Absolutely! You can build a simple lightsaber using everyday items like:
A flashlight for the handle and light source.
Colored cellophane or transparency sheets to tint the blade.
Tape and paper to craft the hilt details.
These DIY lightsabers are great for costumes and light play.
There are many online resources available, including:
Video tutorials on platforms like YouTube that provide step-by-step instructions.
Online communities and forums where enthusiasts share tips and designs.
Websites offering detailed guides and parts for building more complex lightsabers.
Selecting the right LED is crucial for the brightness and color of your lightsaber. Consider the following:
Brightness: High-power LEDs are recommended for a bright, visible blade.
Color: Choose an LED that matches the color you want your lightsaber to be. RGB LEDs offer a range of colors.
Heat: LEDs can get hot; make sure your hilt design allows for heat dissipation.
Safety is paramount when constructing a lightsaber. Keep these tips in mind:
Wear protective gear: Goggles and gloves can protect you from sharp edges and electrical components.
Handle batteries with care: Use the correct type and ensure they are properly insulated.
Be mindful of the blade’s strength: While polycarbonate is durable, it can still break under extreme force.
Conclusion:
Wrapping up, this build-your-own lightsaber tutorial provides an exciting and engaging way to bring your favorite sci-fi dreams to life. Following this step-by-step guide ensures you have all the knowledge needed to build a lightsaber that stands out. Now, you are ready to make your own lightsaber and impress your friends with your craftsmanship. Enjoy the creative process, and may the Force be with you!


