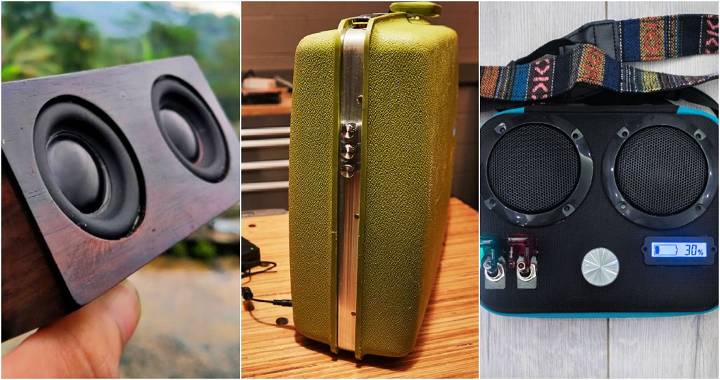
Building a portable Bluetooth speaker from scratch using 3D-printed parts and a bit of DIY spirit was an endeavor that seemed both exciting and daunting. However, the satisfaction of listening to music through a speaker that I had personally designed and assembled was a rewarding experience that I was eager to achieve. Here's a step-by-step guide based on my journey, filled with practical advice and insights.
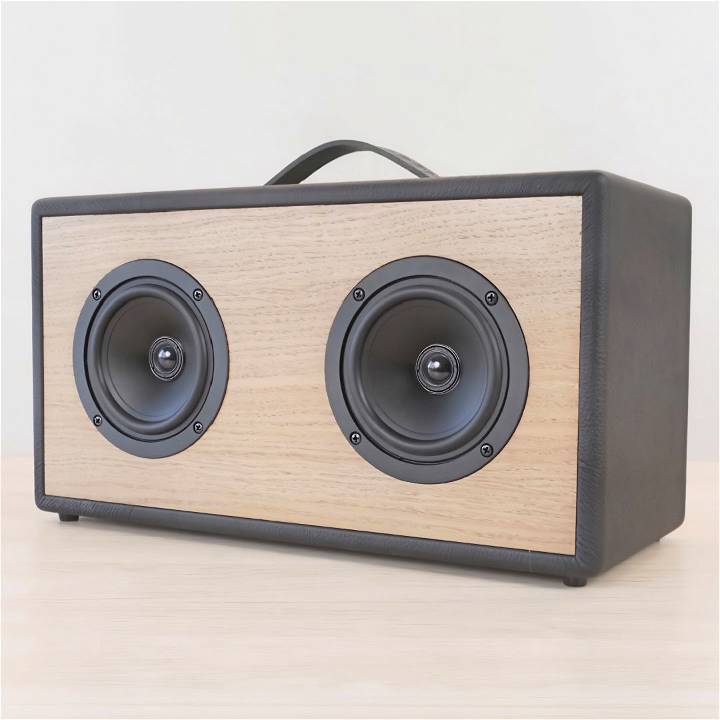
Material is Needed:
- 3D Printer & Filament: Essential for printing the custom speaker enclosure. I chose a Creality 3D printer for its reliability and quality.
- Speaker Components: Including Dayton Audio drivers, crossover components, and a Bluetooth stereo amplifier to ensure high-quality audio playback.
- Battery and Charging Components: 18650 battery cells and a 3S BMS board are required to power the speaker wirelessly.
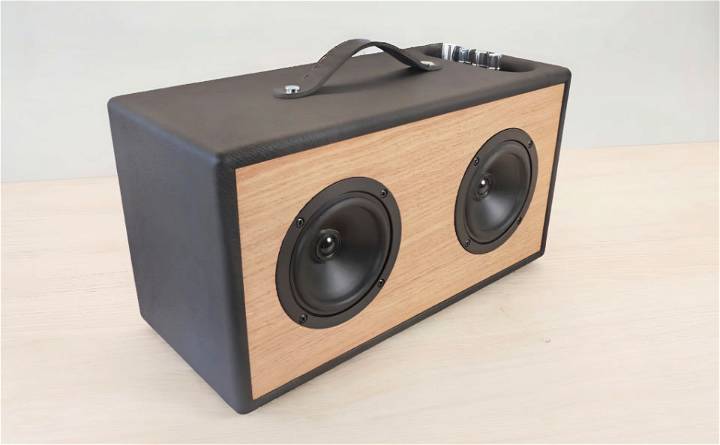
- Decorative and Functional Extras: Materials like faux leather vinyl, rubber feet, and a leather handle not only provide a premium look but also enhance the speaker's functionality.
- Tools: A variety of tools including a soldering iron, multimeter, and spot welder are crucial for assembling and wiring the speaker correctly.
I sourced most components online, ensuring I had all parts before starting the project.
Step by Step Instructions
Learn how to build a DIY Bluetooth speaker with our step-by-step instructions. Build your own portable sound system easily at home!
Step 1: Designing and Printing the Enclosure
The design phase was critical. I wanted a speaker that was not only aesthetically pleasing but also acoustically effective. Using CAD software, I designed the enclosure with specific dimensions to house all the components snugly. Printing the parts required patience and precision, with each piece taking several hours.
Importance of Design:
- Acoustic Performance: The shape and volume of the enclosure significantly affect sound quality.
- Component Fit: Ensuring all parts fit within the enclosure without interfering with each other.
Step 2: Assembling the Speaker Components
The assembly started with the speakers and crossover components. Crossover assembly was tricky; it involved soldering capacitors, inductors, and resistors based on the wiring diagram. A mistake here could affect sound quality, so I double-checked every connection with my multimeter.
Tips for Successful Assembly:
- Follow the Wiring Diagram Carefully: This ensures correct sound channeling and quality.
- Secure Soldered Connections: Use heat shrink or electrical tape to prevent any shorts.
Step 3: Incorporating the Electronics
The Bluetooth amplifier was next. It needed to be connected to the speakers, power supply, and control buttons. Wiring was meticulous work, requiring a steady hand and a clear understanding of the circuit.
Electronics Integration Advice:
- Keep Wiring Neat: This prevents interference and makes maintenance easier.
- Test Before Finalizing: Connect the battery and test the circuit to ensure everything works as expected.
Step 4: Final Touches
Adding the faux leather, handles, and rubber feet was about marrying form and function. The leather gave it a premium feel, while the rubber feet ensured stability.
Why Details Matter:
- Aesthetics: They contribute to the overall appeal of the speaker.
- Functionality: Features like the handle make the speaker more portable.
Step 5: Testing and Troubleshooting
The first sound test was nerve-wracking but hearing music fill the room from the speaker I built was exhilarating. There were minor issues, such as a slight buzz at high volumes, which I traced back to a loose solder joint and quickly fixed.
Testing Importance:
- Ensures Functionality: Identifies any issues before considering the project complete.
- Verifies Sound Quality: The ultimate test of the speaker's performance.
Troubleshooting Common Issues in DIY Bluetooth Speakers
When you're building your own Bluetooth speaker, you might run into a few common issues. Don't worry, these problems are usually easy to fix. Here's a guide to help you troubleshoot and keep your project on track.
Poor Sound Quality
If your speaker doesn't sound quite right, check the connections first. Make sure all the wires are securely soldered and connected to the right places. Also, take a look at the crossover assembly to ensure there are no errors. The speaker enclosure should be sealed properly to prevent any sound leakage, which can affect the audio quality.
Bluetooth Connectivity Problems
Sometimes, the speaker might have trouble connecting to a Bluetooth device. This can often be due to the Bluetooth module not being powered correctly or being blocked by the enclosure. Make sure the module has a clear path to connect with your devices.
Battery Charging Issues
If the battery isn't charging, there could be a problem with the Battery Management System (BMS) board connections. Check that everything is plugged in correctly. Also, ensure that the charger you're using is compatible with the battery.
Remember, building a DIY Bluetooth speaker is a learning process. If you encounter any issues, take a step back and review your work. Often, the solution is simpler than you think. Keep experimenting, and you'll get there!
Advanced Customizations for DIY Bluetooth Speakers
When you've mastered the basics of making a DIY Bluetooth speaker, you might want to add some advanced customizations. These enhancements can make your speaker unique and even more enjoyable to use. Here's a guide to some of the cool things you can do:
Adding LED Lights
LED lights can add a visual flair to your speaker. Consider installing multi-colored LEDs that sync with the music. You'll need to connect the LEDs to the speaker's power supply and program them to respond to the sound output.
Integrating Smart Features
Turn your Bluetooth speaker into a smart device by integrating it with voice control systems like Amazon Alexa or Google Assistant. This will require an additional module that can receive voice commands and control the speaker accordingly.
Building a Waterproof Enclosure
If you want to use your speaker outdoors, consider making the enclosure waterproof. Use materials like silicone sealant and rubber gaskets to protect the electronic components from water damage.
Building a Multi-Room System
For those who want music throughout their home, you can set up a multi-room audio system. This involves connecting multiple speakers to a central system that controls the audio output in different rooms.
Customizing Sound with an Equalizer
Incorporate an equalizer into your speaker to adjust the sound frequencies. This allows you to fine-tune the audio to your preferences, whether you want more bass or clearer vocals.
These are just a few ideas to get you started. With some creativity and technical know-how, you can take your DIY Bluetooth speaker to the next level!
FAQs About DIY Bluetooth Speaker
Discover everything you need to know about DIY Bluetooth speakers in this comprehensive FAQ guide. Learn how to build and customize your own speaker today!
What is a DIY Bluetooth Speaker?
A DIY Bluetooth speaker is a homemade speaker that connects wirelessly to your devices using Bluetooth technology. It's a project where you can build a speaker to your own design and sound quality preferences, often at a lower cost than purchasing a pre-made one.
How do I select the right components?
Select components based on your budget and desired sound quality. Research parts like the Bluetooth module and amplifier to ensure they're compatible with each other and can be powered by your chosen battery type. Consider the size and type of speakers for the kind of sound you want to achieve.
Can I customize the design of my Bluetooth speaker?
Absolutely! You can choose the shape, size, and materials for your speaker's enclosure. This can range from repurposed wooden boxes to custom-designed 3D-printed cases. You can also add personal touches like paint, decals, or LED lights for a unique look.
Are there any safety considerations I should be aware of?
When building your Bluetooth speaker, always follow safety guidelines for using tools and handling electronics. Be cautious when soldering and ensure all electrical connections are secure to prevent short circuits. If you're using lithium batteries, be aware of proper handling and charging practices to avoid potential hazards.
Conclusion and Reflection
Building a portable Bluetooth speaker using 3D-printed parts was a challenging but immensely rewarding project. It tested my patience, soldering skills, and attention to detail. However, the joy of completing it and enjoying music it plays is incomparable. For anyone looking to embark on a similar project, my advice is to:
- Plan and Prepare: Ensure you have all materials and understand the steps before you start.
- Take Your Time: Rushing leads to mistakes. Enjoy the process.
- Don't Be Afraid to Troubleshoot: Problems will arise, but they can often lead to learning and improvement.
This project not only gave me a unique, custom-built speaker but also invaluable DIY experience and the confidence to tackle more complicated builds in the future.


