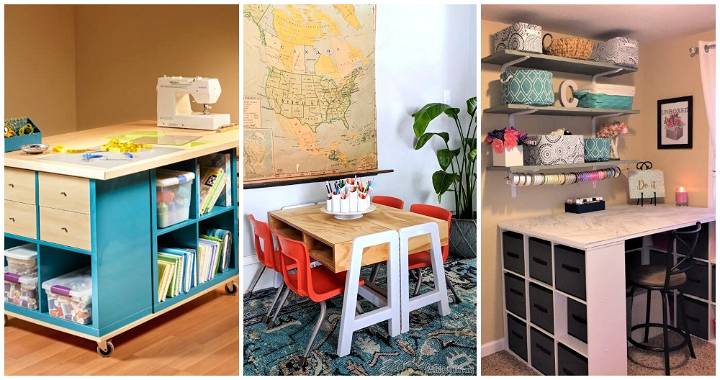
Starting with a blank room, I felt excited about building my own DIY craft table. I planned to have enough space for all my supplies and tools. I gathered materials and tools like wood, screws, and paint. Following a simple craft table plan I found online, I measured and cut the pieces. It was fun and rewarding to see my table take shape.
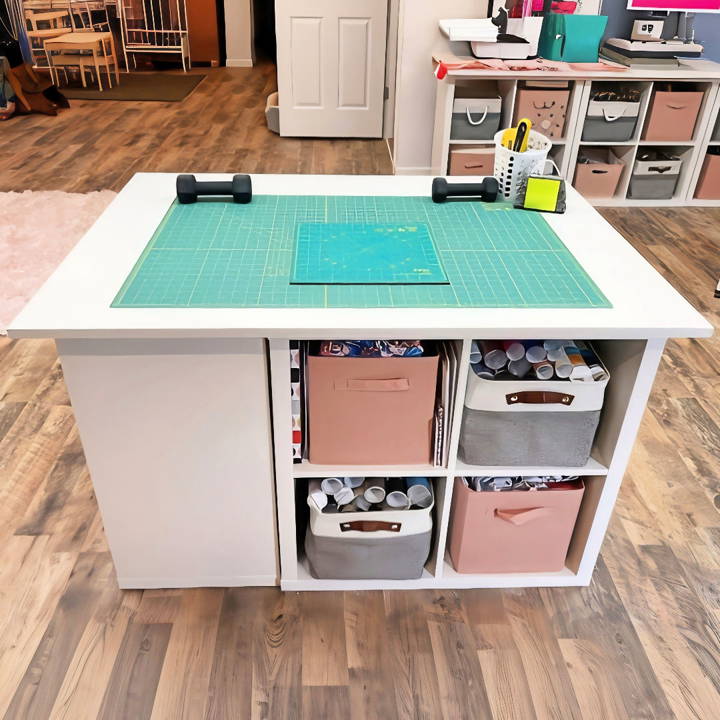
Assembling everything, I carefully made a DIY craft table with storage to keep my supplies organized. It had shelves and drawers to store my paints, brushes, and fabrics. The table became the heart of my craft room.
Building it gave me confidence and satisfaction. You too can enjoy creating a personalized, efficient workspace with the given instructions.
Materials Needed and Why
Discover essential materials for your DIY craft table project: calyx 4 cube storage units, a power drill/screwdriver, like a countertop, and pre-glued iron-on edging.
1. Calyx 4 Cube Storage Units
These units are the backbone of our cutting table. I chose these for their ample storage space; each unit has four cubbies, perfect for organizing materials. For my project, I used three units to ensure I had enough surface area and storage.
2. Power Drill/Screwdriver
This makes the assembly process a breeze compared to manually screwing in each piece. Efficiency is key!
3. IKEA Countertop or A Similar Board
To create the table's surface, we utilized an Ikea countertop, but any sturdy board cut to size will work. This provides a smooth, durable surface for cutting fabrics or crafting.
4. Pre-glued Iron-On Edging
This simple addition gives the cut edges of your board a finished look, ensuring your crafting table not only functions well but looks great, too.
Step by Step Instructions
Learn how to build a DIY craft table with step-by-step instructions, from assembling storage units to placing the countertop. Perfect for your crafting needs!
Assembling The Storage Units
First, it's essential to assemble your Calyx 4 Cube Storage units. If you're anything like me, you'll appreciate a power tool here to speed up the process. Simply follow the unit's assembly instructions—it's straightforward and should only take a few minutes per unit. I got a helping hand from my partner, which made assembly even faster. Don't forget, it's okay to make mistakes; I certainly did! It just means unscrewing and re-screwing a couple of bits, but with a power tool, it's no big deal.
Positioning The Units
Once assembled, position the storage units so two are side-by-side, and the third is at one end, creating an 'L' shape or a longer linear configuration depending on your space and needs. This setup provides a sturdy base for the countertop/board and maximizes the storage capabilities underneath.
Preparing The Countertop/Board
With your base ready, it's time to attend to your countertop or board. Ensure it's cut to the desired size that fits your base structure properly. I recommend a trip to a local hardware store for this where they can cut a piece to your specifications if you don't have the tools at home.
Next, apply the pre-glued iron-on edging around the raw edges to give your table a seamless look. Use a mini iron (a crafting iron works great) to attach the edging, pressing firmly as you go. This step gives the countertop a professional finish and prevents fraying or damage to your fabric and materials.
Placing The Countertop
Carefully place the finished countertop on top of your base structure. Depending on the weight of your board and the dimensions, this might be a two-person job, so don't hesitate to ask for help. The weight of the board should hold it in place, but you can secure it with a few screws or brackets if needed.
Customization Tips for Your DIY Craft Table
Creating a craft table that reflects your personal style and meets your crafting needs is not only rewarding but also adds a touch of personality to your crafting space. Here are some tips to help you customize your DIY craft table:
- Choose Your Style: Think about the overall look you want for your craft table. Do you prefer a modern, sleek design or a rustic farmhouse feel? Select a theme that resonates with your personal taste and the decor of the room where the table will be placed.
- Pick the Right Size: Measure your crafting area before you start building. Consider the size of your room and how much space you need for your projects. A foldable or extendable table might be a good option if you're short on space.
- Select Materials Wisely: Use materials that are durable and easy to clean. For example, a tabletop with a laminate finish can resist stains and is simple to wipe down after messy projects.
- Add Color: Paint your craft table in a color that inspires you. Bright colors can energize the space, while softer tones might help you relax and focus on your crafts.
- Incorporate Storage: Think about what you need to store and how you like to work. Add shelves, drawers, or pegboards to keep your tools and materials within easy reach.
- Consider Comfort: Adjust the height of your table to fit your ergonomic needs. If you plan to stand while crafting, ensure the table is tall enough to prevent straining your back.
- Light It Up: Good lighting is crucial. Install task lighting or place your table near a natural light source to make detailed work easier.
- Make It Mobile: If you like to change your crafting location, consider adding casters to the legs of your table so you can move it around easily.
- Personal Touches: Decorate your craft table with personal items like photos, inspirational quotes, or artwork. This will make the space uniquely yours.
By following these tips, you'll create a craft table that's not only functional but also a reflection of your creativity and style.
Storage Solutions for Your DIY Craft Table
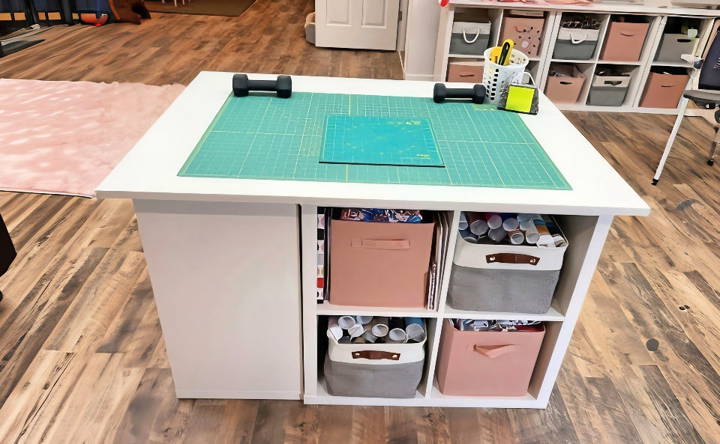
When it comes to crafting, having an organized space can make all the difference. Here are some practical storage solutions for your DIY craft table that will help keep your supplies in order and your creativity flowing:
- Use Vertical Space: Install shelves above your craft table to take advantage of vertical space. This is perfect for storing items you don't use daily but still want within reach.
- Hanging Organizers: Consider using pegboards or magnetic strips to hang tools and materials. This keeps your workspace clear and your tools visible and accessible.
- Drawer Dividers: If your craft table has drawers, use dividers or small containers to organize items by type or color. This makes it easier to find what you need without rummaging through everything.
- Label Everything: Clearly label bins, drawers, and shelves. This not only helps you find items quickly but also makes it easier to put things away in the right place.
- Rolling Carts: A rolling cart with multiple tiers can be a great addition. It provides extra storage and can be moved around as needed.
- Foldable Bins: Use foldable fabric bins for storing fabrics, papers, or other flexible materials. They can be collapsed when not in use to save space.
- Built-in Compartments: If you're handy, consider building compartments into your craft table for specific items like scissors, tape, or glue.
- Repurpose Household Items: Look around your home for items that can be repurposed for storage, such as spice racks for small jars of beads or a wine rack for rolls of ribbon.
- Clear Containers: Use clear containers for small items like buttons, beads, or sequins. Seeing what's inside at a glance saves time and hassle.
By implementing these storage solutions, you'll create a more efficient crafting area that allows you to focus on your projects with ease. Remember, the key is to keep it simple and functional.
Troubleshooting Common Issues
When embarking on a DIY craft table project, you might encounter a few hiccups along the way. Here's a guide to troubleshooting some common issues you may face:
Uneven Table Surface
- Solution: Check if your work surface is level before attaching the tabletop. Use a carpenter's level and adjust the legs as needed. If the surface is already attached, sand down any high spots or fill in low spots with wood filler.
Wobbly Table
- Solution: A wobbly table often means the legs are uneven or not securely attached. Measure each leg to ensure they're the same length and tighten all connections. Adding corner brackets can also increase stability.
Difficulty Attaching Hardware
- Solution: If screws aren't going in smoothly, make sure you're using the correct size and type for the material. Pre-drilling holes can help prevent wood from splitting and make it easier to insert screws.
Sticking Drawers
- Solution: Drawers that stick are usually due to misalignment or swelling from humidity. Check the alignment of the drawer slides and make adjustments. For swelling, remove the drawer and sand down the edges for a smoother glide.
Paint Not Adhering
- Solution: Paint might not stick if the surface isn't properly prepared. Sand the surface lightly to create a rough texture for the paint to grip. Ensure the surface is clean and dry before painting.
Insufficient Storage
- Solution: If you find you need more storage after using your table, consider adding hanging cups, side pockets, or additional shelves. Think creatively about how to incorporate more storage without compromising the table's design.
Misplaced Tools
- Solution: Implement a tool organization system with designated spots for each tool. This could be as simple as a pegboard with outlines of tools or magnetic strips for metal items.
Inaccurate Measurements
- Solution: Double-check all measurements before cutting. Use a reliable tape measure and mark clearly with a pencil. If cuts have already been made, you may need to adjust the design or use wood filler to fill in the gaps.
Anticipating common issues and addressing them prepares you for challenges during your DIY craft table project.
FAQs About DIY Craft Table
Discover answers to common questions about DIY craft tables. Get tips, ideas, and solutions for your perfect crafting space!
The ideal size for a DIY craft table depends on your available space and needs. A table around 50–60 inches in length and 30–40 inches wide usually provides ample space for crafting. If you need more room, consider a larger tabletop or an extendable design.
Absolutely! Many DIY craft tables incorporate modular shelving units or drawers for storage. You can use IKEA’s Alex drawers or Kallax shelving units to create a craft table with plenty of storage for your supplies.
For a standing craft table, aim for a height of about 36 inches. If you prefer sitting, adjust the height to match your chair or stool. You can also choose adjustable legs to switch between sitting and standing as needed.
Yes, you can create a functional and stylish craft table without spending a lot. Look for affordable components like IKEA’s storage solutions or repurpose items you already have at home. With some creativity, you can build a craft table that meets your needs and fits your budget.
To maintain your DIY craft table, wipe the surface with a damp cloth to remove dust and debris. For tougher stains, use a mild soap solution. Avoid harsh chemicals that can damage the finish. It's also a good idea to tighten any loose screws periodically to ensure the table remains stable.
Final Thoughts
Wrapping up, creating the perfect DIY craft table can transform your crafting space into a functional and inspiring area. With a good craft table plan, you ensure the right balance of space, storage, and style. Get started on your DIY project today for a game-changing addition to your creative adventures.


