Building my own DIY electric skateboard was an adventure I loved. I started by researching all the components I needed. I chose a sturdy deck, a powerful motor, and a reliable battery. Step by step, I assembled the parts. There were challenges, but I learned a lot and gained valuable skills. It was fun and rewarding.
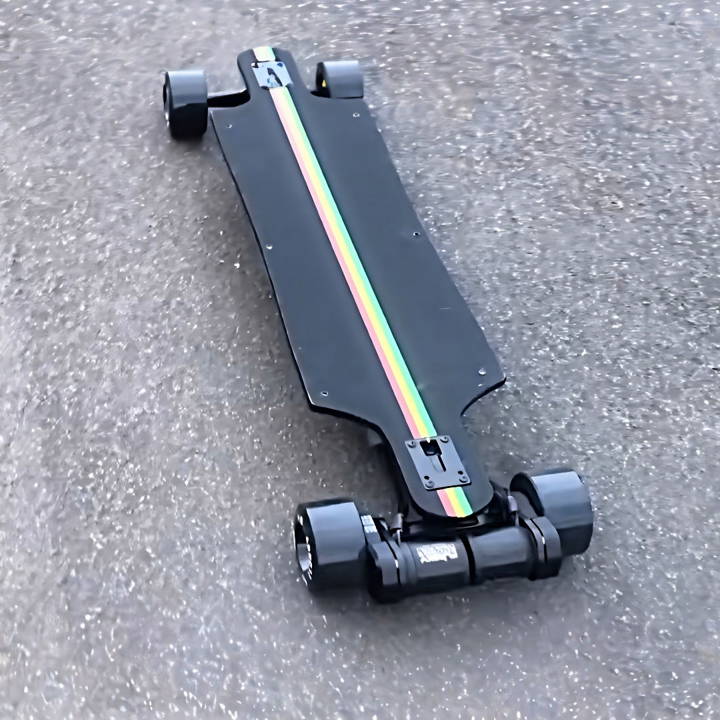
Making your own electric skateboard allows you to customize it. I now have a skateboard that suits my riding style perfectly. If you enjoy making and learning new things, I recommend giving it a try. The satisfaction of riding something I built is unmatched. These guides help you get started and make the process easier. Keep learning and enjoy the ride!
Selecting the Components
Selecting the components: a guide on choosing the right trucks, motor mounts, and motors for your skateboard. Learn how to make the best choices today!
The Trucks and Motor Mounts
I started with Ownboard trucks, chosen for their compatibility with heavy-duty motor mounts and similarity to Evolve trucks. Their built-in motor mount holders were a perfect match for the Ownboard motor mounts I had laid eyes on, which were made from high-quality aluminum and could easily support 6374 motors. The option to adjust the mount positioning was a crucial feature, given my specifications for high speed and range.
- Why Trucks and Motor Mounts Matter: The right truck and motor mount combo lays the foundation for stability and power distribution on your board. It's essential for supporting the motors that propel you to those high speeds.
Choosing the Motors
For the heart of the skateboard, I chose two Flipsky 6374 190KV motors, capable of delivering a combined power of 6300 watts. Their strength ensured that my board would have the muscle to reach and maintain high speeds.
- Why Motors are Key: Your motors directly influence the power and speed of your skateboard. High-quality motors ensure efficiency and endurance, especially when cruising at higher speeds.
Step by Step Instructions
Build your own electric skateboard with our easy step-by-step instructions. Perfect guide for DIY enthusiasts looking to build a custom ride!
Attaching Motors to Mounts
The first real step in the assembly was securing the motors to the motor mounts with bolts. This process was straightforward but highlighted the importance of ensuring every piece fits perfectly to prevent vibrations or misalignments at high speeds.
Tackling the Belt Cover Issue
I encountered an early challenge when trying to fit the belt covers over the motors — the motor shafts were too long. This hiccup was resolved by cutting down the shafts for a snug fit.
- Lesson Learned: Adaptability is crucial. You might need to modify components to fit perfectly.
Deck and Trucks Assembly
I opted for a Santa Cruz Rasta Lion deck because of its excellent concave and aesthetic. Fitting the trucks required disassembling them to mount on the drop-through deck. This setup promised a lower center of gravity and better stability at high speeds.
Wheels and Pulleys
Matching ABEC wheels with Evolve pulleys was a no-brainer for me, as it ensured a smooth ride and efficient power transfer from motors to wheels. I carefully chose the belt size to match the pulleys, ensuring efficient and slip-free power delivery.
- Why Wheels and Pulleys Matter: They're the final link in transferring motor power to actual movement. High-quality components here ensure smooth, efficient rides.
Electronics and Wiring: Bringing it to Life
Learn about the heart of electronics and wiring, including battery, esc, final assembly, and waterproofing. Bring your projects to life with expert guidance.
The Heart: Battery and ESC
The battery is arguably the most critical component. I used a custom-made 12S4P Samsung 30Q battery, providing enough juice for long rides and high speeds. Paired with a Dual 6.6 VESC from Flipsky, it offered the perfect balance of power management and control.
- Why the Right Electronics Matter: They ensure your skateboard is not only powerful but also safe and reliable. Proper wiring and a high-quality battery management system (BMS) are crucial for long-term performance.
Final Assembly and Waterproofing
After mounting the electronics in the enclosure and ensuring all connections were secure, I focused on waterproofing. A rubber gasket around the enclosure's edge prevented water ingress, while conduit fittings protected the phase wires entering the enclosure.
Challenges and Solutions
Cutting down motor shafts, ensuring a tight fit for all components, and waterproofing were among the challenges faced.
Test Ride and Adjustments
The first test ride was exhilarating. The board responded well, but I made minor adjustments to the trucks' tightness to reduce speed wobbles.
Advanced Customization Techniques
Customizing your electric skateboard personalizes it and boosts performance to match your style. Here's how to elevate your DIY skateboard:
Choosing the Right Motor
The motor is the heart of your electric skateboard, and selecting the right one is crucial. For more power and torque, consider a brushless outrunner motor. These motors are efficient and can handle higher speeds and inclines. Look for one with a high wattage rating for the best performance.
Upgrading the Battery Pack
Your skateboard's range and speed depend on the battery. Lithium-ion batteries are a popular choice due to their lightweight and high capacity. If you're comfortable with electronics, you can build a custom pack to fit your specific needs. Remember, more cells mean more range but also more weight.
Custom Decks and Trucks
The deck and trucks determine how your skateboard handles. A stiffer deck will offer stability at high speeds, while a flexible one can absorb more road vibrations. For trucks, wider options provide stability, and narrower ones allow for sharper turns. Choose according to the type of riding you'll be doing.
Wheels and Bearings
Larger wheels roll over obstacles more easily and can give you a smoother ride. However, they can also reduce acceleration. For bearings, ceramic options are more resistant to wear and can provide a smoother ride than steel bearings.
Electronic Speed Controllers (ESC)
An ESC with a higher current rating will allow for more power to be delivered to the motor. Some ESCs come with programmable features, letting you customize acceleration curves and braking strength.
Software Customization
Many ESCs can connect to a smartphone app, allowing you to monitor your skateboard's performance and adjust settings on the go. This can include tuning the throttle sensitivity or setting a speed limit for safety.
Aesthetic Customizations
Finally, don't forget about the look of your skateboard. Custom grip tape, LED lights, and painted decks can make your skateboard stand out.
While customizing your skateboard, always prioritize safety and ensure that all components are compatible with each other.
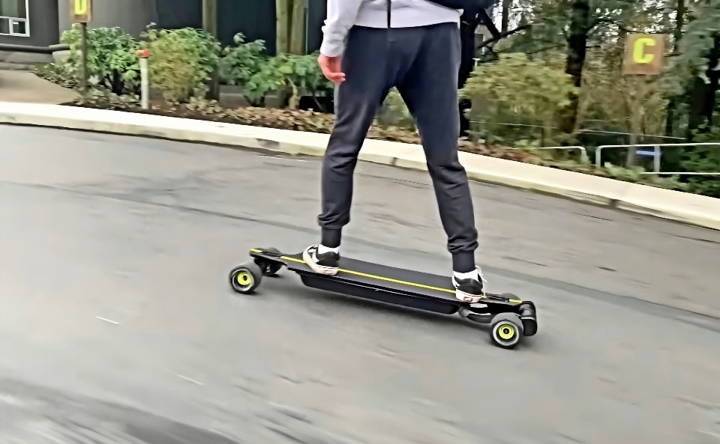
Maintenance and Troubleshooting
Keeping your DIY electric skateboard in top condition is essential for ensuring a safe and enjoyable ride. Regular maintenance and knowing how to troubleshoot common issues will save you time and money in the long run. Here's a straightforward guide to help you along the way:
Regular Maintenance Checks
- Battery Care: Charge your battery regularly, even when not in use, to keep it healthy. Avoid letting it discharge completely.
- Belt Inspection: If your board uses a belt drive, check for wear and tension the belt as needed. A loose belt can slip, while an overly tight one can strain the motor.
- Wheel and Truck Bolts: Tighten the bolts on your wheels and trucks periodically. Loose components can lead to instability.
Cleaning and Storage
- Cleaning: Wipe down your board with a damp cloth after use, especially if you've ridden through dirt or puddles. Keep the electronics dry.
- Storage: Store your skateboard in a cool, dry place away from direct sunlight to prevent damage to the electronic components.
Troubleshooting Common Issues
- Loss of Power: Check the battery charge level and connections. If everything seems fine, inspect the ESC for any signs of damage.
- Unusual Noises: Squeaking usually indicates a need for lubrication. Grinding could mean something is caught in the belt or wheels.
- Remote Connectivity: If your remote isn't connecting, ensure it's charged and not too far from the board. Interference from other devices can also be a culprit.
When to Seek Professional Help
- Electrical Issues: If you suspect a problem with the wiring or electronics and you're not confident in your electrical skills, it's best to consult an expert.
- Major Repairs: For significant damage or complex mechanical problems, professional repair services can ensure your board is fixed correctly.
By following these simple maintenance and troubleshooting steps, you can keep your electric skateboard running smoothly and extend its lifespan.
Safety Guide
Riding an electric skateboard can be a fantastic way to get around, but safety should always be your top priority. Here's a guide to help you ride safely and confidently:
Gear Up for Safety
- Helmet: Always wear a helmet. It's the best way to protect your head in case of a fall.
- Pads: Knee and elbow pads can prevent scrapes and bruises. Wrist guards can help protect against fractures.
- Lights: If you're riding at night, lights are essential. They help you see and be seen by others.
Know Your Ride
- Check Your Board: Before you hop on, give your skateboard a quick check. Make sure the wheels spin freely, and the battery is charged.
- Understand the Controls: Practice using the throttle and brake in a safe area until you feel comfortable.
Riding Smart
- Start Slow: Begin at a slow speed until you're confident with your balance and controls.
- Stay Alert: Keep an eye out for obstacles like rocks, cracks, and potholes.
- Respect Traffic Laws: Follow the same rules as bicycles. Use bike lanes when available and signal your turns.
Handling Hazards
- Avoid Water: Water can damage your board and make surfaces slippery. Try to stay dry.
- Be Cautious of Hills: Going up or down steep hills can be tricky. Make sure your board can handle the incline.
In Case of a Fall
- Roll: If you're falling, try to roll with the fall rather than stopping abruptly.
- Stay Relaxed: Tensing up can make injuries worse. Try to stay as relaxed as possible if you're going down.
By following these tips, you can enjoy your electric skateboard while staying safe. Trust me, these insights are your ticket to a fun and secure ride, ensuring every adventure is memorable and free from mishaps.
FAQs About DIY Electric Skateboard
Explore faqs about DIY electric skateboards and get expert answers on building, safety, components, and tips to build your perfect ride.
A DIY electric skateboard is a custom-built, battery-powered skateboard that you assemble yourself. It offers the freedom to choose your components, tailor the board to your preferences, and often results in cost savings compared to pre-built options. Building your own board can be a rewarding project that gives you a deeper understanding of the mechanics and electronics involved.
Choosing the right motor depends on your riding style and needs. Hub motors are integrated into the wheels and offer a sleek look and quiet operation, while belt-driven motors provide more torque for hill climbing and allow for easier wheel customization. Consider the trade-offs between power, speed, and ride comfort when selecting your motor.
Yes, you can convert a regular skateboard into an electric one using a conversion kit. These kits typically include all the necessary components and can be a great option if you already have a skateboard that you enjoy riding. Make sure to choose a kit that is compatible with your skateboard's size and design.
Safety is paramount when building and riding a DIY electric skateboard. Always wear protective gear, including a helmet, knee pads, and elbow pads. When assembling your board, follow instructions carefully, double-check connections, and ensure all components are securely fastened. Test your skateboard in a safe area before taking it out on busy streets or rough terrain.
Maintaining your DIY electric skateboard is crucial for both longevity and safety. Regular maintenance includes:
Checking for Loose Components: Before and after each ride, check for any loose screws or parts, especially around the trucks and wheels.
Battery Care: Store your battery in a cool, dry place and avoid overcharging it. Follow the manufacturer's guidelines for charging cycles.
Wheel and Bearing Maintenance: Clean your wheels and bearings periodically to remove dirt and debris that can cause wear and tear.
Motor Inspection: Listen for any unusual noises from the motor, which could indicate a problem. Keep the motor clean and free of obstructions.
Software Updates: If your ESC has firmware, keep it updated to ensure optimal performance and access to new features.
Conclusion: Skepticism to Satisfaction
Starting a custom DIY electric skateboard project can be fun and rewarding. It feels great to ride something you made. The joy of building your own electric skateboard is worth the effort. Start today and enjoy the ride!


