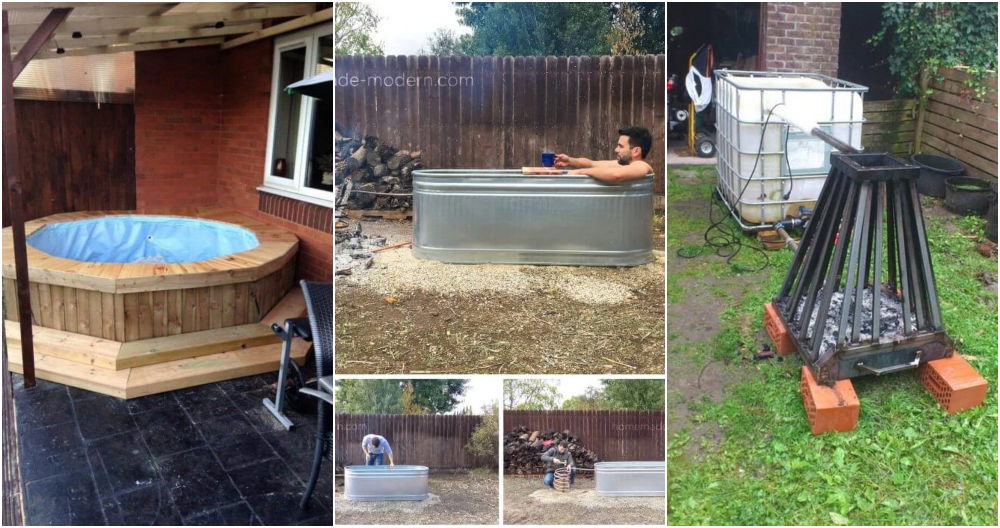
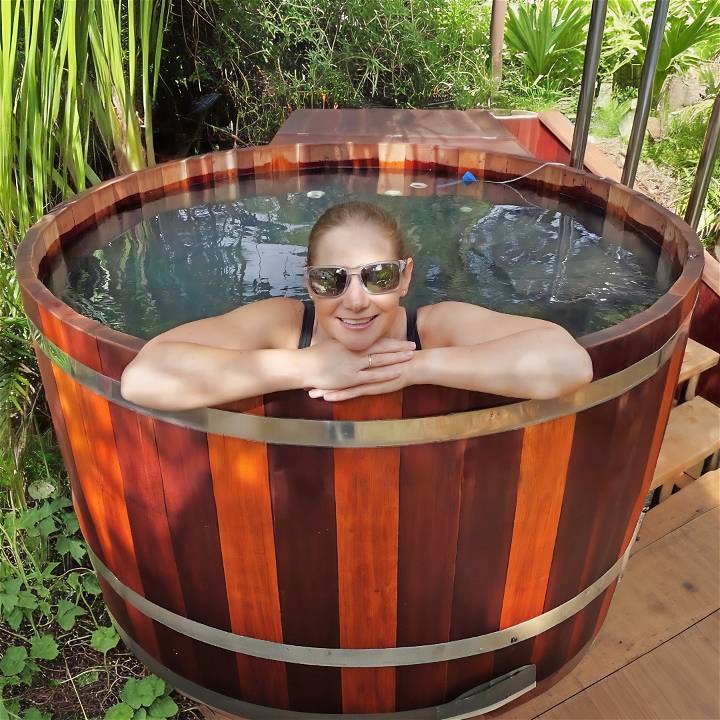
Building a hot tub from scratch was never on my to-do list until I stumbled upon a challenge that I couldn't resist. As someone who enjoys DIY projects, the thought of creating a space where I could relax and unwind right in my backyard was too tempting. I'm excited to share my journey, filled with trials, errors, and ultimately, success. Whether you're a seasoned DIYer or a curious beginner, I hope my experience inspires you and guides you through building your very own hot tub.
Materials and Tools: The Foundation of Success
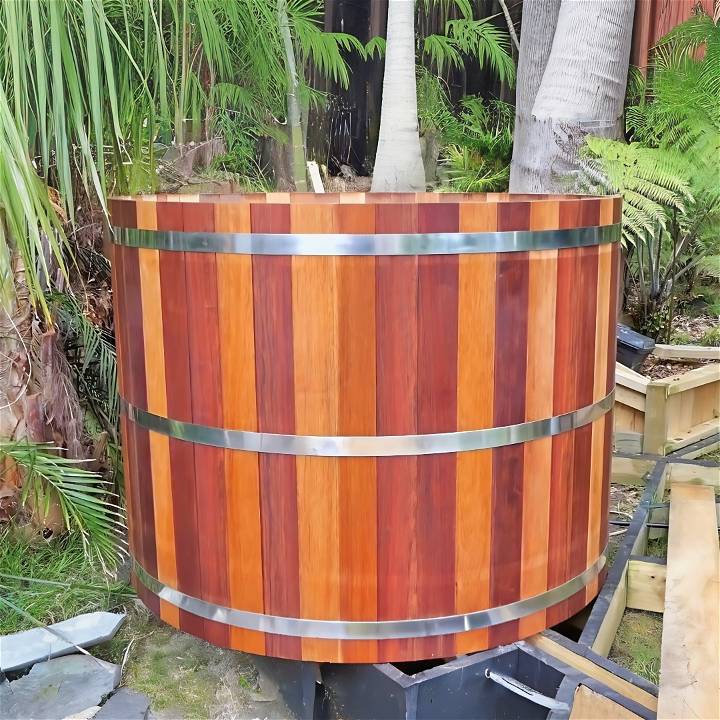
The cornerstone of any successful project lies in the materials and tools you choose. For my hot tub, I needed timber for the base and the staves, stainless steel for the bands, and a collection of tools, including a router, saw, drill, and of course, safety gear like goggles and gloves.
Why each item is essential:
- Timber: Provides the structure. I used vitex for the base and amaura for the staves. The type of wood you choose can vary based on availability and personal preference, but ensure it's durable and water-resistant.
- Stainless Steel Bands: These secure the structure, ensuring it holds together tightly once filled with water.
- Router: Essential for creating grooves and tongues on your timber, which is critical for assembling the hot tub with precision.
- Saw and Drill: For cutting your timber to size and drilling any necessary holes for the assembly and plumbing.
- Safety Gear: Never underestimate the importance of safety. Protective eyewear and gloves can prevent serious injuries.
Step by Step Guide
Learn how to build your own hot tub in this step-by-step DIY guide. From crafting the staves to securing the structure, get expert tips for a successful project.
Building the Base
- Preparing the Timber: I started by cutting my timber to size. For the base, I used boards that were 140mm wide by 32mm thick. Remember, always do a test run on a scrap piece of wood to ensure your measurements are correct.
- Routing the Grooves: Using my half-inch router, I created tongues and grooves on the edges of the base boards. This step required patience and precision, as the fit needed to be snug but not too tight.
- Assembling the Base: After routing, I laid out the boards and assembled the base using stainless steel screws to join them together. This created a sturdy foundation for the rest of the hot tub.
Crafting the Staves
- Cutting the Timber: I cut my stave timber (amaura) into lengths of approximately 1250mm. The exact length will depend on your hot tub's desired height.
- Routing: Similar to the base, I routed tongues and grooves on each stave. This process was perhaps the most time-consuming but crucial for ensuring a water-tight seal.
- Assembling the Staves: With all staves routed, I carefully placed them around the base, ensuring a perfect circular fit. It's key to not force them too snugly; they will tighten once the bands are secured.
Securing the Structure
- Stainless Steel Bands: Preparing the bands involved cutting to length, drilling holes for the bolts, and welding the ends to create a loop. I ensured the bands were tight but allowed for slight adjustments.
- Tightening Everything Up: With the bands in place, I incrementally tightened them, starting from the bottom and working my way up. This process helped to evenly distribute pressure and keep the staves aligned.
The Finishing Touches
- Sealing and Protecting: I applied a coat of oil to the exterior of the hot tub for protection against the elements. Two coats were necessary for lasting durability.
- Plumbing and Accessories: Although not covered in detail here, adding plumbing for water inflow and drainage was my next step, followed by installing seats and steps for comfort and accessibility.
Lessons Learned and Final Thoughts
Building a hot tub from scratch is not a weekend project. It requires patience, precision, and a fair bit of physical labor. The satisfaction of completing it, however, is unmatched. Not only have I gained a relaxing retreat in my own backyard, but I've also honed my woodworking skills significantly.
Advice for Aspiring Builders
- Take Your Time: Don't rush the process. Accuracy, especially when routing and assembling the base and staves, is key to a successful build.
- Safety First: Always wear appropriate safety gear. Power tools, especially routers and saws, are unforgiving.
- Embrace the Learning Curve: Mistakes happen. Use them as learning opportunities rather than setbacks.
I built a hot tub myself; it was rewarding and taught me valuable skills. Take the plunge and enjoy the fruits of your labor.
Troubleshooting Common Issues with DIY Hot Tubs
Building a DIY hot tub can be a rewarding project, but it may come with its own set of challenges. Here’s a guide to help you troubleshoot some common issues that you might encounter during the construction or use of your DIY hot tub.
Water Leakage
Finding the Source:
- Check all the connections and seals.
- Look for wet spots or drips around the tub.
Fixing the Leak:
- Tighten any loose fittings.
- Replace worn-out seals or gaskets.
- Apply waterproof sealant to small cracks.
Inconsistent Water Temperature
Regulating the Heat:
- Ensure the heater is properly sized for your tub.
- Inspect the thermostat for accuracy.
Maintaining Temperature:
- Use a quality insulated cover to retain heat.
- Consider adding a thermal blanket beneath the cover.
Cloudy or Dirty Water
Keeping the Water Clear:
- Test and balance the water chemistry regularly.
- Clean or replace filters as needed.
Improving Water Quality:
- Use a water clarifier to coagulate small particles.
- Shock the water to eliminate bacteria and algae.
Electrical Safety Concerns
Preventing Hazards:
- Hire a licensed electrician to handle all wiring.
- Ensure all electrical components are grounded.
Enhancing Safety:
- Install a ground-fault circuit interrupter (GFCI).
- Regularly check the electrical system for any faults.
Structural Integrity
Ensuring Stability:
- Use sturdy materials that can support the weight of the water.
- Reinforce the structure with additional supports if necessary.
Longevity of Materials:
- Treat wood with a water-resistant sealant.
- Protect metal components from corrosion.
By being proactive and addressing these common issues, you can enjoy a safe and functional DIY hot tub for years to come.
FAQs About DIY Hot Tubs
Building a DIY hot tub can raise many questions. Here are answers to some of the most frequently asked questions, presented in a clear and straightforward manner to help you on your DIY journey.
What is the best material to use for a DIY hot tub?
The best material for a DIY hot tub depends on your budget, skills, and aesthetic preferences. Cedarwood is popular for its durability and natural resistance to rot and insects. Concrete is another option that offers longevity and can be customized into various shapes. For a more budget-friendly choice, polyethylene or fiberglass inserts can be used.
How can I ensure my DIY hot tub is energy efficient?
To make your DIY hot tub energy efficient, consider the following:
- Insulation: Properly insulate the sides and bottom of the hot tub.
- Covers: Use a high-quality insulated cover to minimize heat loss.
- Heating System: Opt for an energy-efficient heater, such as a solar heater or a heat pump.
Can I install a jet system in my DIY hot tub?
Yes, you can install a jet system in your DIY hot tub. You’ll need to purchase a jet kit and pump that are compatible with your hot tub size and design. It’s important to follow the manufacturer’s instructions carefully or consult with a professional to ensure proper installation.
What are the legal requirements for installing a DIY hot tub?
Legal requirements vary by location, but generally, you may need to:
- Obtain Permits: Check with your local building department for any required permits.
- Follow Codes: Ensure your hot tub meets electrical and building codes, which may dictate its location, wiring, and construction standards.
How often should I change the water in my DIY hot tub?
The frequency of water changes in your DIY hot tub depends on usage and water quality. A good rule of thumb is to change the water every 3 to 4 months. However, if the hot tub is used frequently or the water becomes cloudy or has an odor, it may need to be changed more often.
Conclusion:
In conclusion, building your own DIY hot tub can be a fun and rewarding project that can help you relax and unwind in the comfort of your own home. Let your creativity flow, and enjoy the soothing benefits of your homemade oasis.


