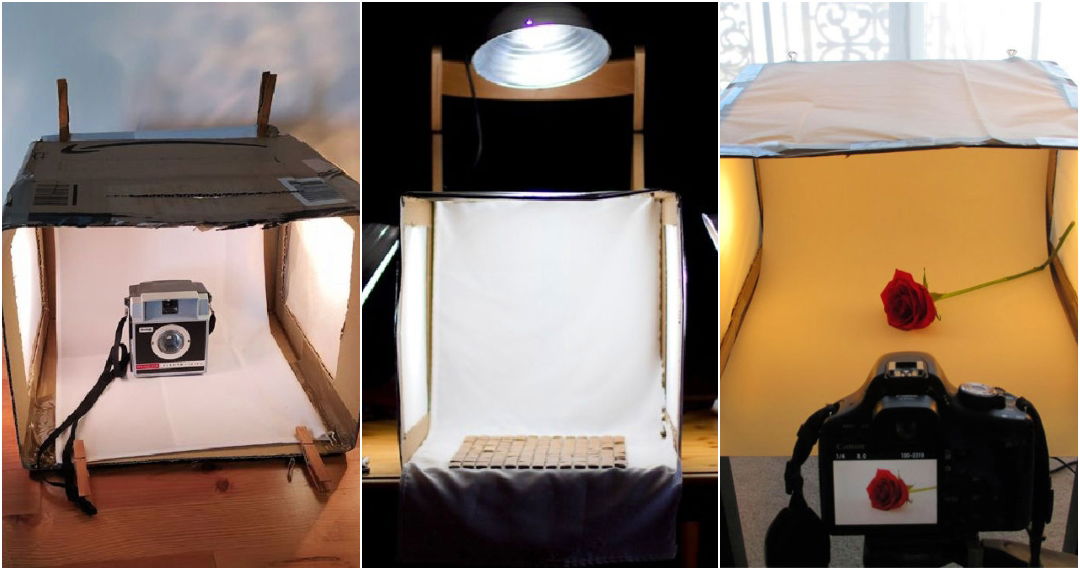
Photography is all about lighting, and having the right equipment can dramatically elevate the quality of your photos. Whether you're capturing products, food, crafts, or personal projects, a lightbox is an essential tool to get professional-looking shots. If you've ever considered improving your photography with a DIY solution, a custom-built DIY lightbox is the perfect project. This guide will walk you through every step of the process, from gathering materials to assembling the box and setting it up for optimal use.
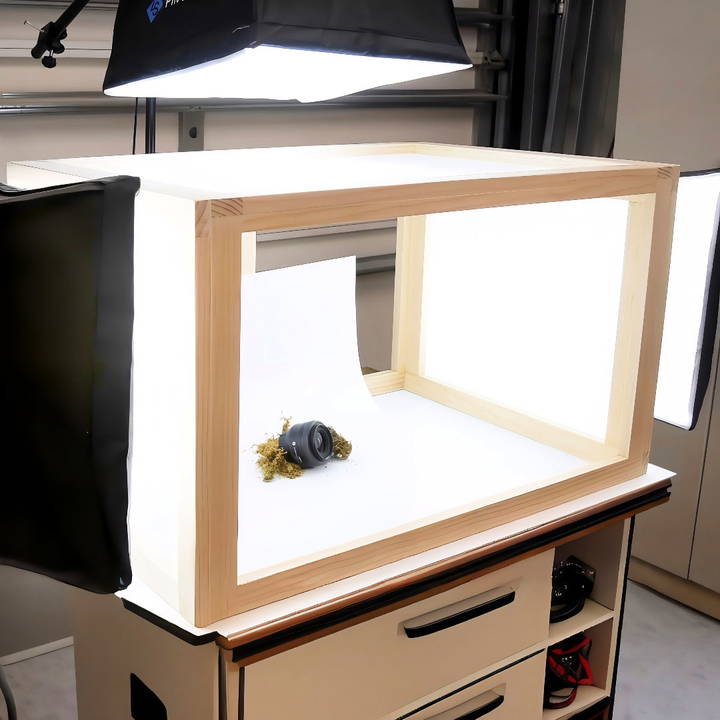
By the end of this tutorial, you'll have your own lightbox that can be used in countless ways, including for social media, website product listings, or personal photography. Let's dive into the process of building your DIY lightbox.
Materials You'll Need
Before starting the construction of your lightbox, you'll need to gather a few essential materials. The quality of your materials will significantly affect the durability and appearance of your final project.
Materials List:
- (7) 1x2x8ft Select Pine – These pieces will form the structure of the lightbox.
- Diffusion Fabric – This fabric will allow light to diffuse evenly across your subject, eliminating harsh shadows.
- Wood Filler – Used to cover up any imperfections or screw holes.
- Wood Glue – Essential for reinforcing the joints.
- Brad Nails – These will secure the wooden pieces together.
- Hardboard or Poster Board – For the backdrop of your lightbox.
- Staple Gun – For securing the diffusion fabric.
Tools Required:
- Miter Saw or Circular Saw – To cut the wood into the correct sizes.
- Metal Square – Ensures that your corners are perfectly square.
- Pocket Hole Jig – For building pocket holes, making it easy to join the wood pieces.
- Drill/Driver – To drive screws into the wood.
- Orbital Sander – For smoothing out the surfaces.
- Heat Gun – Speeds up the drying process of wood filler.
- Clamps (Bandy and Bar Clamps) – Holds the wood pieces in place during assembly.
- Staple Gun – For attaching the diffusion fabric.
Optional:
- Jawhorse – Helps stabilize materials during cutting and assembly.
- Camera and Lighting Kit – If you're looking to take your photography to the next level, consider investing in a camera slider and lighting kit.
Step by Step Instructions
Learn how to make a professional DIY light box with step-by-step instructions, from cutting wood to setting up lighting, for perfect photo shots.
Step 1: Cut the Wood to Size
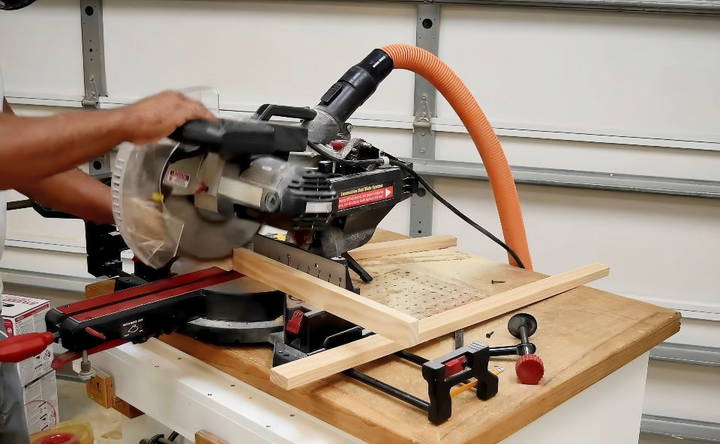
The first step is cutting the select pine into the necessary pieces to form the frame of your lightbox. This can be done with either a miter saw, circular saw, or even a handsaw if you don't have power tools available.
Measurements:
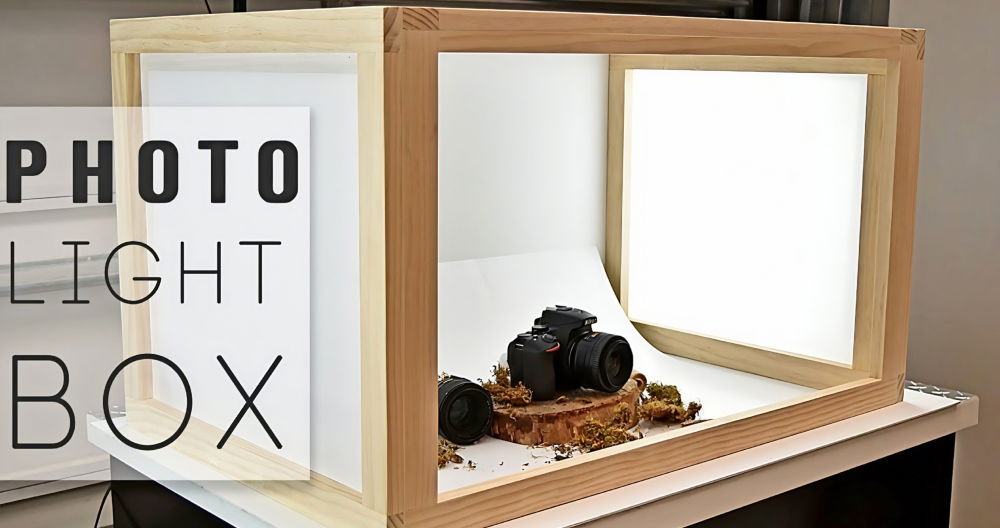
- The finished lightbox will be 32 inches long, 21 inches deep, and 19 inches tall. Make sure you cut the pieces precisely to avoid any fitting issues later on.
Once all your pieces are cut, lay them out and double-check the measurements to ensure accuracy. Keep in mind that you'll need two side pieces, a top piece, a back piece, and a frame for the front opening. Additionally, any scrap wood can be saved for other DIY projects or reinforcing parts of the box.
Step 2: Assemble the Frame
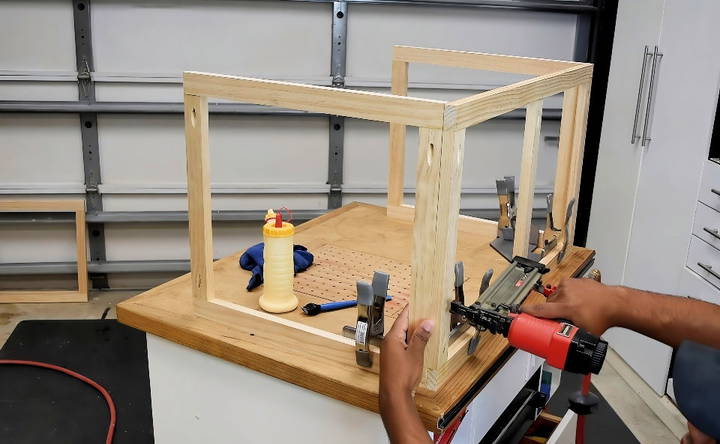
After cutting, it's time to assemble the frame. You'll be making rectangular frames that will eventually form the sides, top, and back of the lightbox.
Instructions:
- Butt Joints and Pocket Holes: To connect the wooden pieces, use butt joints reinforced with pocket hole screws. This method ensures a strong connection between pieces without requiring complex joinery.
- Mark Your Wood: Before drilling the pocket holes, mark the wood so that everything aligns perfectly during assembly.
- Build a Jig: If you're making multiple frames, it's helpful to build a simple jig that allows you to line up each piece of wood and drill pocket holes consistently. This step will save you time and ensure that all pieces fit together seamlessly.
- Use Clamps: When joining pieces, use bar clamps or bandy clamps to hold everything together while you drive in screws or apply wood glue. This prevents any misalignment and ensures a tight fit.
- Brad Nails and Wood Glue: Once the pieces are connected with screws, reinforce them with wood glue and a few brad nails. This adds extra strength to the frame, ensuring it doesn't wobble or break apart over time.
Step 3: Sand and Finish the Frame
After assembling the frame, you'll want to sand everything down to remove any rough edges or uneven surfaces.
Sanding Tips:
- Use an orbital sander to smooth out the surfaces of the wood, paying special attention to any areas where you've applied wood filler or brad nails.
- Round off the corners of the frame to prevent the fabric from tearing or snagging when it's applied.
- Make sure the surface is as smooth as possible before proceeding to the next step.
Step 4: Apply the Diffusion Fabric
The diffusion fabric is a key component of your lightbox, as it helps evenly distribute light across the subject. You'll attach this fabric to the sides and top of the frame to build a softbox-like effect.
Instructions:
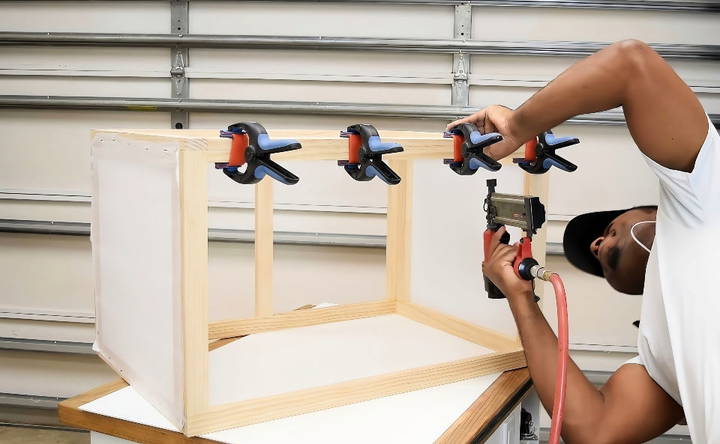
- Cut the Fabric: Measure and cut the diffusion fabric to fit the top and sides of the lightbox. It's a good idea to leave a little extra fabric around the edges to ensure it fits snugly.
- Attach the Fabric with a Staple Gun: Start by securing the fabric to one side of the frame, then work your way around, pulling the fabric taut as you go. Make sure there are no wrinkles or gaps in the fabric.
- Trim Excess Fabric: Once the fabric is securely attached, use scissors to trim any excess material that extends beyond the edges of the frame.
- Cover the Staples: For a cleaner look, attach a final trim piece to cover up the staples and fabric edges. This gives the lightbox a professional finish and prevents the fabric from coming loose over time.
Step 5: Make the Backdrop
Now that the frame and fabric are complete, it's time to build the backdrop for your lightbox. The backdrop will allow you to easily switch between different backgrounds depending on the subject you're photographing.
Backdrop Options:
- Hardboard or Poster Board: These materials make excellent backdrops because they're easy to cut, lightweight, and inexpensive. You can use white, black, or colored boards to build different effects.
- Interchangeable Backgrounds: For added flexibility, consider making multiple interchangeable backdrops. This allows you to switch between different colors or textures, giving you more creative control over your photos.
Assembly:
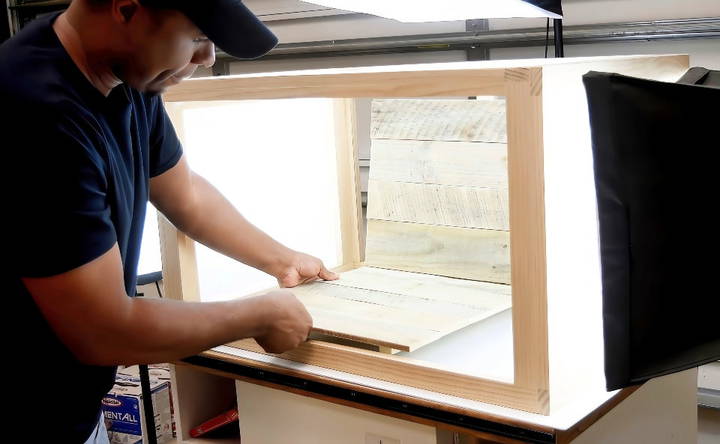
- Cut the backdrop material to the same dimensions as the back of your lightbox. Use clamps to hold the backdrop in place while securing it to the frame with brad nails or screws.
- If you prefer to keep the backdrop removable, avoid using glue so that you can easily swap it out later.
Step 6: Set Up Your Lighting
The beauty of a lightbox is that it provides consistent, even lighting for your photos. Depending on your budget, you can use either professional studio lights or inexpensive alternatives like desk lamps or LED strips.
Lighting Tips:
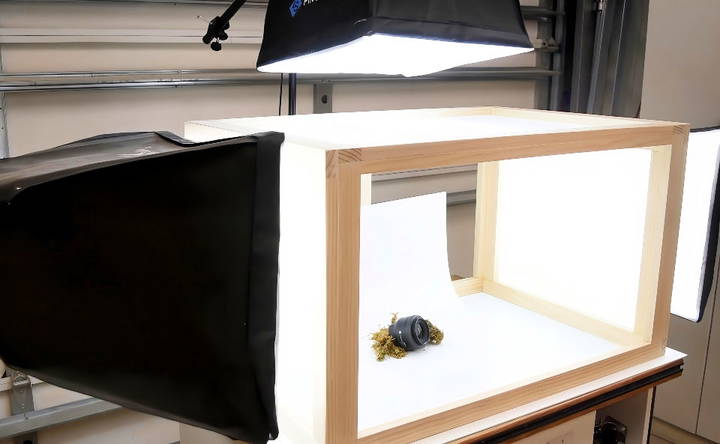
- Position the Lights: Place your light sources outside the diffusion fabric, shining light through the fabric. This will build a soft, even glow inside the box.
- Experiment with Angles: Depending on what you're shooting, you may want to experiment with different lighting angles. For example, placing one light at the top of the box and another on the side can build interesting shadows and highlights.
Bonus Tip: Using a Camera Slider
If you're serious about product photography or videography, consider investing in a camera slider. This will allow you to capture smooth, professional-looking footage of your subject without having to move the camera by hand.
Step 7: Take Your Photos
Now that your lightbox is complete, it's time to start taking photos! The main advantage of a lightbox is the ability to control the lighting and background of your shots, allowing you to capture crisp, professional images.
Photography Tips:
- Use a Tripod: To avoid blurry photos, always use a tripod when shooting inside the lightbox. This keeps the camera steady and ensures sharp images.
- Shoot in Manual Mode: If you're comfortable with manual settings, experiment with aperture, ISO, and shutter speed to get the perfect exposure.
- Play with Angles: Don't be afraid to get creative with your angles! Try shooting from above, below, or from the side to capture your subject in a unique way.
Conclusion
Building your own lightbox is a rewarding DIY project that can significantly improve the quality of your photography. Whether you're a hobbyist or a professional, a lightbox allows you to control your lighting and background, making it easier to take clean, professional-looking photos.
With just a few materials and some basic tools, you can build a custom lightbox that's tailored to your specific needs. Best of all, the project is completely customizable, so you can add extra features like interchangeable backdrops, additional lighting, or even a camera slider.
Now that you've built your lightbox, you're ready to capture stunning photos of whatever you build, from handmade crafts to delicious meals. Enjoy experimenting with your new photography setup!
FAQs About DIY Light Box
Discover everything you need to know about DIY light boxes, including setup tips, materials, and benefits in our comprehensive FAQs guide.
For diffusion, it’s recommended to use diffusion fabric or white nylon fabric, as these materials spread light evenly and soften shadows. You can also use white bedsheets or frosted shower curtains as alternatives.
You can modify the design by using hinges or bolts and wing nuts at the corners to allow the box to be folded flat. Another option is to use Velcro or magnets to easily disassemble the frame.
Yes! You can substitute power tools like a miter saw with a handsaw and miter box for cutting. You can also use glue or nails instead of pocket hole screws, although this might take longer and require more effort.
If you don't have professional lighting, you can use LED desk lamps, clip-on lights, or even household lamps. Position them outside the diffusion fabric to build a soft, even light effect inside the box.
Ensure that your light sources are evenly distributed around the box. Position lights on both sides, and consider placing one on top. Using multiple light sources reduces harsh shadows from a single direction.
If poster boards aren’t available, you can use white foam boards, cardboard, or thick fabric. These materials are easy to source and provide a clean, seamless background for photography.
This issue can be caused by interference between the light source and the camera’s shutter speed. Try adjusting the shutter speed, or use continuous lighting rather than flash to prevent flickering that might cause these lines.
Yes, by using lightweight materials like PVC pipes for the frame and attaching the fabric with Velcro, you can easily assemble and disassemble the lightbox, making it portable and compact for travel.
For larger items like t-shirts, consider building a box that's at least 24 inches wide, 24 inches deep, and 24 inches tall. Adjust the size based on the products or subjects you'll be photographing.
A lightbox offers controlled, even lighting specifically designed for small objects or product photography. While softboxes are great for larger areas, the enclosed environment of a lightbox ensures fewer shadows and consistent light across smaller subjects.


