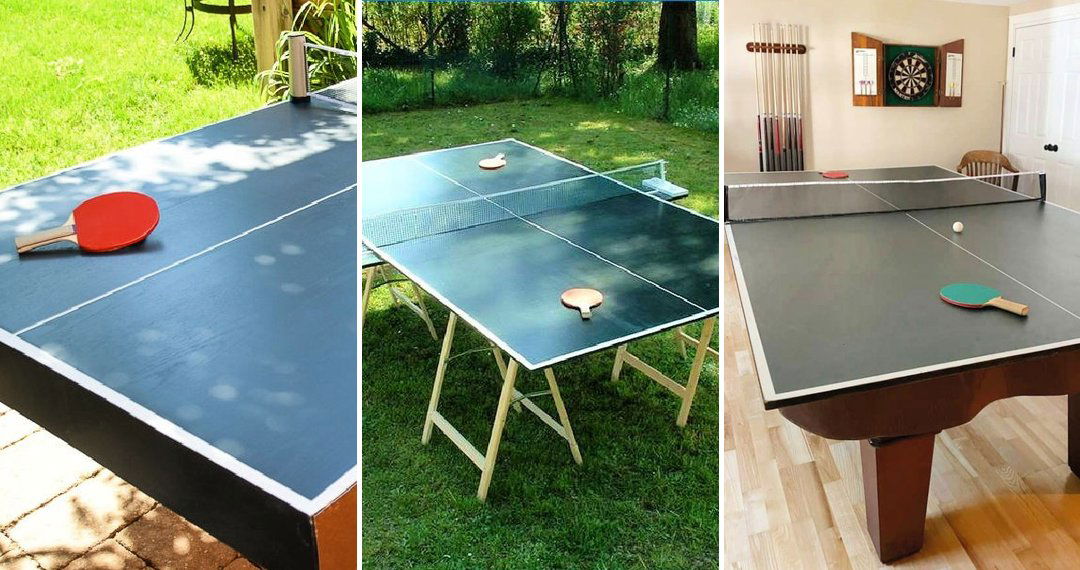
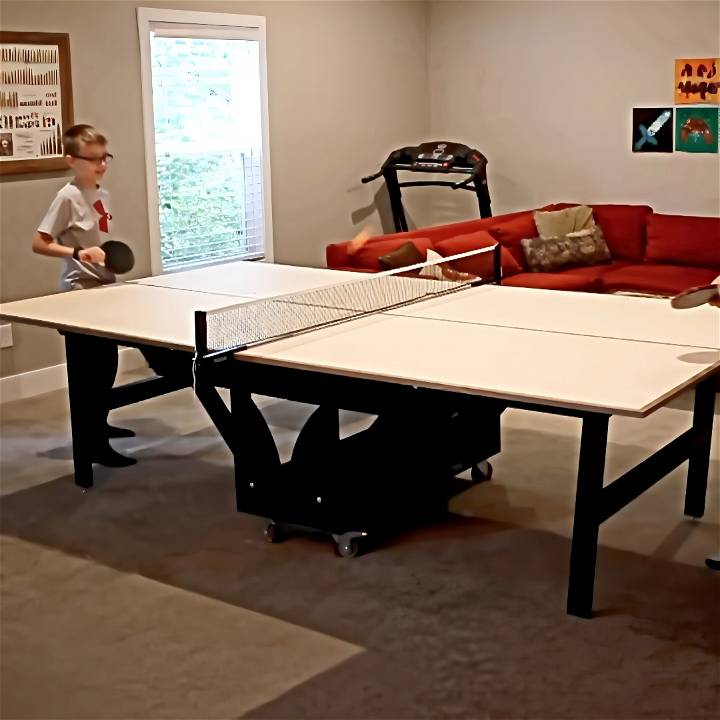
My journey into woodworking began with a cherished memory of my grandfather's neatly designed fold-up ping pong table, a testament to creativity and functionality that filled my childhood with joy. Decades later, inspired by nostalgia and a bit of a competitive streak with my son, I embarked on remaking this masterpiece. This is a step-by-step guide molded by my personal experience, aiming to simplify the woodworking process for you while integrating value with Google's Helpful Content Update principles.
Why This Project?
The essence of remaking my grandfather's ping pong table was not just about crafting a piece of furniture—it was about reigniting family traditions, engaging in a healthy competitive sport, and optimizing space with a foldable design. This project is perfect for anyone looking to build a multifunctional recreation piece that's both storage-efficient and a delightful family heirloom.
Materials and Tools Needed:
- Sheets of Plywood: The foundation of our table. Plywood is durable, affordable, and perfect for crafting a sturdy ping pong table.
- High Tooth Count Blade: For crisp, clean cuts through the plywood.
- Track Saw and Table Saw: Essential for managing the large sheets of plywood and ensuring precise cuts.
- Bandsaw and Belt Sander: For shaping and smoothing the folding mechanisms and legs of the table.
- Drill and Hole Saw: Necessary for making holes and rounded shapes in our components.
- Piano Hinge and Casters: The spine of our folding mechanism and the mobility feature of the table.
- Wood Glue, CA Glue, and Painters Tape: Bonds the pieces firmly with an aesthetically pleasing finish.
- Pocket Hole Jig: For strong, hidden joints.
- Clamps and Bessy Extenders: For secure gluing and assembling of parts.
- Leveling Feet: To adjust for floor variations and ensure a stable playing surface.
Step by Step Instructions DIY Ping Pong Table
Learn how to build a DIY Ping Pong Table with easy step-by-step instructions. Build a fun and affordable game setup at home today!
Step 1: Breaking Down Plywood
Convince your neighbor you're on a noble quest (or just purchase your materials), and begin by cutting the plywood into manageable sizes using a track saw and table saw. Replace the standard blade with a high tooth count blade to prevent splintering for smooth edges.
Step 2: Shaping Unique Components
The character of our ping pong table comes from its unique curves and folding features. Use a bandsaw for rough cuts, and refine with a belt sander. A drill press and hole saw come in handy for the rounded parts and holes needed for folding mechanisms.
Step 3: Constructing the Legs
The legs are the support system of our table. Building both inner and outer legs to bear the weight and maintain stability. Double laminate for thickness where needed, ensuring durability and long-term use.
Step 4: Assembling the Base
The base is where your woodworking skills shine. A combination of carefully measured cuts, pocket holes, and precise glue application is the key to a strong foundation. Make sure to check for squareness and adjust as necessary for a balanced structure.
Step 5: Putting Together the Playing Surface
Here's where precision matters most. Ensure the playing surface is perfectly flat and the joining edges align seamlessly. Apply the plywood edging for a polished look and solid borders to withstand intense games.
Step 6: Bringing the Pieces Together
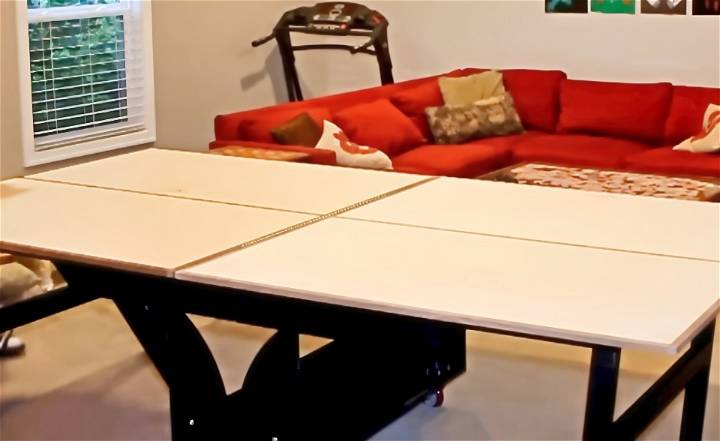
Attach the piano hinge to connect the two halves, ensuring the fold mechanism operates smoothly. Then, attach the legs, integrating the folding mechanism with a keen eye on alignment to guarantee the table stands firm when deployed.
Step 7: Finishing Touches
Sand any rough edges for a smooth finish, then apply primer and paint for protection and style. A matte polyurethane coat on the playing surface ensures durability without compromising on playability.
Testing and Enjoyment
The true test of craftsmanship is in the execution. With my wife's help, we set the table up for the first time. The joints, the folding mechanism, the balance… everything worked flawlessly. The satisfaction of seeing the table stand, fold, and unfold smoothly was unparalleled—a testament to the design and effort placed into this project.
Why Every Step Matters
Each step in this guide was crucial not just for building a ping pong table but for crafting a piece of history, a nexus of family memories, and a symbol of the bond between a grandfather, a father, and his son. This table wasn't just a DIY project; it was a journey. A journey that taught patience, precision, and perseverance.
Customization Ideas for Your DIY Ping Pong Table
Building a DIY ping pong table gives you the freedom to add a personal touch to your game. Here are some unique and practical ideas to customize your table and make it stand out:
Choose Your Color Scheme
Pick colors that reflect your style. Whether it's the vibrant hues of your favorite sports team or a sleek monochrome look, selecting the right colors can make your table a centerpiece.
Add a Personal Logo
Design a personal logo or decal for the center of the table. This could be your initials, a family crest, or a symbol that represents your love for the game.
Select a Surface Finish
Consider different surface finishes. A matte finish can reduce glare, while a glossy finish can give your table a professional sheen. You can also explore textured paints for added grip.
Install LED Lighting
For those who enjoy playing at night, LED lighting under the table or around the edges can enhance visibility and add an exciting flair to your matches.
Make a Foldable Design
If space is a concern, design your table to be foldable. This way, you can easily store it when not in use and set it up quickly for game time.
Accessorize
Add built-in holders for paddles and balls, ensuring everything you need is always within reach. You can also attach a scoreboard for a competitive edge.
Think About the Net
Upgrade the net by choosing a high-quality material or customizing its color. You can even make it adjustable for different levels of play.
Soundproofing
If noise is an issue, add soundproofing material underneath the table or around the playing area to minimize disturbance.
By incorporating these ideas, you not only enhance the look of your ping pong table but also improve the playing experience. Remember, the key is to build a table that reflects your personality and meets your needs.
Troubleshooting Common Issues
Building a DIY Ping Pong Table can be a rewarding project, but sometimes you might encounter issues along the way. Here's a guide to help you troubleshoot some common problems.
Warping or Bending of the Table Surface
Warping can occur due to moisture or uneven drying. To prevent this:
- Ensure the wood is completely dry before assembly.
- Store materials in a dry, flat area before use.
- Use a sealant appropriate for the material to protect against humidity.
Difficulty in Achieving a Flat Playing Surface
A flat surface is crucial for a good bounce. If you're struggling:
- Use a level during assembly to check the flatness.
- Adjust the legs or support structures to eliminate any wobble.
- Sand down any high spots on the surface.
Paint Problems
Issues with paint can affect the look and playability. To fix paint problems:
- Apply primer before painting to ensure even coverage.
- Choose paints specifically designed for sports equipment.
- Allow each coat to dry thoroughly before applying the next.
Net Installation Challenges
A sturdy net is essential for play. If you're having trouble:
- Ensure the net posts are securely attached to the table.
- The net should be taut and at the correct height.
- Consider adjustable net systems for ease of use.
Stability Concerns
A stable table prevents accidents and improves the game. To enhance stability:
- Use brackets or corner braces to reinforce connections.
- Check that all joints are tight and well-constructed.
- Opt for heavier materials for the base if the table feels too light.
By addressing these common issues, you can ensure your DIY Ping Pong Table is both functional and enjoyable. Remember, patience and attention to detail are your best tools in this project.
FAQs About DIY Ping Pong Tables
Get answers to all your questions about DIY ping pong tables in this comprehensive FAQ guide. Learn how to build, customize, and maintain your own table.
What materials do I need to build a DIY ping pong table?
To build a DIY ping pong table, you'll need a flat, sturdy surface like medium-density fiberboard (MDF) or plywood, at least half an inch thick. You'll also need supporting materials for the frame and legs, hardware for assembly, paint for the surface, and a net. It's important to choose materials that will provide a consistent bounce and withstand regular use.
How do I ensure my ping pong table has the correct dimensions?
A regulation ping pong table should measure 9 feet long, 5 feet wide, and 2.5 feet high. The net should stand 6 inches tall. Use a tape measure to ensure your materials are cut to the correct dimensions, and always double-check your measurements before assembling.
Can I build a foldable ping pong table for easy storage?
Yes, you can build a foldable ping pong table by incorporating hinges into the design. This allows you to fold the table in half for easy storage. Make sure the folding mechanism is secure and doesn't compromise the stability of the table when it's set up for play.
How can I customize my DIY ping pong table?
Customize your ping pong table by choosing a color scheme that suits your style, adding a personal logo or decal, and selecting a surface finish that enhances playability. You can also add LED lighting for night play, accessories like paddle holders, or even soundproofing materials if noise is a concern.
What maintenance does my DIY ping pong table require?
Regular maintenance for your ping pong table includes cleaning the surface to remove dust and debris, checking for any loose screws or hardware, and applying a sealant or protective cover when not in use to protect against humidity and prevent warping. Regular care will help extend the life of your table.
Conclusion
The DIY Ping Pong Table project stands as a testament to the connection between past and present, showcasing how woodworking can transcend being a mere hobby to become a conduit of family legacy. It serves as a reminder that in the hustle of modern life, taking the time to build something meaningful can bring immeasurable joy and fulfillment.
As I play ping pong with my son on our newly minted table, I'm not just passing on a family tradition; I'm instilling in him the values of creativity, resilience, and the joy of making something with your own hands—lessons that are far more valuable than any victory on the table.


