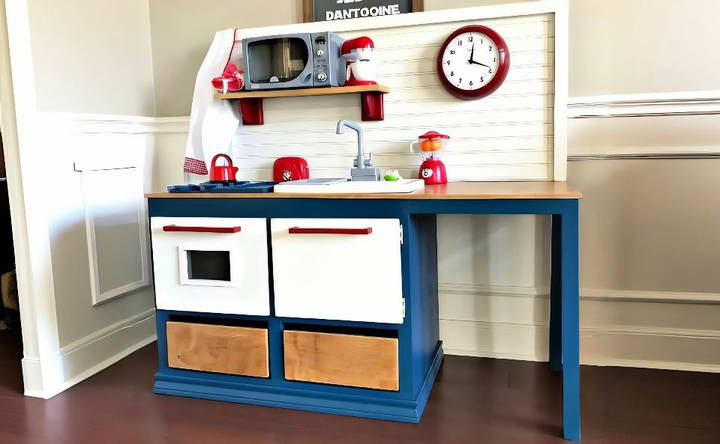
Building a DIY play kitchen for kids can be a fun and rewarding project. I recently built one for my little one, and the process was easier than I thought. I started with a simple design and gathered materials like wood, paint, and screws. The steps were straightforward, and I found that with a bit of patience, I could build something special for my child.
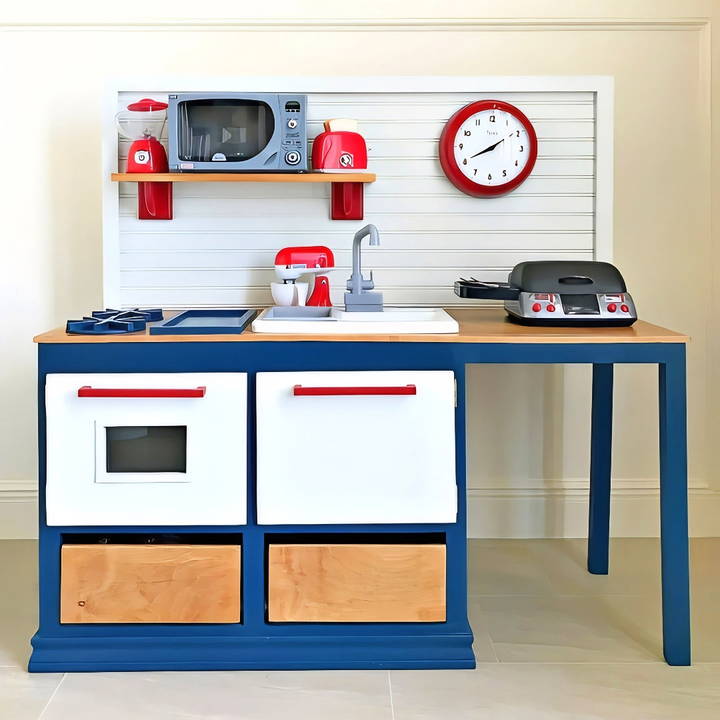
Making a DIY kid's kitchen isn't just about making a toy. It's about crafting something that brings joy and sparks creativity in children. Watching my child play and imagine cooking in their own kitchen was incredibly fulfilling. If you're thinking about starting your own project, I'm here to help you. This guide will make it simple and enjoyable for you to build.
Preparing the Materials
First things first, gathering the right materials is crucial. Here's what you'll need and why:
- 1/2 Plywood - For sides and shelves. Plywood is sturdy and easy to work with, making it ideal for the structure.
- 1x2 and 1x Dimensional Lumber - For face framing. These give the kitchen its shape and add to its durability.
- 2x2's Lumber - For the base. It provides a stable foundation for the play kitchen.
- Sandpaper (180 grit) - For smoothing the wood surfaces. It's essential for preparing the wood for painting or staining.
- Wood Filler - To fill in nail holes or imperfections. This ensures a smooth, professional finish.
- Glue & Brad Nails - For assembling the pieces together. A combination of these provides a strong bond.
- Paint/Primer - To finish your kitchen. Choose non-toxic products for safety.
Tools You'll Need
- Compound Miter Saw - For precise cuts on plywood and lumber.
- Kreg Jig R3 - For making pocket holes in joining pieces.
- Ryobi 18V Brad Nailer - Eases the process of nailing without a hammer.
- Ryobi 18V Drill - For drilling holes or driving screws.
- Arrow Staple Gun - Useful for attaching back panels or fabric.
Step by Step Instructions
Learn how to make a DIY play kitchen with our step-by-step guide. From cutting plywood to finishing touches, make the perfect play space for kids!
Step 1: Cutting the Plywood
The journey begins with cutting the 1/2" plywood into sides and shelves. I followed the dimensions provided in the YouTube video carefully, ensuring each piece was precise. This step is fundamental as it lays the groundwork for the entire kitchen.
Step 2: Sanding
Before assembly, I sanded down all plywood pieces to 180 grit. Sanding at this stage is easier since the pieces are separate and easier to handle. This step ensures that the surfaces are smooth for painting or staining later.
Step 3: Frame Assembly
Using the 1x2 and 1x dimensional lumber, I began assembling the frame. The face-framing defines the kitchen's appearance, so aligning everything correctly is vital. I used wood glue and brad nails for a sturdy build. It's fascinating to see the kitchen's shape coming together at this stage.
Step 4: Base Construction
The stability of the play kitchen hinges on a robust base constructed from 2x2's lumber. Following the video's guidance, I assembled the base ensuring it was level and sturdy. This foundation supports the entire kitchen, making it safe for my kids to play with.
Step 5: Adding Details
Then, I added the shelves, using glue and brad nails. Additional features like a sink, faucet, and stove were made from spare materials and thrifted items, following the innovative tips from the video. This step is where creativity comes into play, allowing for the personalization of the kitchen.
Step 6: Finishing Touches
After assembling, I filled any nail holes and gaps with wood filler, sanded the kitchen again, and then applied primer and paint. Choosing a bright, cheerful color made the kitchen inviting. The finish not only protects the wood but also makes it easy to clean.
Customization and Personalization
Designing a unique play kitchen for your child can be a fun project. Add personal touches to make it their own special place to play.
Choose a Theme That Sparks Joy
tart by thinking about what your child loves. Is it a certain color, a favorite cartoon character, or perhaps a dream of space exploration? Use these interests as a springboard for your theme. For example:
- Space Explorer Kitchen: Use silver and metallic paints, add star stickers, and maybe even a rocket ship oven door.
- Enchanted Forest Cooking Corner: Incorporate earthy tones, use leaves and flowers for decoration, and build a fairy-sized pantry.
Decorate with Decals and Stickers
Decals and stickers are an easy way to add character to the play kitchen without permanent changes. They come in all shapes and sizes, and you can switch them out as your child's interests evolve.
Incorporate Their Artwork
If your child loves to draw or paint, frame their artwork and hang it on the walls of the play kitchen. It's a wonderful way to showcase their creativity and make the space truly theirs.
DIY Knobs and Handles
Customize knobs and handles with bright colors or fun shapes. You can even repurpose old toys as knobs – for instance, using a small toy car as a handle for the fridge.
Let Them Help
Involve your child in the customization process. They can choose colors, help with painting, or decide where to place stickers. This not only personalizes the kitchen but also gives them a sense of ownership and pride in the final product.
Add Interactive Elements
Consider adding elements that they can interact with, such as:
- A Chalkboard Menu: Paint a section with chalkboard paint so they can write out the day's menu or draw their favorite foods.
- Fabric Food Items: Sew or buy fabric versions of common food items. These are safe, washable, and can be customized in any color or pattern.
Personalize your child's play kitchen to foster their imagination and individuality. Keep it fun, simple, and unique to them.
Safety Measures and Child-Friendly Design
When making a play kitchen for your little one, safety should be a top priority. Follow these guidelines to ensure that your play kitchen is both fun and safe:
Rounded Edges and Smooth Surfaces:
- Sand down any sharp edges or corners on wooden components. Children are curious and tend to explore with their hands, so smooth surfaces reduce the risk of cuts or bruises.
- Check all surfaces, including countertops, shelves, and stove areas, for splinters or rough spots.
Sturdy Base and Stability:
- Ensure that the play kitchen has a stable base. It should not wobble or tip over during play.
- If you're building a freestanding play kitchen, consider adding weight to the base (e.g., sandbags or heavy objects) to prevent accidental tipping.
Child-Safe Paints and Sealants:
- Use non-toxic paints and sealants for finishing touches. These are safe for children and won't release harmful fumes.
- Opt for water-based paints, as they dry quickly and are easy to clean up.
Secure Attachments:
- Attach handles, knobs, and doors securely. Loose components can pose a choking hazard.
- Use child-safe screws or nails to prevent accidental detachment.
Avoid Small Parts:
- Be cautious with small accessories like play food items. Ensure they are large enough that they cannot be swallowed.
- If you're adding buttons or knobs, choose ones that are too big to fit entirely into a child's mouth.
Heat-Free Appliances:
- If your play kitchen includes an oven or stovetop, make sure they don't generate heat. Children may touch or pretend to cook, and you don't want any accidental burns.
- Consider using painted or printed images to represent burners and oven dials instead of actual heat sources.
Child-Height Design:
- Adjust the height of countertops, sinks, and shelves to match your child's stature. They should be able to reach everything comfortably.
- Avoid placing heavy items or sharp objects within easy reach.
Regular Inspections:
- Periodically check the play kitchen for wear and tear. Tighten any loose screws or bolts.
- Look for signs of damage, such as peeling paint or splintered wood, and address them promptly.
A safe play kitchen fosters creativity while ensuring your child's safety. Follow these tips to build a fun, secure space for little chefs!
FAQs About DIY Play Kitchens
Discover the FAQs about DIY play kitchens. Get tips, materials, and step-by-step guides to build the perfect play kitchen for your child.
A DIY play kitchen is a miniature kitchen set designed for children to engage in imaginative play. It typically includes features like a stove, sink, refrigerator, and storage compartments. Building a DIY play kitchen can be a rewarding project because it:
Encourages creativity and pretend play.
Teaches basic life skills.
Allows customization to match your child's interests.
It can be budget-friendly compared to store-bought play kitchens.
Safety is crucial:
Smooth edges: Sand down any rough edges to prevent splinters.
Secure construction: Ensure stability and avoid wobbling.
Non-toxic materials: Use child-safe paints and finishes.
Child-sized: Make sure the height and size are suitable for your child.
Get creative! Consider adding:
Imaginary appliances: Draw or attach knobs, burners, and oven doors.
Sink and faucet: Use a small basin and a faucet made from PVC pipes.
Storage shelves: Add compartments for play food, utensils, and pots.
Hooks and pegs: Hang play towels, aprons, and utensils.
Absolutely! Here are some ideas:
Color scheme: Choose colors that match your child’s preferences.
Accessories: Add curtains, mini pots and pans, and even a chalkboard for menu planning.
Collaborate: Involve your child in the design process to make it truly special.
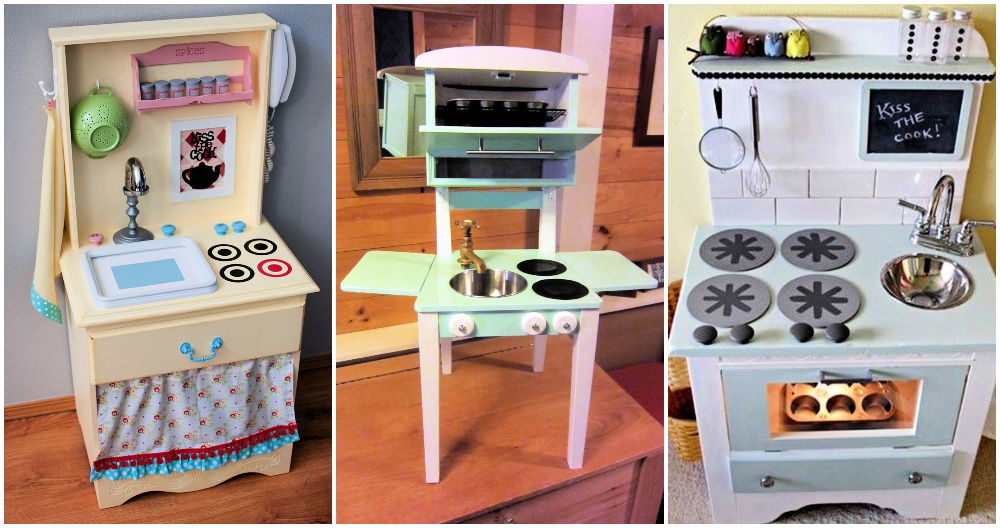
Absolutely! Repurposing old furniture is a fantastic way to build a unique play kitchen. Consider the following steps:
Select the Base Furniture: Look for old cabinets, side tables, or shelves that you no longer need. These will serve as the base structure for your play kitchen.
Clean and Prep: Clean the furniture thoroughly. Sand down any rough edges or surfaces. Remove any hardware that won't be part of the play kitchen.
Imagination Time: Visualize how the furniture can transform into a kitchen. Decide which part will be the stove, sink, and storage areas.
Cut and Modify: Use a saw or other appropriate tools to cut openings for the stove and sink. Build shelves or compartments for storage. You can also add a countertop using plywood or MDF.
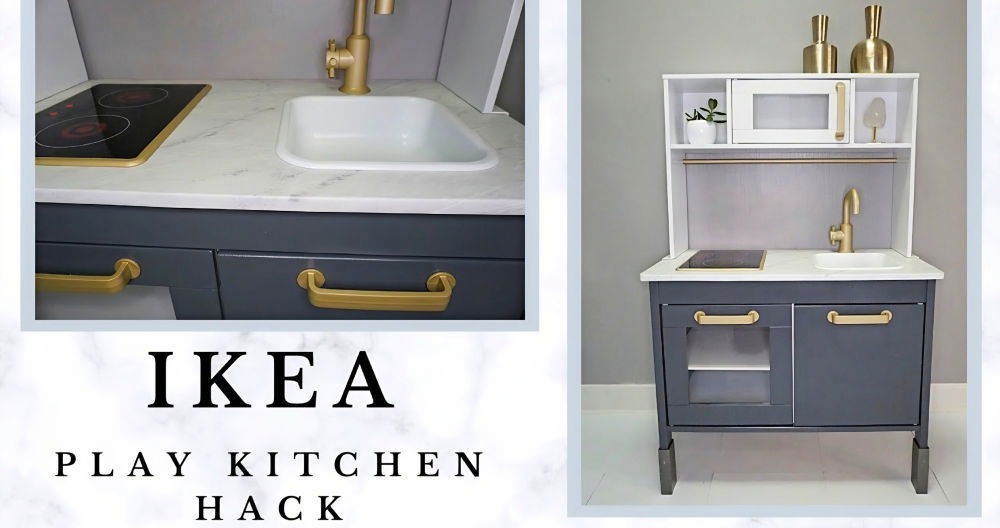
Paint and Decorate: Paint the furniture in fun colors. Add details like knobs, burners, and oven doors using paint or decals. Attach a small basin for the sink and build a faucet from PVC pipes.
Accessorize: Hang hooks for play utensils, attach pegs for towels, and consider adding curtains or fabric panels.
Final Thoughts
In conclusion, building a DIY play kitchen is a rewarding project that brings joy to both parents and kids. This diy kids' kitchen allows for creativity, hands-on learning, and endless playtime fun. With this simple guide, you'll have everything you need to build a custom play kitchen that will be cherished for years to come. Happy crafting!


