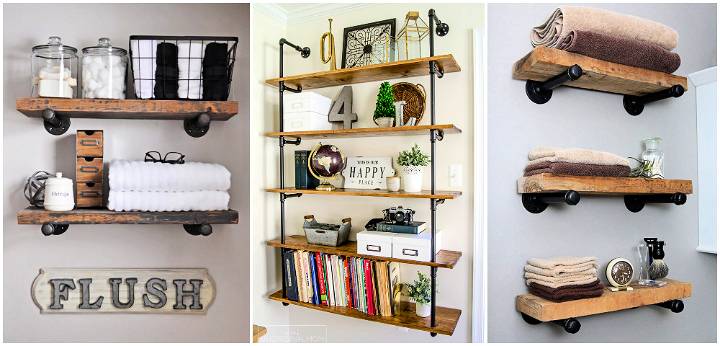
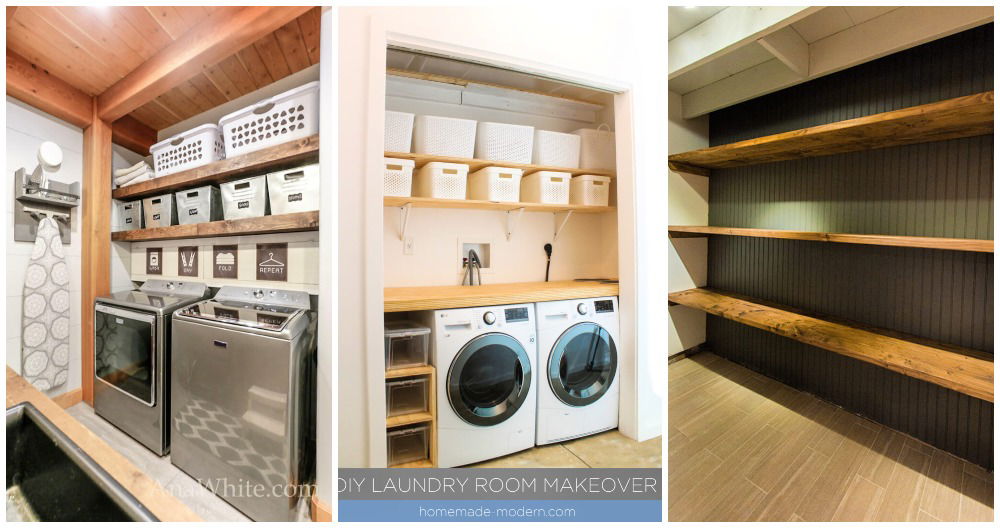
Building DIY pipe shelves is an excellent way to add a touch of industrial style to any room. These shelves are not only stylish but also practical and sturdy. With just a few materials like pipes, flanges, and wooden boards, you can construct shelving units suitable for various spaces. This project allows for personalization, making it perfect for showcasing your unique taste and needs.
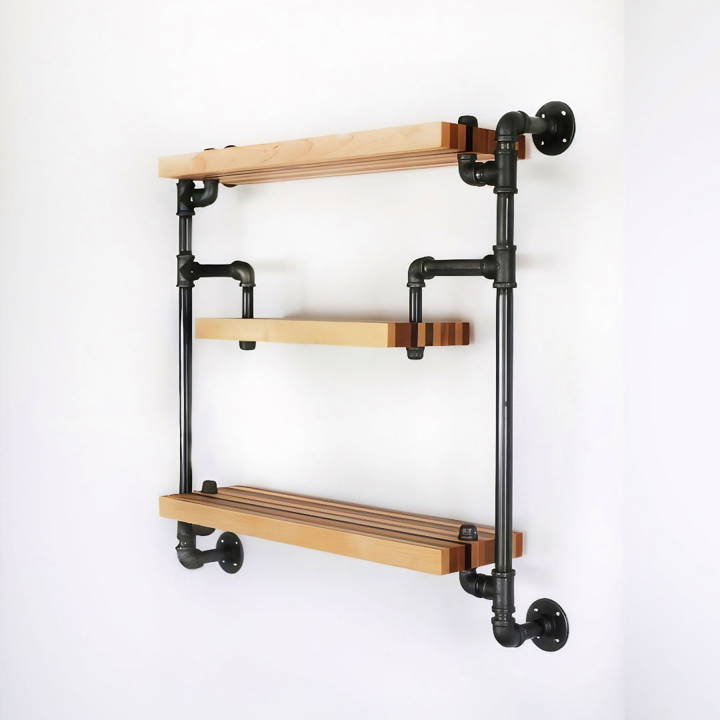
By making DIY industrial pipe shelves, you can save money and build a custom storage solution. The process is simple and straightforward, even for those with limited DIY experience. These shelves work well in living rooms, kitchens, or bedrooms. Follow these basic steps and tips for a successful project that fits seamlessly into your home decor.
Ready to put your skills to the test? Keep reading to explore detailed instructions and useful tips for making your very own DIY pipe shelves.
Gathering Materials
First things first: materials. Here's a breakdown of what I needed and why:
- Four Floor Flanges: These act as the base of the shelf, attaching it securely to the wall.
- Ten 90 Degrees Elbows and Six Tee Connectors: Essential for making the frame of the shelf.
- Two 16 Inches Nipples, Six 4 Inches Nipples, Eight 2 Inches Nipples, Eight 1 Inch Nipples: These various lengths allow for customization of the shelf size and fit.
- Six Pipe Caps: To safely cover the exposed ends of the pipes.
I appreciated the flexibility these materials offered, allowing for customization based on my space and design preferences.
Step by Step Instructions
Learn how to build DIY pipe shelves with our step-by-step guide, which includes assembling pipes, preparing wood, and finishing touches for a stylish home.
Assembling the Pipes
Starting with the two-inch nipples attached to the flanges, I began making the foundation that would extend the shelf from the wall. I was careful not to overtighten but to ensure everything was securely connected.
The great thing about DIY projects is the customization. For my shelf, I needed it to fit a specific space and look a certain way. Laying out the pipes and measuring everything meticulously was key. I learned that taking my time during this step saved me from headaches later on.
Preparing the Wood
Choosing the right wood was crucial. I opted for boards with a width of 15 centimeters, which was perfect for the space between the wall and the center of the pipe. After cutting, planing, and jointing the wood, I had boards of the perfect thickness and length.
Drilling the holes for the pipes to fit through was nerve-wracking. Each hole had to be precisely placed and the right size—slightly wider than the pipe to allow for a snug fit. To accommodate the flanges on the top board, I used a router to make recesses. This, I would say, was where patience really became my friend.
Finishing Touches
Sanding and finishing the boards was both calming and exciting. It's where your project really starts to look like the finished product. I applied a coat of polyurethane primer, sanded between coats, and then applied the varnish for that glossy finish.
Painting the pipes black transformed them from plain to industrial-chic. It's incredible how something as simple as spray paint can elevate the look of galvanized pipes.
Assembly and Installation
Putting it all together felt like the culmination of a journey. Sliding the boards onto the pipes and securing them with the caps was the moment of truth. And then, the final step: mounting the shelf on the wall. Drilling pilot holes, screwing in one corner, and making sure everything was level before securing the rest felt like a dance. A dance that, thankfully, resulted in a beautifully mounted pipe shelf.
Design Customization
When it comes to making DIY galvanized pipe shelves, the beauty lies in the ability to tailor them to your personal style and space requirements. Here's how you can customize your design to make a statement piece that's both functional and stylish.
- Choose Your Aesthetic: Start by deciding on the overall look you want to achieve. Whether you're going for an industrial vibe, a modern minimalist look, or a warm rustic feel, the design of your shelves can be adapted to suit your taste.
- Selecting Pipe Finishes: Galvanized pipes come in various finishes. You can keep the original silver-grey color for an industrial edge or paint them in black or bronze for a more refined appearance. For a unique touch, consider using copper pipes for a pop of color and elegance.
- Wood and Stain Options: The type of wood you choose for your shelves will greatly impact the final look. Reclaimed wood can add character and history to your room, while hardwoods like oak or maple provide a sleek and clean look. Stain the wood to match your decor or leave it natural for a more organic feel.
- Shelf Configurations: Think about the layout of your shelves. You can design them to fit into corners, extend across entire walls, or even build a freestanding unit. Play with the number of shelves and spacing between them to find the perfect balance for your items.
- Functional Additions: Consider the practicality of your shelves. Add hooks underneath for hanging items, or incorporate a magnetic strip to hold tools. If you're using the shelves in a kitchen or bathroom, think about adding a towel bar or a built-in soap dish.
- Accessorize: Once your shelves are installed, accessorize them with items that reflect your personality. Plants, books, and artwork can all add life to your shelves. Use decorative containers to hide clutter and maintain a clean look.
Use these design options to build storage that reflects your style and meets your needs. Aim for a functional and enjoyable space. Keep it simple and add your personal touch!
FAQs About DIY Galvanized Pipe Shelves
Discover all you need to know about DIY galvanized pipe shelves with our comprehensive faqs. Tips, materials, and installation guide!
DIY galvanized pipe shelves are quite sturdy and can typically hold up to 150lbs. However, the actual weight capacity may vary based on the wall material, the size of the pipes, and how well the shelves are installed.
Absolutely! You can decide the length, width, and number of shelves based on your needs and space availability. Just ensure that the pipes and wooden boards are cut to your desired dimensions before assembly.
For secure installation, make sure to anchor the floor flanges properly into the wall studs or use appropriate wall anchors for your wall type. This will provide the necessary support for the weight of the shelves and their contents.
Galvanized pipe shelves are low maintenance. Dust them regularly and check the tightness of the pipe fittings periodically. If you notice any rust, you can lightly sand the area and apply a metal primer and paint to prevent further corrosion.
When selecting wood for your galvanized pipe shelves, consider the weight the shelves will carry and the aesthetic you desire. Hardwoods like oak or walnut are durable and have a rich look, but are more expensive. Softwoods like pine are more affordable and easier to work with, but may not hold up as well under heavy use. For a balance of cost and durability, consider plywood or reclaimed wood, which can also add character to your shelves.
My Reflections
In conclusion, These DIY pipe shelves for any room offer a blend of style and functionality that can enhance any space. These DIY pipe shelves are perfect for adding a modern, industrial touch to your home.


