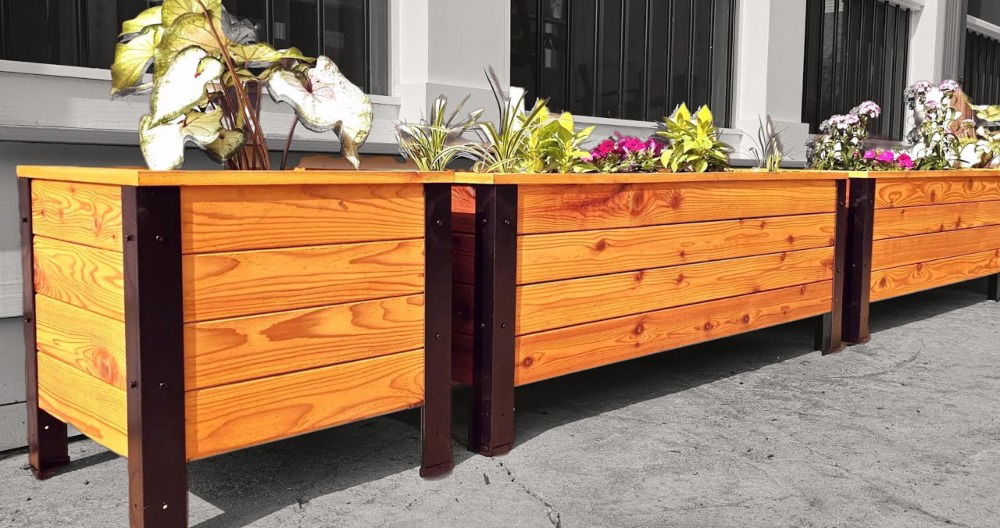
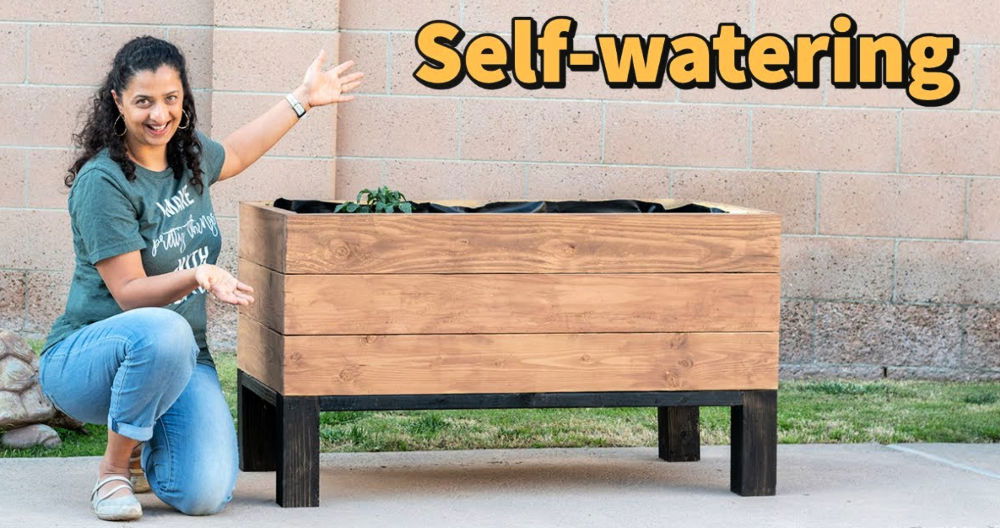
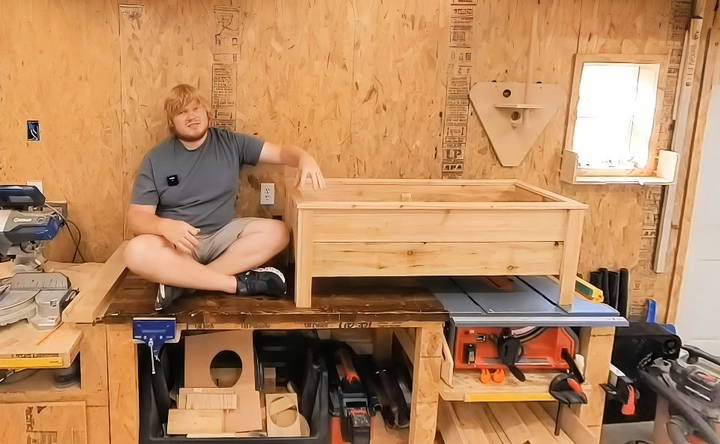
Building a DIY cedar planter box is a great project for garden enthusiasts. This guide outlines clear and simple steps to build a beautiful and functional cedar planter box. These cedar planter box plans are easy to follow and include all necessary materials and measurements. Making your own planter allows customization to fit your garden's specific needs and style.
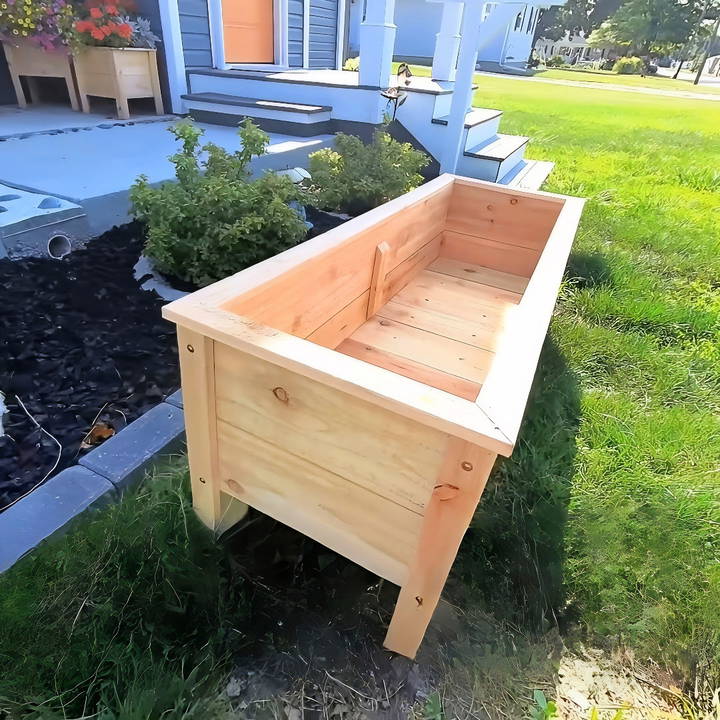
Learn how to build a cedar planter box with these detailed instructions. The process involves basic woodworking skills and can be a fun weekend project. Using DIY cedar planter box plans ensures accuracy and helps you avoid common mistakes.
Ready to enhance your garden? Explore the steps in the next section for all the details you need.
Materials and Their Purpose
First off, let me list the materials I gathered, based on the video's recommendations:
- Cedar Pickets: I chose cedar for its durability and resistance to rot and pests, perfect for outdoor conditions. I needed seven pickets in total.
- Table Saw and Miter Saw: Crucial for cutting the pickets to the correct size.
- Drill, Glue, and Nail Gun: For assembling the pieces securely.
- Bostitch 18 Gauge, One-Inch Nails: Optimal length to avoid piercing through both boards.
- Titebond 3 Ultimate Glue: A waterproof exterior glue, ensuring longevity.
- Square and Pencil: For accuracy in aligning and cutting.
- GRK One and a Half Inch Cabinet Screws: To reinforce the legs.
Step by Step Instructions
Build your own cedar planter box with our step-by-step guide. From setup to final touches, learn how to build a beautiful DIY planter.
Setting Up
After watching the tutorial and noting the dimensions, I began by cutting the staples off the barcode ends of the pickets and ensuring ends were at perfect right angles. The preciseness at this stage is crucial for the overall stability of the planter box.
Cutting to Size
Using the table saw, I set the blade height to just above the picket's thickness and ripped them into three equal strips for the legs and top lip, as recommended. It was fascinating to see how adjusting the saw to just under 1 and * ¾ inches meant I could achieve uniform strips, a trick I wouldn't have thought of on my own.
Assembling the Frame
I cut the two ripped-down pieces to 16 inches for the legs at the miter saw, ensuring the good side of the wood was facing outwards. Applying the waterproof glue and aligning the leg with the cuts of the long boards was a delicate process that taught me the importance of precision. The glue's role wasn't just adhesive but also for water-sealing the joints.
Adding the Sides
For the sides of the planter box, I cut four pickets to 44 inches long and then two to 12 and three-quarters inch. This step required attention to detail, ensuring all sides matched up perfectly for a snug fit.
Bottom Boards and Ledger Support
This step involved more cutting, ensuring we had enough bottom boards to cover the length of the planter. Using the long side as a guide for the support lengths was a clever trick, making me appreciate the foresight needed in woodworking.
Final Touches
Building the drainage holes was something I hadn't considered initially. Drilling them about two inches from the sides ensures the water has time to be absorbed by the soil rather than draining straight through – a crucial tip for the health of the plants.
For the top lip, measuring the box's assembled width led to precise cuts for a snug fit, finishing off the project neatly.
Customization Ideas for Your Cedar Planter Box
Building a cedar planter box is not just about functionality; it's also an opportunity to add a personal touch to your garden. Here are some customization ideas to make your cedar planter box uniquely yours:
Choose Your Style
- Traditional: Stick with a classic rectangular shape, or try a square for a more symmetrical look.
- Modern: Opt for clean lines and geometric shapes like triangles or hexagons for a contemporary feel.
Add Some Color
- Stain: Apply a wood stain to enhance the natural grain of the cedar and give it a richer color.
- Paint: Select outdoor-friendly paint in a color that complements your outdoor space.
Functional Add-Ons
- Trellis: Attach a trellis to the back of your planter box for climbing plants like ivy or roses.
- Wheels: Add casters to the bottom for easy mobility, especially if your planter is large or heavy.
Decorative Elements
- Carvings: Personalize your planter with simple carvings, such as your initials or a favorite symbol.
- Mosaic Tiles: Adorn the sides with mosaic tiles for a splash of color and artistry.
Practical Touches
- Drainage Holes: Ensure proper drainage by drilling holes in the bottom of your planter box.
- Liner: Use a landscape fabric liner to protect the wood and retain the soil.
Accessorize
- Plant Markers: Make DIY plant markers from popsicle sticks or small stones to label your herbs or flowers.
- Lighting: Integrate solar-powered lights to illuminate your planter box at night.
The key to a successful DIY project is to make it your own. These ideas are just a starting point—feel free to mix, match, and modify them to suit your taste and needs.
Troubleshooting Common Issues with Cedar Planter Boxes
When crafting your cedar planter box, you might encounter a few hiccups along the way. Here's a straightforward guide to solving some common issues:
Wo od Splitting
- Cause: Often due to drilling too close to the edge or using screws that are too large.
- Solution: Pre-drill holes to prevent splitting, and choose screws appropriate for the wood thickness.
Poor Drainloration
- Cause: Cedar can change color over time due to weather exposure.
- Solution: Apply a sealant designed for cedar wood to protect its natural hue.
Planter Box Warping
- Cause: Fluctuations in moisture and temperature can cause the wood to warp.
- Solution: Use thicker wood for more stability and ensure all sides are evenly exposed to the elements.
Insect Infestation
- Cause: Even though cedar is naturally resistant to insects, infestations can still occur.
- Solution: Regularly inspect your planter and treat with a natural insect repellent if necessary.
Loose Joints
- Cause: Over time, the joints of your planter box may loosen.
- Solution: Tighten any screws or bolts. If needed, reinforce the joints with corner brackets.
Mold or Mildew Growth
- Cause: Excess moisture and poor air circulation can lead to mold.
- Solution: Improve air circulation around your planter and consider using a mold inhibitor when constructing it.
By anticipating issues and addressing them, your cedar planter box will look great and last for years. Regular maintenance is crucial for DIY project longevity.
Maintenance and Care Tips for Cedar Planter Boxes
Cedar planter boxes are a beautiful and durable choice for gardeners. To ensure they last many seasons, here are some maintenance and care tips:
Regular Cleaning
- Gentle Wash: Use a soft brush and mild soap to clean your planter box. Rinse with water and let it dry completely.
- Avoid Harsh Chemicals: Strong cleaners can damage the wood. Stick to natural or gentle products.
Wood Treatment
- Sealing: Apply a sealant every few years to protect the cedar from moisture and UV rays.
- Oiling: For a natural finish, use a wood oil that's safe for plants and soil.
Inspection
- Check for Damage: Look for cracks, splits, or loose joints. Repair them promptly to prevent further damage.
- Monitor for Pests: Cedar is naturally pest-resistant, but it's still good to check for signs of insects.
Soil Care
- Refresh Soil: Replace or refresh the soil annually to provide nutrients for your plants.
- Proper Drainage: Ensure the drainage holes are clear to prevent waterlogging.
Winter Care
- Storage: If possible, store your cedar planter box indoors or under a cover during harsh winters.
- Insulation: Wrap the planter in burlap or a frost blanket to protect it from extreme cold.
Plant Health
- Rotate Plants: Change the plants seasonally to prevent soil depletion and diseases.
- Prune Regularly: Keep your plants healthy by pruning dead or overgrown branches.
By following these simple tips, you can enjoy a robust and thriving cedar planter box that enhances your garden year after year.
FAQs About DIY Cedar Planter Box
Discover FAQs about DIY cedar planter box: get expert tips, step-by-step instructions, and answers to common questions on building your cedar planter.
Proper drainage is crucial for plant health. To ensure this, drill several holes in the bottom of your planter box. You can also build an air space between the wood and the soil by using fabric grow bags inside the box, which allows water to drain freely without soaking the sides.
The size of your cedar planter box will depend on the space available and the types of plants you want to grow. A larger box can accommodate bigger plants or multiple small plants. It’s important to consider the depth as well, especially if you plan to grow deep-rooted plants.
Absolutely! Cedar planter boxes can be tailored to your style and skill level. Simple designs are great for beginners, while more experienced woodworkers might add intricate details. You can also apply different finishes to match your outdoor decor.
Cedar is naturally rot-resistant, making it low-maintenance. However, to prolong its life, you can treat it with a wood sealant. Regularly check for any loose screws or damage, and clean out the box between planting seasons to prevent disease.
Cedar wood is naturally weather-resistant, but to further protect your planter box from harsh elements, consider applying a water-repellent finish or a wood stain with UV protection. This will help maintain the wood's appearance and prevent it from graying over time. Additionally, during extreme weather conditions, such as heavy rain or snow, you can move the planter box to a covered area to prevent waterlogging or damage.
Reflections
Wrapping up, constructing your very own DIY cedar planter box with free plans can be a rewarding project. The cedar planter box plans provided offer step-by-step guidance to ensure your success. Enjoy making a beautiful and functional DIY cedar planter box for your garden.


