Building a cheap DIY above-ground pond can transform your outdoor space without breaking the bank. This simple guide will explain everything you need to know about building an affordable, above-ground pond. You'll learn about the materials required, step-by-step instructions, and helpful tips to make your project successful. Making your own pond not only saves money but also gives you a sense of achievement.
Building a DIY above-ground pond is easy and enjoyable. Whether you have a small yard or a larger garden, an above-ground pond can be a great addition. This guide will help you understand the essential steps, how to manage costs, and how to maintain your pond long-term.
Stay motivated and ready to dive into the details in the next section for more advanced tips and tricks.
Planning and Preparations
Before diving headfirst into the construction, I needed to clear out the old setup. The existing pond served me well for almost three years, but it was time for an upgrade. After ensuring my goldfish had a safe temporary home in an above-ground mini pond, I set to work on dismantling the old pond. This included relocating the plants I intended to reuse.
Materials Needed
- 1,000-liter Laguna tub: Chosen for its size and durability, it offered nearly double the volume of my old pond.
- Building sand and bricks: Essential for making a stable base and insulation for the pond.
- Insulation boards: To keep the water temperature regulated.
- Decking boards: For aesthetic cladding around the pond.
Each material was selected with a purpose. The Laguna tub was sturdy and able to withstand the elements. The sand and bricks provided a leveled ground and insulated base, preventing cold from seeping in during the winter. Insulation boards added an extra layer of temperature control, and the decking boards offered a natural look that blended with my garden's aesthetic.
Step by Step Instructions
Discover easy, affordable steps to build a DIY above-ground pond. From excavation to installation, follow our guide for a stunning backyard pond.
Step 1: The Excavation
The first step was to measure and mark where I needed to cut the deck to lower the pond into the ground. This was a crucial step; accuracy here meant a seamless fit for the pond. After cutting and removing the deck pieces, I patched up any gaps and prepared the ground, ensuring it was level.
Step 2: Building a Base
With the ground ready, I spread building sand to provide a cushion for the pond. This helped me adjust the level more finely and added a bit of insulation. Bricks were then laid out to mark the boundary and support the insulation material.
Step 3: Installation and Insulation
The Laguna tub was maneuvered into place, taking extra care to ensure it was perfectly level. Surrounding the base with bricks wasn't just for support; it was a preparation for the insulation boards that wrapped around the pond, providing necessary warmth during colder months.
Step 4: Cladding
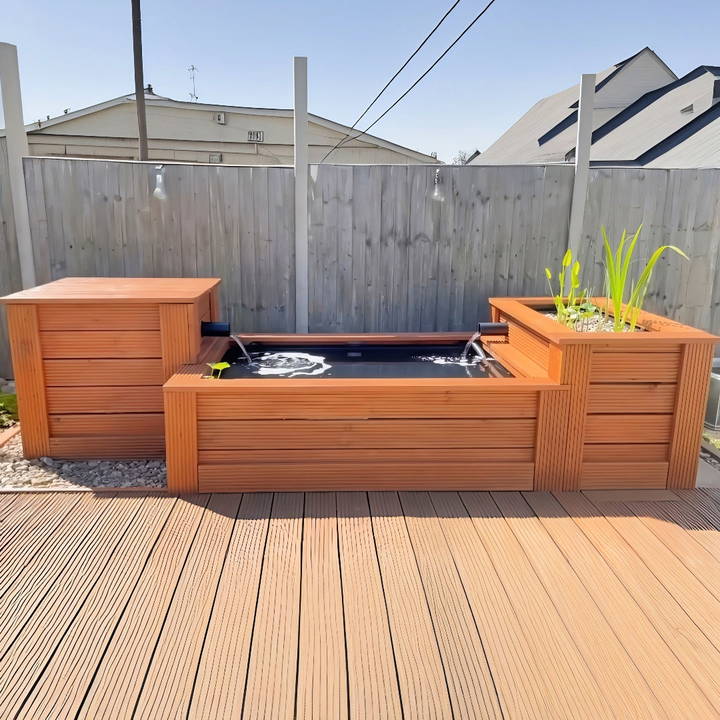
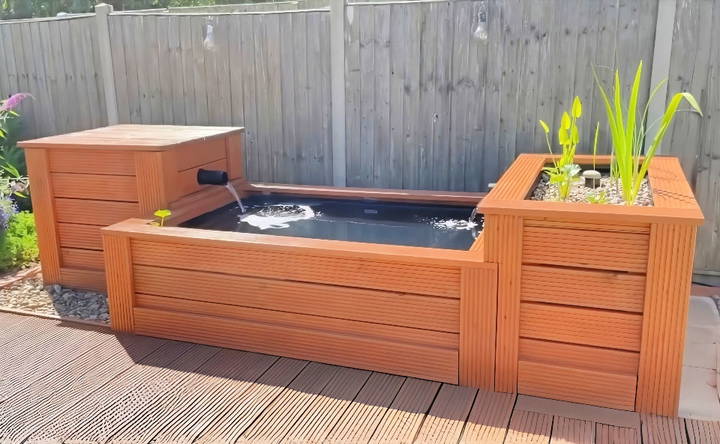
Using decking boards, I buildd a frame that fit snugly around the pond, not only for aesthetics but also to cover the insulation, offering a polished look. The notches at the top allowed for tubing and electrical cords to pass through without compromising the design.
Filtration System
No pond is complete without a proper filtration system. For mine, I chose a dual approach: one focusing on mechanical filtration and the other on biological filtration.
- Mechanical Filter: I repurposed a 240-liter wheelie bin as a DIY mechanical filter, ensuring the water would be pumped in from the bottom and rise through various filter media before overflowing back to the pond.
- Biological Filter: A sturdier build, this involved another large container filled with rock and gravel. The water would pass through this media, fostering beneficial bacterial growth that naturally cleanses the water.
Common Challenges and Solutions
Building a DIY above-ground pond can be a rewarding project, but it's not without its challenges. Here are some common issues you might face and practical solutions to overcome them:
Uneven Ground
- Solution: Use shims or adjustable supports to level the frame of your pond. Ensure the top edge is even to maintain a consistent water level.
Material Selection
- Solution: Choose durable materials like EPDM rubber or PVC for your pond liner. These are resistant to punctures and can handle the weight of the water.
Weather Conditions
- Solution: If you live in an area with cold winters, consider insulating your pond or using a pond heater to prevent freezing. In hot climates, provide shade to reduce algae growth.
Structural Integrity
- Solution: Reinforce your pond's structure with strong brackets and screws, especially if you're using wooden frames. This will help withstand the water pressure.
Maintenance
- Solution: Set up a routine to check and clean your pond regularly. Use a net to remove debris and a filter to keep the water clear.
Algae Control
- Solution: Balance sunlight exposure and add aquatic plants that compete with algae for nutrients. Regularly monitor and adjust water chemistry as needed.
Wildlife Interference
- Solution: Protect your pond from birds and other predators with netting or decoys. Choose non-invasive plants to maintain the local ecosystem.
Legal Restrictions
- Solution: Before starting your project, check local regulations regarding water features. Obtain any necessary permits to avoid legal issues.
Prepare for challenges and solutions to build a beautiful, functional above-ground pond. Patience and planning are key to any DIY project.
Legal and Safety Guidelines
When embarking on the construction of a DIY above-ground pond, it's essential to be aware of the legal and safety guidelines to ensure a smooth and compliant project. Here's a comprehensive section that covers these aspects:
- Understanding Local Regulations: Before you start building, check with your local council or zoning office about any regulations or permits required for water features. Some areas may have restrictions on the size, depth, or location of ponds.
- Securing Necessary Permits: If permits are needed, submit detailed plans and wait for approval before beginning construction. This step is crucial to avoid fines or having to dismantle your pond later on.
- Choosing the Right Location: Select a spot away from underground utilities and large tree roots. Ensure the area has access to an electrical source for pumps and filters, and avoid low-lying areas that may flood.
- Safety First: Install a Ground Fault Circuit Interrupter (GFCI) outlet to power your pond's electrical components. This will help prevent electrical shocks and is often a legal requirement.
- Child Safety: If there are children in your household, consider installing a fence or barrier around the pond to prevent accidental falls.
- Wildlife Protection: Use materials and plants that are safe for wildlife. Avoid introducing invasive species that could harm the local ecosystem.
- Structural Integrity: Ensure your pond is built with sturdy materials and proper construction techniques to prevent collapses or leaks.
- Regular Inspections: Once your pond is complete, inspect it regularly for any structural issues or safety hazards. Promptly repair any damage to maintain a safe environment.
By following these guidelines, you can build a beautiful and safe above ground pond that complies with legal requirements and provides a serene retreat in your garden.
FAQs About Cheap DIY Above-Ground Pond
Discover FAQs about cheap DIY above-ground ponds: cost-effective tips, materials, and maintenance advice for making your own backyard oasis.
When constructing your pond on uneven ground, use shims or bricks to adjust the height of the frame. Ensure the top of the wood frame is level so that the water line will be even. You may need to dig slightly or elevate one side to achieve this.
Yes, you can create a no-dig pond by constructing a raised garden bed frame and using a pond liner. This method is less labor-intensive and can be a great option if you want to avoid digging into your yard.
For most backyard ponds, a depth of 18 to 24 inches (45 to 60 cm) is recommended. This depth supports a variety of pond plants and fish, if desired, and helps maintain a stable temperature in the pond.
Maintaining your pond involves:
Regularly checking and cleaning the pond filter and pump if installed
Removing debris like leaves and twigs
Monitoring water levels and topping up as necessary
In winter, consider using a pond de-icer to prevent the surface from completely freezing over.
To safeguard your pond from wildlife and pets, consider the following measures:
Install a sturdy cover such as a wire mesh or grill that allows water to pass through but keeps animals out.
Use pond netting to prevent birds from fishing in your pond.
Elevate the pond with a higher frame to deter small animals and pets from accessing it.
Plant shrubbery around the pond to build a natural barrier.
Motion-activated sprinklers can deter larger animals without causing harm.
Finishing Touches
In conclusion, building a cheap DIY above-ground pond can be a rewarding project that enhances your outdoor space. With the right materials and steps, building an above-ground pond is both affordable and straightforward. Start your project today and enjoy the calming presence of water in your garden.


