Building a fun and functional space for your cat can be an incredibly rewarding project. One fantastic option is to build your own cat shelves, which give your cat vertical space to explore, lounge, and play. In this comprehensive guide, we will take you through the process of building DIY cat shelves, inspired by the experiences of a passionate cat owner who build her own after some trial and error. Whether you're an experienced DIY-er or new to the craft, this guide will help you design a unique and enjoyable climbing space for your feline friend.
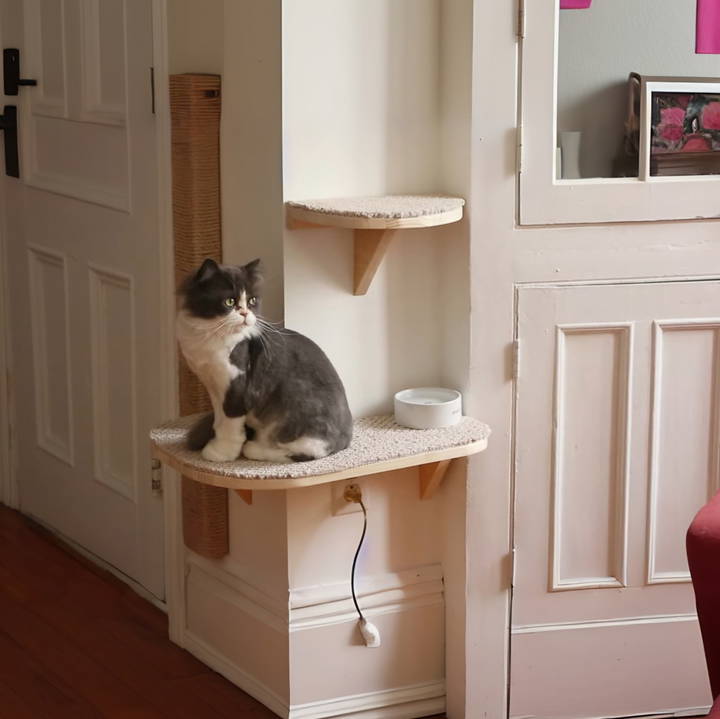
Why Build Cat Shelves?
Cats love climbing and observing their surroundings from high perches. Shelves allow your cat to engage in their natural behaviors like climbing, jumping, and lounging in elevated spots. These shelves not only provide your cat with physical exercise but also help stimulate their mind by giving them a variety of environments to explore. Additionally, they can free up floor space in your home and integrate seamlessly into your decor.
By building DIY cat shelves, you can build a custom space tailored to your cat's preferences, which can lead to a happier and more active feline companion.
What You'll Need
Before getting started, here's a list of materials and tools you'll need to build your own cat shelves:
Materials:
- Wood planks or boards: Choose a sturdy wood like pine or oak for your shelves.
- Sisal rope: For wrapping around some shelves to build scratching surfaces.
- Carpet: To add a non-slip surface for your cat to climb on.
- Brackets and screws: Heavy-duty wall brackets to support the shelves.
- Wood glue: For extra stability and attaching carpet or sisal to wood.
- Wall anchors: If attaching to drywall without studs.
Tools:
- Jigsaw or saw: For cutting the wood into shelf shapes.
- Drill: To make pilot holes and attach brackets.
- Sander or sandpaper: To smooth the edges of the wood.
- Hot glue gun: For securing sisal rope or carpeting.
- Measuring tape: To measure spaces and ensure symmetry.
- Pencil: To mark your measurements.
- Level: To ensure shelves are even.
Step by Step Instructions
Learn how to build DIY cat shelves with our step-by-step guide. From planning to installation, make your home cat-friendly with ease and safety in mind.
Step 1: Planning the Design
Begin by assessing the space where you'd like to install the shelves. Consider how high you want the shelves to go and the distance between each shelf. Keep in mind that cats need space to jump between the levels, but the shelves shouldn't be too far apart, especially for older or less athletic cats. The design should allow your cat to climb up and down comfortably.
In the case of the DIY enthusiast in the source project, their goal was to turn a bare corner into a vertical climbing space. Initially, they tried to build wall scratchers, but this design didn't work out well for the cat to climb easily. Instead, they pivoted to designing shelves at angles that the cat could navigate more naturally.

Step 2: Cutting the Shelves
Once you have your design mapped out, it's time to cut the wood. Measure the width and depth you want for your shelves. As a general rule, the shelves should be at least 12 inches deep to give your cat ample space to rest. You can use a jigsaw or any saw to cut the wood to size.
For a more polished look, consider cutting the shelves into rounded shapes. This helps avoid sharp edges and gives the shelves a sleek, modern appearance. Sand down any rough edges to ensure the surface is smooth and safe for your cat.
In our DIY example, the creator experimented with different shapes and found that round edges worked best, both for aesthetics and cat comfort.
Step 3: Wrapping Shelves with Sisal Rope and Carpet
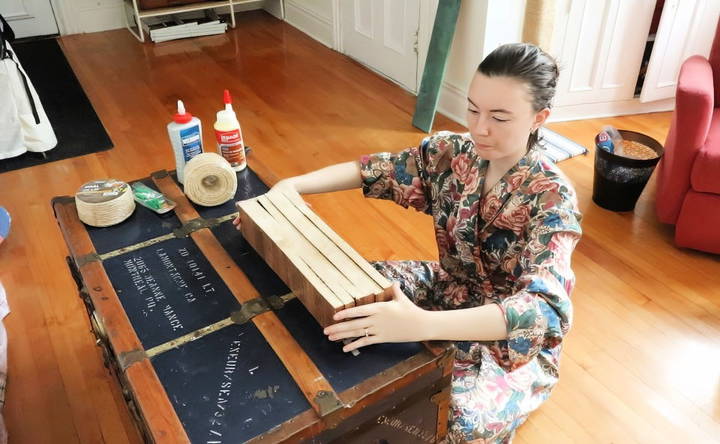
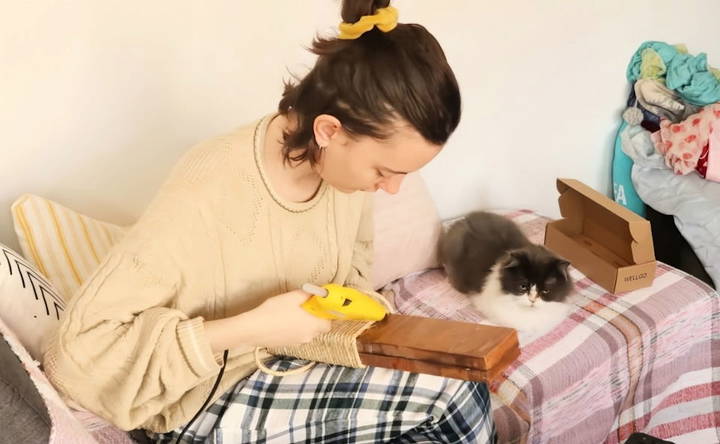
To provide your cat with a scratch-friendly surface, wrap some shelves in sisal rope. This helps encourage your cat to climb and also gives them a spot to sharpen their claws. Use a hot glue gun to secure the rope, making sure it is tightly wrapped so that it stays in place.
For other shelves, apply carpet to prevent slipping when your cat jumps. You can purchase small carpet remnants or use leftover pieces from a previous project. Attach the carpet with wood glue or hot glue, ensuring it is well-secured and covers the surface of the shelf. Be sure to let the glue dry fully before allowing your cat to test the shelves.
The creator in the transcript faced challenges when trying to find the right color and quantity of carpet, but after some help from a friend, they were able to get leftover carpet for free, which worked perfectly.
Step 4: Installing the Shelves
Now comes the critical part—attaching the shelves to the wall. It's essential to use sturdy brackets and ensure the shelves are securely fastened to the wall, as they will need to hold your cat's weight.
Use a drill to make pilot holes in both the shelf and the wall where the brackets will be installed. If you're drilling into drywall, make sure to use wall anchors to prevent the screws from pulling out under the weight of the shelf and your cat.
You'll also want to use a level to make sure each shelf is even. Having shelves that are slanted or uneven could discourage your cat from using them, or worse, make them unsafe.
In the transcript, the creator made sure to pre-drill holes and used glue along with screws to reinforce the shelves, ensuring they could support the cat's weight safely.
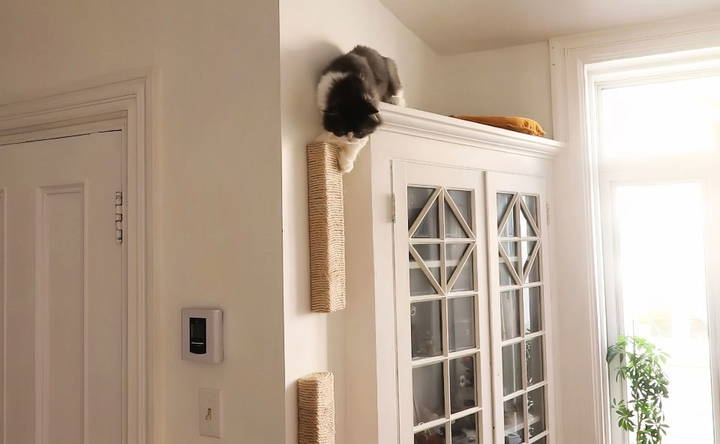
Step 5: Building a Cat-Friendly Pathway
Once your shelves are installed, think about how your cat will navigate the space. Place the shelves at varying heights so that your cat can hop from one to another. If you want your cat to reach a higher perch or area, make sure the shelves form a pathway that allows them to climb up easily and come back down safely.
If your shelves don't connect in a logical way, your cat may avoid them or find them difficult to use. For example, in the transcript, the creator initially made shelves that were too steep and difficult for the cat to climb. After observing the cat struggle, they revised the setup and added wider shelves that the cat could comfortably navigate.
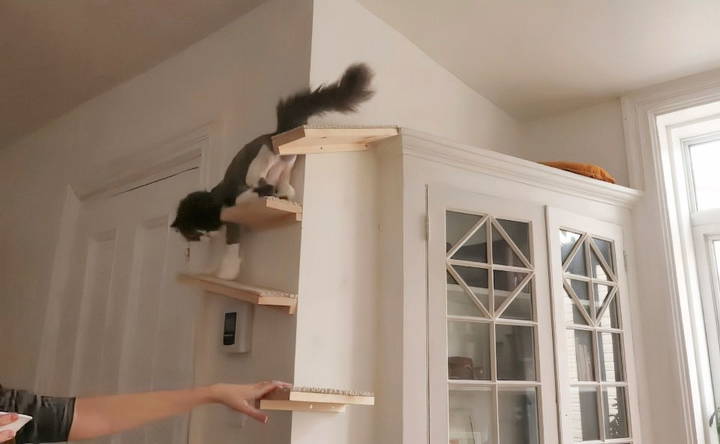
Step 6: Encouraging Your Cat to Use the Shelves
Cats can be cautious when it comes to new furniture or toys, so you may need to encourage your cat to explore their new shelves. Place treats or toys on the shelves to entice them to climb. You can also lead your cat up the shelves using a laser pointer or feather wand to make the experience fun and interactive.
It's important to remember that it may take time for your cat to feel comfortable using the shelves. In the DIY project, the cat initially didn't understand how to use the shelves and only became confident after a few days of exploring them.
Step 7: Adding Personal Touches
Finally, you can personalize your shelves to suit your style and your cat's needs. Consider adding plants, pictures, or decorative elements to make the space blend with your existing decor. You can also build a cozy spot for your cat to nap by adding cushions or small blankets to some of the wider shelves.
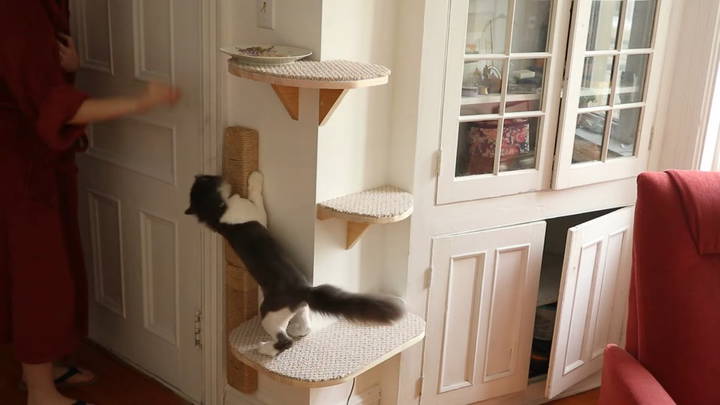
In the transcript, the DIY creator placed cushions on the top shelf to build a comfortable resting area for her cat, which added an extra cozy touch to the project.
Safety Considerations
When building cat shelves, it's important to prioritize safety:
- Ensure the shelves are strong enough to hold your cat's weight.
- Avoid sharp edges by sanding down the wood or using round shapes.
- Use non-toxic materials when applying glue, paint, or finishes to the shelves.
- Check stability regularly to make sure the shelves haven't come loose.
By following these safety guidelines, you can build a fun and safe environment for your cat to enjoy.
Conclusion: Crafting the Perfect Cat Playground
Building DIY cat shelves is a fun and fulfilling project that can improve your cat's quality of life by providing them with vertical space to explore. By carefully planning the design, using safe materials, and creating an environment your cat will love, you can give your feline friend a new playground that doubles as an eye-catching feature in your home.
Whether you're a novice or experienced in DIY, this project allows you to customize a space that fits both your cat's needs and your personal style. So gather your tools, find your wood, and get started on building your own set of cat shelves today!
FAQs About DIY Cat Shelves
Discover answers to common questions about DIY cat shelves, including materials, safety tips, and installation for happy, active felines.
Cats need space to jump, but the distance should be appropriate for their agility. A good starting point is to leave 12-18 inches between shelves. Older or less active cats may need closer spacing, around 8-12 inches. If your cat struggles to jump down, reduce the height or add more steps.
Sisal rope is an excellent choice for wrapping parts of the shelves to build scratch-friendly surfaces. It's durable, safe for cats, and helps with climbing. Make sure to secure it tightly with hot glue or wood glue to prevent unraveling.
Start by placing treats or toys on the shelves to attract your cat. Cats may hesitate at first, but using interactive play, such as a laser pointer, can help guide them. Patience is key—your cat will gain confidence over time.
Cats’ claws are designed for climbing up, not down. To make descending easier, ensure the shelves are well-spaced and avoid sharp drops. Adding shelves closer together or incorporating ramps can give your cat a smoother descent.
Shelves should be at least 12 inches deep to give your cat enough room to sit or turn around. If your cat feels cramped, try using larger shelves or trimming down the edges for easier navigation.
Yes, but it's best to choose a sturdy and affordable wood like pine. Avoid treated wood, as it may contain chemicals harmful to pets. Sand the edges smooth to prevent injuries.
Use heavy-duty brackets and screws to support the shelves. If attaching to drywall, use wall anchors to prevent the shelves from pulling out under your cat's weight. Ensure everything is level and secure before allowing your cat to explore.
Mistakes can be easily patched using pre-mixed plaster or spackle. Sand the area smooth, then paint over the patch to blend with the rest of the wall. Make sure the wall is sturdy before re-drilling.
If your cat avoids the top shelf, it may feel unsafe or too far to jump down from. Consider trimming the shelf or adding more steps to ease the jump. Cats may also need time to get comfortable with new heights.
Regularly vacuum the shelves, especially if they're covered in carpet. Inspect the shelves and brackets every few months to ensure they remain stable and safe. Replace any worn-out materials, like fraying carpet or sisal rope.


