Building your own cheap DIY pool enclosure can transform your backyard, offering protection from the elements, reducing debris, and enhancing the aesthetic appeal of your outdoor space. Building a pool cage or enclosure might feel intimidating at first, but this guide offers clear, step-by-step instructions to help you along the way. Drawing on practical tips from professionals in Florida who specialize in aluminum structures, this article is designed to help you build your DIY pool enclosure effectively and safely.
Why Build a Pool Enclosure?
Before diving into the construction process, let's briefly explore the benefits of building a pool enclosure:
- Protection from Bugs and Debris: Pool enclosures act as a barrier, preventing leaves, insects, and other debris from contaminating your pool water.
- Enhanced Safety: Enclosures provide added safety by keeping children and pets away from the pool when not in use.
- Increased Longevity of Pool Equipment: By reducing the exposure of your pool to the elements, an enclosure can extend the life of your pool equipment.
- Weather Control: A pool cage allows you to enjoy your pool even during less-than-ideal weather conditions, particularly in regions like Florida where rain and intense sun are common.
Now, let's break down how you can build your own pool enclosure.
Step by Step Instructions
Learn how to build your own pool enclosure with our step-by-step guide, covering planning, construction, and maintenance for a perfect DIY project.
Step 1: Planning Your Pool Enclosure
Plan your pool enclosure by determining the type, choosing materials, checking local regulations, and measuring the pool area efficiently.
Determine the Type of Enclosure
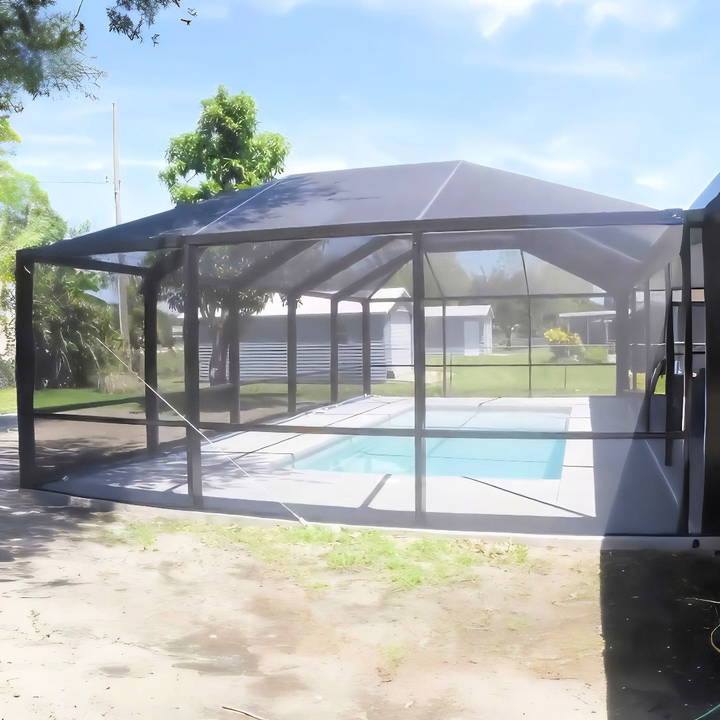
There are several types of pool enclosures, including screened enclosures, glass enclosures, and partial enclosures. In this guide, we'll focus on building a screened enclosure using aluminum framing—a popular choice due to its durability and resistance to rust.
Choose the Right Materials
For a standard aluminum-screened pool enclosure, you'll need:
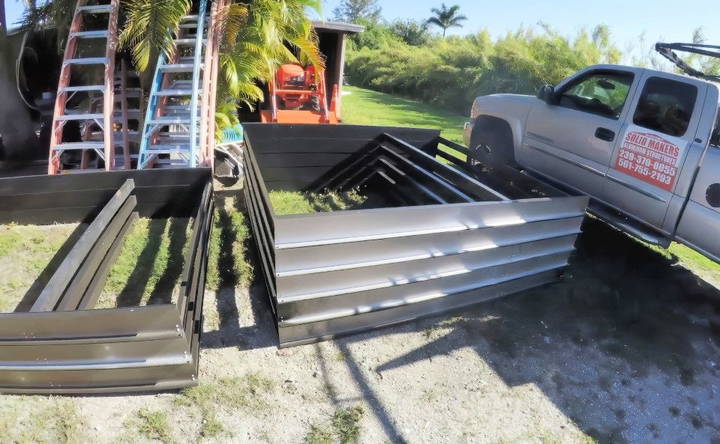
- Aluminum frames: Lightweight and strong, aluminum is the best choice for framing. It resists corrosion, which is crucial for areas with high humidity or salt air.
- Screening material: Fiberglass screens are most commonly used for pool enclosures, but polyester screens are stronger and more resistant to damage from pets or high winds.
- Screws and fasteners: Stainless steel screws and fasteners are ideal, as they won't rust or degrade over time.
- Anchors: Ensure your enclosure is properly anchored into concrete or another solid base.
Check Local Regulations and Permits
Before beginning construction, check with your local authorities to see if you need any permits or if there are building codes you must follow. This step is crucial, especially in states like Florida where pool enclosures must meet specific hurricane resistance standards.
Measure the Pool Area
Accurate measurements are essential to ensure you purchase the correct amount of materials and to avoid costly mistakes. Measure the perimeter of your pool and decide how much clearance you want around the edges of the enclosure. You'll also need to determine the height of your enclosure, which may be influenced by local building codes.
Step 2: Preparing for Construction
Efficiently prepare for construction by gathering tools, making a detailed blueprint, and clearing the work area for seamless project execution.
Gather Tools and Supplies
To build your pool enclosure, you'll need the following tools:
- Measuring tape
- Power drill
- Hammer
- Screwdriver
- Level
- Circular saw (for cutting aluminum beams)
- Safety gear (gloves, goggles, and ear protection)
Build a Blueprint or Layout
Before starting construction, build a detailed blueprint or sketch of your enclosure. This will help guide the building process and ensure you have all the materials and tools on hand.
Clear the Work Area
Ensure the pool area is clear of any obstacles, including furniture, landscaping, or any other items that could interfere with construction. If your pool is surrounded by dirt or grass, consider laying down protective coverings to prevent damage during the build.
Step 3: Building the Pool Enclosure
Learn about building the pool enclosure with steps on laying the foundation, installing vertical posts, adding purlins, and attaching roof beams.
Laying the Foundation
Start by marking the points where your vertical support posts will be placed. Using a power drill with a masonry bit, drill holes into the concrete (or whatever base you are using) where the posts will be secured. Insert the anchors, and ensure they are firmly in place to build a strong foundation.
- Pro tip: Measure twice, drill once! Mistakes in the foundation stage can compromise the structural integrity of your enclosure.
Installing Vertical Posts
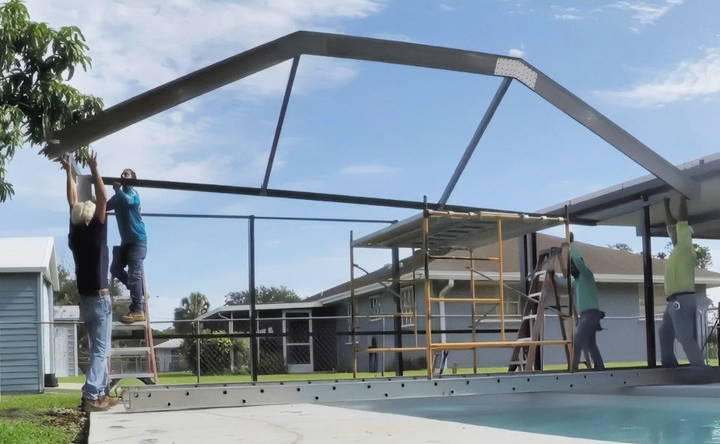
Once the foundation is set, it's time to install the vertical posts. Position each aluminum post into the anchor holes, ensuring they are plumb (vertical) with the help of a level. Secure the posts using stainless steel screws. This step requires patience to ensure that each post is aligned perfectly, as it will affect the overall stability of your structure.
Adding Horizontal Beams (Purlins)
Next, you'll need to install the horizontal beams, also known as purlins. These beams will connect the vertical posts and form the structure's skeleton. Measure and cut the aluminum beams to the appropriate lengths, then attach them to the vertical posts using corner brackets and screws.
When positioning the purlins, ensure they are spaced evenly for both aesthetic appeal and structural strength. The spacing will depend on the size of your enclosure and the screen material you are using.
Attaching the Roof Beams
If your pool enclosure will have a flat or pitched roof, the next step is to install the roof beams. Similar to the horizontal beams on the sides, the roof beams connect across the top of the structure and support the screening material.
Ensure that your roof beams are securely fastened to the top of the vertical posts and horizontal beams using appropriate brackets and screws.
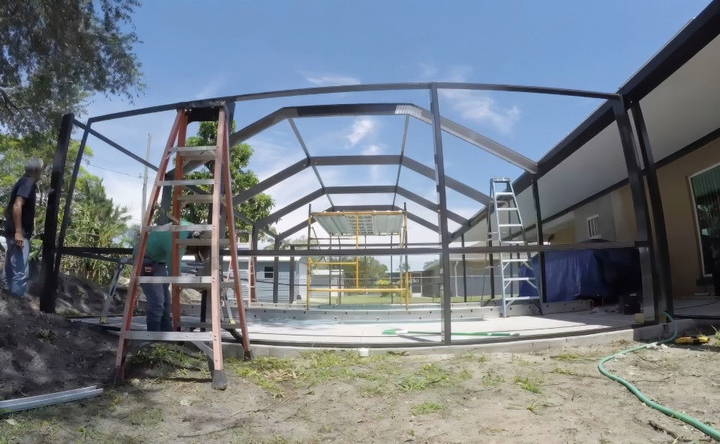
- Pro Tip: If you're working on a larger enclosure, you may want to enlist help when installing the roof beams, as they can be difficult to position on your own.
Step 4: Installing the Screens
Learn the step-by-step process of installing screens by cutting, fitting, and securing screen panels for a perfect fit in your spaces.
Cutting and Fitting the Screen Panels
With the framework of the enclosure complete, you can now install the screens. Measure each section of the frame and cut your screening material to size, leaving a little extra on each side to allow for proper fitting.
Using a spline tool (a small roller), press the screen into the frame's grooves, securing it with a rubber spline. This process should be done carefully to ensure the screens are tight and secure, avoiding any sagging.
Securing the Screens
Once the screen is properly aligned and the spline is in place, use a utility knife to trim any excess screening material. Repeat this process for each panel of the enclosure.
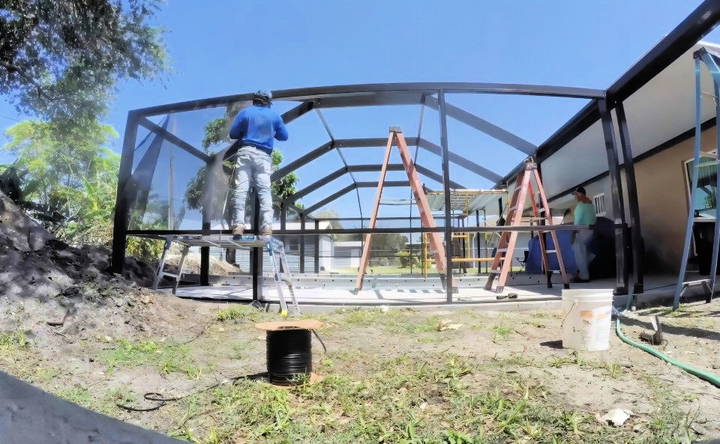
- Pro Tip: Start with the top panels, as this will make it easier to fit the screens on the sides.
Step 5: Finishing Touches
Enhance your pool with expert finishing touches. Install the enclosure door, secure fasteners, and optionally add gutter systems for optimal function.
Install the Pool Enclosure Door
Most pool enclosures will include at least one door for easy access. Purchase a pre-fabricated aluminum screen door that matches your enclosure design. Install the door according to the manufacturer's instructions, ensuring it swings open easily and locks securely.
Secure All Fasteners and Inspect
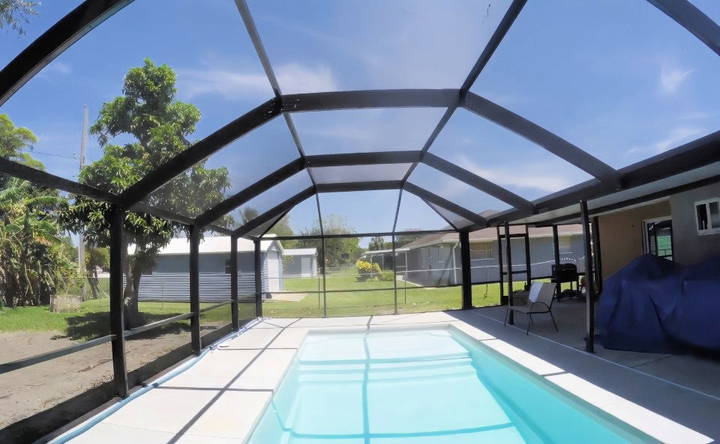
Before declaring your pool enclosure complete, go over every connection point and fastener to ensure everything is tight and secure. Check the alignment of the posts and beams, and make sure the screens are taut and free from gaps.
Add Gutter Systems (Optional)
In some cases, it might be beneficial to install gutters along the edge of your pool enclosure roof. This will help direct rainwater away from the structure and pool area, reducing potential water damage.
Step 6: Maintenance and Care
Once your DIY pool enclosure is complete, it's essential to maintain it to ensure its longevity. Here are some maintenance tips:
- Regular Cleaning: Clean the screens periodically to remove dirt, algae, or debris. A gentle spray from a garden hose usually suffices.
- Check for Damage: Inspect the enclosure for any tears in the screen or loose fasteners after storms or heavy winds.
- Reapply Protective Coatings: If your aluminum frame shows signs of wear, consider applying a protective coating to prevent further damage.
Conclusion:
Building a DIY pool enclosure requires time, careful planning, and attention to detail, but the result is a durable structure that enhances the enjoyment and safety of your pool area. With the right tools, materials, and this step-by-step guide, you can build a professional-quality enclosure that provides protection, boosts the aesthetic of your yard, and adds value to your home. So, roll up your sleeves and get started on your pool enclosure today!
FAQs About DIY Pool Enclosure
Discover essential FAQs about DIY pool enclosures to enhance safety and style in your backyard with practical tips and expert guidance.
On average, building a pool enclosure can take around a week. This includes preparing materials, cutting aluminum beams, installing the frame, and attaching the screens. Weather conditions and availability of materials can affect the timeline.
The cost for building a pool enclosure can vary widely based on factors such as the size of the pool, material quality, and local labor rates. For a DIY project, aluminum and screen materials will be your main expenses, but professional installations can increase the price.
Yes, it is possible, but having some construction or DIY experience will make the process easier. If you're new to this type of work, start by thoroughly researching the materials and methods involved, and consider enlisting help for safety.
To avoid sagging, ensure the screen is tightly stretched and secure it with a rubber spline. Using a spline tool will help press the screen into the frame correctly, ensuring a taut and clean finish.
Essential tools include a measuring tape, power drill, level, circular saw, spline tool, and safety gear such as gloves and goggles. For cutting aluminum beams, a saw with an appropriate blade for metal cutting is necessary.
Regular maintenance involves cleaning the screens with water to remove dirt and debris. Inspect the enclosure for any tears or loose screws, especially after storms, and repair any damage promptly to prevent further issues.
Yes, but ensure the enclosure meets local hurricane resistance standards. This usually involves using stronger materials and additional anchoring for structural stability during high winds.
Yes, but it may require additional leveling work or customized framing to ensure the enclosure is stable. You might need professional advice if the ground is significantly uneven.
Yes, adding gutters to the roof of your pool enclosure can help direct rainwater away, protecting both the enclosure and the pool area from water damage. This is especially useful in areas with frequent rain.
Using a saw table or sawhorses to cut beams can prevent knee strain from working on the ground. While cutting on the ground may be a habit for some, standing tools make the process easier on your body.


