I recently decided to build cheap DIY pool steps. The goal was simple: ensure my mom, who's in her seventies, could easily get in and out of the pool. She needed steps that were sturdy, easy to navigate, and tailored to her needs. It wasn't just about making pool access easier—it was about maintaining her independence and ensuring she could enjoy swimming safely.
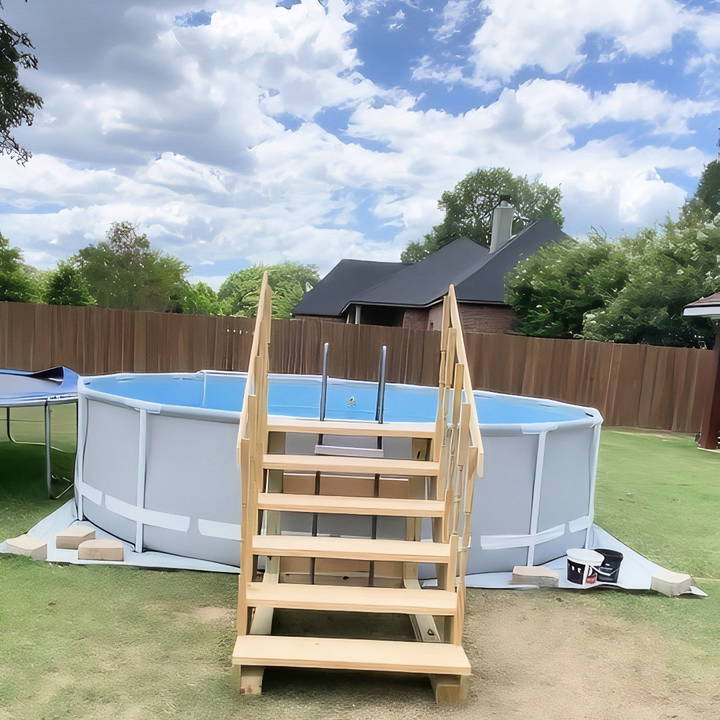
I want to walk you through my experience, sharing the challenges I faced and the lessons I learned along the way. While this project may sound complicated, it can be broken down into simple steps, making it accessible to anyone willing to put in the effort. By sharing my approach, I hope to give you confidence if you're considering a similar project.
Understanding the Need
The first step in any project is understanding the "why." For me, it was all about making the pool accessible to my mother. I wanted something more custom and stable than those off-the-shelf solutions. While there are many premade options for pool steps, I knew I could tailor something better suited to our pool and her needs.
When tackling any project like this, you must think about who will be using the structure. In my case, it was important to ensure the steps were wide, stable, and secure.
Step by Step Instructions
Learn how to build DIY pool steps with our comprehensive guide. Follow the steps from designing to finishing touches for safe, sturdy, and stylish pool access.
Designing the Steps
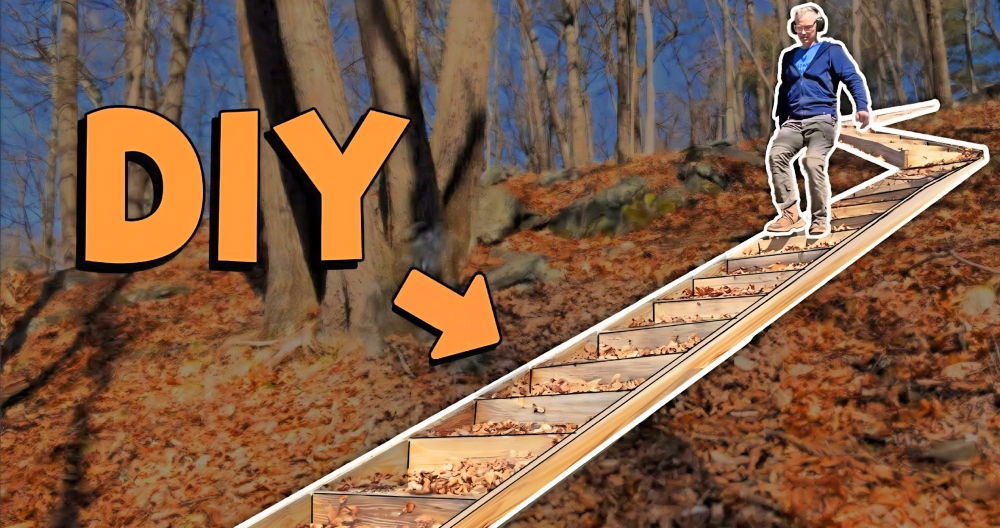
The initial step in building anything is designing it. I knew I wanted the steps to be about 40 inches wide with around six steps leading up to the pool. This would provide a gentle incline for my mom to walk up without feeling unstable. I didn't need anything overly complex or fancy—just something solid and functional.
- Width and Height: I aimed for around 40 inches across, which provides plenty of room for stability. The steps needed to be high enough to reach the pool's edge but low enough for easy access.
- Materials: I chose wood for this project because it's strong, affordable, and relatively easy to work with. Plus, I already had most of the materials on hand, which saved me some time and money.
When you design your steps, think about your own pool's dimensions and the needs of the people who will be using the steps. Will they be carrying things up and down, like towels or toys? Do you need extra handrails for added stability? I chose to install some rails for extra support.
Building the Frame
Once I had the design in my mind, I started building the frame. This is the most critical part of the project since it will determine how stable the entire structure is.
- Step 1: I began by cutting the wood to size. This included the sides of the steps and the slats that would form the steps themselves.
- Step 2: I constructed the basic frame, ensuring everything was level and straight. This is where bracing comes into play. I added extra supports to make sure the steps wouldn't wobble when someone walked on them.
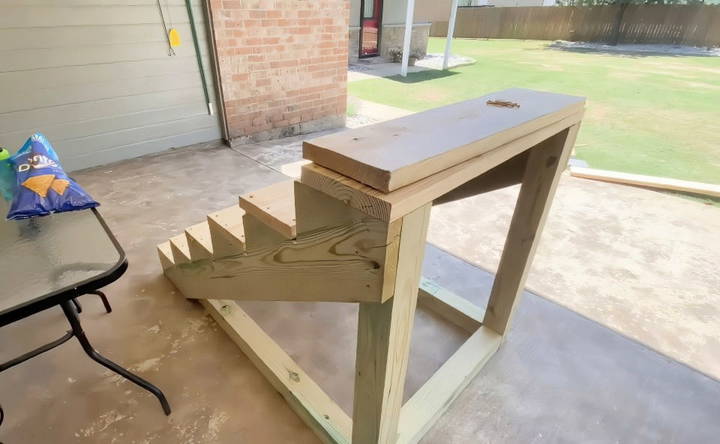
Even if you don't have a lot of experience building things, this step is manageable if you take it slow and measure carefully. It's better to double-check measurements than to have to redo something later.
Adding the Steps and Railings
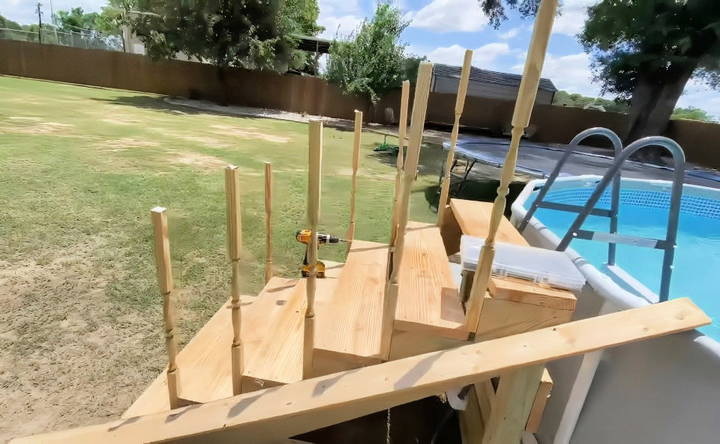
With the frame built, the next step was installing the actual steps. Here's where I decided to save some time: I didn't cut out my own steps. Instead, I bought them pre-made. This allowed me to focus more on assembling the structure rather than spending hours cutting wood perfectly to size.
The steps were placed securely onto the frame, and I made sure there was no bend or give when pressure was applied. This was crucial since the entire point was to build something sturdy. The last thing I wanted was for the steps to feel shaky when my mom used them.
Next came the railings. I initially thought I would need to drill holes to secure them, but fortunately, I had enough room to fit the pieces snugly into place without additional drilling. It was one of those happy accidents that made the project easier than expected.
Finishing Touches
At this point, the steps were functional, but they weren't quite finished. I still had some panels to add for additional stability and aesthetic purposes. I also wanted to brace the steps further, just to be sure they could withstand years of use.
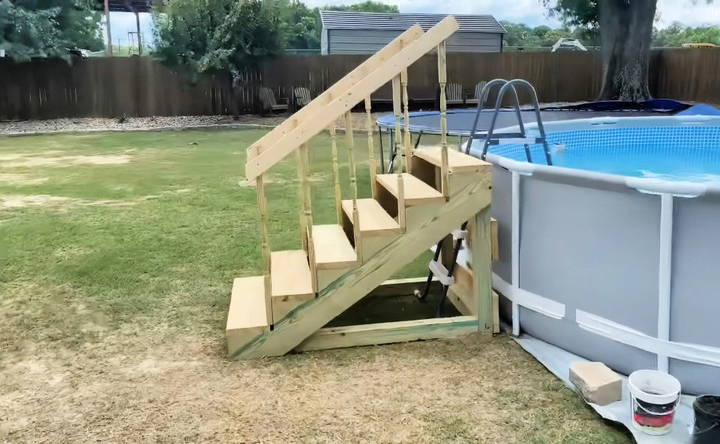
It wasn't the prettiest thing in the world, but it got the job done. The steps fit perfectly against the pool, and there was just enough clearance at the top to make sure they wouldn't get in the way when people were swimming.
I was really happy with how it turned out. More importantly, my mom was able to use the steps comfortably.
Reflecting on the Project
Looking back, the process was simpler than I initially thought. Here are some key lessons I learned along the way:
- Start with a clear goal: Know exactly what you need before you begin. For me, the goal was to build safe, sturdy steps for my mom, and that vision guided every decision I made.
- Measure twice, cut once: This old saying is true. Take the time to measure carefully before cutting or assembling anything.
- Don't be afraid to use premade parts: If you're not comfortable cutting every single piece from scratch, it's perfectly fine to buy some pre-made materials, like steps or rails.
- Brace everything: You can never over-brace something that people are going to stand on. It's better to be overly cautious and build something sturdy than to skimp on materials and risk it being unstable.
Customization Tips
Customizing your DIY pool steps can make them more functional and visually appealing. Here are some easy-to-follow tips to help you personalize your pool steps:
Design Variations
- Step Shape and Size: Adjust the shape and size of the steps to fit your pool's dimensions. For smaller pools, consider narrower steps to save space. For larger pools, wider steps can provide more comfort.
- Curved vs. Straight Steps: Choose between curved or straight steps based on your pool's design. Curved steps can add a touch of elegance, while straight steps offer a classic look.
Aesthetic Enhancements
- Paint and Finish: Use waterproof paint to add color to your steps. Choose a color that complements your pool and surrounding area. For a sleek finish, consider using a high-gloss paint.
- Non-Slip Surfaces: Safety is crucial. Apply non-slip coatings or adhesive strips to the steps to prevent accidents. These come in various colors and textures, allowing you to match your pool's aesthetic.
Material Choices
- Wood: For a natural look, use treated wood. It's durable and can be stained or painted to match your pool deck.
- Composite Materials: These are low-maintenance and resistant to water damage. They come in various colors and textures, offering a modern look.
- Metal: Stainless steel or aluminum steps are sturdy and rust-resistant. They can be polished for a shiny finish.
Functional Additions
- Handrails: Install handrails for added safety, especially for children and elderly users. Choose materials that match your steps, such as stainless steel or painted wood.
- Lighting: Add LED lights to the steps for better visibility at night. Solar-powered options are eco-friendly and easy to install.
Personal Touches
- Decorative Tiles: Incorporate mosaic tiles on the step risers for a unique look. Choose patterns and colors that reflect your style.
- Planters and Greenery: Place planters with water-friendly plants around the steps. This adds a touch of nature and enhances the poolside ambiance.
Seasonal Adjustments
- Removable Steps: If you live in an area with harsh winters, consider making the steps removable. This allows you to store them during the off-season, extending their lifespan.
- Weatherproofing: Apply weatherproof sealants to protect the steps from sun, rain, and snow. This helps maintain their appearance and durability.
By following these customization tips, you can build pool steps that are not only functional but also a beautiful addition to your pool area.
Troubleshooting Common Issues
Building DIY pool steps can be a rewarding project, but sometimes things don't go as planned. Here are some common issues you might encounter and how to solve them:
Steps Are Wobbly
- Problem: The steps feel unstable or wobbly when you step on them.
- Solution: Check if the ground is level. Uneven ground can cause instability. Use a level to ensure the base is flat. If needed, add more support underneath the steps, such as additional braces or a concrete pad.
Steps Are Slippery
- Problem: The steps are too slippery, posing a safety hazard.
- Solution: Apply non-slip coatings or adhesive strips to the surface of the steps. These products are available at most hardware stores and come in various textures and colors to match your design.
Steps Are Sinking
- Problem: The steps are sinking into the ground over time.
- Solution: This usually happens if the ground is too soft or if the steps are too heavy. Reinforce the base with a concrete pad or use larger, more stable footings. Ensure proper drainage around the steps to prevent water from softening the ground.
Steps Are Cracking
- Problem: Cracks appear in the steps, especially if they are made of concrete or wood.
- Solution: For concrete steps, use a concrete patching compound to fill the cracks. For wooden steps, replace any damaged boards and seal the wood to protect it from moisture. Regular maintenance can prevent cracks from worsening.
Steps Are Misaligned
- Problem: The steps are not aligned properly, making them difficult to use.
- Solution: Measure and mark the placement of each step carefully before installation. If the steps are already installed, you may need to remove and reposition them. Use a level and measuring tape to ensure even spacing and alignment.
Steps Are Difficult to Assemble
- Problem: The assembly process is more complicated than expected.
- Solution: Double-check the instructions and ensure you have all the necessary tools and materials. If you're still having trouble, look for video tutorials online or seek advice from a local hardware store. Sometimes, breaking the project into smaller steps can make it more manageable.
Steps Are Not Durable
- Problem: The steps wear out quickly or show signs of damage.
- Solution: Choose high-quality, durable materials that are suitable for outdoor use. Regularly inspect and maintain the steps to extend their lifespan. Applying protective coatings can also help prevent damage from the elements.
Steps Are Too Steep
- Problem: The steps are too steep, making them uncomfortable or unsafe to use.
- Solution: Ensure that the rise (height) and run (depth) of each step are within comfortable and safe limits. The rise should typically be between 6 to 8 inches, and the run should be at least 10 inches. If necessary, rebuild the steps with these dimensions in mind.
By addressing these common issues, you can ensure that your DIY pool steps are safe, durable, and functional.
FAQs About DIY Pool Steps
Find answers to all your questions about DIY pool steps, from materials to installation, in this comprehensive FAQ guide. Get started on your project today!
Yes, you can add steps to an existing pool. Options include drop-in steps, fiberglass steps, and vinyl-over steps. Each type has its own installation process and benefits.
Drop-in steps, also known as bolt-on steps, are usually made from plastic or fiberglass. They can be placed anywhere in the pool's shallow end and are a quick and cost-effective option.
While building pool steps can be a DIY project, you may need professional help if you're not comfortable with tools or if the project is complex. Safety is paramount.
Yes, you can use metal such as stainless steel or aluminum for pool steps. These materials are durable and resistant to corrosion, making them suitable for pool environments.
The time required depends on the complexity of the design and your experience with DIY projects. On average, it can take anywhere from a few hours to a couple of days to complete the project.
Wrapping Up
Building your own DIY pool steps is a rewarding project, especially when you see how much it helps a loved one. It may seem intimidating at first, but by breaking it down into manageable steps and focusing on safety and stability, anyone can do it. The key is to take your time, plan carefully, and focus on the user's needs.
Whether you're looking to build pool steps for yourself, a family member, or just to enhance your pool area, this project is completely doable with the right mindset and materials.


