Looking to add a personal touch to your living space or next creative project? Our list of 15 eay DIY contact paper ideas might just be what you need. From transforming countertops to sprucing up furniture, the versatility of contact paper is unmatched. It's an affordable solution that allows for endless creativity and personalization. With a range of patterns and finishes, DIY contact paper projects can breathe new life into any item, making it look brand new without a hefty price tag.
Starting your own project with contact paper doesn't have to be daunting. It’s all about knowing the basic steps and letting your creativity flourish. Whether it's choosing the right design, gathering necessary supplies, or applying the paper with precision, each stage contributes to the success of your project. So, why not dive into the world of DIY projects and see the transformation unfold? Keep reading to discover how to kick-start your venture into DIY contact paper projects effectively and see your visions come to life.
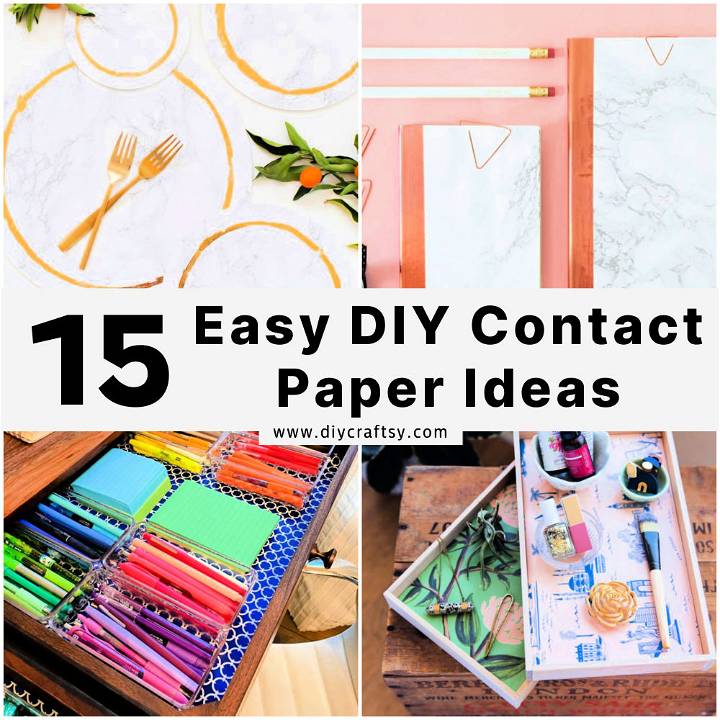
Why Choose DIY Contact Paper Projects?
Discover the benefits of DIY contact paper projects. Explore why they are a popular choice for creative home decor enthusiasts.
- Affordability: One of the top reasons to opt for DIY contact paper projects is their cost-effectiveness. Instead of splurging on expensive materials or decor items, contact paper offers a budget-friendly alternative. You can achieve high-end looks like marble or wood textures for a fraction of the price.
- Versatility: Contact paper comes in a plethora of designs and textures, making it a versatile option for home décor. Whether you're looking to update furniture, make decorative items, or add a splash of color to your space, there's a pattern or texture that fits the bill.
- Ease of Use: Applying contact paper is a straightforward process that doesn't require specialized tools or skills. With just a few basic supplies like scissors and a smoothing tool, you can transform various items around your home with ease. It's an accessible project for DIY enthusiasts of all levels.
- Temporary and Reversible: For renters or those who like to change up their decor frequently, contact paper is an ideal solution. It's easily removable and doesn't leave a residue, allowing you to update your space without permanent alterations or risking your security deposit.
- Creativity and Personalization: DIY contact paper projects provide an excellent outlet for creativity. They allow you to personalize your space uniquely and reflect your style. Whether you're making over furniture, making wall art, or updating accessories, contact paper projects enable you to put your personal touch on your home décor.
Embracing DIY contact paper projects can transform your space affordably and creatively, offering a satisfying way to personalize your home.
How to Apply Contact Paper Like a Pro: Quick and Easy Tips for Perfect Corners
Have you ever looked at a piece of furniture in your home and thought it could use a bit of a facelift? Contact paper is a fantastic, budget-friendly way to give your old furniture a new lease on life. Whether it’s updating the look of a table, desk, or countertop, contact paper can add texture, color, and patterns to any surface.
In this guide, I’ll show you how to apply contact paper in just 3 minutes, with special tips for handling those tricky corners. With my background in DIY projects and home decor, I promise to make this process straightforward and rewarding. Expect a transformation that’s both simple and stunning, suitable for any skill level.
Preparation: Laying the Groundwork
Before diving into the application process, ensure you have all the necessary materials and tools at hand. This preparation step is crucial for a smooth and efficient application.
Materials/Tools:
- Contact paper of your choice
- Cleaning wipes or a damp cloth
- Smoothing tool (an old credit card or a plastic scraper works well)
- Precision cutter or scissors
- Ruler or measuring tape
- Heavy books (optional, for flattening)
Important Pre-Steps:
- Clean the Surface: Thoroughly wipe down the area where you’ll apply the contact paper. It should be free of dust, dirt, and grease to ensure the adhesive sticks properly.
- Measure and Cut: Measure the surface to cover and cut the contact paper to size, leaving a few extra inches for adjustment and trimming.
Step-By-Step Instructions
1. Align and Start Peeling
Carefully align the contact paper with the edge of the surface, considering the pattern’s direction if applicable. Peel back the first few inches of the backing and start adhering from one edge.
2. Smooth It Out
Use a smoothing tool to press the contact paper onto the surface, working your way out from the center to the edges. This method helps eliminate air bubbles and wrinkles.
Tips:
- Go slow: Apply the contact paper gradually, peeling more of the backing as you smooth it down.
- For large surfaces, having an extra pair of hands can be helpful to hold the paper taut.
3. Deal with Corners and Edges
Corners require special attention. For a neat finish, cut slits in the contact paper at the corners. Fold and smooth down one side first, then the other.
Tips: Use a precision cutter for trimming excess material and creating clean lines around edges and corners.
4. Final Adjustments
Inspect the surface for any air bubbles. If you find any, gently press them towards the nearest edge. For stubborn bubbles, a small pinprick can release the air, then smooth over.
Variations: Tailoring to Your Needs
Alternative Methods:
- Dry Application: The method outlined above.
- Wet Application: Spraying a light mist of water on the surface before applying the contact paper can allow for repositioning and easier bubble removal.
Different Skill Levels:
- Beginners: Start with smaller projects like coasters or small tabletops to gain confidence.
- Experienced DIYers: Tackle larger surfaces or furniture pieces, experimenting with patterns and textures.
Troubleshooting: Common Hiccups
- Air Bubbles: Use a pin to prick them, then smooth.
- Misalignment: Carefully peel back and reapply. The sooner you address it, the easier the adjustment.
Why This Guide Rocks
This guide stands out because it’s rooted in real-life experience and tested tips, especially for mastering those pesky corners. It’s not just about getting the job done but about achieving a flawless finish that lasts.
Video Tutorial
For a more visual step-by-step guide, including how to handle corners and edges seamlessly, check out this helpful tutorial on YouTube:
It complements this written guide perfectly, offering a visual perspective on the techniques discussed.
By following these detailed instructions, you can transform any piece of furniture or surface in your home with contact paper. The process is quick, cost-effective, and incredibly satisfying. You’ll marvel at the transformation and enjoy the fresh look of your updated item.
Dive into your contact paper project today! If you have any questions, comments, or want to share your success stories, feel free to reach out.
How to Get Started with DIY Contact Paper Ideas
Embarking on DIY contact paper projects is a wonderful way to infuse your space with personality and style without straining your budget. Whether you're aiming to revamp your furniture, make custom decor items, or simply add a touch of elegance to your home, contact paper can be your go-to material. Here's a helpful guide to get you started on your DIY journey with contact paper.
Understand the Basics
Before diving into your project, it's important to understand what contact paper is and its benefits. Contact paper is a versatile, adhesive material that comes in various designs and textures. It's affordable, easy to apply, and perfect for temporary changes, making it ideal for renters and those who love to switch up their decor often.
Choose Your Project
Start by choosing a project that matches your skill level and interests. Beginners might prefer something simple, like covering a small object or lining drawers. More advanced DIYers might opt for larger projects such as updating kitchen counters or making a faux wood or marble effect on furniture.
Gather Your Supplies
Once you've selected your project, gather all the necessary supplies. Basic items you'll need include:
- Contact paper in your chosen design
- Scissors or a craft knife for precise cutting
- A smoothing tool, like a credit card or a squeegee, to eliminate air bubbles
- A measuring tape to ensure you cut the correct size
For specific projects, you may need additional items, so check the requirements for your chosen task.
Prepare Your Surface
For the best results, ensure the surface you're working on is clean, dry, and smooth. Remove any dust, dirt, or grease, as these can affect the adhesion of the contact paper and lead to a less-than-perfect finish.
Measure and Cut
Carefully measure the area you wish to cover and cut your contact paper accordingly. It's always better to cut a slightly larger piece than needed, as you can trim the excess later. Be precise with your measurements to ensure a snug and seamless fit.
Apply with Care
Peel off the backing of the contact paper and gently apply it to your surface, starting from one edge. Use your smoothing tool to press the paper down as you go, working out any air bubbles for a smooth finish. Take your time with this step to avoid wrinkles and ensure a professional look.
Enjoy Your Handiwork
Once you've successfully applied the contact paper, step back and enjoy your work. You've not only maked something unique but also added a personal touch to your space. Remember, one of the best things about DIY contact paper projects is their reversibility. If you decide to change your decor down the line, you can easily remove the contact paper and start anew.
DIY contact paper projects offer a fun, affordable way to unleash your creativity and personalize your living space. By following these simple steps, you'll be well on your way to transforming everyday items into stunning pieces of decor.
DIY Contact Paper FAQs
Making DIY projects with contact paper can spark a lot of questions. Here are some of the most commonly asked questions, answered in a way that's easy to understand and helpful.
What is contact paper?
Contact paper is a self-adhesive material commonly used for lining shelves and drawers. It's also widely utilized in various DIY projects due to its versatility, availability in different patterns and textures, and ease of application. Contact paper can mimic the appearance of more expensive materials, such as wood, marble, or metal, offering a cost-effective solution for home decor enhancements.
How do you apply contact paper without bubbles?
- Start by cleaning the surface you're applying the contact paper to, ensuring it's free of dust and debris.
- Measure and cut the contact paper, allowing a little extra for adjustments.
- Peel off a small portion of the backing and align it to your desired starting point.
- Gradually peel and stick the paper, smoothing it out with a squeegee or a credit card to push out air bubbles as you go.
- For larger bubbles that form, gently lift the paper back and smooth again.
Can contact paper be removed easily?
Yes, one of the great advantages of contact paper is that it can be removed quite easily, making it ideal for renters or anyone looking for a temporary decor change. To remove, gently peel it off from a corner. If the paper is stubborn, you can use a hairdryer on a low heat setting to warm the adhesive, making it easier to peel off without leaving residue.
Is contact paper durable?
Contact paper is surprisingly durable for everyday use, especially if applied correctly and maintained well. However, its longevity can depend on the quality of the paper, the surface it's applied to, and how much wear and tear it gets. Areas with high moisture or where it might come into direct contact with heat may see a shorter lifespan. For best results, choose a high-quality contact paper and follow the manufacturer's instructions for use and care.
Can contact paper be used on countertops?
Contact paper can be used to transform countertops temporarily. It's a budget-friendly way to change the look of your kitchen or bathroom. However, it's important to note that while contact paper is water-resistant, it's not waterproof or heat-resistant. Avoid placing hot items directly on the surface and wipe up spills promptly to maintain the appearance and integrity of the contact paper.
How do you cut contact paper precisely?
For precise cuts, first, measure the area you'll be covering carefully. Mark your measurements on the back of the contact paper using a pencil and a ruler for straight lines. For intricate shapes, consider making a template with paper or cardboard. Use a sharp craft knife or scissors for cutting, and work on a cutting mat to protect underlying surfaces. Taking your time and measuring twice before cutting can ensure a neat, professional-looking finish.
Can contact paper be used on furniture?
Absolutely! Contact paper is a fantastic way to update or personalize furniture. Whether you're covering a tabletop, lining drawers, or giving an old dresser a new look, contact paper can be applied to most smooth, clean surfaces. Ensure the furniture surface is clean and dry before application, and use a smoothing tool to adhere the contact paper without bubbles for the best finish.
15 Unique DIY Contact Paper Ideas
Discover 15 creative DIY contact paper ideas to transform your space with style.
1. Burl Wood Ikea Dresser Hack Using Contact Paper
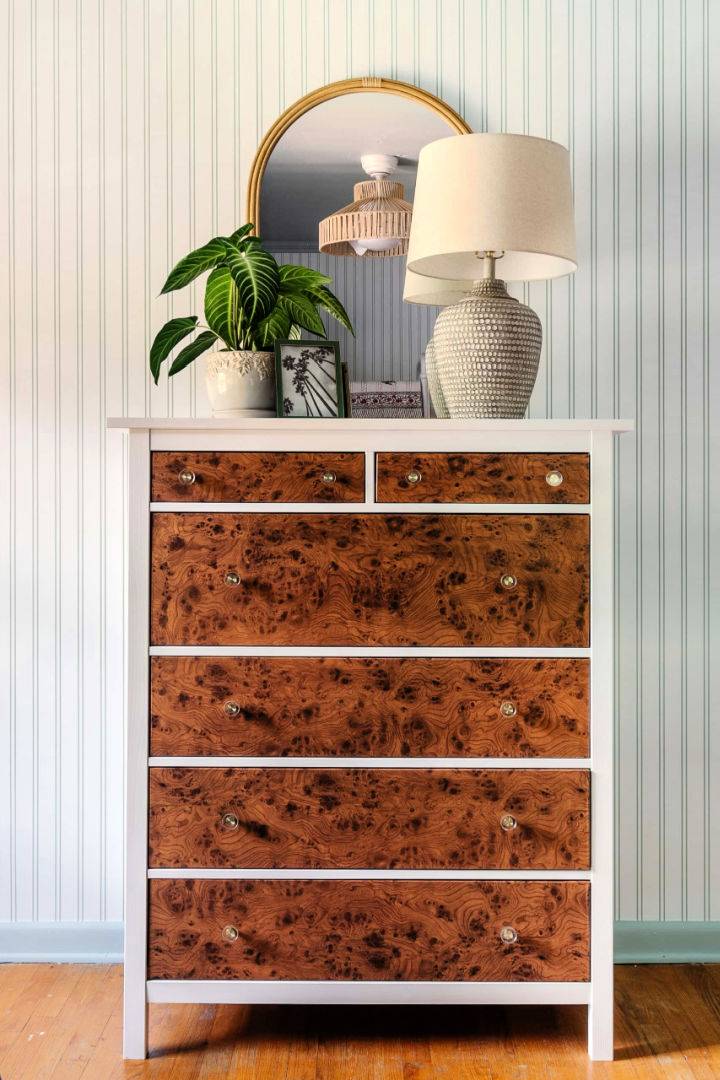
Transform your IKEA dresser into a luxurious burl wood masterpiece with this simple DIY hack. By using burl wood print contact paper, you can achieve a high-end vintage look for a fraction of the price - all it takes is about $30 and an hour of your time. Perfect for anyone seeking to add a touch of elegance and sophistication to their home without breaking the bank. Learn how with our easy instructions at Blesser House. Give your furniture that bespoke feel today!
2. Making a Contact Paper Kitchen Counters
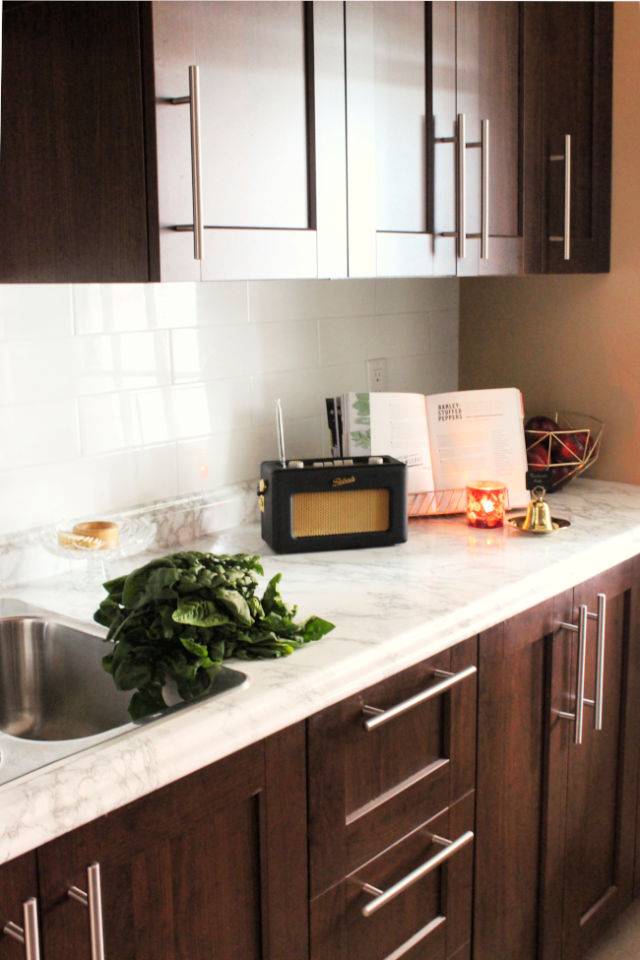
Transform your kitchen with this renter-friendly update: DIY contact paper counters. A budget-friendly transformation that's reversible! Learn how to achieve a fresh look without permanent changes.
Perfect for enhancing dark, task-oriented spaces with a touch of elegance. Detailed guidance ensures a smooth application around tricky areas, like sinks. Note: Contact paper isn't heat-resistant, so caution is advised. Interested in a full tutorial? Visit The Interior DIYer for step-by-step instructions and more insights.
3. Marble Coaster With Contact Paper
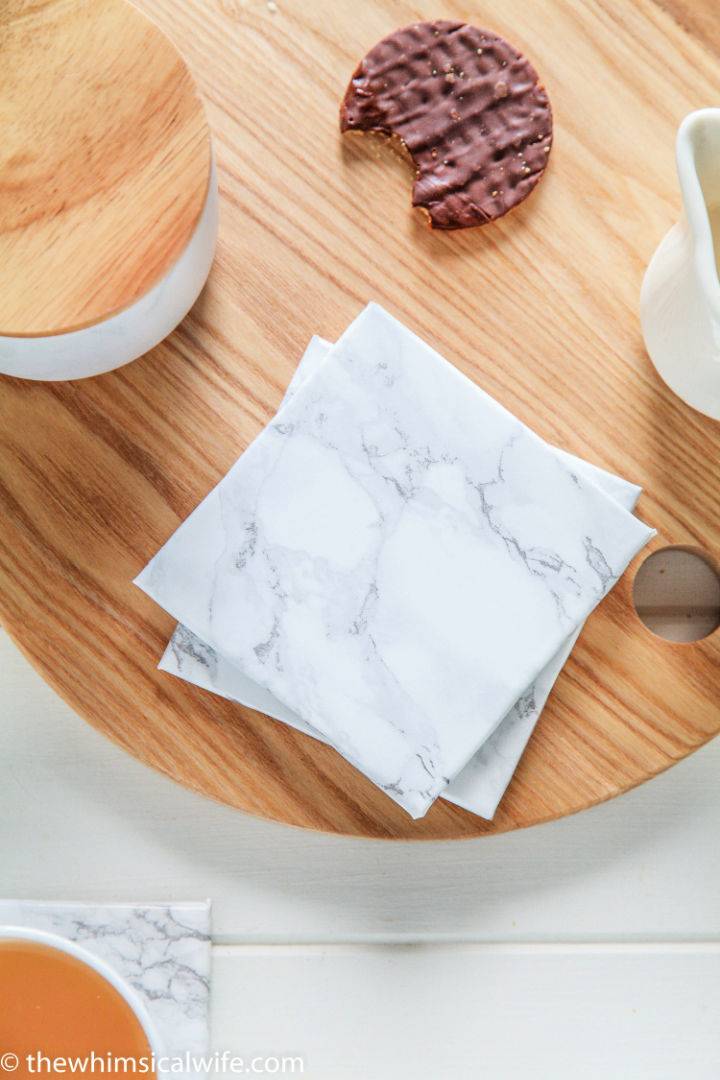
Transform your old coasters into stylish marble wonders with this easy DIY marble coaster hack. Perfect for adding a touch of elegance to any room, this quick project requires just a few materials: square tiles, marble contact paper, felt squares, scissors, and sikkens contact spray adhesive. Follow our simple steps to revamp your coasters in under 10 minutes. For a detailed guide and video tutorial, visit The Whimsical Wife. Elevate your home décor with this chic, easy-to-follow DIY project today!
4. Beautiful Contact Paper Privacy Window
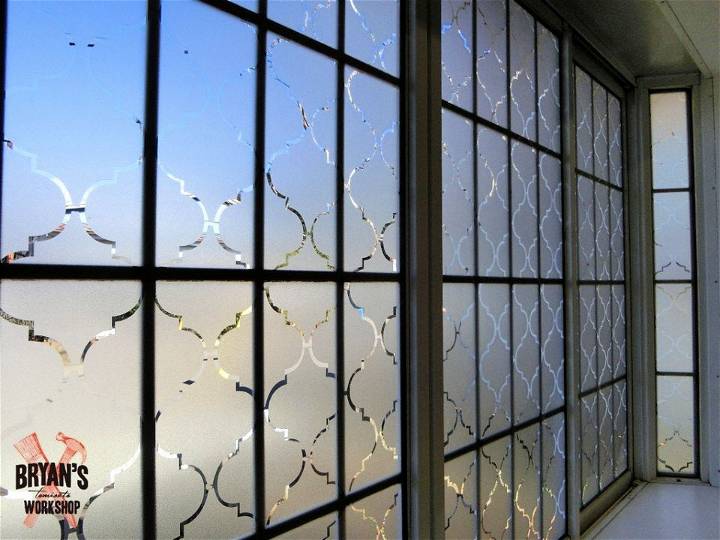
Transform your windows with this easy-to-follow guide on making a Beautiful Contact Paper Privacy Window. Perfect for renters or anyone looking for a non-permanent solution, this DIY project will not only enhance privacy but also add an elegant touch to your space. Dive into a world of creativity and see how simple sheets of contact paper can work wonders for your windows. Ideal for rooms that need a little extra privacy without sacrificing natural light. Get all the details and tips you need to succeed with this engaging project.
5. How to Make a Drawer Liners
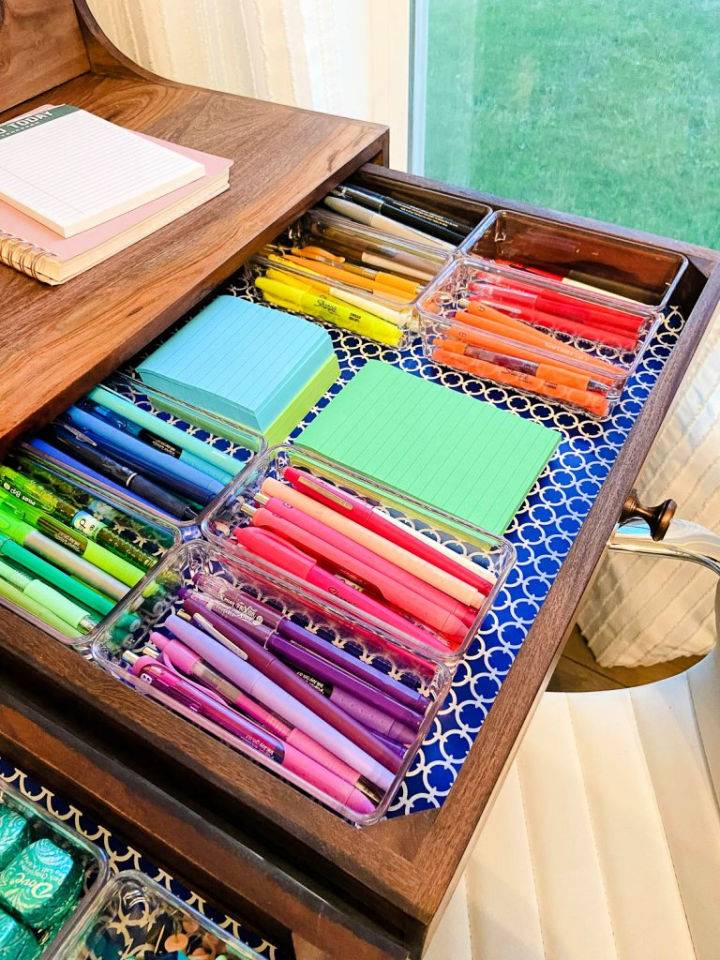
Transform your windows with this easy-to-follow guide on making a Beautiful Contact Paper Privacy Window. Perfect for renters or anyone looking for a non-permanent solution, this DIY project will not only enhance privacy but also add an elegant touch to your space. Dive into a world of creativity and see how simple sheets of contact paper can work wonders for your windows. Ideal for rooms that need a little extra privacy without sacrificing natural light. Get all the details and tips you need to succeed with this engaging project.
6. Easy DIY Marble Planters
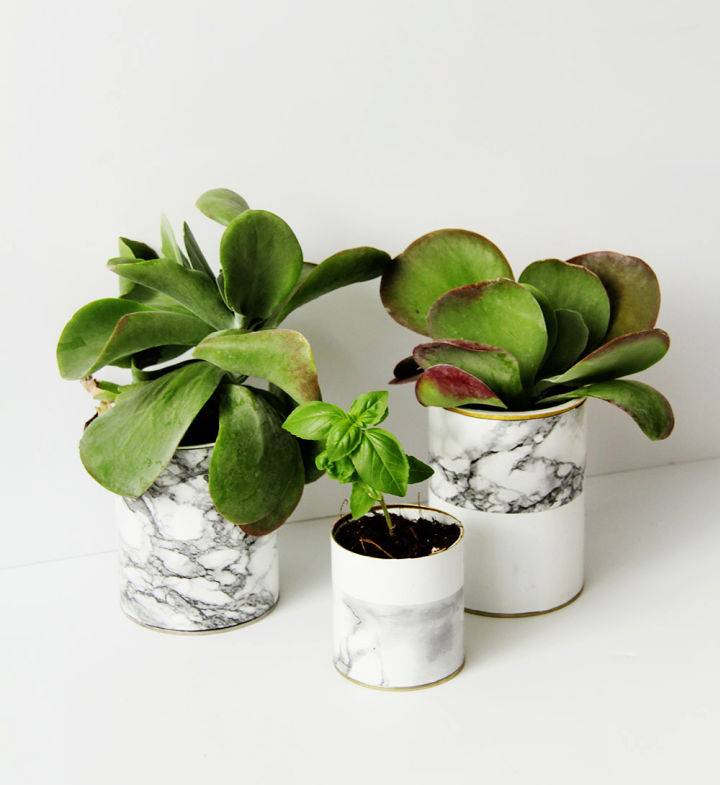
Looking to spruce up your space with unique planters without breaking the bank? Fall For DIY offers a step-by-step guide to making your very own marble planters using simple household materials. Perfect for giving your resilient basil or trendy succulents a stylish new home. Grab some cylindrical packaging, glue, a craft knife, and marble contact paper to get started. This project is not just fun; it's also a clever way to upcycle and personalize your space with minimal effort.
7. Make a Wooden Paper Tray
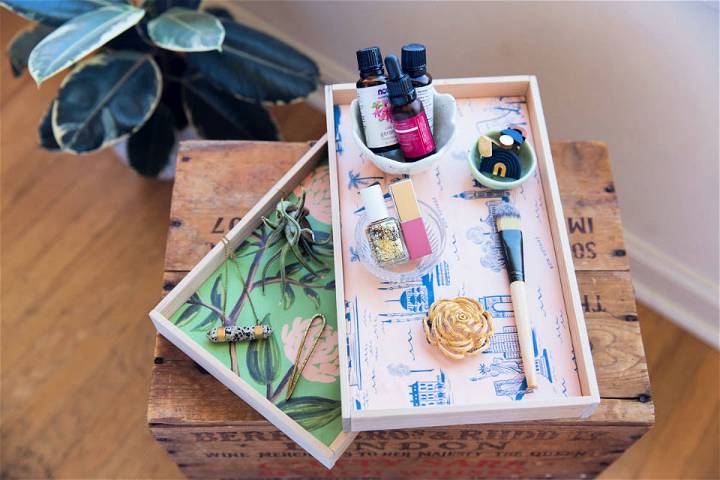
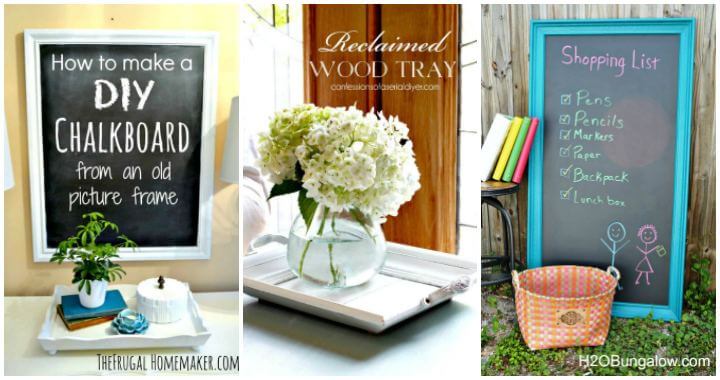
Elevate your desk or coffee table with a personalized touch! Learn how to craft a simplistic yet stylish wooden paper tray that brings functionality and charm to any room. From selecting the perfect wood to choosing a decorative paper that reflects your style, this guide at DIY.DunnLumber provides step-by-step instructions for making a unique piece. Whether it's for organizing letters or displaying odds and ends, this DIY project is both easy and affordable, making it a splendid gift idea or a delightful addition to your home decor.
8. Making a Jewelry Box
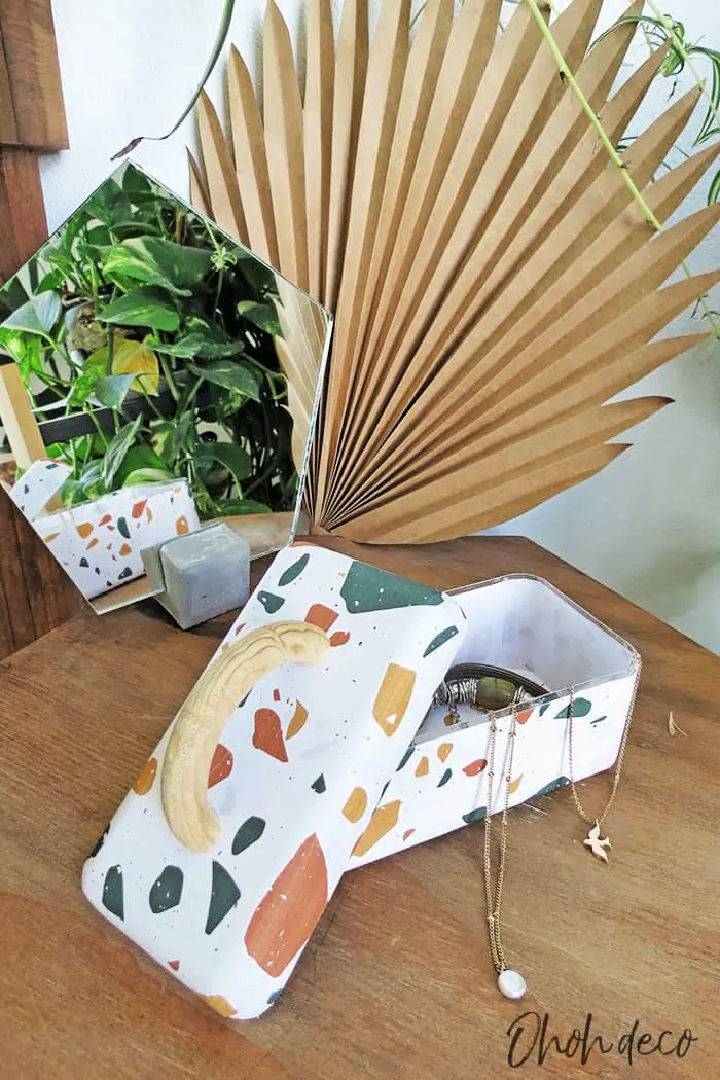
Discover the joy of crafting your very own jewelry box with an eco-friendly twist at Ohoh Deco. This project breathes new life into a recycled chocolate box, making it not only a creative endeavor but also a nod towards sustainability. It’s an ideal DIY for those who admire functionality and style, offering a personalized space to keep your precious jewelry organized.
By repurposing readily available materials like a chocolate box, printable paper, and a wooden ring, this DIY jewelry box is an affordable and quick project. Customize it with your choice of printable paper designs for a piece that's uniquely yours. Whether it's storing necklaces or keeping small treasures, this handmade jewelry box is sure to add a touch of charm to your space.
9. Make Your Own Brushed Gold Vase
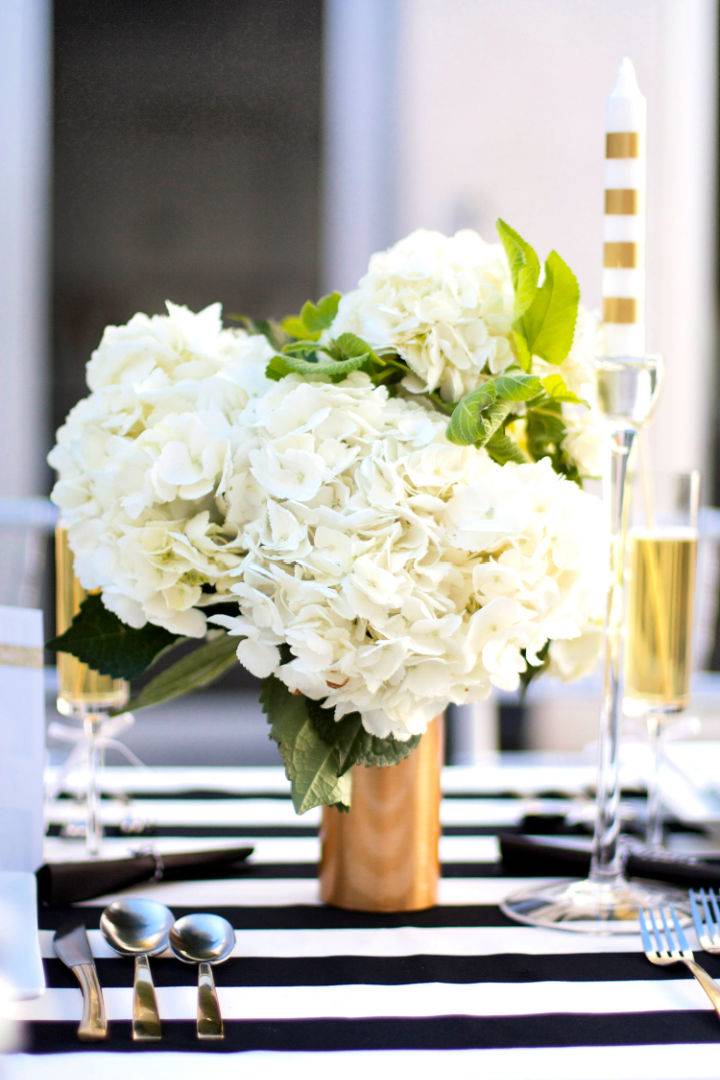
Transform your ordinary vases into stunning pieces with this simple DIY Brushed Gold Vase tutorial from Kristi Murphy. With a passion for contact paper, Kristi walks you through the easy steps to wrap your vases in elegance, starting with measuring your vase to perfectly cutting and applying the brushed gold contact paper.
This guide ensures a flawless and bubble-free finish, adding that extra sparkle to your home decor. Perfect for any occasion or simply to revamp your space, start making your brushed gold masterpieces today. For full instructions, visit Kristi Murphy's DIY Blog.
10. DIY Marble and Copper Stationery
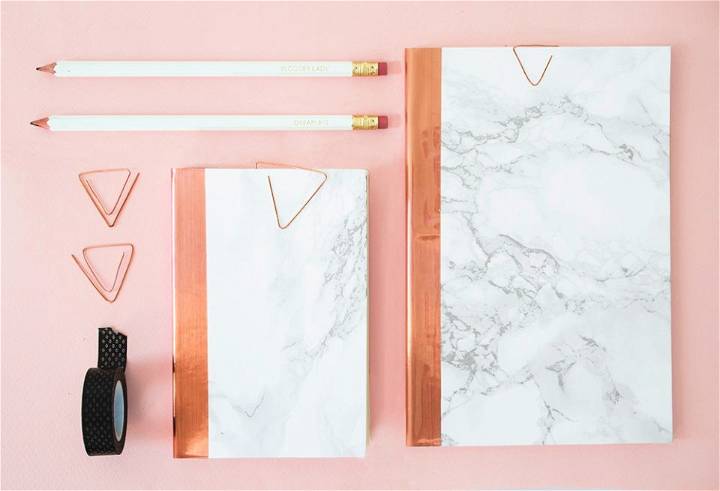
Calling all stationery enthusiasts! The Lovely Drawer has something special for you. Dive into a simple yet highly satisfying DIY project blending the trendy allure of marble and copper. This guide walks you through making a stylish, personalized notebook and geometric paperclips. With easy-to-follow steps and common materials, resist the temptation to marble and copper everything in sight. Perfect for personalizing your workspace or as thoughtful gifts. Transform ordinary stationery into extraordinary treasures today!
11. DIY Contact Paper Used as Wallpaper
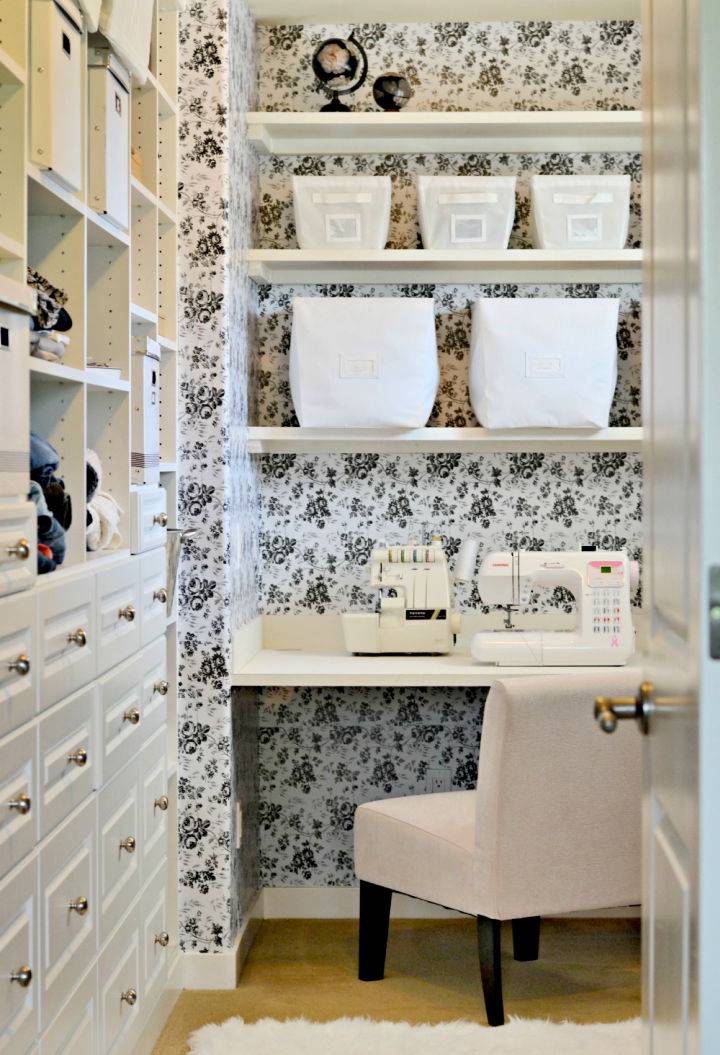
Transform your space effortlessly and on a budget with contact paper as a creative wallpaper alternative! Rachel at Rachel Teodoro's blog shares a practical DIY guide, demonstrating how she revamped her master bedroom closet for under $20.
She provides insightful tips and essential tools needed, emphasizing the method isn't for perfectionists due to potential bubbles and mismatched seams but promises stunning results. Ideal for renters, this method allows for easy application and removal, making it a perfect temporary décor solution. Explore how to use contact paper creatively beyond drawer lining and personalize your space today!
12. Faux Marble Table Lamp Makeover with Contact Paper
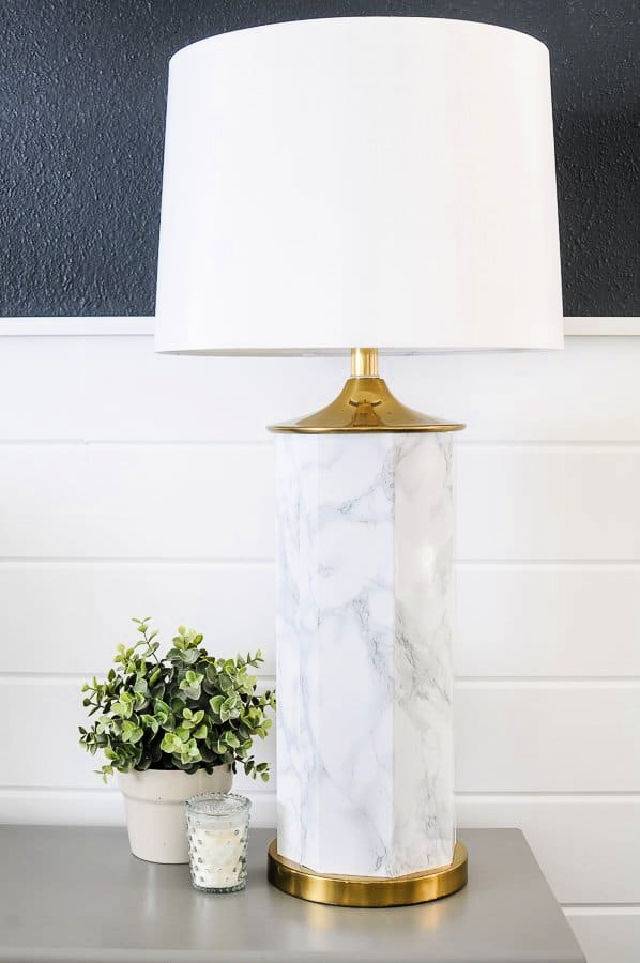
Discover how to give an outdated lamp a luxurious makeover with this DIY faux marble table lamp tutorial. This budget-friendly project uses contact paper to achieve a high-end marble look, saving you hundreds compared to store-bought alternatives. Ideal for thrift store finds, this method is not only cost-effective but also simple to execute, requiring just a few basic tools and materials. Follow these easy steps to transform a dated lamp into a chic, designer-inspired piece for your home.
13. Make a Decorative Marble Plates
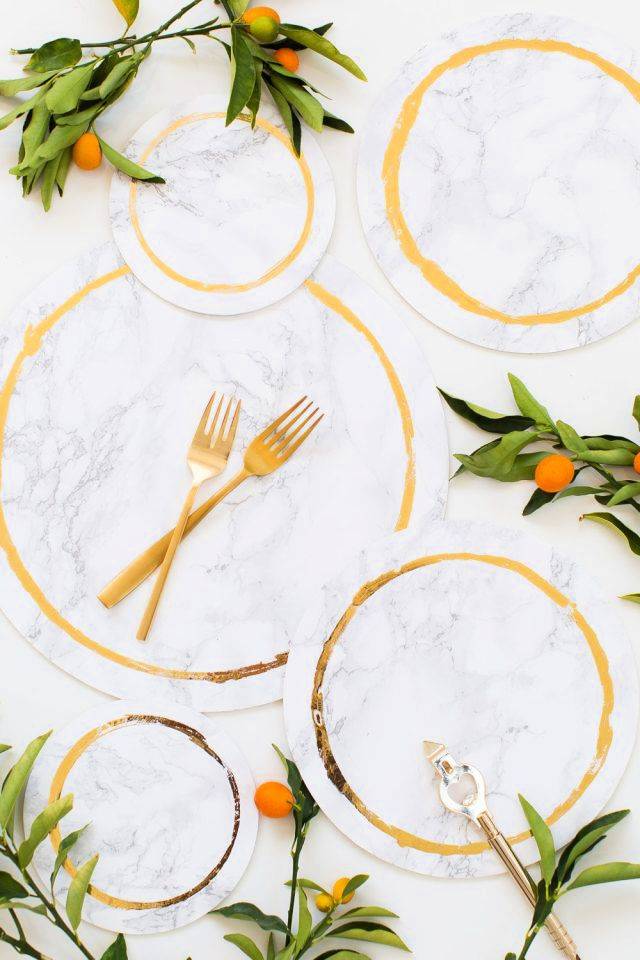
Discover the simple joy of making stunning DIY marble plates with an easy-to-follow tutorial from Sugar & Cloth Decor. Perfect for adding an elegant touch to any gathering, these plates blend affordability with style.
With just a few materials like wood plywood circles, marble contact paper, and gold foil, you can craft these chic decorative pieces. Ideal for special events or everyday elegance, they are also easily reusable. Dive into this engaging project and impress your guests with your crafty skills and sophisticated decor flair.
14. DIY Table Makeover
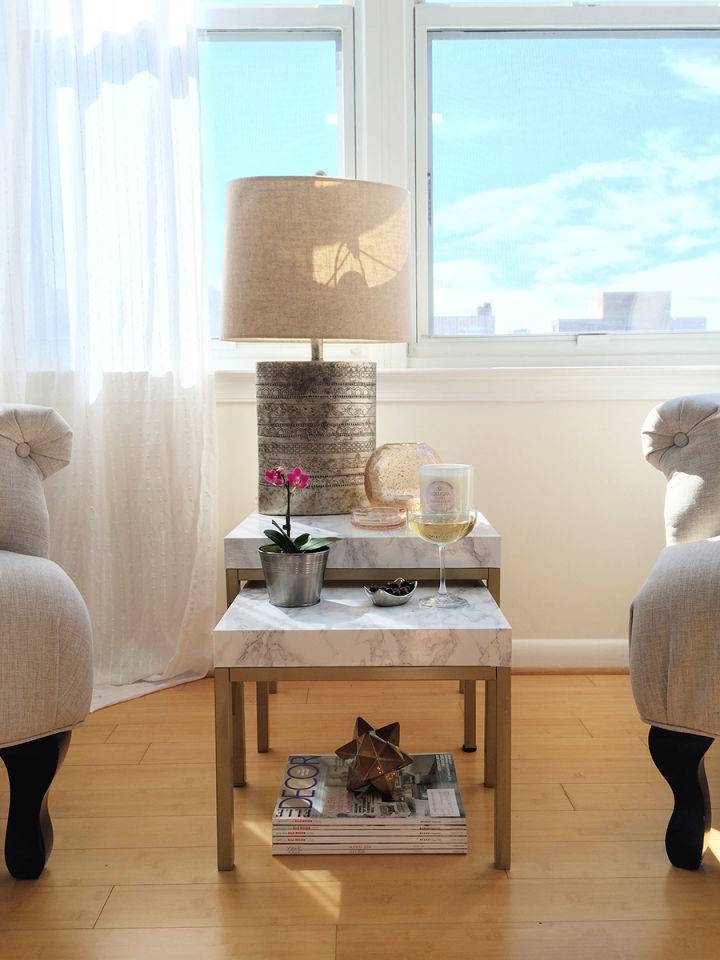
Revitalize your space with our easy DIY table makeover guide on Splendor Styling. Transform your old tables into stylish, eye-catching pieces with just a few simple supplies: gold spray paint and marble-like contact paper.
We walk you through each step, from prepping your table with painter's tape to applying the contact paper for a sleek finish. No heavy tools are required, and perfect for a weekend project. Elevate your home's ambiance with this chic, budget-friendly makeover. Get inspired and start your transformation today!
15. Copper Patterned Iphone Case
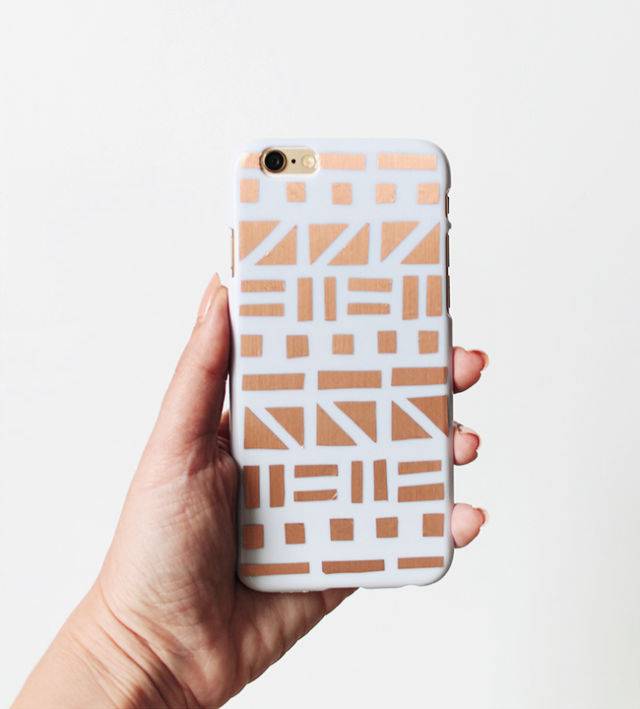
Elevate your iPhone’s style with a unique DIY copper patterned case. You only need a few simple materials: a plain case, metallic contact paper, small scissors, tweezers, and optionally, Mod Podge to seal your masterpiece. Follow an easy process to cut, layout, and stick shapes onto your case. Be mindful of the contact paper’s grain for a consistent shine. This project is perfect for a cozy crafting session. For a detailed guide, visit Almost Makes Perfect.
Conclusion:
In conclusion, exploring 15 unique DIY contact paper ideas offers a creative and budget-friendly way to revamp your space. From customizing countertops to beautifying old furniture, the versatility of contact paper makes it an ideal choice for DIY enthusiasts seeking to add a personal touch to their homes.
With guidance on how to start, apply, and enjoy your projects, this guide ensures a smooth crafting experience. Embracing these DIY projects not only elevates your interior design but also unleashes your creativity, proving that a small change can make a big difference. So grab your supplies, choose your project, and transform your space with contact paper today.
Author Bio
As a seasoned DIY enthusiast and home decor blogger, I’ve spent years exploring and sharing creative ways to beautify living spaces. My passion lies in teaching others how to make impactful changes in their homes, ensuring each guide is practical, detailed, and accessible for all skill levels.


