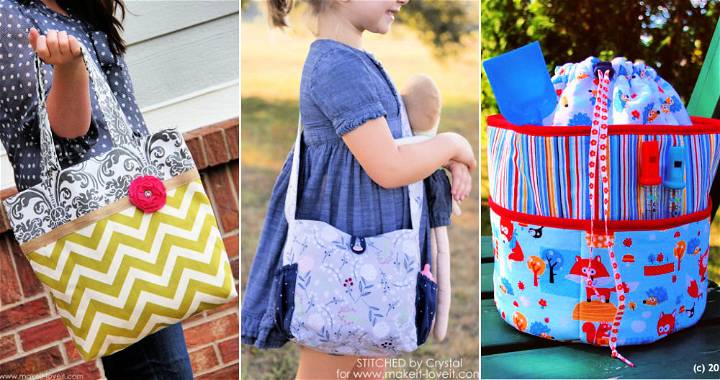
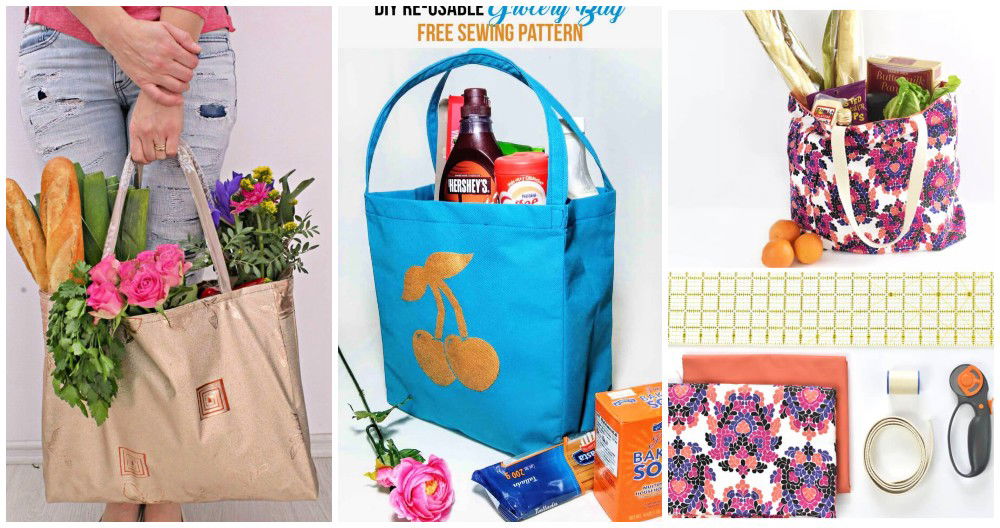
Making your own DIY lunch bag is not only a fun and rewarding project but also a step towards more sustainable living. With 15 free DIY lunch bag patterns to choose from, you're sure to find the perfect design that meets your needs. These patterns vary in style, size, and complexity, making it easy to customize according to your preferences. Crafting a DIY lunch bag gives you the freedom to select materials that suit your lifestyle, whether you prioritize durability, insulation, or aesthetics.
Embarking on a project to sew your own lunch bag can seem daunting at first, but with our comprehensive guide, it turns into an enjoyable and fulfilling activity. From gathering the right materials to following step-by-step instructions and leveraging pro tips for success, we've got you covered. Plus, we offer advice on customization and maintenance to ensure your lunch bag not only looks great but lasts long.
Get ready to explore the next sections, where you'll learn everything needed to make a lunch bag that's uniquely yours.
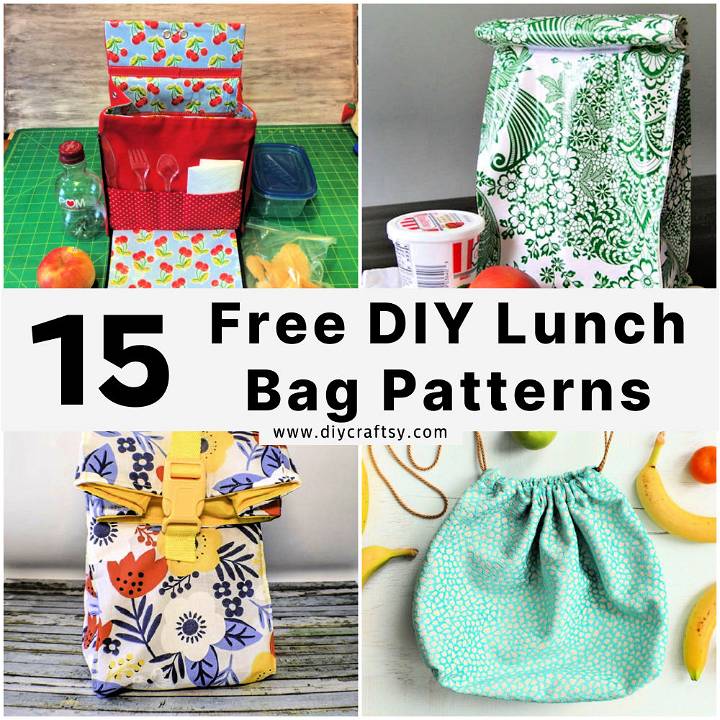
How to Make a Lunch Bag: A Step-by-Step Guide
Making your own lunch bag is not only an eco-friendly option but also a chance to showcase your personal style. With this easy-to-follow guide, you'll learn how to make a durable and stylish lunch bag in no time. Before we dive into the steps, ensure you have all the necessary materials ready.
Materials Needed
- Outer Fabric: Choose a printed canvas measuring 88 x 38 cm (34 5/8" x 15"). This will be the exterior of your lunch bag.
- Lining Fabric: Pick a piece of cotton fabric with the same measurements as the outer fabric. This will serve as the interior.
- Cotton Rope: A 4mm thick piece, 7 cm (2 3/4") long, will act as the drawstring.
- Webbing Strap: A 3 cm (1 1/4”) wide strap, 22 cm (8 5/8") in length, will be the handle.
- Button: You'll need one button for closure.
Step-by-Step Instructions
Prepare the Fabrics
- Begin by laying both the outer and lining fabrics wrong side up on your work surface.
- Make sure they are precisely aligned over one another.
Cutting and Folding
- Fold the fabric in half, ensuring the short ends meet. Press the fold firmly.
- On the folded fabric, mark the center point at both ends.
Sewing the Sides
- Sew along both open sides, leaving a small gap at the center fold marks for the drawstring.
Adding the Drawstring
- Cut a small hole on either side of the bag within the seam allowance.
- Use a safety pin to thread the cotton rope through the holes, circling around the top of the bag.
Attaching the Webbing Strap
- Position the webbing strap on one side of the bag to make a loop, making sure it's properly centered.
- Sew the ends of the strap to the bag, reinforcing it with multiple stitches for durability.
Sewing in the Button
- On the opposite side of the bag from the handle, sew the button in place just below the drawstring channel.
Finishing Touches
- Turn the bag inside out, gently pushing out the corners.
- Now, you have a custom-made lunch bag with a drawstring closure and a sturdy handle!
Tips for Success
- Choose a durable and washable fabric for both the outer and inner layers to ensure your lunch bag lasts long.
- Personalize your bag with decorative stitches, patches, or fabric paint for a unique touch.
Video Tutorial
For a step-by-step video tutorial on making a lunch bag, watch Fast & Easy! How to make a lunch bag on YouTube.
This visual guide complements our written instructions perfectly, offering an engaging way to understand each step thoroughly. It's a fantastic resource for those who prefer learning visually, making the process clear and enjoyable.
Make your own personalized lunch bag with just a few materials and a touch of creativity. A fun and rewarding DIY project that is both practical and eco-friendly.
Customization Ideas for Your DIY Lunch Bag
Making a DIY lunch bag is not just about crafting a functional item; it's also an opportunity to express your personal style and creativity. Here are some ideas to help you customize your lunch bag and make it truly one-of-a-kind:
- Choose Your Colors and Patterns: Start by selecting fabrics that reflect your personality. Do you prefer bold and bright or subtle and sophisticated? Patterns can range from floral to geometric, or you might opt for a solid color with a contrasting trim.
- Add Pockets and Compartments: Functionality meets style when you add extra pockets to your lunch bag. Consider a mesh side pocket for a water bottle, a front pocket for utensils, or an interior compartment for an ice pack.
- Personalize with Appliques: Appliques are a fun way to add character to your lunch bag. Cut out shapes from fabric scraps—like fruits, animals, or initials—and sew them onto your bag. You can also use iron-on patches for an easier option.
- Embroidery and Embellishments: If you enjoy embroidery, add some stitched designs to your lunch bag. Simple stitches can make beautiful patterns, or you can embroider a favorite quote or your name.
- Handles and Straps: The type of handle or strap you choose can change the look and feel of your bag. A braided rope handle adds a rustic touch, while an adjustable nylon strap gives a more modern and practical look.
- Closure Options: Velcro, snaps, buttons, or zippers not only secure your lunch bag but also contribute to its design. Choose a closure that complements your bag's style and ensures your food stays put.
- Lining Choices: The lining of your bag is just as important as the outside. Use a contrasting fabric to add an unexpected pop of color every time you open your bag. Waterproof linings are also practical for easy cleaning.
Your lunch bag will not only be a reflection of your style but also a testament to your crafting skills. Enjoy making a lunch bag that's as unique as you are!
Troubleshooting Common Issues in DIY Lunch Bag Making
When crafting your own DIY lunch bag, you might encounter a few hiccups along the way. Don't worry; these are common and can be easily fixed with a bit of know-how. Here's a guide to help you overcome some typical challenges:
Problem: Fabric Not Holding Shape
Solution: Use interfacing or fusible fleece to give your bag more structure. Iron it onto the wrong side of your fabric before sewing the pieces together.
Problem: Difficulty Sewing Through Thick Layers
Solution: When sewing through multiple layers or thicker fabrics, switch to a heavier needle, like a denim or leather needle. Reduce your sewing machine's speed for better control.
Problem: Zipper Installation Troubles
Solution: Zippers can be tricky, but using zipper foot attachment and basting the zipper in place before final sewing can make the process smoother. Remember to iron the fabric flat first.
Problem: Lining Keeps Shifting
Solution: To keep the lining from moving around, tack it to the outer bag at the corners or use a few hand stitches to secure it to the zipper tape.
Problem: Bag Isn't Waterproof
Solution: If you want a waterproof lunch bag, choose a waterproof fabric like PUL or oilcloth for the lining. You can also apply a waterproof spray to the finished bag.
Problem: Handles Aren't Sturdy
Solution: For stronger handles, use webbing or make your own by folding fabric strips and sewing them with multiple rows of stitching. Attach them securely to the bag with reinforced stitches.
By anticipating these issues and knowing how to address them, you'll be well on your way to making a lunch bag that's not only stylish but also durable and functional.
Embracing Sustainability with Your DIY Lunch Bag
In today's world, making environmentally conscious choices is more important than ever. By making a DIY lunch bag, you're already taking a step towards sustainability. Here's how you can ensure your lunch bag project aligns with eco-friendly practices:
- Choose Sustainable Materials: Opt for natural fibers like organic cotton, hemp, or jute. These materials are biodegradable and have a lower environmental impact than synthetic alternatives.
- Upcycle with Purpose: Give old clothes or textiles a new life by repurposing them into your lunch bag. This not only reduces waste but also adds a unique story to your creation.
- Minimize Fabric Waste: Plan your cuts carefully to use fabric efficiently. Save scraps for future projects or use them as stuffing or quilt patches.
- Eco-Friendly Accessories: Select natural or recycled materials for buttons, zippers, and other bag accessories. Look for items that can be easily recycled or composted at the end of their life.
- Non-Toxic Adhesives and Dyes: If you're using adhesives or dyes, choose products that are free from harmful chemicals. Water-based and plant-based options are safer for you and the planet.
- Reusable and Washable Design: Design your lunch bag to be durable and easy to clean, encouraging long-term use and reducing the need for disposable alternatives.
- Educate and Inspire: Share your sustainable DIY journey on social media or with friends. Inspiring others can amplify the positive impact of your eco-friendly choices.
By focusing on sustainability, you're not just crafting a lunch bag; you're contributing to a healthier planet. Your thoughtful choices can inspire others to make a difference, one DIY project at a time.
Maintenance and Care Tips for Your DIY Lunch Bag
Taking care of your DIY lunch bag is essential to ensure it stays clean, hygienic, and lasts a long time. Here are some tips to help you maintain your lunch bag:
- Regular Cleaning: Clean your lunch bag regularly to prevent stains and odors. If it's made of fabric, turn it inside out and shake out any crumbs. Spot clean any stains using a mild detergent and a soft brush.
- Machine Washing: If your lunch bag is machine washable, use a gentle cycle with cold water. To protect the shape and print of your bag, place it in a pillowcase or laundry bag before washing.
- Hand Washing: For bags that aren't machine washable, hand wash them with warm soapy water. Use a soft sponge to gently scrub the inside and outside of the bag. Rinse thoroughly to remove all soap residue.
- Drying: After washing, air dry your lunch bag completely before using it again. Avoid using a dryer as the high heat can damage the fabric or insulation. Hang the bag upside down to ensure water drains out and air circulates inside.
- Deodorizing: To remove any lingering odors, sprinkle baking soda inside the bag and let it sit overnight. In the morning, shake out the baking soda and wipe the bag with a damp cloth.
- Storing: When not in use, store your lunch bag in a cool, dry place. Keep it open or loosely folded to prevent mold and mildew growth.
- Repairs: Check your lunch bag periodically for any wear and tear. If you find a loose thread or a small tear, repair it promptly to prevent further damage.
By following these maintenance tips, your DIY lunch bag will stay fresh and last longer. Enjoy crafting and caring for your bag!
FAQs About DIY Lunch Bag
Discover the answers to all your DIY lunch bag questions in this comprehensive FAQ guide. Learn how to make your own stylish and functional lunch bag.
What is the best size for a DIY lunch bag?
The ideal size depends on your needs. A standard size is about 9 inches tall, 7 inches wide, and 4 inches deep. Adjust the dimensions based on what you plan to carry.
How can I make my lunch bag waterproof?
Use waterproof fabrics like PUL or oilcloth for the lining. You can also line your bag with a plastic liner or apply a waterproof spray to the fabric.
Can I add insulation to my lunch bag?
Yes, you can add insulation to keep your food at the right temperature. Use materials like insulated batting or foam sheets between the outer fabric and lining.
How do I adjust the pattern for different sizes?
To adjust the size, simply scale the pattern up or down while maintaining the same proportions. Make sure to account for seam allowances.
What type of closure is best for a lunch bag?
Velcro, snaps, buttons, and zippers are all good options. Choose one based on your skill level and the style of your bag.
How do I clean my fabric lunch bag?
If it's machine washable, wash it on a gentle cycle with cold water. For hand washing, use warm soapy water and air dry completely.
Can I use recycled materials for my lunch bag?
Absolutely! Upcycling materials like old jeans or curtains is a great way to be eco-friendly and add a unique touch to your bag.
By keeping these answers in mind, you'll be well-equipped to tackle any challenges that come your way during your DIY lunch bag project.
15 Free DIY Lunch Bag Patterns To Sew
Discover 15 free DIY lunch bag patterns to sew and make your own stylish and practical lunch bags in no time. Get crafting today!
1. DIY Lunch Bag With Zip Down Placemat
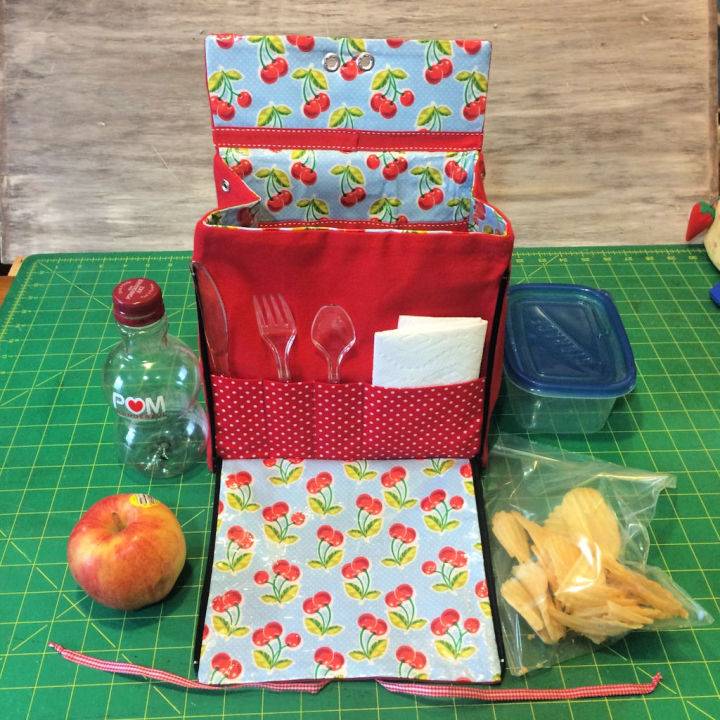
Make a custom lunch bag with a zip-down placemat using this step-by-step guide from Instructables. Ideal for anyone who enjoys crafting their accessories, this project is perfect for ensuring cleanliness and convenience during meal times. The design incorporates a vinyl-lined placemat and interior for easy cleaning, as well as a built-in utensil pocket, making it practical for work or outdoor activities.
With detailed instructions on materials and assembly, this DIY lunch bag can collapse for compact storage and is spacious enough to carry a hearty lunch and snacks. Whether sewing for personal use or as a thoughtful gift, this tutorial provides all the information needed to make a functional and stylish lunchtime accessory.
2. How to Sew a Lunch Box Bag
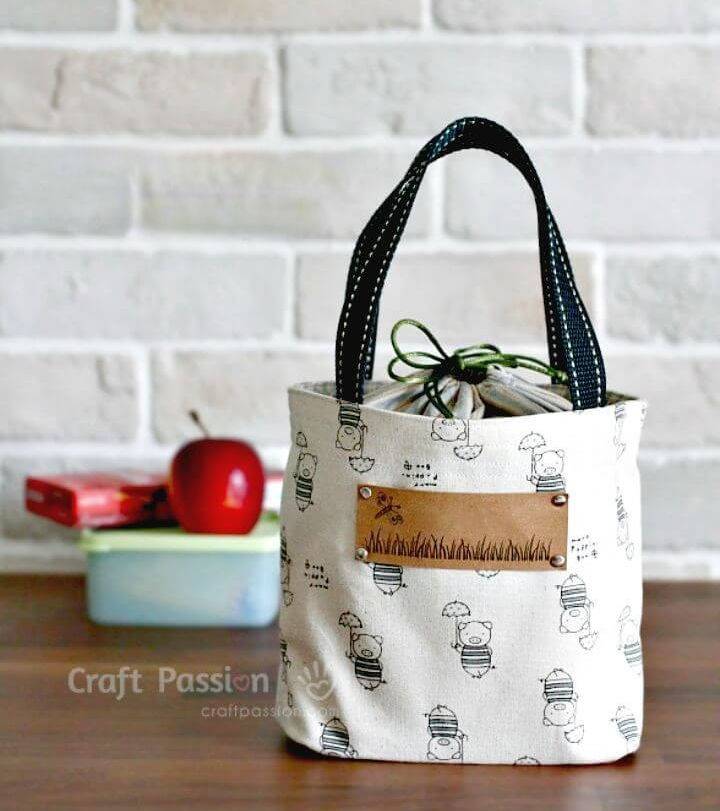
Crafting a homemade lunch box bag has never been easier with the step-by-step guide provided by Craft Passion. Their tutorial offers clear instructions and a free pattern to make a versatile bag with a unique drawstring cover to keep items secure. Perfect for carrying lunch or small craft projects, this DIY sewing project is a delightful way to add a personal touch to your daily essentials.
The bag's design ensures it lays flat when not in use, saving storage space. Moreover, by adding an insulated lining, you can transform the bag into a thermal lunch carrier. With this guide, you'll learn to sew a practical item that's not only functional but also stylish and reusable.
3. Drawstring Lunch Bag Sewing Pattern
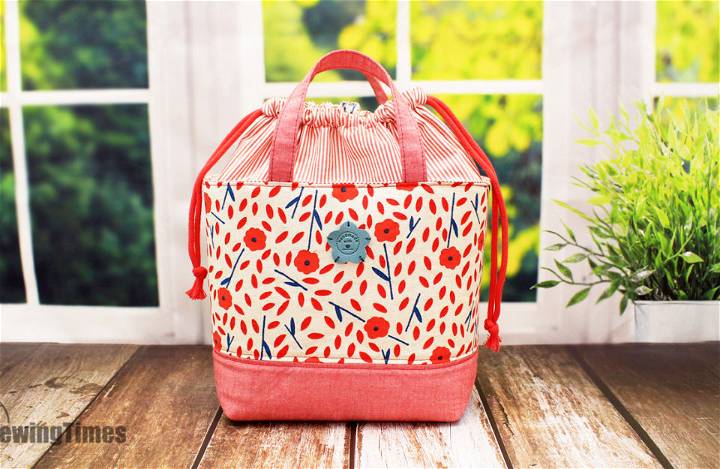
Make a charming DIY drawstring lunch bag with ease following the instructive guide on Sewingtimesblog. Ideal for daily use or as a unique project bag, this tutorial breaks down the process into manageable steps, making it accessible for sewing aficionados of all levels.
The clear and engaging instructions will help you craft a practical accessory, complete with approximate dimensions of 8⅜″ W × 8⅜″ H × 6″ D, from the comfort of your home. This project is perfect for those looking to add a handmade touch to their collection, and the result is a custom lunch bag that showcases your skills and style. Join in on the fun of DIY sewing with this helpful and relevant tutorial.
4. Sewing a Back to School Lunch Bag
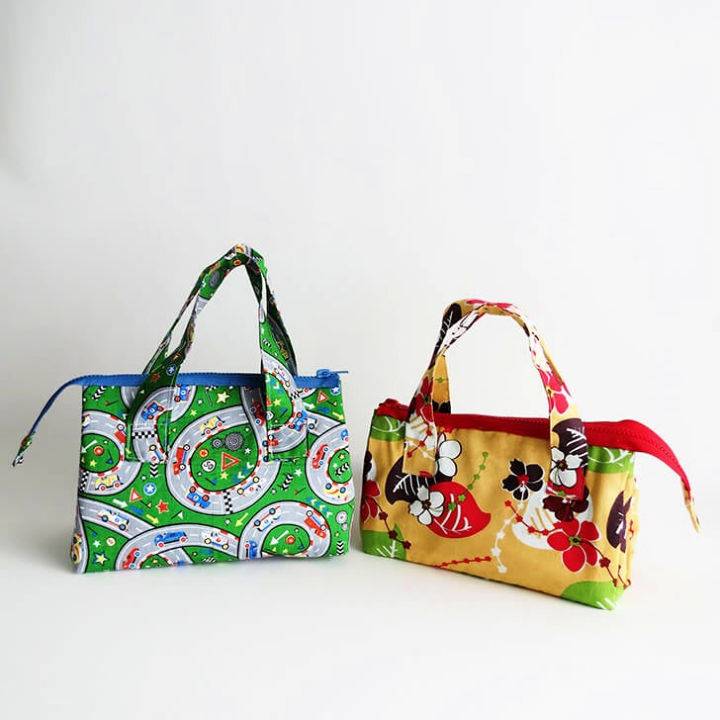
Make a charming and practical lunch bag for your kids with this easy-to-follow sewing tutorial from Dream a Little Bigger. Delve into crafting a unique piece that will brighten up your child's school day. You'll need some sturdy cotton fabric, interfacing for reinforcement if you opt for a lighter material, a 12-inch zipper, and basic sewing supplies.
The process involves sewing the fabric into a simple bag shape, adding a lining, installing a zipper, and attaching handles for easy carrying. With your creativity, you can select fun patterns and colors to personalize the lunch bag. This project is not only engaging but also provides an opportunity for you to handcraft a special item for your kids that they will cherish during their lunchtime breaks.
5. Make Your Own Drawstring Lunch Bag
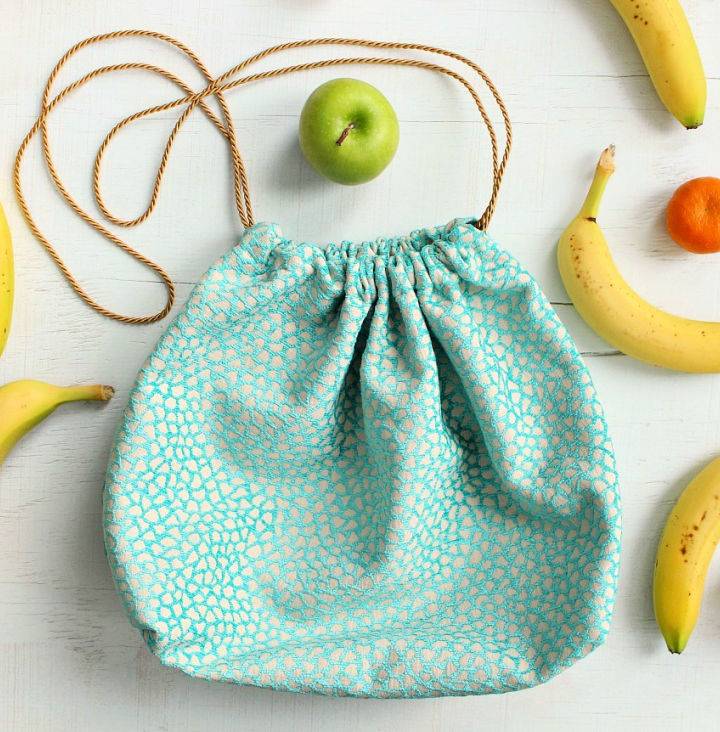
If you're eager to craft a unique and practical lunch bag using materials you already have, Dans le Lakehouse provides an engaging step-by-step guide on making a custom drawstring lunch tote. Perfect for carrying those bulky salad containers, this DIY project transforms sturdy fabric into a stylish and functional lunch bag with a neat drawstring closure.
The instructions are easy to follow, featuring sewing tips and tricks to ensure a smooth crafting experience. By following Tanya's creative process, you can repurpose unused fabrics and make a personalized lunch bag that's both spacious and collapsible for convenience. Dive into this sewing project to elevate your lunchtime accessories with a touch of handmade charm.
6. DIY Reusable Lunch Bag at Home
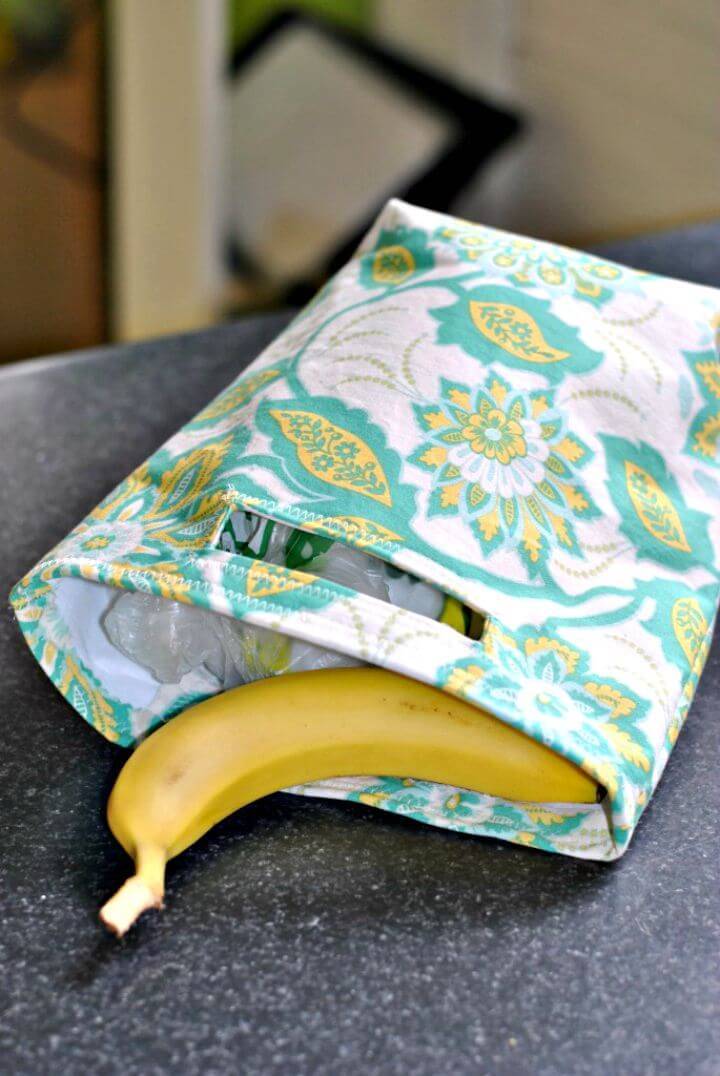
If your car often becomes a haven for wrappers, bottles, and assorted trash during road trips, making a car trash bag can be a handy solution. This DIY project is perfect for keeping your vehicle clutter-free. IJWT Ltd. provides a step-by-step guide on crafting a durable and washable bag that can be used not only for gathering garbage but also as a reusable lunch bag or a carrier for your essentials on outings.
The instructions are clear and easy to follow, requiring simple materials such as home decor weight fabric, medium-weight fusible interfacing, and basic sewing tools. Dive into this sewing project to make a practical accessory for your car or for enjoying outdoor activities with less mess and more convenience. Craft Buds
7. How to Make Your Own Lunch Bag
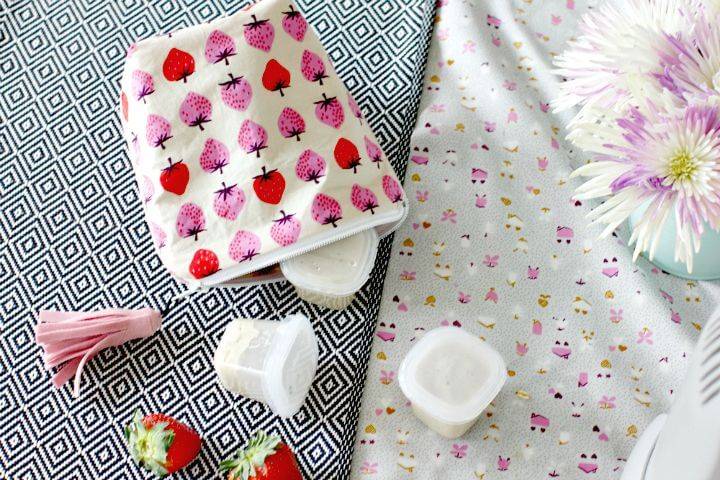
Gugu Guru brings an engaging DIY lunch bag tutorial for crafters aiming to make a functional and stylish accessory for baby, toddler, or even personal use. With clear instructions and a simple materials list, this project is accessible for crafters who have some sewing experience and are ready to tackle a project with a zipper.
The step-by-step guide ensures you can confidently craft a unique lunch bag, using a mix of velvet and vibrant quilting cotton, that not only serves as a cute container for food items but also adds a touch of luxury to your daily routine. Get your sewing kit ready, and visit Gugu Guru for the full tutorial to enhance your crafting repertoire with this lovely lunch bag.
8. Easy DIY Back to School Lunch Box
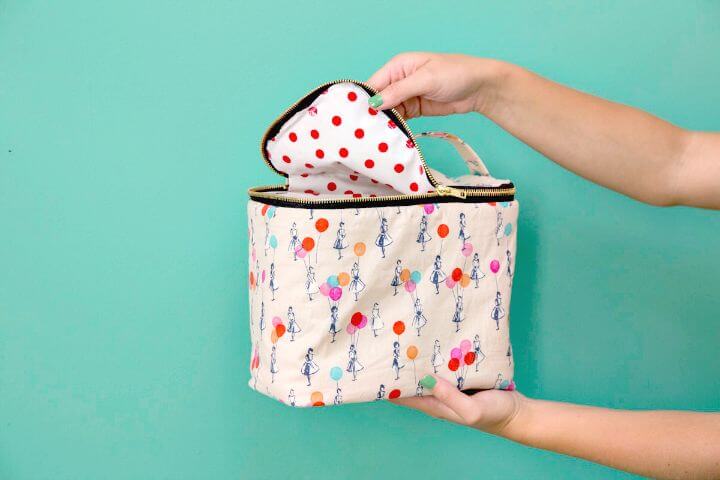
Preparing for the new school year involves more than purchasing supplies—it's about starting fresh with new experiences and routines. Crafting a custom back-to-school lunch box can add a personal touch to your daily routine. At Dunn DIY, you'll find a comprehensive guide to making a stylish, insulated lunch tote that not only looks fantastic but also keeps your meals cool and secure.
The guide is detailed, perfect for those with intermediate sewing skills who enjoy challenging projects. With step-by-step instructions and tips for working with various fabrics, you'll be able to fashion a lunch box that rivals designer totes in both looks and functionality. It's a creative and practical project that promises to make lunchtime more enjoyable.
9. Sewing Your Own Lunch Bag
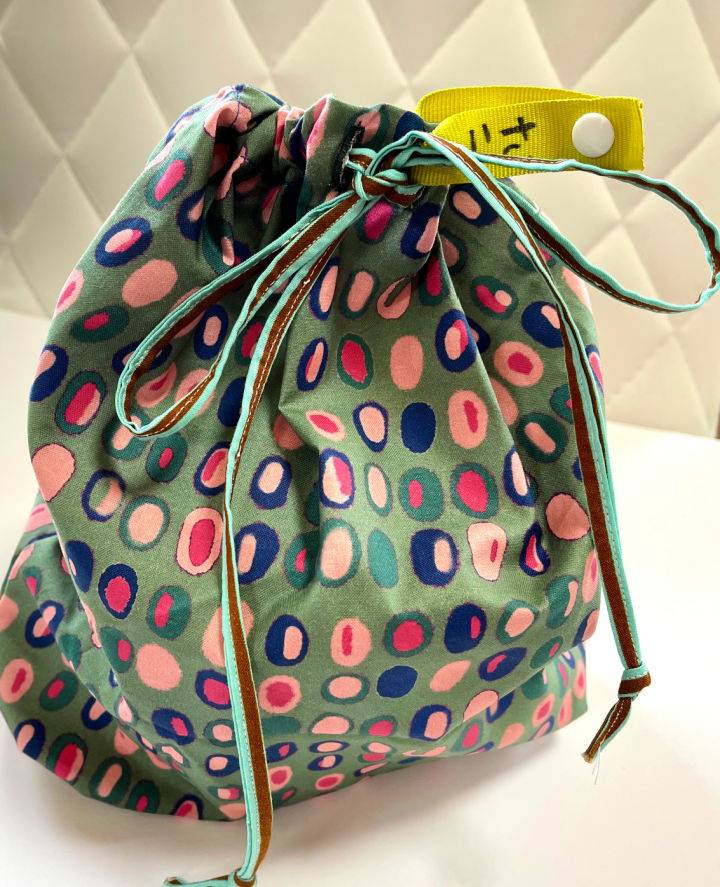
Craft a personalized lunch bag with Katie Kortman's engaging and easy-to-understand guide on WeAllSew. Perfect for back-to-school prep or spicing up your daily lunch routine, this tutorial teaches you how to sew a Japanese-inspired bento lunch bag. Follow the instructive steps to make a drawstring bag and a versatile napkin wrap, both of which are essential for carrying your homemade meals in style. With clear instructions and helpful tips, this sewing project is tailored to enhance your crafting experience and add a touch of handmade charm to your lunchtime.
10. DIY Insulated Lunch Tote Bag
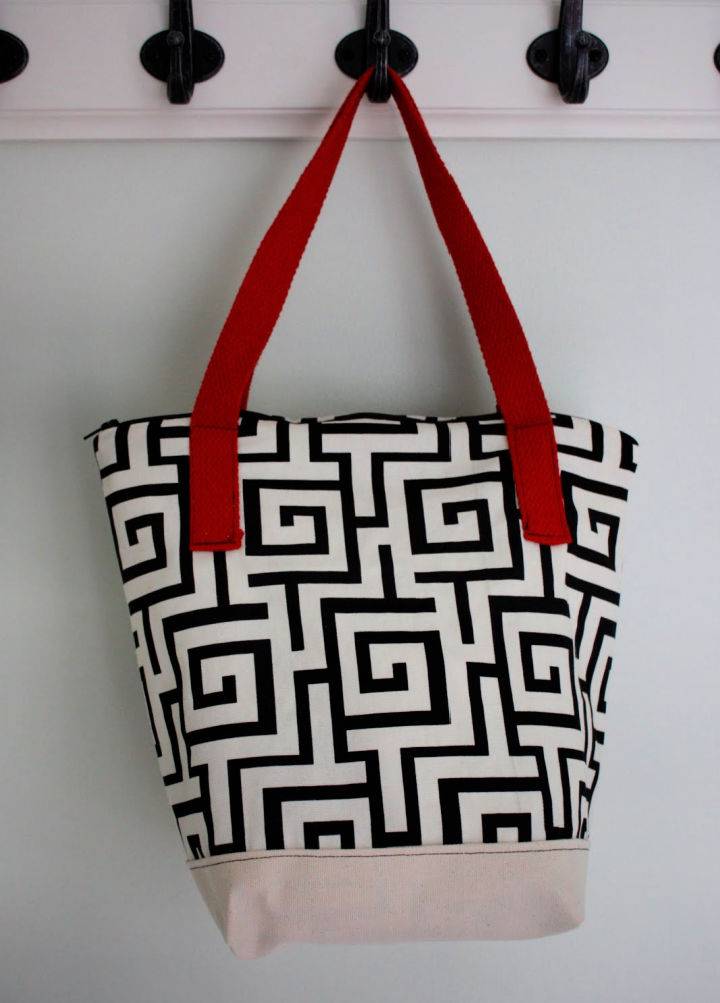
Step into the world of crafting with our Insulated Lunch Tote Tutorial. Updated for clarity and additional details, this guide is designed to help you make a practical and washable lunch tote. With precise instructions, you will learn how to cut, shape, and assemble your lunch tote using medium weight fabric, waterproof PUL, insulating Insul-Bright material, and a zipper.
This tutorial provides an engaging and instructive approach, ensuring that your finished product is not only functional but also a stylish accessory for your daily meals. Perfect for personal use or as a thoughtful handmade gift, follow our step-by-step process to achieve a durable and attractive insulated lunch tote. Zaaberry
11. Sew a Reusable Insulated Lunch Bag
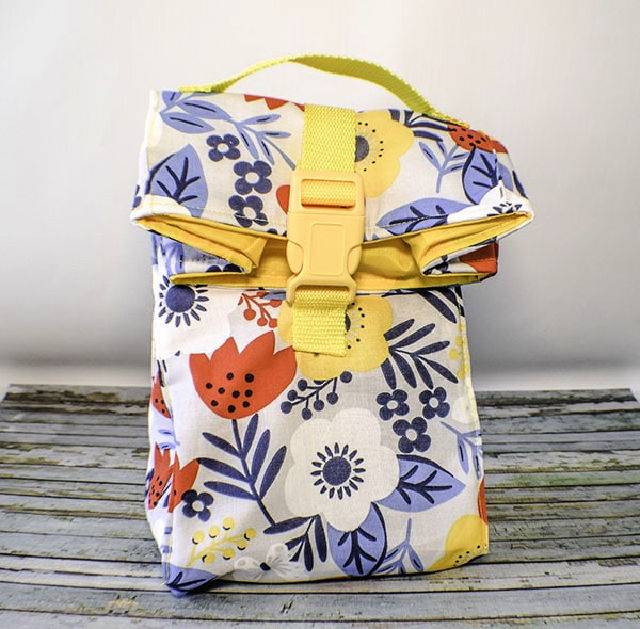
If you're keen on adding a personal touch to your daily routine and care about sustainability, crafting a reusable insulated lunch bag is an excellent project to undertake. Sew Very Crafty offers a step-by-step guide that will help you make a stylish and practical lunch bag using basic sewing techniques. Not only will this bag keep your meals at the right temperature, but it's also water-resistant, thanks to the clever use of ripstop nylon and Insul-Bright materials.
Whether you're off to work or enjoying a picnic, this DIY insulated lunch bag is a functional accessory that's sure to impress. It's a perfect project for those who enjoy sewing and are passionate about reducing their environmental footprint. Follow the instructions carefully, gather your materials, and enjoy the satisfaction of sewing a unique lunch bag that reflects your style and commitment to sustainability.
12. How to Make Oilcloth Lunch Bag
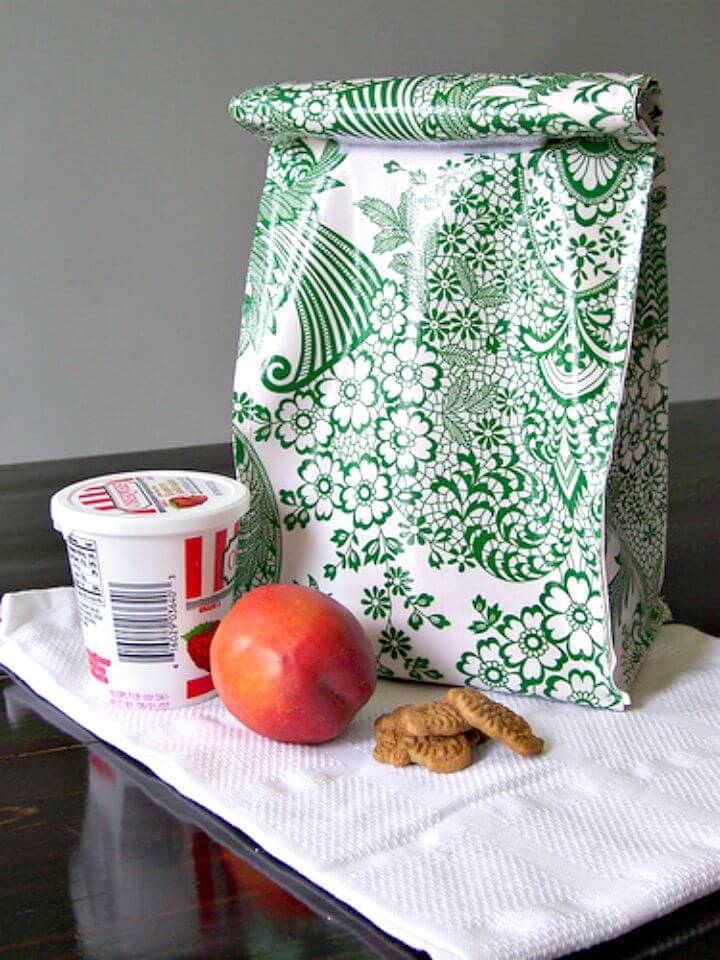
Discover the versatility and utility of crafting an oilcloth lunch bag with our easy-to-follow guide. This lunch bag is not only a stylish way to carry your meals but also a sustainable option that encourages healthier eating and cost savings. Say goodbye to cafeteria food and hello to homemade goodness! Our tutorial will walk you through the process using oilcloth—a durable material perfect for such projects—and common household items like a thin batting and a shower curtain for lining.
With simple sewing steps, you can make a custom lunch bag featuring a Velcro closure to keep your snacks secure. Perfect for everyday use, this lunch bag is a practical addition to your eco-friendly lifestyle, ensuring your meals are carried in style while keeping waste to a minimum. Join us as we show you how to craft a functional and chic lunch bag that stands out in the fridge at work or school. Tumbling Blocks
13. Colorful DIY Decorated Lunch Bag
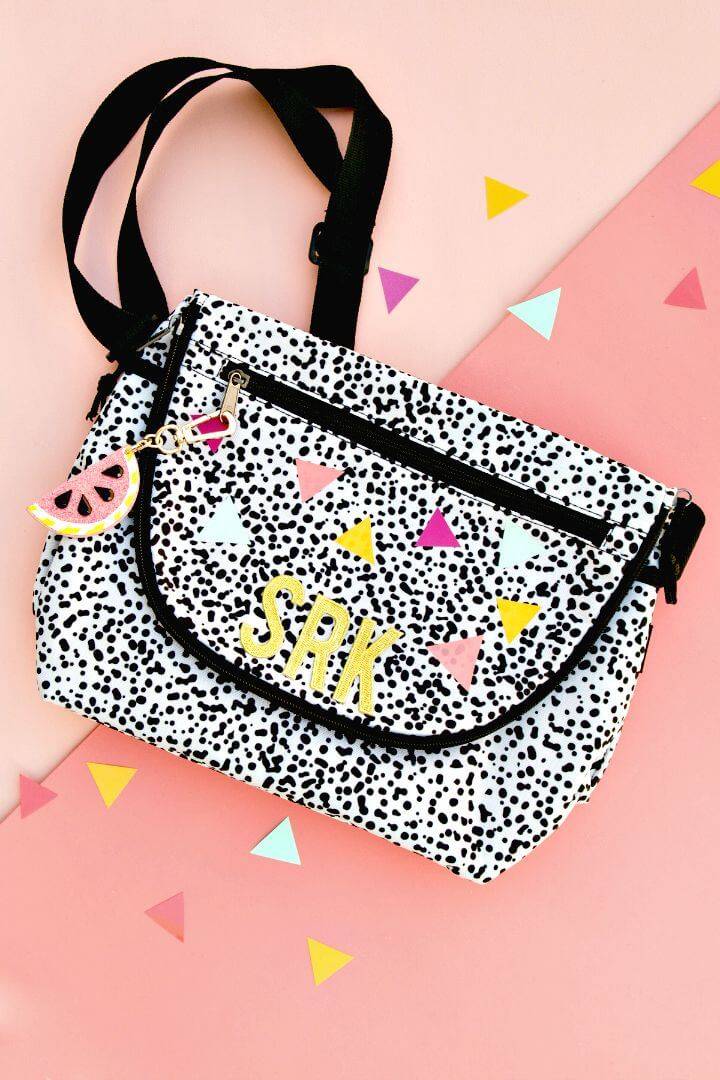
Revamp your lunchtime style with Sarah Hearts' DIY Colorful Decorated Lunch Bag guide. This creative tutorial walks you through customizing a store-bought lunch bag into a vibrant, personalized accessory sure to make a statement at work or school. Gather simple supplies like gold iron-on letter patches, colorful heat transfer vinyl, and a mini iron to start the transformation.
Cut the vinyl into shapes like triangles or hearts and iron them on for a unique touch. Add your name or a fun phrase with the letter patches, and you have a one-of-a-kind lunch carrier. This engaging craft is perfect for those looking to infuse a bit of personality into their daily routine. Get crafting and ensure your lunch bag never gets mistaken again!
14. Simple and Easy Button Lunch Bag
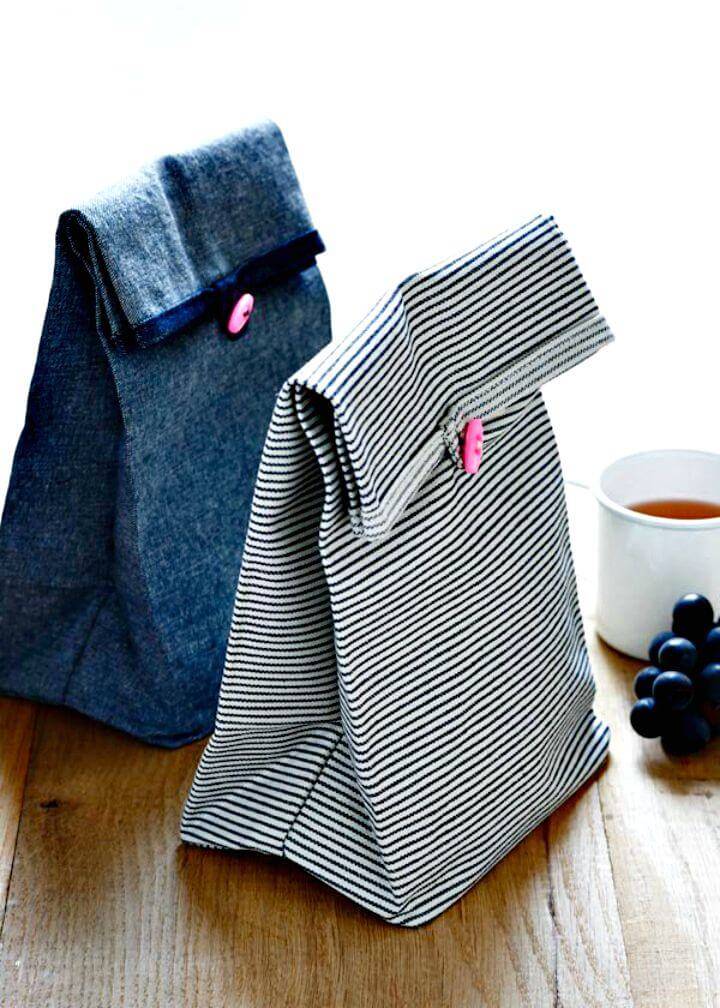
Embrace the crispness of fall with a creative project from Purl Soho. Their Button Lunch Bags are perfect for anyone wanting to add a personal touch to daily routines. These charming, homemade lunch bags are crafted from durable, washable cotton and secured with a quaint button.
Ideal for more than just your midday meal, these bags bring a sense of warmth and style to any occasion. The pattern is user-friendly, detailed, and accessible, guiding you through each step with clarity. So grab some fabric, matching bias tape, thread, and an oblong button, and start sewing your way into a sustainable and stylish lunchtime experience.
15. Homemade Quilted Lunch Bag
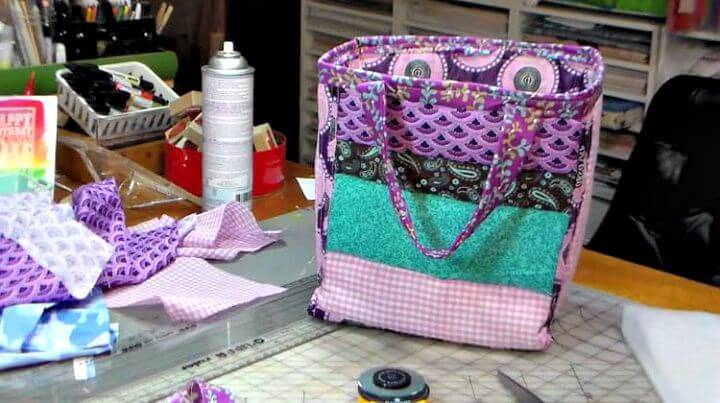
Making a quilted lunch bag for your kids is a charming and practical sewing project that adds a personal touch to their school day. Sewing.com offers an instructive guide that walks you through each step, from selecting fabrics to attaching straps, ensuring you craft a durable and stylish lunch bag.
With clear instructions and helpful tips, such as using basting spray to secure layers and pressing seams for easy assembly, you'll enjoy a satisfying crafting experience. Not only will your kids love their unique lunch bag, but you'll also contribute to waste reduction by avoiding disposable bags. Get ready to craft a homemade quilted lunch bag that's sure to be the envy of the school cafeteria!
Conclusion:
In conclusion, our exploration of 15 free DIY lunch bag patterns to sew provides a comprehensive guide to making your very own lunch bag. From selecting the right materials to the step-by-step construction process, customization ideas, and tackling common issues, we've covered all the essentials to guide you in making a lunch bag that not only stands out but also embraces sustainability.
Don't forget the importance of proper maintenance and care to extend the life of your creation. With these patterns and tips, you're well-equipped to make a functional, stylish, and eco-friendly lunch bag that reflects your personal taste and lifestyle. Happy sewing!


