Building a 3D printer from scratch has been a passion project of mine for some time now. My journey into the world of 3D printing began when I stumbled upon the concept of making your own printer rather than purchasing a pre-assembled one. This approach promised a deeper understanding of the mechanics and electronics behind 3D printing, as well as offering a more tailored experience to suit my specific printing needs. Inspired by various sources, including a comprehensive tutorial by Dr. D-Flo, I embarked on this challenging yet rewarding DIY adventure.
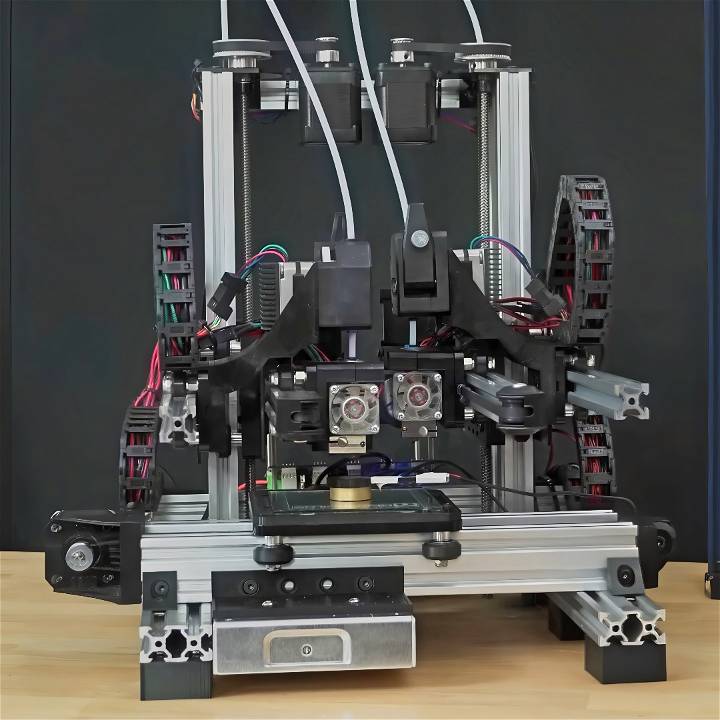
Step by Step Instructions
Learn how to build a DIY 3D printer from scratch with step-by-step instructions for selecting components, building the frame, wiring electronics, and more.
Selecting the Design and Components
My first step was deciding what type of 3D printer I wanted to build. I was intrigued by the idea of an Independent Dual Extruder (IDEX) system, which allows for more versatility in printing materials and colors. After extensive research, I landed on a design that featured two independently moving extruders, fine-tuned for precision and flexibility. The parts list was extensive, covering everything from the frame materials, stepper motors, to the electronic components like the motherboard and power supply. Each component was meticulously chosen to ensure compatibility and performance.
Building the Frame
The assembly began with constructing the frame out of aluminum extrusion rails. Cutting the rails to the correct length required precision, as the structure's integrity depended on this foundation. With the base assembled and all components squared perfectly, I had established the skeleton of my 3D printer.
Wiring and Electronics
Next was the task of wiring and setting up the electronics, arguably the most daunting part for a newcomer. Following detailed guides, I carefully connected stepper motors to their respective drivers on the motherboard, ensuring correct polarity and connections for limit switches and other sensors. I opted for a Duet Wi-Fi board for its superior capabilities and the convenience of wireless control. The calibration of the stepper drivers and configuring the motherboard firmware were critical steps to translate digital commands into precise mechanical movements.
Calibration and Fine-tuning
With the hardware set up, I was ready for calibration. I started with basic movements, testing each axis for smooth operation and correct direction. Following that, I established the home positions and fine-tuned the Z-axis using a probe for consistent nozzle height across the bed. Extruder calibration ensured accurate filament extrusion by adjusting steps per millimeter settings in the firmware.
My first print was a simple cube, serving as a test for dimension accuracy and the printer's ability to handle basic shapes. From there, I moved on to more complex calibration prints, like a Benchy boat, tweaking slicer settings to optimize print quality, layer adhesion, and support structures. Each print brought new insights, leading to incremental improvements in the printer's performance.
Overcoming Challenges
Throughout this project, I faced numerous challenges, from mechanical issues like misaligned rails or belts to electronic hiccups like incorrect firmware settings. One particular hurdle was achieving the perfect first layer, which required adjusting bed leveling, nozzle distance, and temperature settings. Another was managing the complexity of dual extrusion prints, balancing the delicate interplay between two independent extruders to achieve clean, multi-material prints.
Reflecting on the Journey
Building a 3D printer from scratch was an incredibly educational experience. It pushed me to learn about aspects of mechanical engineering, electronics, and computer programming I had never touched before. The process was filled with moments of frustration, but also tremendous satisfaction, especially when seeing a successful print emerge from a machine I had built with my own hands.
Sharing Knowledge and Expanding the Community
Eager to share my learnings and connect with others on this DIY journey, I started documenting my process, compiling tips, troubleshooting guides, and resources that had helped me. Participating in online forums became a routine, offering advice to novices and learning from experienced builders. This community aspect, sharing successes and failures, and collectively pushing the boundaries of what homemade 3D printers can achieve, has been one of the most rewarding parts of this endeavor.
Building a 3D printer from scratch is not just about making a machine but about embracing a process of continuous learning, troubleshooting, and innovation. It's a journey that tests patience and persistence but offers immense satisfaction and a deep understanding of the technology that's reshaping how we build and manufacture. Whether optimizing print settings for a complex model or experimenting with new materials, the possibilities are endless, and the adventure is just beginning.
Common Troubleshooting Tips for Your DIY 3D Printer
1. Layer Adhesion Problems
- Issue: Prints not adhering well to the build surface, resulting in layer separation or warping.
- Possible Causes:
- Incorrect bed leveling.
- Inadequate bed adhesion (e.g., unclean surface or improper adhesive).
- Incorrect first layer height.
- Solutions:
- Calibrate Bed Leveling: Ensure the bed is perfectly leveled. Use a piece of paper or a feeler gauge to adjust the bed height.
- Clean the Build Surface: Regularly clean the print bed with isopropyl alcohol or warm soapy water to remove dust, grease, or residue.
- Use Proper Adhesive: Apply painter's tape, glue stick, or specialized bed adhesives (like BuildTak) to improve adhesion.
- Check First Layer Height: Adjust the nozzle height during the first layer to achieve optimal adhesion.
2. Warped Prints
- Issue: Prints lifting or warping at the corners.
- Possible Causes:
- Uneven cooling (rapid cooling on one side).
- Incorrect bed temperature.
- Material shrinkage during cooling.
- Solutions:
- Even Cooling: Ensure proper cooling fans are evenly distributing airflow across the print.
- Bed Temperature: Adjust the heated bed temperature based on the filament type (usually between 50°C and 70°C).
- Enclosure: Consider using an enclosure to maintain consistent ambient temperature.
- Brims or Rafts: Add a brim or raft to improve adhesion and reduce warping.
3. Stringing and Oozing
- Issue: Thin strings of filament between printed parts or along travel paths.
- Possible Causes:
- High nozzle temperature.
- Excessive retraction distance.
- Poorly calibrated retraction settings.
- Solutions:
- Retraction Settings: Optimize retraction distance (usually between 1mm and 6mm) and speed (around 25mm/s).
- Temperature Control: Lower the nozzle temperature slightly to reduce stringing.
- Travel Speed: Adjust travel speed to minimize filament oozing during non-print moves.
4. Nozzle Clogs
- Issue: Filament flow interrupted due to a clogged nozzle.
- Possible Causes:
- Dust or debris in the nozzle.
- Poor-quality filament.
- Incorrect retraction settings.
- Solutions:
- Cold Pull (Atomic Pull): Heat the nozzle, then manually pull out the filament to clear any debris.
- Inspect Filament Quality: Use high-quality filament to prevent impurities.
- Regular Maintenance: Periodically disassemble the hotend and clean the nozzle.
5. Ghosting and Ringing (Artifact Lines)
- Issue: Visible wavy lines or artifacts on the printed surface.
- Possible Causes:
- Mechanical vibrations during printing.
- Belt tension issues.
- Acceleration and jerk settings.
- Solutions:
- Reduce Vibrations: Place the printer on a stable surface and dampen vibrations (e.g., using anti-vibration pads).
- Check Belt Tension: Ensure belts are properly tensioned (not too loose or too tight).
- Fine-Tune Acceleration and Jerk: Adjust printer firmware settings to minimize sudden movements.
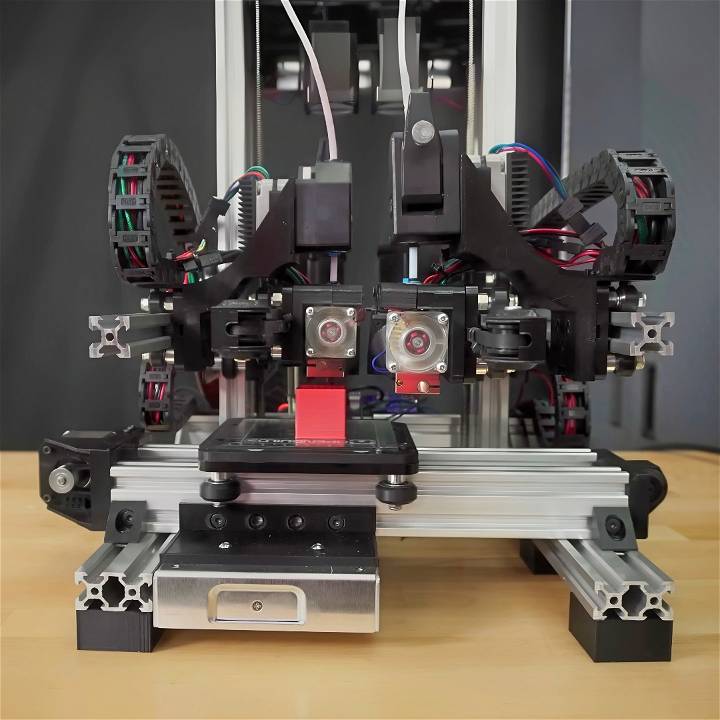
DIY 3D Printer FAQs
Get answers to all your DIY 3D Printer FAQs in one place. Learn about printing materials, troubleshooting, and more. Start your 3D printing journey today.
What is a DIY 3D Printer?
A DIY 3D printer is a machine you build yourself, either from a kit or from scratch. It's a project that combines electronics, mechanics, and software to build a device capable of turning digital models into physical objects by layering material.
Why Should I Build My Own 3D Printer?
Building your own 3D printer is a rewarding experience that can save you money. It also provides a deep understanding of the machine's workings, making future repairs and upgrades easier. It's a great learning experience and can be more cost-effective than buying a pre-assembled printer.
What Do I Need to Build a DIY 3D Printer?
To build a DIY 3D printer, you'll need a kit or the individual components, which include a frame, motors, a control board, power supply, extruder, and printing bed. You'll also need tools for assembly and possibly soldering equipment for electronics.
How Difficult is it to Build a DIY 3D Printer?
The difficulty varies based on the complexity of the design and your experience with similar projects. Kits come with instructions and are a good starting point for beginners. Building from scratch requires more knowledge and may be more challenging.
Can I Save Money by Building a DIY 3D Printer?
Yes, building a DIY 3D printer can be more cost-effective than buying a pre-assembled one. Kits are generally cheaper and allow for customization. However, the cost savings may not be significant if you need to purchase many tools or make mistakes that require purchasing additional parts.
Remember, building a 3D printer is a complex project that requires time, patience, and a willingness to learn. But the result is a personalized machine that you'll understand inside and out.
Conclusion:
In conclusion, building a DIY 3D printer can be a rewarding and cost-effective project for technology enthusiasts. With the right tools and materials, you can unleash your creativity and embark on a journey to explore the world of 3D printing.


