Building your own DIY A-frame cabin can be a fun and rewarding project, especially for those who enjoy hands-on activities. This guide will walk you through the essential steps on how to build an A-frame house from start to finish. With straightforward instructions and practical advice, you'll gain the confidence and skills needed to successfully complete your DIY A-frame cabin.
If you’ve always been curious about constructing your own structure, this guide covers everything from planning and materials to final touches. Detailed illustrations and step-by-step directions make it easy to follow along.
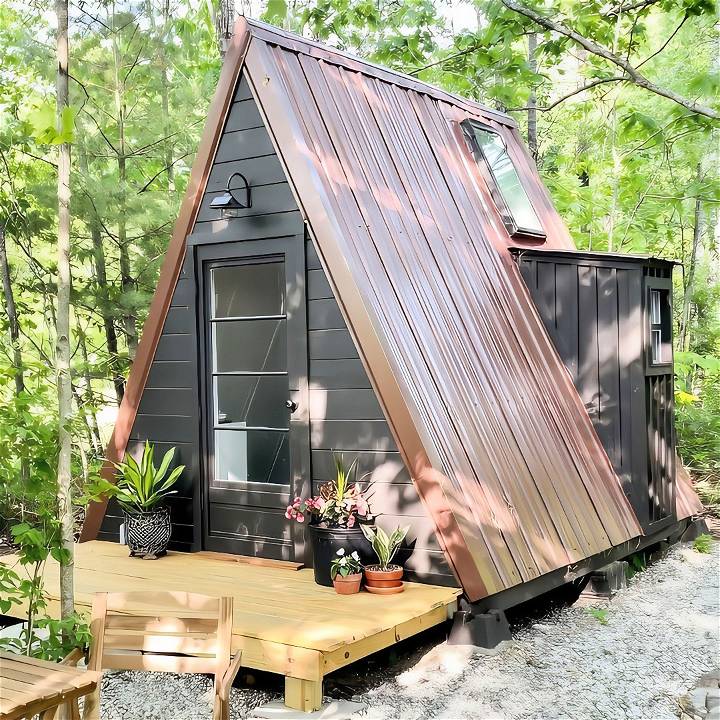
Build your dream DIY A-Frame Cabin with our step-by-step guide. Perfect for beginners. Start your project today and enjoy cozy, stylish living.
Step by Step Instructions
Learn how to DIY an a-frame cabin with our detailed step-by-step guide. From clearing land to final decoration, we cover all materials and instructions needed!
Clearing the Land
Discover the essentials of clearing the land—your ultimate guide to preparing land for development, improving soil health, and enhancing its value.
Materials Needed:
- Chainsaw
- Shovel
- Wheelbarrow
Clearing the land was the first big task. It might seem simple, but clearing trees, shrubs, and rocks took a lot more effort than we initially anticipated. We started by using a chainsaw to cut down large trees. It’s essential to wear protective gear like gloves and goggles to avoid injury. Then, we used shovels to dig out roots and a wheelbarrow to haul away debris. This stage laid the groundwork for everything to come.
A-Frame Foundation and Platform
Explore the versatile a-frame foundation and platform for sturdy, customizable construction solutions for your home or projects.
Materials Needed:
- Concrete blocks
- Gravel
- Wooden beams
- Screws and nails
- Hammer
A solid foundation is crucial for the durability of your cabin. We opted for concrete blocks because they are easier for amateurs like us to work with. We leveled the ground and placed the blocks, ensuring they were evenly spaced and stable. Adding a layer of gravel underneath helped with drainage. Following this, we assembled the wooden beams to form the platform, securing them with screws and nails.
Building the Front and Back Walls
Learn the steps for building the front and back walls. Get essential tips for a strong foundation and efficient construction.
Materials Needed:
- Wooden planks
- Measuring tape
- Saw
- Screws and nails
Building the walls was another major milestone. We measured each plank carefully before cutting to ensure they fit perfectly. It’s worth investing in quality wood as this makes the structure more resilient. Using a measuring tape, saw, screws, and nails, we erected the front and back walls, marking the starting point of our cabin’s frame.
Constructing the A-Frame Roof
Master the techniques of constructing an a-frame roof with our detailed guide. Essential tips and step-by-step instructions for perfect execution.
Materials Needed:
- Roof trusses
- Wooden beams
- Hinge brackets
- Ladder
The iconic A-frame roof was both exciting and challenging to build. Pre-fabricated roof trusses made the job easier and faster. We attached the trusses to wooden beams using hinge brackets for additional support. Climbing up a ladder to fix the trusses into place was nerve-wracking, but taking it slow and steady ensured we did a good job.
Building Dormers
Add charm and space to your home with dormers. Learn the benefits and steps involved in building dormers for enhanced curb appeal and functionality.
Materials Needed:
- Wooden planks
- Saw
- Measuring tape
- Screws and nails
Dormers added functional space and aesthetic value to the cabin. We built them using wooden planks, following the same careful measuring and cutting process as before. Securing the dormers with screws and nails, we made sure they were sturdy and well-aligned with the roof.
Adding Board and Batten to the Dormers
Enhance curb appeal by adding board and batten to dormers. Discover tips and techniques for a stunning exterior transformation.
Materials Needed:
- Board and batten
- Measuring tape
- Hammer
- Nails
The board and batten technique gave the dormers a cozy, rustic look. Measure and cut the boards to the required sizes before nailing them in place. This part can be tedious, but the result is worth the effort. Ensure that each board is securely nailed to prevent water ingress and increase durability.
Installing Custom Windows
Learn how to expertly install custom windows with our step-by-step guide. Enhance your home's aesthetics and energy efficiency today!
Materials Needed:
- Custom-made windows
- Measuring tape
- Drill
- Screws
- Sealant
Windows are crucial for natural light and ventilation. Custom windows were a bit more expensive, but they allowed us to get the perfect fit. Using a measuring tape, drill, and screws, we carefully installed each window, then sealed the edges to prevent any leaks. Proper installation ensures the cabin is energy-efficient and weatherproof.
Insulation
Discover the benefits of insulation for energy efficiency and comfort in your home. Learn more about types and installation for maximum impact.
Materials Needed:
- Insulation material (foam boards, fiberglass batts, etc.)
- Utility knife
- Staple gun
To make the cabin comfortable in all seasons, we added insulation. Foam boards and fiberglass batts are both good options. We cut the insulation material using a utility knife and stapled it to the inside walls. Proper insulation helps in maintaining a stable indoor temperature, crucial for an Airbnb rental.
Flooring
Find durable, stylish flooring options for every room. Upgrade your home with our range of hardwood, laminate, vinyl, and more.
Materials Needed:
- Plywood sheets
- Sandpaper
- Varnish
- Screws
- Drill
For the flooring, we used plywood sheets that are both sturdy and cost-effective. After securing the sheets to the floor frame with screws, we sanded them down smoothly. A coat of varnish not only added shine but also protected the wood from wear and tear. This step turned the cabin into a welcoming space.
Decorating the A-Frame and the Big Reveal
Discover the transformation of an a-frame as we reveal stunning decor ideas and the big reveal in our latest makeover series!
Materials Needed:
- Paint
- Furniture
- Decorative items
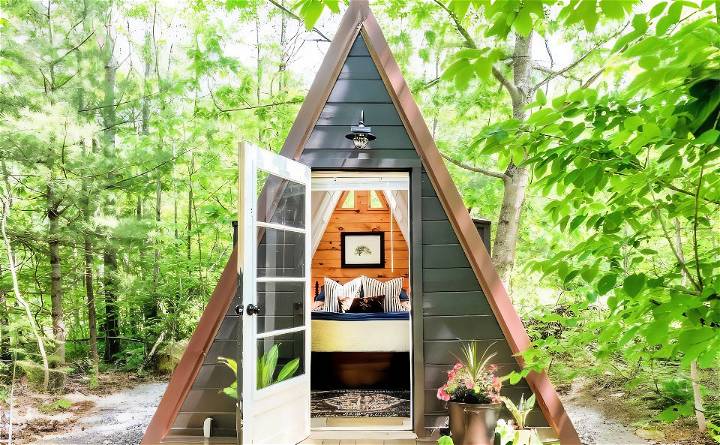
Finally, the most fun part is decorating! A fresh coat of paint brightened up the interior. We chose furniture that was both stylish and space-efficient. Adding personal touches like pillows, lamps, and artwork made the cabin cozy and inviting. Once everything was in place, we stepped back to admire our hard work.
Personalization and Decoration
Decorating your A-frame cabin is a delightful process that allows you to infuse your personality into your living space. Here’s how you can make your cabin feel like a home:
- Choose a Theme: Start by selecting a theme that reflects your personal style. Whether it’s rustic, modern, or a mix of both, your theme will guide your decoration choices.
- Color Palette: Colors can dramatically affect a room's mood. For A-frames, earthy tones like greens, browns, and beiges complement the natural surroundings. Brighter colors can add a cheerful touch to smaller spaces.
- Furniture Selection: Opt for furniture that maximizes space and provides comfort. Multi-functional pieces like sofa beds or loft beds are great for saving space. Remember, less is more in a cozy cabin.
- Lighting: Good lighting is crucial. Use a combination of natural light, overhead lights, and lamps to create a warm and inviting atmosphere. Consider energy-efficient LED bulbs to save on electricity.
- Textiles and Fabrics: Soft furnishings add warmth and texture. Rugs, throws, and cushions in various textures can make your cabin feel snug and welcoming.
- Wall Decor: Hang artwork or photographs that have personal significance. If you’re artistic, consider creating a mural or wall painting that captures the essence of your cabin.
- Outdoor Spaces: Don’t forget the exterior. Add outdoor seating, fairy lights, or a hammock to create an inviting outdoor retreat.
- DIY Projects: Engage in DIY projects to add a unique touch. Handmade items like pottery, knitted blankets, or carved wooden pieces can add character.
- Sustainability: Where possible, use sustainable and locally sourced materials. This not only supports local businesses but also reduces your environmental footprint.
The key to decorating your A-frame cabin is to create a space that feels right for you. It’s your retreat from the world, so make it a place where you love to spend time.
Maintenance and Upkeep
Keeping your A-frame cabin in top condition is essential for its longevity and your enjoyment. Here’s a straightforward guide to maintaining your cabin:
- Regular Inspections: Twice a year, inspect your cabin for any signs of wear and tear. Look for cracks in the wood, leaks in the roof, and any signs of pests.
- Cleaning Gutters: Keep the gutters clean to prevent water damage. Blocked gutters can lead to water seeping into the cabin walls.
- Treating Wood: Treat the exterior wood with a protective sealant to guard against moisture and insects. This should be done every few years, depending on the climate.
- Roof Maintenance: Check the roof for missing shingles or tiles, especially after severe weather. The steep angle of A-frame roofs can be tricky, so consider hiring a professional.
- Pest Control: Be proactive about pest control. Regularly check for signs of rodents or insects and address any infestations immediately.
- Winterizing: If you live in a cold climate, make sure to winterize your cabin by insulating pipes and adding weather stripping to doors and windows.
- Ventilation: Ensure good ventilation to prevent mold and mildew. Use dehumidifiers if necessary, especially in damp areas.
- Fire Safety: Install smoke detectors and keep a fire extinguisher on hand. Regularly check that they are in working order.
- Septic System: If you have a septic system, have it inspected and pumped out by a professional every few years to prevent backups.
- Landscaping: Maintain the surrounding landscape to prevent trees and branches from damaging your cabin. Trim any overhanging branches.
Maintain your A-frame cabin regularly to keep it safe, cozy, and beautiful. This helps avoid expensive repairs and ensures you enjoy your retreat worry-free.
FAQs About DIY A-Frame Cabin
Discover FAQs about DIY a-frame cabin. Get tips, materials, and essential info for building your own a-frame retreat.
To build a DIY A-frame cabin, you need a clear plan, the right materials, and tools. A typical list includes lumber, plywood, roofing materials, and fasteners. Tools like a cordless drill, electric screwdriver, jigsaw, level, and measuring tape are essential. The difficulty level varies, but many find it manageable with some construction knowledge.
Permit requirements vary by location. Generally, smaller structures may not need permits, but it’s crucial to check local regulations. Some areas may have restrictions on size, location, or use of the cabin.
While A-frame cabins are versatile, the land must be suitable for construction. It should be stable, level, and accessible. Also, consider the land’s zoning and environmental impact. Always ensure you have the legal right to build on the chosen land.
A-frame cabins offer a unique aesthetic with high ceilings and large windows. They’re often more affordable and quicker to build than traditional homes. Their design is efficient for heating and cooling, and they blend well with natural surroundings.
The time to build an A-frame cabin can vary greatly. For a simple design, it might take a few weekends, while more complex designs could take several months. One builder managed to construct a basic A-frame cabin in about 35-40 full days of work. Planning, weather conditions, and the builder’s skill level will influence the total time required.
Conclusion:
Building an A-frame cabin from start to finish was an incredible journey. It tested our patience and skills, but the end result was worth every moment. Whether you’re building for personal use or as an Airbnb rental, this step-by-step guide aims to help you through the process. If you have any questions, feel free to comment below, and don’t forget to subscribe to our channel for more updates on our ongoing projects.


