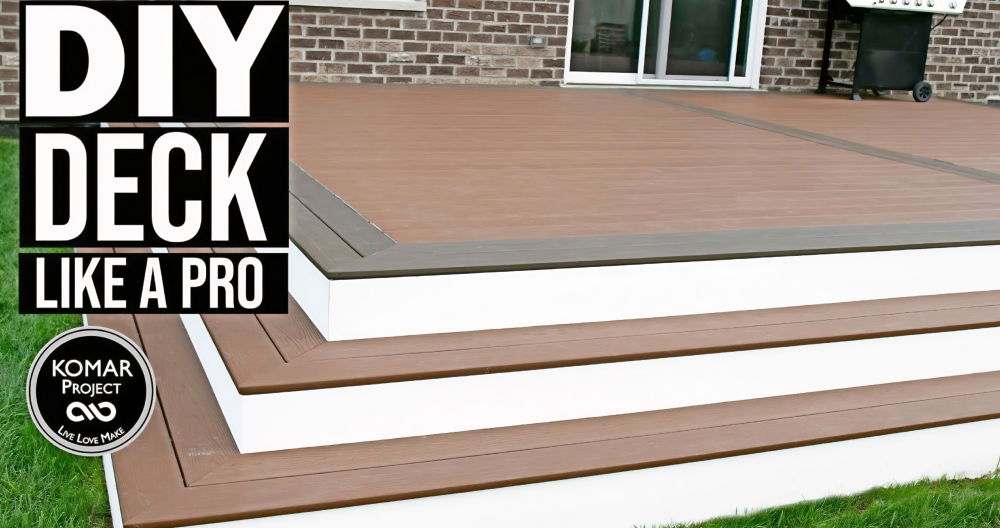
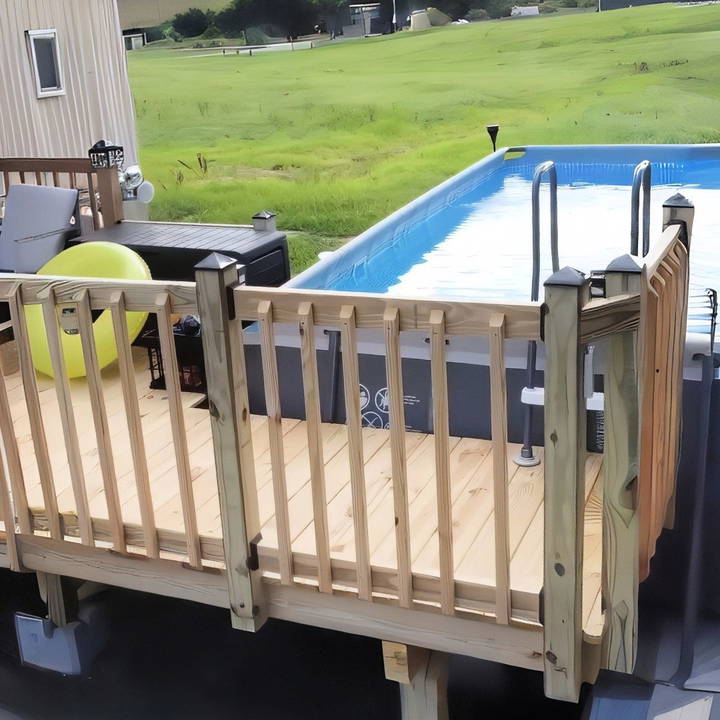
Building a DIY above-ground pool deck can significantly enhance the functionality and aesthetics of your backyard. It provides a safe, comfortable space for poolside lounging, easier access to the pool, and adds value to your outdoor area. Here, you'll discover the steps to construct a custom above-ground pool deck, with insights drawn from a successful DIY project completed within three days. Whether you're a seasoned DIYer or a beginner looking to take on a new challenge, this guide will cover all the steps needed to build a sturdy, stylish, and functional deck.
What You'll Need Before You Start
Before jumping into the project, gather the following materials and tools to ensure a smooth building process:
Materials:
- Pressure-treated lumber (various sizes, including 2x6s and 2x10s)
- Concrete blocks for the foundation
- Galvanized carriage bolts
- Joist hangers and brackets
- Deck boards (composite or wood)
- Deck screws
Tools:
- Reciprocating saw (for quick cuts)
- Level
- Speed square
- Drill and drill bits
- Circular saw
- Hammer and nails
Step by Step Instructions
Learn DIY above-ground pool deck with step-by-step instructions. From demolition to finishing touches, build your dream deck safely and effectively!
Day 1: Demolition and Laying the Foundation
Learn about demolition and laying the foundation with steps on deconstruction, establishing the foundation, installing the ledger board, and setting beam posts.
Step 1: Deconstruction
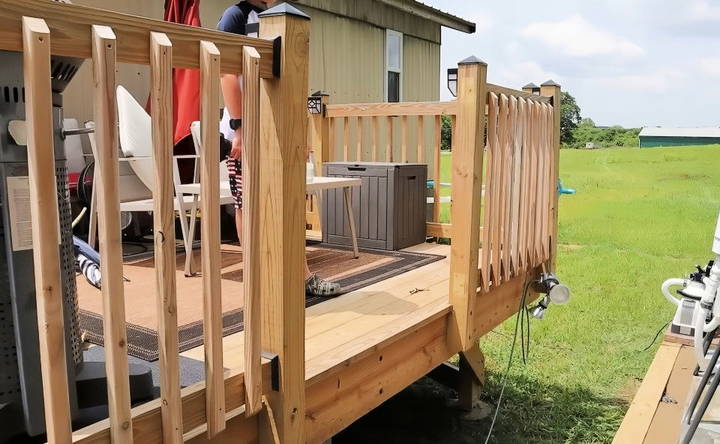
The first step in building your above-ground pool deck is to prepare the area by removing any existing barriers or parts of your current deck that might interfere with the new structure. In this project, the existing railing was removed to make space for the new deck. Careful deconstruction ensures that you can reuse materials when possible, saving time and money.
Step 2: Establishing the Foundation
For a stable and long-lasting deck, the foundation is critical. Here's how this project tackled the foundation setup:
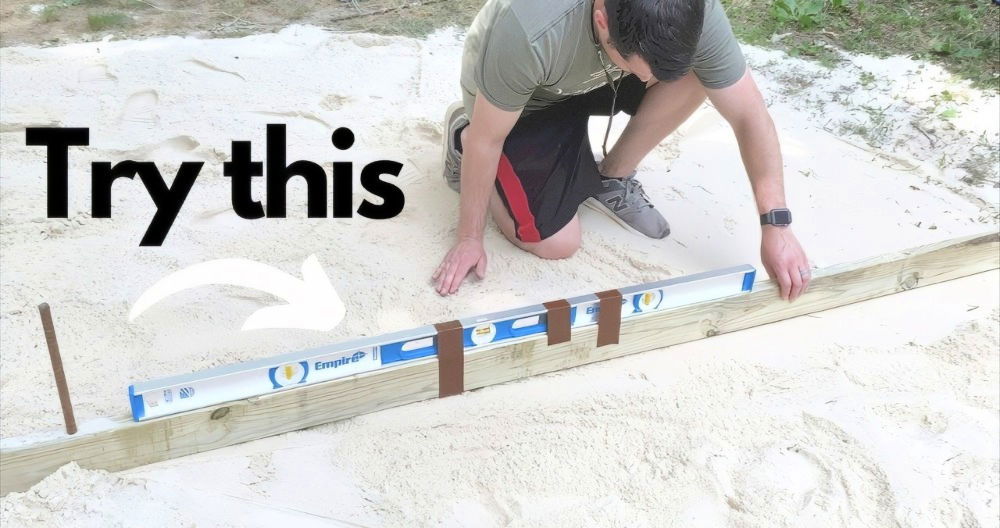
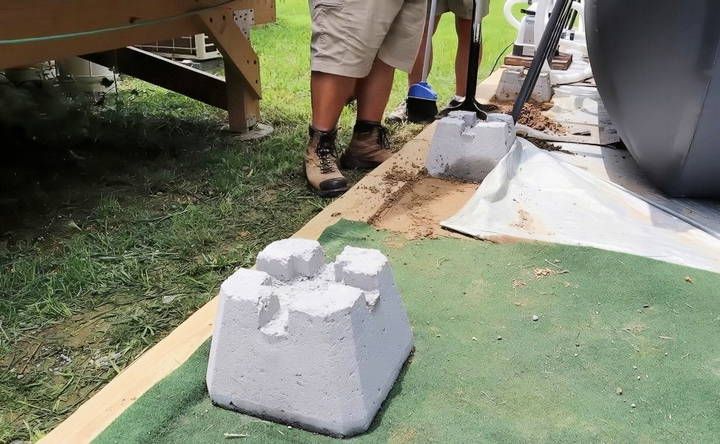
- Clearing the Area: The pool deck's foundation used concrete blocks placed directly on a compacted layer of rock beneath the pool. Any sand or loose material was removed to reach the rock layer, which was then leveled and packed down.
- Placing Foundation Blocks: Concrete blocks were placed on top of the compacted surface, and the surrounding sand was backfilled for added stability. This method provides a sturdy base without the need for deep excavation.
Step 3: Installing the Ledger Board
The ledger board is an essential component as it connects the deck to your existing structure. Here's the process:
- Choosing the Right Lumber: In this build, a 2x6 ledger board was attached to the existing deck using half-inch galvanized carriage bolts.
- Attaching the Ledger Board: Bolt the new ledger board to the existing structure, ensuring it is level and secure. This part will act as the anchor point for the rest of the deck framing.
Step 4: Setting the Beam Posts
After the foundation and ledger board are in place, it's time to set up the support beams:
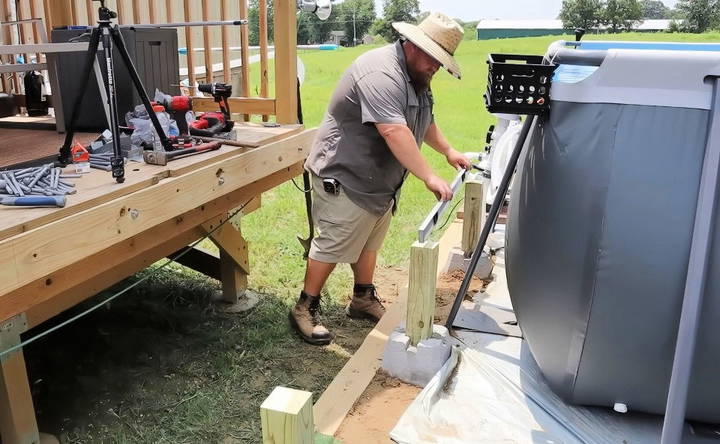
- Measuring Post Heights: Using a two-level method, measure the height of the posts. It helps to have an extra set of hands to ensure accuracy.
- Cutting the Posts: Once measured, cut the posts to the correct length and secure them into the foundation blocks.
- Assembling the Beam: The next step involves building a 2x6 beam that spans across the posts. This beam will support the joists that form the deck's framework.
Day 2: Framing the Deck
Learn framing the deck with steps on attaching joist hangers, squaring joists, and adding bracing for a secure and sturdy deck structure.
Step 1: Attaching Joist Hangers and Joists
With the beam in place, you can start framing the deck using joists. Proper framing ensures that the deck will be stable and can support weight evenly across its surface.
- Installing Joist Hangers: Attach joist hangers to the ledger board. It's recommended to use a piece of scrap lumber to align the hangers before securing them. This ensures consistency in spacing.
- Placing the Joists: Insert the joists into the hangers and secure them. Make sure each joist is flush with the top of the ledger board for a level deck surface.
Step 2: Squaring and Securing the Joists
Squaring the joists is a crucial step to ensure your deck has a straight and aligned structure:
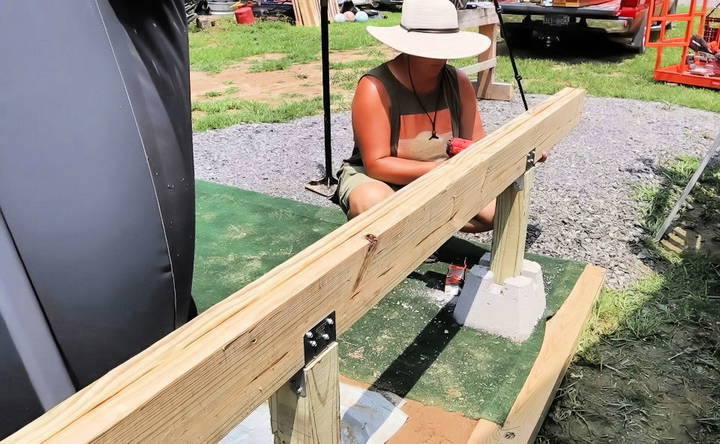
- Using a Speed Square: Place a speed square against the beam and adjust the joist until it is aligned perfectly with the square. Mark the position with a pencil.
- Attaching Hurricane Brackets: To keep the joists in place, use hurricane brackets. These brackets help lock the joists to the beam and prevent lateral movement, adding stability to the deck frame.
Step 3: Additional Bracing and Blocking
Bracing and blocking help reinforce the deck and prepare it for the decking boards:
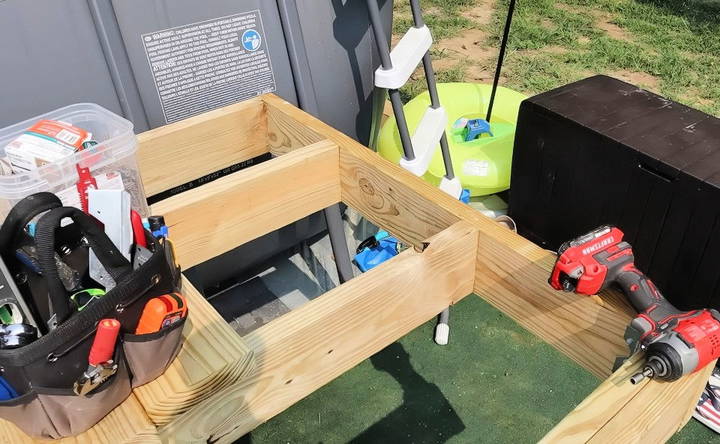
- Adding Blocking: Install small blocks between joists where you plan to add handrail posts. This prevents twisting of the joists and adds rigidity.
- Diagonal Braces: Include diagonal braces under the deck for additional support. This helps distribute the weight more evenly, making the deck more stable and safer.
Day 3: Decking and Finishing Touches
Enhance your outdoor space with expert decking and finishing touches, from laying boards to installing railings and modifying the pool ladder.
Step 1: Laying the Deck Boards
With the frame complete, it's time to lay the deck boards:
- Choosing Deck Boards: Depending on your preference and budget, you can use either composite decking or pressure-treated wood. Composite is low-maintenance but more expensive, while wood is more affordable but requires periodic sealing.
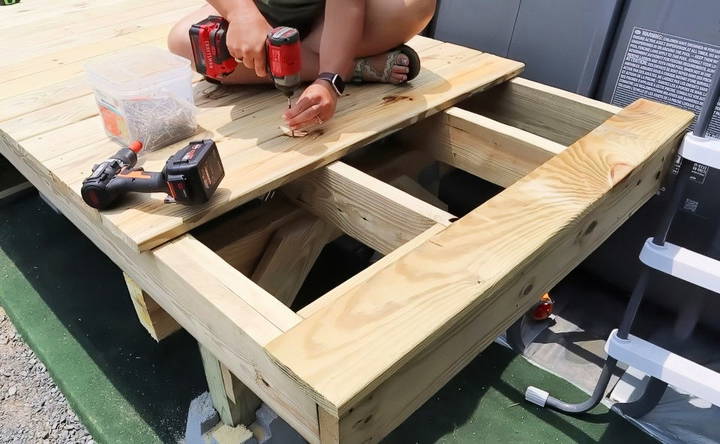
- Installing Deck Boards: Lay the boards across the joists and secure them using deck screws. Work methodically from one end to the other, ensuring that each board is aligned properly. This is a great task to share with a helper, allowing one person to position the boards while the other secures them in place.
Step 2: Cutting and Fitting the Final Boards
The final boards may need to be cut to fit precisely:
- Measuring Twice, Cutting Once: Use a circular saw to trim the last few deck boards to size. Take your time with this step to ensure a neat finish along the edges.
- Securing the Last Boards: Attach these trimmed boards carefully, making sure all edges are flush and smooth.
Step 3: Installing the Railings
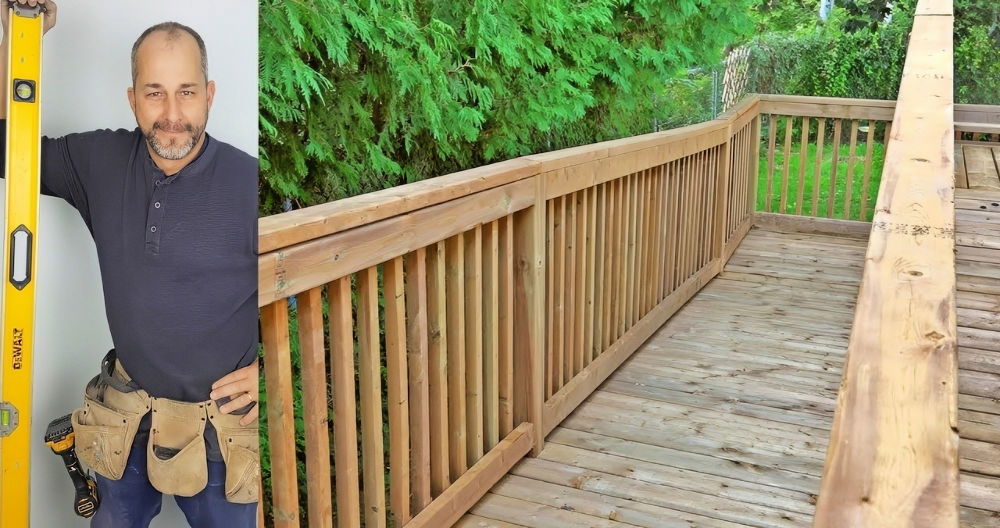
After the deck boards are installed, adding railings is the next step for safety and aesthetics. Here's how to properly install deck railings:
- Positioning the Posts: Start by placing the railing posts at evenly spaced intervals along the perimeter of the deck. Secure them to the blocking between joists for added strength.
- Attaching Handrails: Measure the height of the handrails and attach them securely to each post using galvanized screws or brackets. Ensure that the handrails are level and meet any local building codes for safety.
- Adding Balusters: Use a spacing jig to ensure consistent spacing between balusters. This not only makes the installation faster but ensures a uniform look. Secure the balusters to the handrails and base rail with deck screws.
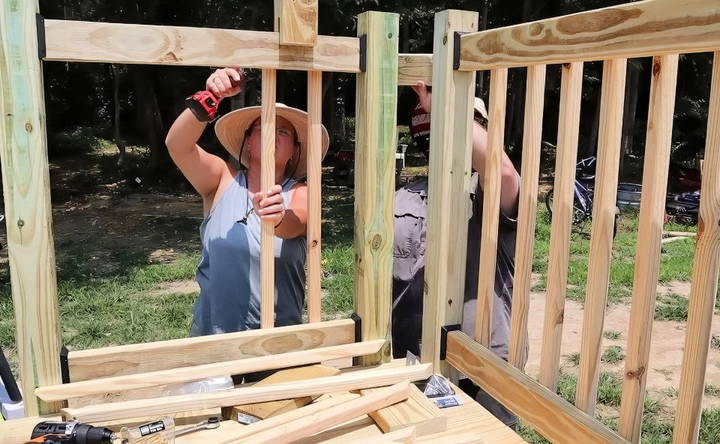
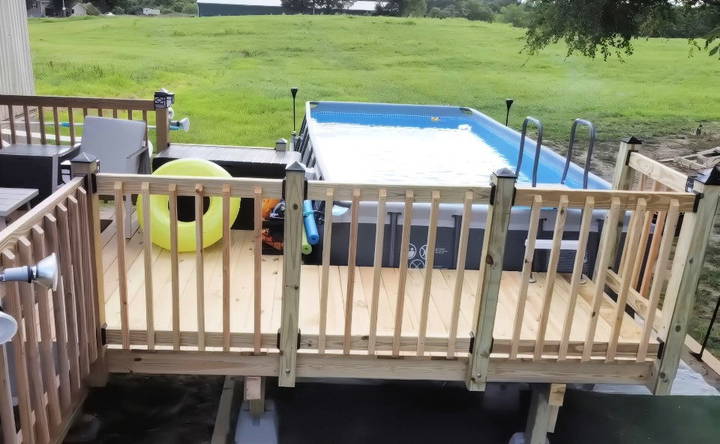
When working with railing installations, it's important to keep safety in mind. Properly installed railings provide a secure barrier, especially if children will be using the pool area. In this project, the railing height was customized for better visibility from the seating area, allowing for easier supervision of the pool.
Step 4: Modifying the Pool Ladder
A safe and sturdy entry and exit from the pool is crucial, and integrating the ladder into your new deck structure can improve accessibility:
- Adjusting Ladder Legs: The existing ladder was modified by cutting the legs to the correct height so that it could rest securely against the deck. Custom brackets or fittings can be used to attach the ladder to the deck, ensuring that it won't move when in use.
- Securing the Ladder: Bolt the ladder securely into place using galvanized hardware to prevent rust and ensure durability. Test the ladder's stability before allowing it to be used to ensure it can safely support weight.
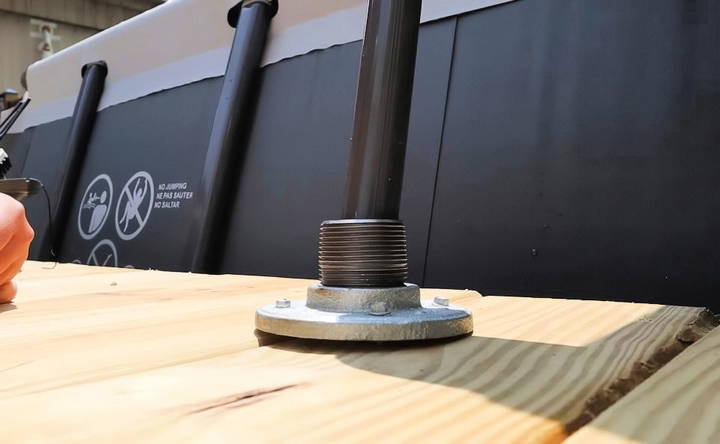
This custom setup ensures that the ladder is well-anchored, making it safer and more user-friendly for those entering and exiting the pool.
Finishing Touches and Safety Considerations
Now that the structure is complete, there are a few more steps to finalize the project and ensure it meets safety standards:
Step 1: Inspecting the Deck for Stability
Before using your new pool deck, do a thorough inspection:
- Check Fasteners: Make sure that all bolts, screws, and brackets are secure. Tighten any that may have come loose during the build.
- Test for Wobble: Walk around the deck and test for any movement or wobbling, especially near the edges and the railing. Address any instability by adding extra bracing or rechecking connections.
- Review the Structure: Pay special attention to the beam and joist connections, ensuring that everything is properly aligned and secured.
Step 2: Sealing and Protecting the Deck
If you're using pressure-treated wood for your deck, applying a sealant can help protect it from moisture, UV damage, and general wear:
- Choosing the Right Sealant: Look for a sealant designed specifically for outdoor decks, offering water resistance and UV protection.
- Applying the Sealant: Use a roller or brush to apply an even coat of sealant to the deck boards and railing. Let it dry completely before using the deck.
- Maintenance Tips: Plan to reseal the deck every few years to maintain its appearance and durability. Composite decking may not require sealing but can benefit from periodic cleaning.
Costs and Budget Considerations
Building a DIY above-ground pool deck is not only a great way to enhance your outdoor space, but it can also be more cost-effective than hiring a professional. Here's a breakdown of potential costs based on the real-life project:
- Materials Cost: As of July 2023, the project cost approximately $900. This included all the lumber, brackets, screws, and decking materials.
- Ways to Save: Opting for simpler brackets or skipping decorative elements like post caps can reduce costs. Using leftover or reclaimed wood for smaller components can also help keep the budget in check.
- Additional Costs: Be prepared for possible extra expenses, such as renting tools you don't have or purchasing additional hardware if you run out.
Prices can vary depending on your location, the quality of materials, and the size of your deck. It's always a good idea to shop around for the best prices and consider buying in bulk if possible.
Why Choose a Smaller Deck Size?
One of the common questions that might come up when planning your pool deck is its size. The deck in this project was designed to be more compact, integrated with the existing deck space of the house. Here's why a smaller deck might be a good choice:
- Less Wasted Space: A smaller deck can be more efficient, avoiding unused areas that could just collect clutter. This build allowed for a perfect spot for the grill and storage for pool toys and chemicals.
- Fits Family Needs: The deck size was tailored for a family of four, making it large enough for lounging and pool access without overwhelming the yard space. If you often have large gatherings, you might consider a larger deck, but a compact deck is often ideal for smaller families.
- Cost Efficiency: Building a smaller deck not only saves on materials but also reduces the time required for construction. This makes it easier to complete in a shorter time frame, like the three days it took in this project.
Safety Tips and Considerations
Safety is a top priority when building a deck around an above-ground pool. Here are some additional safety tips to keep in mind:
- Check Local Building Codes: Regulations for pool decks can vary significantly depending on location. Be sure to consult local building codes and homeowner's association rules before starting your project.
- Consider a Gate: If you have young children or pets, installing a gate on the deck can provide an extra layer of security. Some areas may even require a gate for pools.
- Non-Slip Decking: Using decking materials that have a non-slip surface can prevent accidents, especially when the deck gets wet. This is particularly important for poolside areas.
Once your deck is complete, it's time to enjoy the new space you've buildd. With proper planning, attention to detail, and a bit of elbow grease, a DIY above-ground pool deck can transform your backyard into a functional and attractive space for relaxation and family fun.
Conclusion
Building an above-ground pool deck can seem daunting, but with careful planning and step-by-step execution, it's a rewarding DIY project. This guide outlined the process from demolition to finishing touches, offering practical tips and insights from a real-life build. Whether you decide to replicate this project or use it as inspiration for your own unique design, the result will be a stylish and functional addition to your home.
FAQs About DIY Above-Ground Pool Deck
Discover answers to common questions about DIY above-ground pool deck construction, materials, costs, and maintenance tips for a perfect setup.
When placing the metal leg bases of your pool, account for the slight expansion of the pool liner when filled with water. It's best to leave a few inches of space between the pool and deck edge to prevent pressure on the liner.
In this specific build, the joist hangers were installed upside down to support the weight distribution from the band board to the joists. This method was chosen to accommodate the unique structure of the deck and ensure added stability.
To avoid the ladder damaging the pool liner, place soft materials like folded terry towels or a small rubber mat under the ladder feet. This helps absorb pressure and prevents wear on the liner.
Yes, sealing or staining your deck is recommended, especially if you are using pressure-treated wood. It protects the wood from moisture and pool chemicals, prolonging the lifespan of the deck.
The dimensions of the original railings did not match the new deck's layout. They were stored under the deck for potential future use in other projects.
To keep the deck clean, place a small tub or bucket of water at the base of the stairs. This allows people to rinse off dirt or grass before entering the pool, reducing debris transfer.
Regulations vary by location. Some areas require fencing around above-ground pools, while others may not. Always check with local building codes and your insurance provider to ensure compliance.
As of July 2023, the entire project cost around $900. Prices may vary depending on materials, location, and additional features like decorative brackets.
The deck foundation uses concrete blocks set on a compacted layer of rock. This method avoids deep excavation while providing a stable base for the deck structure.
If wood surfaces become slippery, consider adding anti-slip mats or using a non-slip deck paint. These options can provide better traction and reduce the risk of slips.


