Making DIY abstract art has always been fun for me. I remember the first time I tried it in my small apartment. I had a blank wall staring back at me and only a few basic art supplies. With some old paints and brushes, I transformed that empty space into an amazing piece. It wasn't perfect, but it brought life and personality to my room.
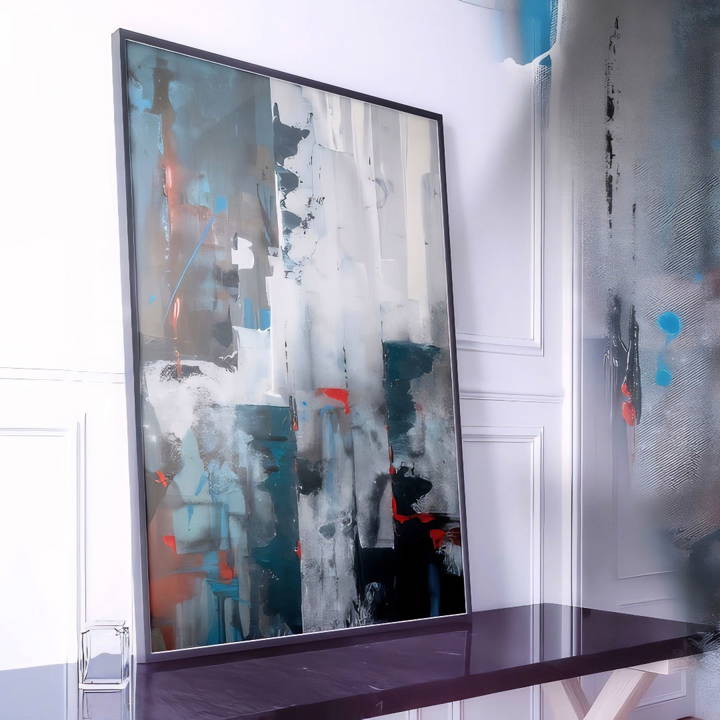
Trying DIY abstract wall art on a budget is also a great way to relax. It's easy to get started with materials you already have at home. You can use everything from old magazines to leftover fabric. The best part is watching your unique ideas come to life on a canvas or a wall. Sharing this tip with friends has also been rewarding, seeing them make beautiful pieces.
Materials You'll Need
- Canvas: Acts as the base for your painting. Available in various sizes; choose one that fits your space.
- Paints: Acrylic paints in different shades – black, white, blue, and yellow orchid. Easy to manipulate and dry quickly.
- Squeegees: Purchased from a pound shop or dollar store. They help spread the paint across the canvas.
- Foam Board (Foam X): Used to make a custom paint tray. Keeps paint from seeping out and allows easy handling.
- Glue: To secure the sides of the paint tray.
- Water: To dilute the paint for different effects.
- Flotrol: Added to paint to make it run smoothly.
- Spray Bottle: For watering down the canvas, ensuring free paint movement.
- Tissues: For dabbing and making textures.
- Propane Torch: Used for quick drying.
- Painter's Tape: For clean edges and easy removal.
Step by Step Instructions
Learn how to make pretty DIY abstract art with our step-by-step instructions. Perfect for beginners wanting to add a personal touch to their decor.
Preparing Your Workspace
Before you begin, ensure your workspace is prepared. Lay down some protective sheets to avoid any spills. Set up your canvas on an easel or flat surface.
Making a Custom Paint Tray
I made a custom paint tray from Foam X, which helps in organizing the painting process.
- Cut and Glue: Cut the foam board to make the base and sides. Glue these together.
- Seal the Edges: Seal the edges well to prevent any paint from seeping through.
- Dry: Allow the glue to dry fully before using.
Mixing Your Paints
- Mix Paints: Combine black, yellow orchid, and a bit of white.
- Dilute: Add water and Flotrol to achieve a smooth consistency.
Pour this mixed paint onto the canvas and spread it around the perimeter using a brush or your hands.
Setting Up the Canvas
- Spray Water: Lightly spray water over the canvas to ensure smooth paint flow.
- Pour Base Color: Pour the mix from the center and spread it evenly.
Using the Squeegee
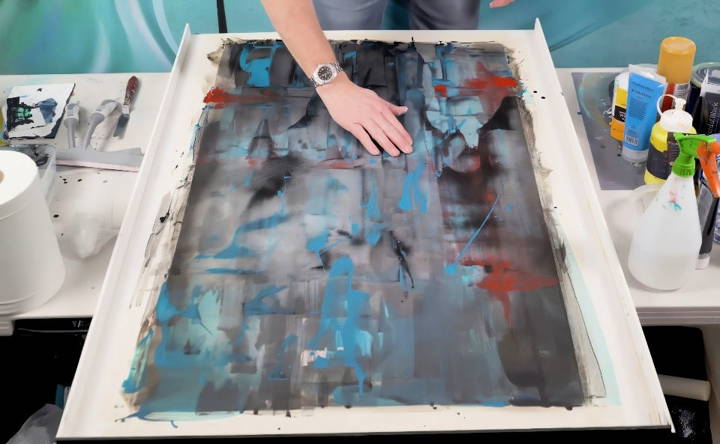
- Apply Black Paint: Pour some watered-down black paint in the middle.
- Squeegee Action: Drag the squeegee across the canvas to spread the paint. Apply enough pressure to move the paint smoothly, but watch out for excessive bends.
- Vertical and Horizontal Marks: Experiment with both directions to make varied textures.
Adding Details and Textures
This is where the fun begins!
- Clean Edges: Use tissues to dab and clean certain sections, adding textures.
- Spiral Shapes and Runs: Make interesting shapes and runs using additional water and light squeegee strokes.
- Quick Drying: Use a propane torch to dry the wetter sections quickly.
Introducing a Third Color
To add depth to your piece:
- Select Color: Choose a subtle third color, like a nuanced blue.
- Strategic Application: Apply it over selected sections, blending it subtly.
Giving it a Night to Dry
Allow the painting to dry overnight but check in the morning for any still-wet areas before proceeding to the next step.
Adding White Accents
- Mix and Dilute: Prepare a runny white paint mix.
- Apply: Target specific areas for white detailing.
- Dab and Blend: Use tissues again to soften the white, ensuring it blends well with the background.
Final Touches and Lines
- Dark Blue and Black Mix: Use this to make bold lines and sections.
- Strategic Placement: Apply lined sections to balance the artwork.
- Let it Dry: Allow your additions to dry completely.
Finishing Up
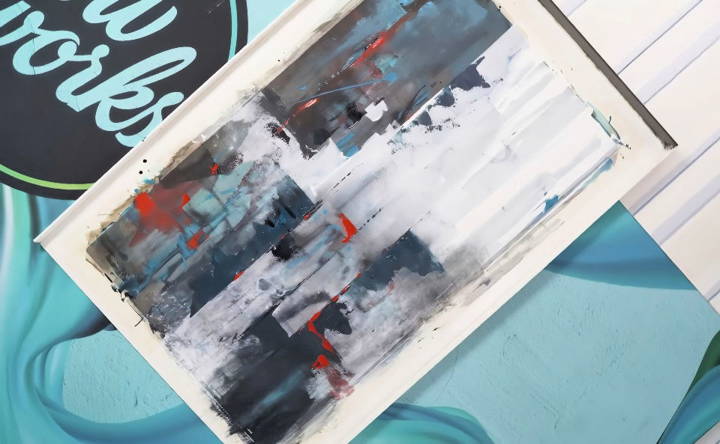
- Remove Tape: Carefully remove the painter's tape.
- Sign Your Work: Add your signature for a personal touch.
- Mount and Display: Mount your artwork onto a larger canvas or frame it.
Technical Tips for Making Abstract Art
Making abstract art can be a liberating experience, allowing you to express your emotions and creativity without the constraints of representational art. Here are some technical tips to help you make your own abstract masterpieces:
Start with the Basics
- Choose Your Medium: Whether it's acrylics, oils, watercolors, or mixed media, select a medium that resonates with you and your artistic vision.
- Understand Your Tools: Brushes, palette knives, sponges, or even your fingers can be used to apply paint. Each tool makes different textures and effects.
Experiment with Color
- Color Theory: Familiarize yourself with the color wheel. Complementary colors can make your work pop, while analogous colors make harmony.
- Mixing Colors: Practice mixing colors to get the perfect shades. Remember, less is more when combining paints to avoid muddy colors.
Explore Composition
- Balance and Harmony: Even in abstract art, balance is key. Consider the placement of shapes and lines to make a harmonious composition.
- Negative Space: Don't underestimate the power of negative space (the area around and between subjects). It can define shapes and make visual interest.
Develop Your Technique
- Layering: Build up layers of paint to add depth and texture to your work. Allow layers to dry in between applications.
- Mark Making: Use different techniques to make marks on your canvas. Dripping, splattering, and scratching can add dynamic elements to your art.
Refine Your Style
- Find Inspiration: Look at the work of other abstract artists. What do you like about their work? How can you incorporate similar elements into your own style?
- Practice Consistently: The more you paint, the more your unique style will emerge. Don't be afraid to try new things and make mistakes.
Preserve Your Art
- Varnishing: Once your painting is dry, apply a varnish to protect it from dust, UV rays, and fading.
- Proper Storage: Store your artwork in a cool, dry place away from direct sunlight to preserve its colors and materials.
Use these tips to make visually appealing abstract art that reflects your unique voice.
Upcycling Ideas for Abstract Art
Upcycling is a creative and environmentally friendly way to repurpose old materials into new, beautiful pieces of abstract art. Here are some ideas to get you started:
Use Old Magazines and Newspapers
- Cut out interesting patterns or colors from magazines and newspapers.
- Arrange them on a canvas or board to make a collage.
- Secure them with glue and cover with a clear sealant for longevity.
Repurpose Old Fabric
- Gather fabric scraps or old clothing with unique textures or patterns.
- Stretch the fabric over a frame to make a textured canvas.
- Paint over the fabric with acrylics or leave as-is for a mixed-media effect.
Transform Discarded Books
- Take pages from old books and use them as a base for painting.
- The text adds a unique background and depth to your artwork.
- Experiment with inks or watercolors for a translucent effect.
Recycle Glass Bottles or Jars
- Wrap glass bottles or jars with twine or colored yarn.
- Apply a thin layer of paint for a stained-glass look.
- Use them as vases for dried flowers or as standalone art pieces.
Old CDs and DVDs
- Break CDs or DVDs into small pieces to make mosaic tiles.
- Glue them onto a canvas in an abstract pattern.
- The reflective surface will add sparkle and light to your art.
Cardboard Boxes
- Cut cardboard into various shapes and sizes.
- Layer and glue them to make a 3D abstract sculpture.
- Paint or leave raw for an industrial look.
Wine Corks
- Collect wine corks and slice them into thin discs.
- Arrange and glue onto a surface to make a textured mosaic.
- Stain or paint the corks for added color variation.
Incorporate upcycling into your art to make beauty while reducing waste. It benefits both artist and environment. See potential in everyday items and transform them into art.
FAQs About DIY Abstract Art
Discover the top faqs about DIY abstract art, including essential tips, techniques, and materials to unleash your creativity!
No, you don’t need special skills or formal training to create abstract art. It’s all about expressing yourself and letting your creativity flow. There are many beginner-friendly techniques that you can use to start painting, such as wet-on-wet, dry brushing, and blending with water. The key is to enjoy the process and not worry about the outcome.
Absolutely! Household items like bubble wrap, Q-tips, salt, and parchment paper can be used to add interesting textures and patterns to your abstract paintings. These items can be pressed into wet paint or used to apply paint in unique ways, giving your artwork an extra dimension.
Knowing when your abstract art piece is finished can be subjective, as it's largely based on personal preference. A good practice is to step back and view your work from a distance. If the composition feels balanced and you're satisfied with the result, it might be complete. Remember, there's no right or wrong in abstract art; it's all about what feels right to you.
Inspiration for abstract art can come from anywhere—nature, emotions, music, or even the materials you use. To get started, you might:
Take a walk and observe the colors and shapes around you.
Listen to music and let the rhythms guide your brushstrokes.
Look at other artworks or photographs for color and composition ideas.
Use your feelings or mood as a starting point and express them through colors and textures on the canvas.
Yes, there are several techniques that beginners can use to start an abstract painting with confidence:
Wet on Wet: Apply wet paint over a wet surface to make a soft, blended effect.
Vertical Pouring: Pour paint vertically onto the canvas and tilt it to make organic shapes.
Wet Blending with Water: Use water to blend colors directly on the canvas for a fluid look.
Dry Brushing: Drag a dry brush with minimal paint across the canvas to make a textured, scratchy effect. These techniques can be mixed and matched to make unique and interesting abstract pieces.
Conclusion:
I hope sharing my experience with DIY abstract art inspires you to try it yourself. It's a fun and affordable way to add a personal touch to your home. Get creative, experiment with different materials, and enjoy the process. These tips can help you make your own masterpiece.


