Maintaining your air conditioning (AC) system is essential to ensure it runs efficiently and keeps your home cool. Cleaning the condenser coils of your AC unit is a critical maintenance step, and the good news is, that it's simple enough to do yourself! With this guide, you'll master the full procedure for cleaning your AC condenser coils while also clarifying common misunderstandings about coil cleaning. By the end, you'll be able to keep your AC unit in top shape and avoid unnecessary maintenance costs.
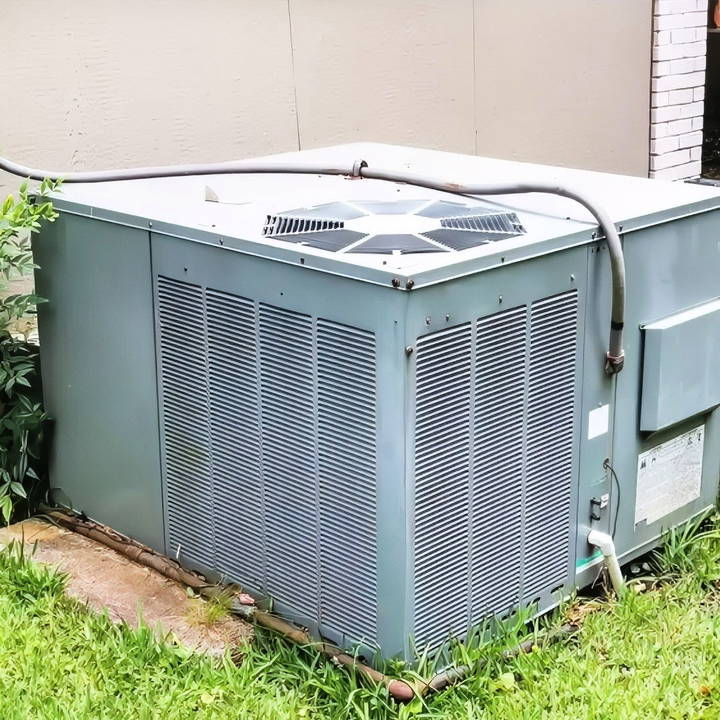
Why Clean Your AC Condenser Coils?
The condenser coil in an AC unit is responsible for releasing the heat absorbed from your home. When the coils get dirty, the unit's efficiency decreases, causing it to work harder to cool your space. This can lead to higher energy bills, reduced cooling capacity, and a shortened lifespan for your AC unit. Regular cleaning can prevent these issues and help your system maintain peak performance.
What You'll Need to Clean Your AC Coils
Before diving into the cleaning process, gather the following tools and supplies:
- Garden hose with a spray nozzle: A hose with adjustable spray settings is ideal.
- Coil cleaner (optional): Only necessary if there's heavy buildup. Avoid harsh chemicals that can damage the coils.
- Protective gear: Safety glasses and gloves are recommended if you're using a coil cleaner.
- Screwdriver or nut driver: Required if you need to remove panels for access.
Step by Step Instructions
Learn how to clean AC coils with our step-by-step DIY guide. Discover tips for coil maintenance, debunk myths, and avoid common cleaning mistakes.
Step 1: Turn Off the Power
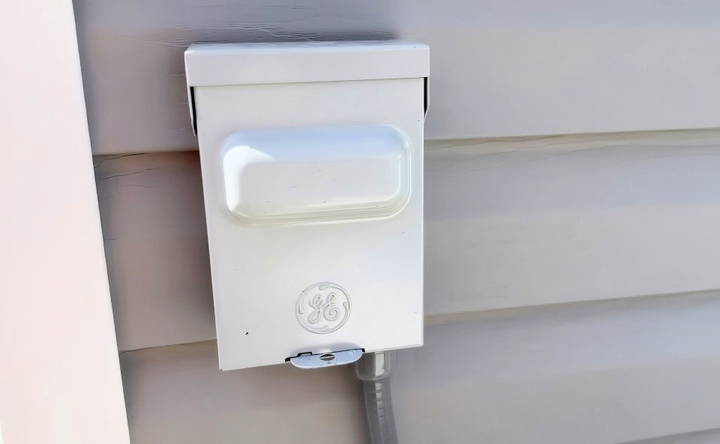
Safety comes first. Before you start, ensure the AC unit is turned off. Locate the disconnect box near the condenser unit, usually mounted on the wall nearby, and switch it to the “off” position. Alternatively, turn off the breaker that controls your AC unit in your electrical panel.
Step 2: Assess the Condition of the Coils
Take a close look at the coils to gauge how dirty they are. If you've kept up with maintenance, you may only need a quick rinse. However, if there's visible dust, debris, or leaves, a deeper clean may be in order.
Step 3: Rinse the Coils with Water
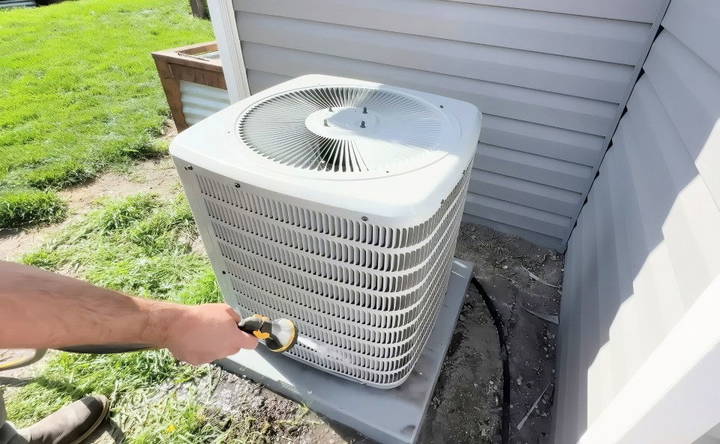
Using your garden hose, set the spray to a gentle setting. Avoid using a pressure washer as the high pressure can damage the delicate coil fins. Start at the top of the coils and move downwards in a slow, sweeping motion. This ensures that any loosened debris falls off the coils rather than getting pushed further in.
Debunking Coil Cleaning Myths
Several misconceptions about coil cleaning can lead to extra work or even damage your AC unit. Here's what you need to know:
- Myth 1: You Must Remove the Top Lid to Clean the Coils from the Inside Many DIY guides suggest removing the AC's top panel to spray the coils from the inside. While this can work, it's unnecessary for most units. Most AC coils are designed with a single or double layer that effectively prevents dust from settling deep within the coils. Spraying from the outside in a top-to-bottom motion should be sufficient to remove dust and debris.
- Myth 2: You Always Need Coil Cleaner If you've been rinsing your coils regularly (at least once or twice a year), plain water is usually enough to keep them clean. Coil cleaners can be harsh and, if used too frequently, may damage the coils by slowly eroding the metal. Only consider a coil cleaner if there's significant buildup that water alone cannot remove. Otherwise, stick to water for routine maintenance.
- Myth 3: Professional Maintenance Plans Are Necessary for Warranty Some AC contractors may suggest that professional maintenance is required to maintain your AC unit's warranty. However, most manufacturers simply require proof that the system has been maintained, not that a contractor performed the maintenance. Keep records and receipts for DIY maintenance to show that you've kept up with regular cleaning and care.
When to Use Coil Cleaner and How to Apply It
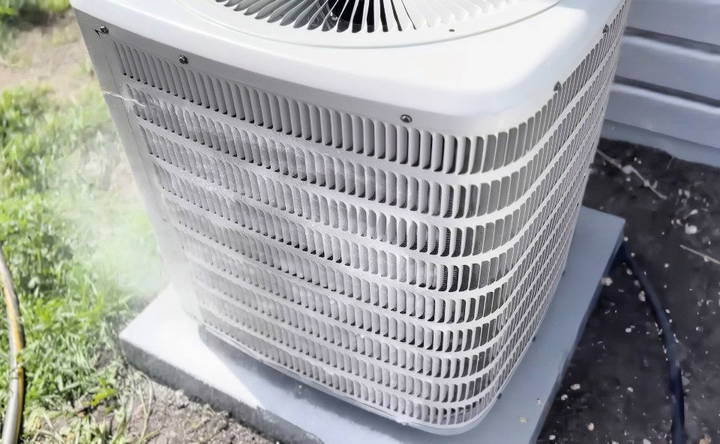
If your condenser coils have a substantial buildup of grime, algae, or mold, a coil cleaner may be necessary. Here's how to safely apply a coil cleaner:
- Read the Instructions: Always follow the instructions on your specific coil cleaner.
- Shake Well: Most coil cleaners need to be well shaken before application.
- Apply at the Base: Start spraying from the bottom of the coils, as this area tends to accumulate the most dirt. Work your way up, covering the coils evenly.
- Let It Sit: Allow the cleaner to sit for the recommended time (usually 2–3 minutes), which gives it time to break down stubborn residues.
- Rinse Thoroughly: After letting the cleaner sit, rinse the coils thoroughly with water from top to bottom. This will wash away both the cleaner and any loosened debris.
Special Considerations for Side-Discharge and Mini-Split Units
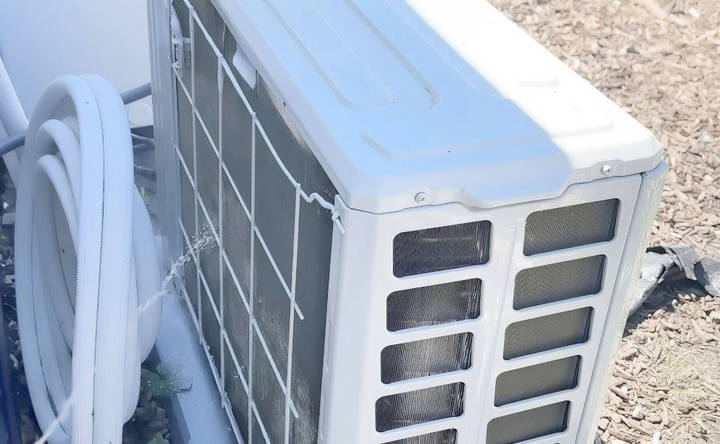
Side-discharge units, like mini-splits, operate a bit differently. These units may have a feature that periodically reverses the fan direction to blow out accumulated dust. This self-cleaning mechanism can reduce the need for frequent coil cleaning. However, if you notice visible dirt, follow these steps:
- Use a garden hose to rinse the coils, again from top to bottom.
- Apply coil cleaner if there is significant buildup, then rinse thoroughly.
Since side-discharge units often run self-cleaning cycles, you may find they need less frequent deep cleaning than traditional AC condenser units.
Additional Tips for Efficient AC Coil Maintenance
- Regular Maintenance: Clean your coils once or twice a year, especially before the cooling season. Routine cleaning reduces the need for chemical cleaners and keeps the unit running efficiently.
- Avoid Harsh Chemicals: Stick to coil cleaners designed for AC units. Harsh cleaners can damage the coils and void warranties.
- Use Soft-Bristle Brushes for Stubborn Areas: If certain spots are particularly grimy, a soft-bristle brush can help without damaging the fins.
- Check for Leaks and Damage: While you're cleaning, inspect the unit for signs of wear or leaks. Catching issues early can prevent costly repairs.
Why DIY Maintenance Matters for Warranty and Longevity
Keeping your AC coils clean isn't just about ensuring cold air; it's also about protecting your investment. Regular maintenance helps prevent costly breakdowns and shows that you've kept up with manufacturer-recommended care. As long as you keep records, most manufacturers will honor the warranty even for DIY-maintained units.
In some cases, if a warranty claim is made and the manufacturer finds that the coils are filthy, they may deny coverage, blaming lack of maintenance. A quick rinse each season is a simple way to ensure your warranty remains intact.
Common Mistakes to Avoid When Cleaning AC Coils
- Using a Pressure Washer: The high pressure can damage the coil fins, making them less effective at dissipating heat.
- Skipping Safety Gear: Coil cleaners can be irritating. Use gloves, safety glasses, and even a mask if you're dealing with a lot of dust.
- Cleaning Only Once Every Few Years: Accumulated dirt can lead to reduced efficiency and even equipment failure. Aim to clean at least annually.
Benefits of Regular Coil Cleaning
Cleaning your AC coils offers several advantages:
- Improved Energy Efficiency: A clean AC unit doesn't have to work as hard, leading to lower energy bills.
- Better Cooling Performance: Dirty coils reduce cooling capacity. Regular cleaning keeps your home cooler with less effort from the unit.
- Extended Lifespan: With reduced strain, your AC unit can last longer, saving you money on replacements.
- Reduced Risk of Costly Repairs: By maintaining the coils, you minimize the likelihood of overheating and other issues that lead to breakdowns.
Final Thoughts: DIY Coil Cleaning Saves Time and Money
Cleaning your AC coils may sound intimidating, but it's a straightforward process that any homeowner can handle. By following these steps and avoiding common myths, you can keep your AC system running smoothly and efficiently. Not only will you enjoy cooler air, but you'll also save on energy bills and reduce the likelihood of costly repairs. Make coil cleaning a part of your regular home maintenance, and your AC unit will thank you for years to come!
With these insights and easy-to-follow steps, you're all set to tackle AC coil cleaning like a pro.
FAQs About DIY Coil Cleaning
Discover expert tips and answers to common FAQs about DIY coil cleaning to maintain your HVAC system efficiently and safely.
It’s generally safe to wait at least 30 minutes after rinsing, allowing any residual water to evaporate. If you’re cleaning on a warm day, it should dry faster, but allowing this time ensures your system is dry and ready to restart safely.
Yes, you can use diluted dish soap, like Dawn, in a spray bottle. Just mist it onto the coils, let it sit for a few minutes, and rinse thoroughly. Avoid harsher cleaners that may damage the coils or void warranties.
For units accumulating leaves inside, consider carefully removing the top to access and clear out debris. Some homeowners opt for preventive covers, like mesh, to keep debris out.
Ideally, clean your coils once or twice a year, especially at the start of the cooling season. Homes near trees or dust-prone areas may benefit from more frequent rinses to prevent buildup.
Yes, high pressure can bend or damage the fins, reducing efficiency. Stick with a low-pressure garden hose and avoid pressure washers. Spray from the top down with gentle, even strokes.
Removing the top cover is optional and typically only necessary for heavy buildup. If you clean your coils regularly, a rinse from the outside is usually enough. For stubborn grime or deep cleaning, consider removing the top.
Yes, turning off the power is a good precaution to avoid electrical issues. While the system may handle rain, turning off the power eliminates any risk during manual cleaning.
For mineral deposits, look for a specific coil cleaner that targets mineral buildup. If your area has hard water, avoid misting systems around the AC to prevent mineral accumulation on the coils.
Check the manufacturer's guidelines first, as some newer units with delicate coils may not tolerate harsh cleaners. In most cases, a simple water rinse will suffice for regular maintenance.


