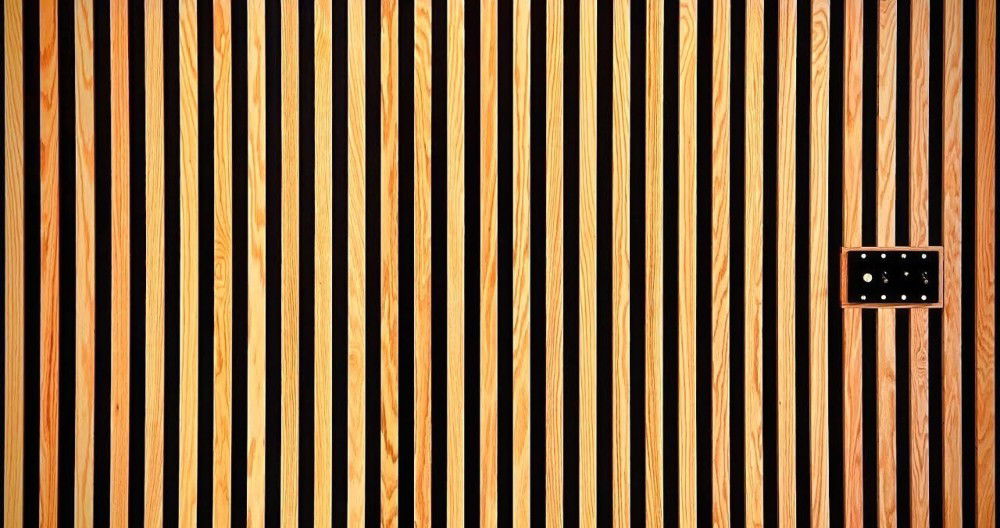
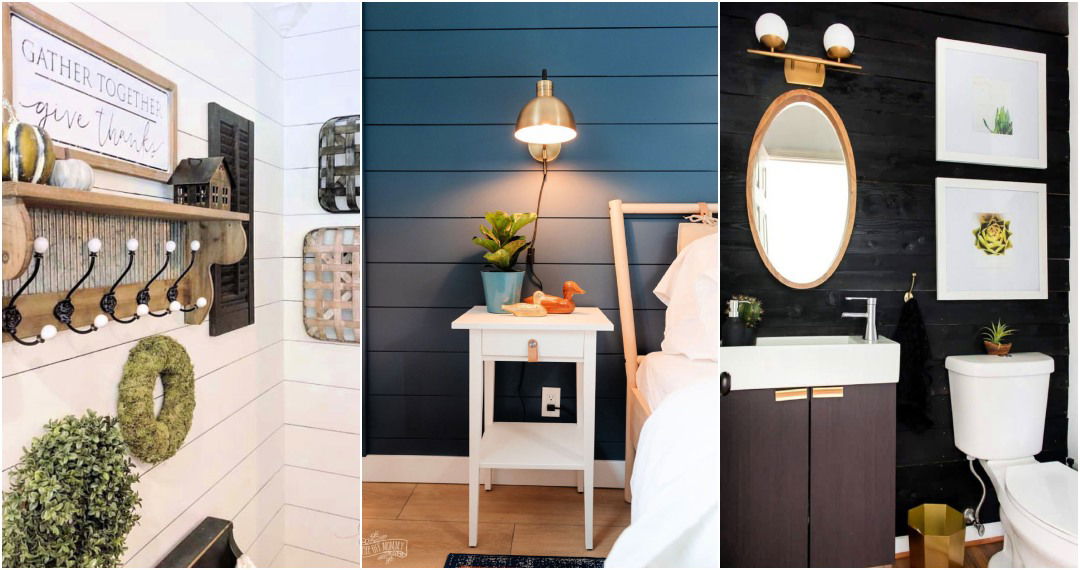
Building a DIY accent wall can completely transform your space without breaking your budget. By focusing on a single wall, you can add color, texture, and personality to any room. Whether it’s using paint, wallpaper, or a different material, an accent wall is a creative way to make a bold statement. This guide will walk you through the steps on how to make an accent wall, from choosing the right wall to finishing touches.
Learn how to do an accent wall easily with our straightforward instructions. We cover everything from gathering materials and tools to tips for a smooth application. This process is perfect for anyone wanting to add a unique touch to their home decor.
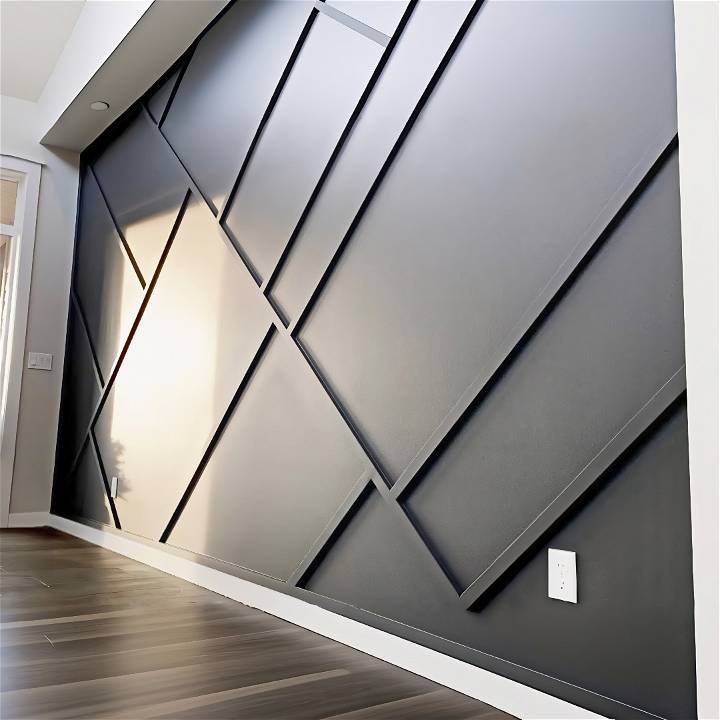
Build a stunning DIY accent wall to transform your space! Easy step-by-step guide for a budget-friendly home makeover.
Materials and Why They're Needed:
- Trim (1x2 MDF): Provides the framework for the accent wall. I chose MDF for its consistency and resistance to warping.
- Paint (Flat Finish, Benjamin Moore Regal Select): To give the wall depth and contrast.
- Tools (Stud Finder, Chop Saw, Brad Nailer): Essential for accurate placement, cutting, and securing the trim.
- Spackle and Caulk: For a professional finish, seal gaps and cover nail holes.
- Paint Sprayer: For a smooth and even coat of paint over the textured surface.
Step by Step Instructions
Create a lovely DIY accent wall with step-by-step instructions. Learn planning, design, trim installation, finishing touches, and painting techniques.
Planning and Designing:
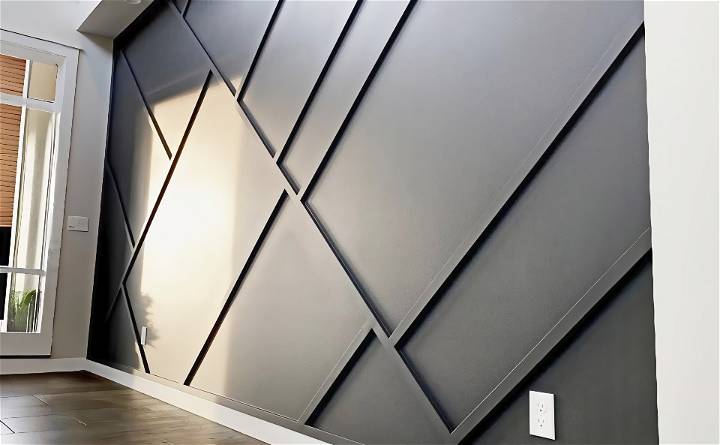
I started by visualizing the design on my wall, a recessed area next to the front door. This step was crucial as it set the tone for the entire project. I used pieces of the trim to sketch out my vision directly on the wall, ensuring my design was well proportioned to the size of the wall (9 feet tall by 14 feet long in my case).
Installation of the Trim:
Using a stud finder, I located and marked the studs on my wall. This ensured that the trim would be securely fastened. A chop saw made cutting the MDF trim to the exact lengths needed a breeze. Remember, securing the trim directly into studs whenever possible adds stability to the structure. In places where studs weren't available, I used CA glue as an adhesive to keep the trim firmly in place.
Finishing Touches:
This is where precision comes into play. Spackling over the nail holes and caulking the edges where the trim meets the wall were tasks that demanded a meticulous hand, but the outcome was worth the effort, building a seamless look. Sanding down these areas made the wall ready for painting.
Painting:
I chose a flat finish paint that complemented my living space's aesthetic. The Wagner Flexio 3000 sprayer was an invaluable tool here, providing an even coat quickly and efficiently. Adding a bit of water to the paint ensured a smooth application. Two coats of paint were necessary to achieve the desired finish, with a light sanding in between for an ultra-smooth texture.
Additional Tips for Success:
- Measure Twice, Cut Once: Double-checking measurements can save time and materials in the long run.
- Patience is Key: Allow spackle and paint to dry completely between steps.
- Personal Touch: Feel free to add unique elements to your design that reflect your personal style.
Common Mistakes and Troubleshooting
When embarking on a DIY accent wall project, it’s easy to get caught up in the excitement and overlook some critical steps. Here’s a guide to help you avoid common mistakes and ensure your accent wall is a success.
Choosing the Wrong Wall
- Mistake: Selecting a wall with too many interruptions like windows or doors can detract from the accent wall’s impact.
- Solution: Opt for a solid wall or one with minimal interruptions. It should be a focal point that’s visible upon entering the room.
Ignoring Room Lighting
- Mistake: Not considering the natural and artificial lighting can result in colors looking different than expected.
- Solution: Observe your wall at different times of the day and under various lighting conditions before finalizing the color or wallpaper.
Skimping on Preparation
- Mistake: Rushing into painting or applying wallpaper without proper wall preparation.
- Solution: Clean the wall, fill in holes, and sand down any rough spots. A smooth surface ensures the best finish.
Overlooking Paint Quality
- Mistake: Using low-quality paint can lead to disappointing results and less durability.
- Solution: Invest in high-quality paint. It covers better, lasts longer, and often requires fewer coats.
Neglecting Color Theory
- Mistake: Choosing a color without considering the room’s color scheme can make a clashing appearance.
- Solution: Use a color wheel or consult design blogs to understand complementary colors and make a harmonious look.
Forgetting the Finish
- Mistake: Ignoring the paint finish can affect both the look and maintenance of the wall.
- Solution: Matte finishes hide imperfections well, while glossier finishes are easier to clean but highlight flaws.
Measuring Inaccurately
- Mistake: Inaccurate measurements can lead to wallpaper shortages or excess and poorly aligned patterns.
- Solution: Measure the wall dimensions multiple times and buy extra wallpaper to account for mistakes and pattern matching.
Lacking the Right Tools
- Mistake: Not having the correct tools on hand can hinder your progress and affect the quality of the work.
- Solution: Gather all necessary tools before starting. This includes quality brushes, rollers, tape, and a level.
Avoiding common mistakes will make your DIY accent wall a beautiful home addition. Doing it right saves time and frustration later.
Maintenance and Upkeep Advice
Making an accent wall is a fantastic way to add personality to your space, but maintaining it is key to ensuring it continues to brighten your room for years to come. Here’s how you can keep your accent wall looking fresh and vibrant:
Regular Cleaning
- Mistake: Letting dust and dirt accumulate can make the wall look dull and affect the paint or wallpaper quality.
- Solution: Gently clean the wall with a soft, damp cloth. For painted walls, use a mild detergent if necessary, and for wallpaper, use products designed for that purpose.
Touch-Ups
- Mistake: Ignoring small chips and cracks can lead to bigger maintenance issues later.
- Solution: Keep leftover paint or an extra roll of wallpaper for minor touch-ups. Address imperfections promptly to prevent them from worsening.
Avoiding Sun Damage
- Mistake: Continuous exposure to direct sunlight can fade the colors of your accent wall.
- Solution: Use window treatments like curtains or blinds to protect the wall from harsh sunlight, especially during peak hours.
Humidity Control
- Mistake: High humidity levels can damage the wall, causing paint to peel or wallpaper to bubble.
- Solution: Ensure good ventilation in the room, and consider using a dehumidifier if necessary to maintain optimal humidity levels.
Safe Decorating
- Mistake: Using harsh adhesives or heavy items can damage the wall’s surface.
- Solution: Opt for removable hooks and lightweight decor. Avoid drilling holes whenever possible.
Periodic Inspections
- Mistake: Not regularly checking the wall’s condition can lead to unnoticed damage.
- Solution: Inspect the wall periodically for signs of wear and tear. Early detection makes repairs easier and less costly.
By following these simple maintenance tips, you can keep your accent wall in top condition. A little care goes a long way in preserving the beauty of your home’s focal point.
FAQs About DIY Accent Wall
Discover everything you need to know about DIY accent wall projects with our comprehensive faqs. Tips, materials, and best practices are included!
A DIY accent wall is a wall in a room that’s been transformed to become a focal point, usually by using a different color, material, or texture from the other walls. It’s a popular home improvement project because it can add character and depth to a space with relatively little expense and effort.
When selecting an accent wall, consider the room’s layout and natural focal points. Look for a wall that draws attention naturally, such as the one behind a bed in a bedroom or behind a television in a living room. Avoid walls with too many windows or doors, as they can detract from the accent wall’s impact.
Yes, even if you’re renting, you can still make an accent wall. Removable wallpaper or temporary decals are great options that can provide a dramatic change without permanent alterations. Always check with your landlord or rental agreement before making any changes.
Preparation is key for a successful DIY accent wall. Start by choosing the right material and design for your space. Then, gather all necessary tools and materials. Make sure the wall is clean, dry, and smooth. If painting, apply primer before the paint. If using wood or other materials, measure and cut pieces to fit the wall precisely.
Maintaining your DIY accent wall will depend on the materials you’ve used. For painted walls, you can easily wipe them down with a damp cloth to remove dust and dirt. For wood accent walls, dusting and occasional polishing may be necessary to keep the wood looking fresh. If you’ve used wallpaper or fabric, be sure to check the manufacturer’s instructions for cleaning and care. Remember, regular maintenance will help your accent wall look great for years to come.
Final Thoughts
In conclusion, making a DIY accent wall is an excellent way to transform your space on a budget. This project can add character and style without breaking the bank. By following these simple steps on how to make an accent wall, you'll achieve a stunning result that enhances your home’s aesthetic.


