Before we dive into the process of making DIY acoustic panels, it's important to understand the basics of acoustics. This knowledge will help you understand why acoustic panels are needed and how they work.

What is Sound?
Sound is a type of energy made by vibrations. When any object vibrates, it causes movement in the air particles. These particles bump into the particles close to them, which makes them vibrate too causing them to bump into more air particles. This movement, called sound waves, keeps going until they run out of energy. If your ear is within range of these vibrations, you hear the sound.
How Do Acoustic Panels Work?
Acoustic panels work by absorbing sound waves, reducing the overall amount of noise in a room. They do this by using materials that are effective at absorbing the energy of the sound wave, preventing it from reflecting off the walls and causing echoes.
Why Are Acoustic Panels Important?
In spaces where clear sound is important, like a home theater or recording studio, acoustic panels can make a big difference. They can reduce echo and background noise, making it easier to hear clear, high-quality sound. Without acoustic panels, sound can bounce around the room, making a muddy or echoey audio experience.
How to Make $20 DIY Acoustic Panels
Learn how to make $20 DIY acoustic panels with our step-by-step guide. Improve the sound quality in any room on a budget. Start your project today!
Materials and Tools Needed
- MDF (Medium Density Fiberboard)
- Insulation (Preferably rock wool or similar acoustic insulation)
- 100% Cotton Fabric (Acoustically transparent)
- Wood Glue
- Screws (Opt for MDF screws for better grip)
- Staple Gun with Staples (Consider a pneumatic staple gun for ease)
- Utility Shears
- Measuring Tape
- Table Saw or Hand Saw
- Drill with Countersink Bit
- Respirator or Dust Mask
- PPE (Personal Protective Equipment)
Step By Step Instructions
Learn how to make $20 DIY acoustic panels with this step-by-step guide below:
Building the Frame
- Measure and Cut MDF: Begin by measuring and cutting your MDF into strips to build a frame. The size of the frame will depend on the insulation size, typically 15.25 inches wide by 47 inches long.
- Assemble Frame: Using wood glue, apply an ample amount on the edges and join them together. For added strength, drill countersink holes and insert screws into each corner. A tip here is to go heavier on the corners with the glue for extra bond strength, and be cautious not to strip the screws when tightening.
- Add Side Cleats: For mounting purposes, attach additional MDF strips on the sides of the frame with a 45-degree angle cut at the end. These will act as the support for the French cleat system.
Preparing and Attaching the Fabric
- Cut Fabric: Cut your 100% cotton fabric to size. Ensure it's large enough to wrap around to the back of the frame with extra space for attachment.
- Attach Fabric: Lay the fabric on a clean surface, place the frame on top, and begin to staple the fabric to the back. Start with one side, pulling tight as you go, and then proceed to the opposite side. Ensure there are no creases and the fabric is taut.
- Corner Folds: When you reach a corner, fold the fabric neatly and staple it in place. Aim for a clean fold to keep the front looking sharp.
Adding Insulation
- Insert Insulation: Cut the acoustic insulation to fit tightly within the frame. Rockwool or similar materials are recommended for effective sound absorption.
- Back Fabric Cover: To prevent fiber release and enhance the look, cut another piece of fabric and staple it to the back, enclosing the insulation.
Mounting the Panels
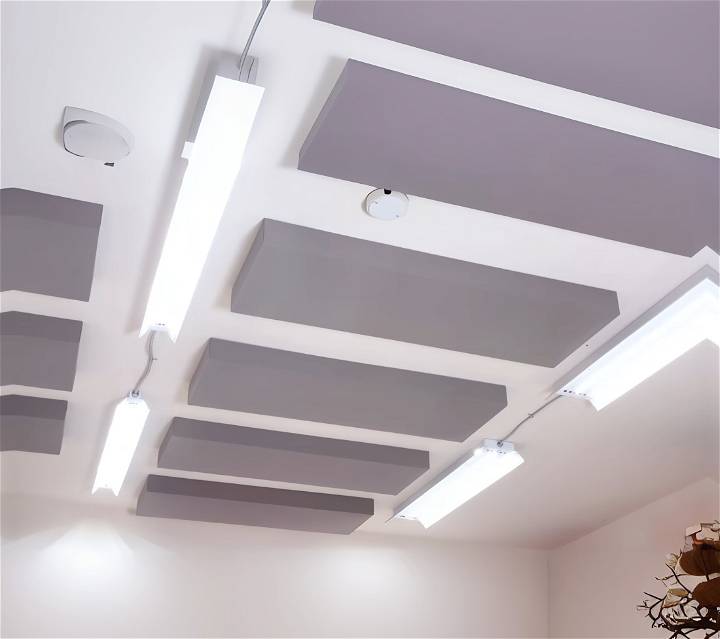
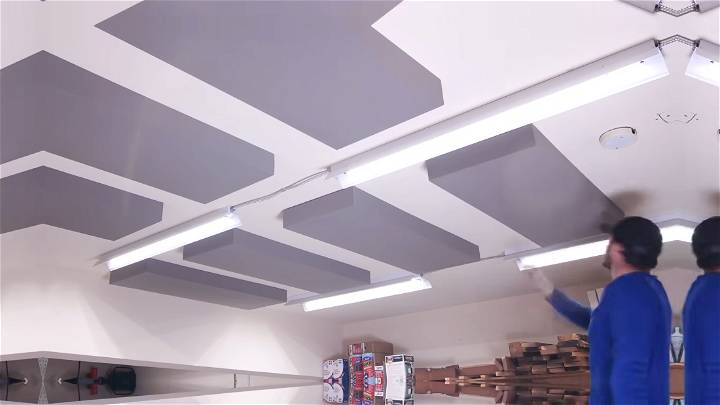
- Prepare Ceiling Cleats: Cut additional MDF strips with a 45-degree angle to match the side cleats on the panel. These will be screwed into the ceiling.
- Install Ceiling Cleats: Using construction screws, attach the cleats to the ceiling. Ensure they are properly spaced and secured.
- Hang Panels: Slide the panel cleats into the ceiling cleats. Test the fit and stability before proceeding with the remaining panels.
Safety Tips
- Always wear a respirator or dust mask when cutting MDF or handling insulation to protect from dust and fibers.
- Use PPE, like safety goggles and gloves, throughout the construction process to prevent injuries.
Video Tutorial
For a step-by-step video tutorial on making these DIY Acoustic Panels, watch this helpful video: Fix This Build That: $20 DIY Acoustic Panels.
It pairs well with this written guide, offering a visual representation of the instructions provided for a clearer understanding.
Making DIY acoustic panels improves sound quality economically. At $20 per panel, reduce echo and improve audio clarity with precise measurements, secure fabric, and safety. Customize for your space's look.
Installation Guide
Installing your DIY acoustic panels correctly is crucial for achieving the best sound absorption. Here's a simple, step-by-step guide to help you through the process.
Determine the Placement
The first step is to determine where to place your acoustic panels. The placement will depend on the room and its acoustics. A common strategy is to place panels at the first reflection points. These are the points where sound bounces off the wall and reaches your ears. To find these points, you can use the mirror trick: sit in your listening position and have a friend move a mirror along the wall. Where you can see the speakers in the mirror are your first reflection points.
Mounting the Panels
Once you've determined where to place your panels, it's time to mount them. Here's how:
- Measure and Mark: Measure the height at which you want to mount the panels and mark the points on the wall.
- Attach Brackets: Attach the mounting brackets to the wall at the marked points. Make sure they are level.
- Hang the Panels: Carefully hang the panels on the brackets. Ensure they are secure and level.
Checking the Acoustics
After installing the panels, check the acoustics of the room. You should notice a reduction in echoes and background noise. If not, you may need to adjust the placement of the panels.
The goal of installing acoustic panels is to improve the sound quality of the room. Take your time with the installation process to ensure the best results.

Troubleshooting Common Issues
When working on a DIY project like making acoustic panels, you might encounter some challenges. Here are some common issues and their solutions:
Issue: Poor Sound Absorption
Solution: If you're not noticing a significant improvement in sound quality after installing your panels, they might not be placed correctly. Remember, acoustic panels should be placed at the first reflection points. Use the mirror trick mentioned in the installation guide to find these points.
Issue: Panels Falling Off the Wall
Solution: If your panels are not staying on the wall, it could be due to the mounting method. Make sure you're using sturdy brackets and that they're securely attached to the wall. If the panels are heavy, you might need to use wall anchors for additional support.
Issue: Panels Not Fitting Properly
Solution: If your panels aren't fitting properly on the wall, it could be because they weren't cut to the right size. Always measure your space carefully before cutting your materials. If a panel is too large, you can trim it down. If it's too small, you may need to build a new panel.
Issue: Material Hard to Work With
Solution: Some materials used for acoustic panels can be difficult to work with. If you're having trouble, consider using a different material. There are many types of acoustic foam available, each with different properties. Choose one that suits your skill level and the tools you have available.
DIY projects have challenges. Stay patient and problem-solve to make acoustic panels.
FAQs About DIY Acoustic Panels
Learn all about DIY acoustic panels in our comprehensive FAQs guide. Discover how to make, install, and optimize acoustic panels for your space.
What are Acoustic Panels?
Acoustic panels are used to reduce noise and control sound in many different spaces. They come in a large variety of sizes, types, and colors to meet your design, budgetary, and durability requirements.
Why Do I Need Acoustic Panels?
Acoustic panels can enhance the sound quality of a room. They can be used in a home theater, recording studio, or any space that requires good sound quality.
What Materials Can I Use for DIY Acoustic Panels?
Common materials used for DIY acoustic panels include dense mineral wool or foam. Both materials are effective at absorbing sound.
How Many Acoustic Panels Do I Need?
The number of panels you need depends on the size of your room and the level of sound control you want to achieve. As a general rule, covering about 20% to 30% of the wall and ceiling surfaces with acoustic panels can significantly improve the sound quality of a room.
Where Should I Place Acoustic Panels?
Acoustic panels should be placed at the first reflection points on the walls and ceiling. These are the points where sound bounces off the wall and reaches your ears.
How Do I Install Acoustic Panels?
Acoustic panels can be installed using mounting brackets. Measure and mark the points on the wall where you want to place the panels, attach the brackets at these points, and then hang the panels on the brackets.
How Do I Maintain Acoustic Panels?
Regular dusting can help keep your panels clean and effective. Also, avoid exposing the panels to direct sunlight as it can cause the materials to degrade over time.
Can I Customize the Look of My Acoustic Panels?
Yes, you can customize your panels by choosing different materials or by covering them with fabric that matches your room decor.
Are DIY Acoustic Panels as Effective as Commercial Ones?
DIY acoustic panels can be just as effective as commercial ones if they are made and installed correctly. The key is to use the right materials and to place the panels at the correct positions in the room.
Can Acoustic Panels Block Out All Noise?
While acoustic panels can significantly reduce noise levels and improve sound quality, they cannot block out all noise. For complete soundproofing, you would need to use additional methods such as adding mass to the walls or decoupling the walls.
Conclusion:
In conclusion, DIY acoustic panels are an affordable and effective solution to improve sound quality in your space. By following these easy steps, you can build customized panels to enhance your listening experience.


