Air plants, also known as Tillandsias, have gained popularity as low-maintenance, soil-free houseplants that thrive in various environments. Their unique ability to absorb nutrients and water through their leaves makes them an ideal choice for creative display options. Learn how to make a sleek and stylish DIY air plant holder with this straightforward guide, using easy-to-find materials.
This project is beginner-friendly and requires only a few tools, so whether you're an experienced crafter or just starting, this tutorial will equip you with everything needed to make a personalized air plant holder.
What You'll Need
Here's a list of the materials and tools required for making this air plant holder. The best part? You may already have many of these items at home:
- Aluminum wire (about 20-22 gauge is ideal for flexibility)
- Flat-bottomed rock (smooth, medium-sized for stability)
- Hot glue gun and glue sticks
- Pliers (for shaping the wire)
- Hammer (optional for extra shaping)
Step by Step Instructions
Learn how to make a DIY air plant holder with step-by-step instructions. Personalize your decor and embrace the benefits of easy air plant care.
Step 1: Prepare the Base Rock
Start by selecting a flat-bottomed rock that will serve as the base of your air plant holder. The flat bottom ensures that the holder will be stable on various surfaces. Smooth stones, such as river rocks, are ideal due to their natural beauty and minimalist aesthetic. If the rock has a rough base, you might need to use sandpaper to smooth it out, ensuring that it won't tip over once your plant is added.
Step 2: Attach the Wire to the Rock
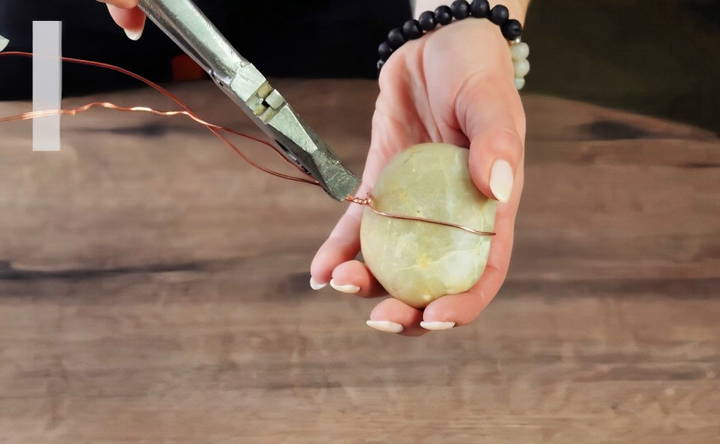
- Wrap the Wire Around the Base: Take a length of aluminum wire and wrap it around the bottom of the rock. Aluminum wire is flexible and easy to work with, making it an excellent choice for this project. Wrap the wire tightly around the rock to secure it, ensuring it doesn't shift or loosen.
- Flatten the Wire Underneath: After wrapping the wire around the base, flatten the section of wire that will sit at the rock's bottom. This will make a stable, even surface, preventing wobbling.
- Twist the Wire at the Top: Once the base is secure, twist the wire ends together at the top of the rock. This twist not only keeps the wire from unraveling but also serves as the foundation for the spiral that will hold your air plant.
Step 3: Secure with Hot Glue
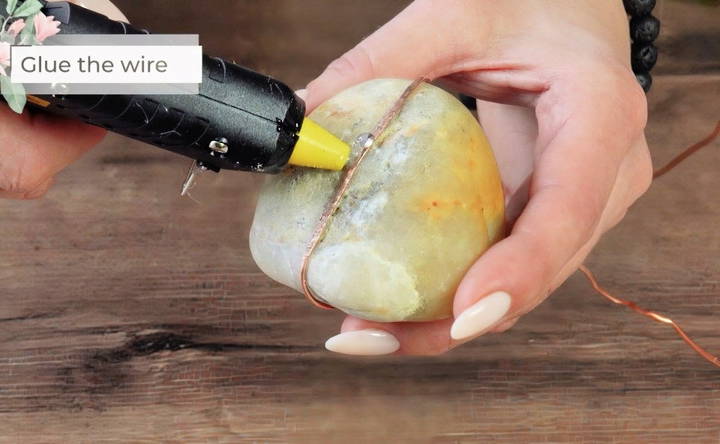
To ensure that the wire stays firmly attached to the rock, add a small line of hot glue between the rock and the wire. Apply the glue sparingly, as excess glue can affect the aesthetics of your holder. The hot glue will provide extra security, ensuring that the wire won't shift over time.
- Tip: If you want to ensure a seamless appearance, use clear or neutral-colored glue sticks that blend well with the rock and wire.
Step 4: Make the Spiral Plant Holder
- Cut a Short Length of Wire: Measure and cut a short piece of wire for the spiral holder. Aim for a piece about 4-6 inches long, which will give enough length for a secure loop without overwhelming the plant.
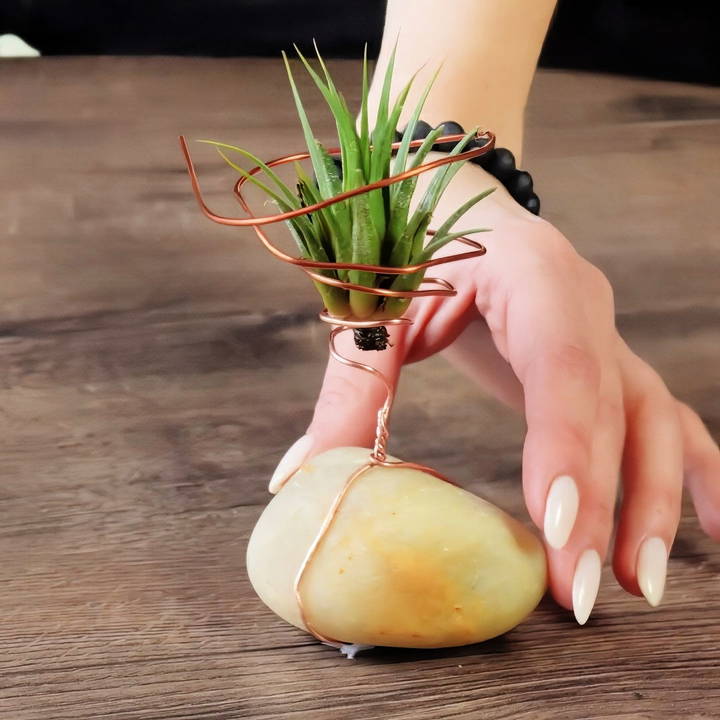
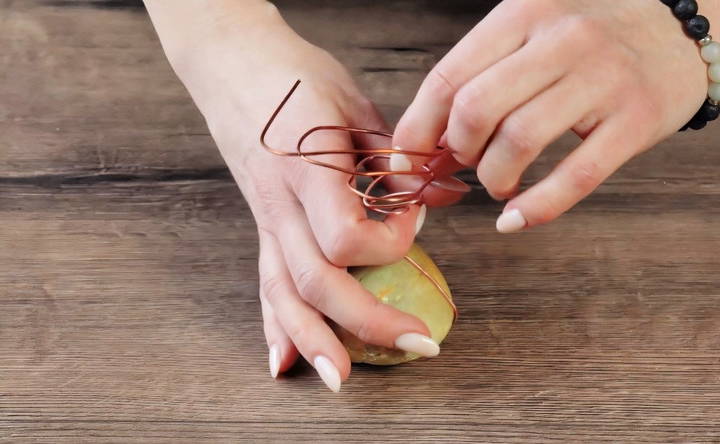
- Make the Spiral: Using pliers, make a spiral or circular shape at the top of the wire piece. This spiral acts as the seat for your air plant. Aim for a diameter large enough to comfortably hold the plant's base without crushing it.
- Attach the Spiral to the Twisted Base: Insert the spiral wire into the twisted portion at the top of the rock and secure it by gently twisting it around the existing wire. Ensure the spiral sits evenly and securely to prevent your air plant from tipping out.
Adding Your Air Plant
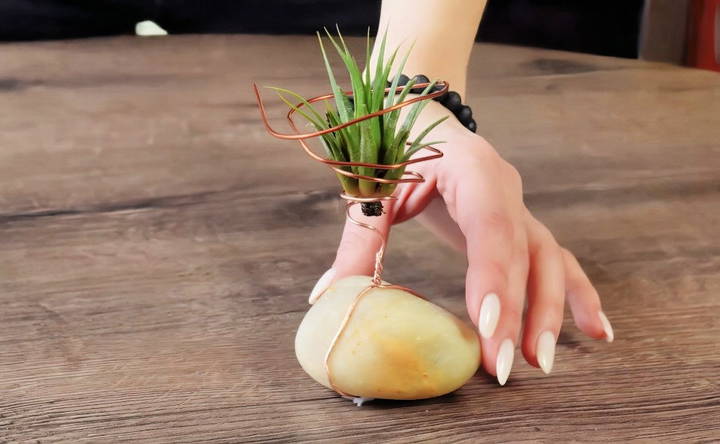
With the holder complete, it's time to place your air plant in its new home! Position the plant within the spiral holder, making sure it sits snugly without being squeezed. The spiral should hold the plant upright, showcasing its unique shape and leaves.
- Care Tip: When watering air plants, always remove them from the holder to avoid moisture accumulation, which could lead to rot. Mist your plant outside of the holder or soak it briefly in water, then allow it to dry completely before returning it.
Customization Ideas
One of the best parts about making a DIY air plant holder is that you can personalize it to match your decor. Here are some ideas to inspire your creativity:
- Painted Rocks: Consider painting the rock base with a color that complements your home's aesthetic. Matte or metallic paints can add a modern touch, while natural colors blend seamlessly with minimalist decor.
- Decorative Wire Shapes: Experiment with different shapes for the wire. Instead of a simple spiral, you could make geometric shapes like triangles or hearts to give your holder a unique look.
- Multiple Spirals for Multiple Plants: If you have several air plants, try adding multiple spirals on a larger rock. This way, you can make a mini air plant display with a single holder.
- Beaded Wire for Extra Detail: Slide a few decorative beads onto the wire before securing it around the rock to add a subtle pop of color or sparkle. Just make sure the beads are securely fixed and won't interfere with the plant holder's stability.
Conclusion:
Crafting your own air plant holder is a fulfilling way to bring greenery into your home while adding a touch of personal creativity. With minimal materials and a few simple steps, you can make a stylish, functional display for your air plants. Not only will you have a beautiful plant holder, but you'll also enjoy the satisfaction of crafting it yourself.
Whether you keep it minimalistic or get adventurous with decorations, this DIY air plant holder will enhance any room and give your air plant a perfect new home.
FAQs for DIY Air Plant Holders
Discover creative DIY air plant holders with our faq guide. Learn how to make, care for, and display air plants effortlessly.
The hot glue provides a strong hold when applied between the rock and wire. Use a small, steady line of glue to prevent slipping, ensuring the holder remains stable over time. If you notice movement, add more glue to reinforce it.
Yes, but choose rocks with a flat, stable base to prevent tipping. Smooth river rocks work best, but slate or similar flat stones can also be effective. Avoid porous rocks, as they might absorb the glue and reduce stability.
You can substitute with copper or brass wire, but make sure it’s flexible enough to shape easily. Aluminum is preferred for its balance of flexibility and durability, especially for beginners.
For a more durable option, you can use epoxy or superglue. Epoxy provides a stronger bond, though it takes longer to cure. Avoid craft glue, as it might not hold up over time.
Wipe the rock and wire with a damp cloth as needed. For the plant, remember to remove it from the holder before misting or soaking to prevent excess moisture on the rock, which could encourage mold.
Yes! To display several air plants, attach additional spirals or wires to a larger rock, spacing them to allow each plant ample room. Ensure the rock is heavy enough to balance the added weight.
Using pliers, gently widen or tighten the spiral until it holds your plant securely. The spiral should cradle the plant’s base comfortably without squeezing or bending its leaves.
Yes! Adding beads, paint, or even wrapping the wire in colorful string can add personality. Just make sure any added elements are securely fastened and won't interfere with plant placement.


