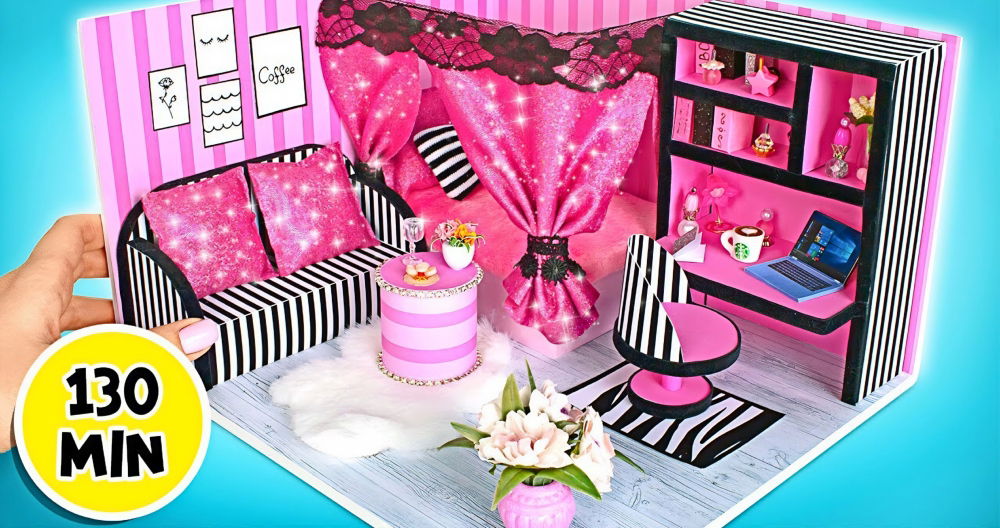
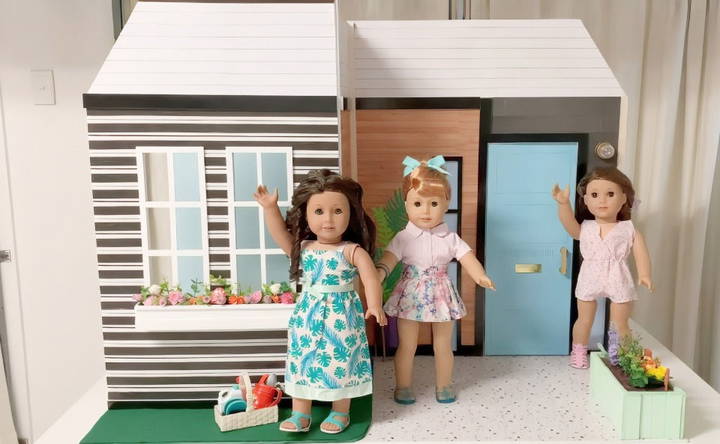
Building a custom dollhouse for an American Girl doll is a fantastic way to spark creativity and save on cost. Whether you're building it for your child or yourself, this project is not only fun but also offers endless opportunities for customization. Inspired by My Froggy Stuff's folding dollhouse and American Girl's Kidcraft Ultimate Dollhouse, this tutorial will guide you through the process of making a stylish and modern DIY american girl dollhouse with 360-degree access that can be easily disassembled for storage.
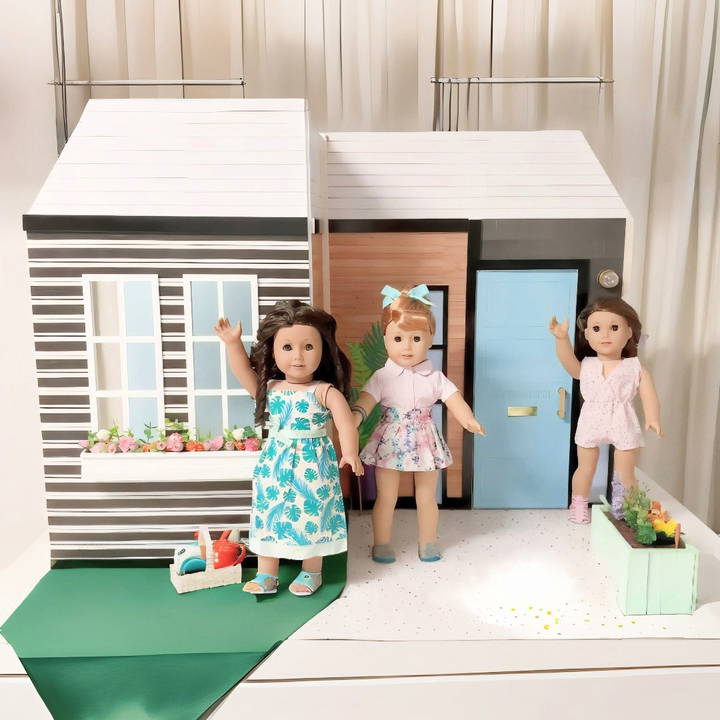
Materials You Will Need
Before we dive into the step-by-step instructions, it's essential to gather all the materials. Here's a list of what you'll need to build the dollhouse:
- Six A1 Sheets of 5mm Foam Board: These will serve as the primary structure for your walls and floors.
- Four 12.5mm Square Dowel Rods: These rods will act as support beams.
- Glue: A strong adhesive is necessary to hold everything in place.
- Scrapbook Paper, Contact Paper, and Printables: These will add flair and design to your rooms.
- Paint and Brushes: Choose colors that complement your design.
- Painter's Tape: Low-tack tape works best for temporarily securing pieces during assembly.
- Miscellaneous Materials: You'll need items like a tea candle, Christmas bauble, and popsicle sticks for crafting details like porch lights and door handles.
Step by Step Instructions
Make a gorgeous DIY american girl doll house with our step-by-step guide! From building and decorating to adding final touches, find everything you need here!
Step 1: Building the Main Structure (Panel A)
Begin by joining two sheets of foam board lengthwise. Painter's tape works well to keep them secure without leaving residue. For Panel A, this will be the starting structure of your dollhouse.
Dividing the Rooms
- Draw a vertical line to divide the panel into two rooms.
- Add a horizontal line to mark where the roof will go.
- Cut a triangle from each of the top corners for a sloped roof.
Building the Door and Windows
The right side of Panel A will serve as the patio wall. Use foam board to cut out frames for a short window, a door, and a tall window. After cutting the door from the panel, secure it with vellum paper to give a translucent look to your windows, mimicking sunlight filtering through.
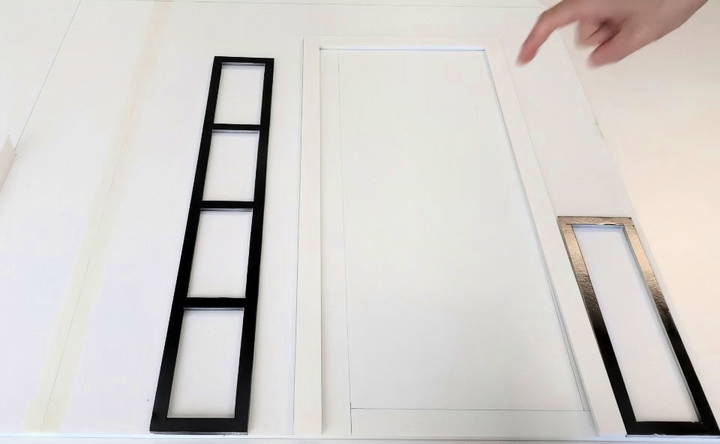
Decorating the Patio Wall
For the patio wall, start by covering half of the wall with wood-grain scrapbook paper. Then, cut strips of black cardstock to build contrast siding. This layering will give the siding some dimension and add a modern aesthetic to your design.
Step 2: Adding Dimension and Detail to Panel A
Once the basic structure is in place, it's time to enhance it with details.
Building the Door
- Glue both door pieces together, trimming the edges for a snug fit.
- From recycled cardboard, cut rectangular frames to add detail to the door, both front and back.
- For extra flair, use puffy alphabet stickers to spell out “American Girl” on the door, then paint it a vibrant blue to match the AG version.
After the paint dries, cut out a mail slot and insert gold metallic cardstock for an added touch of realism.
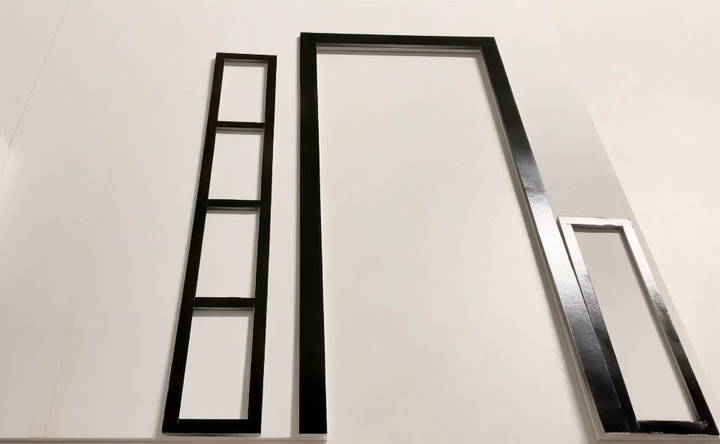
Wall Decorations and Accessories
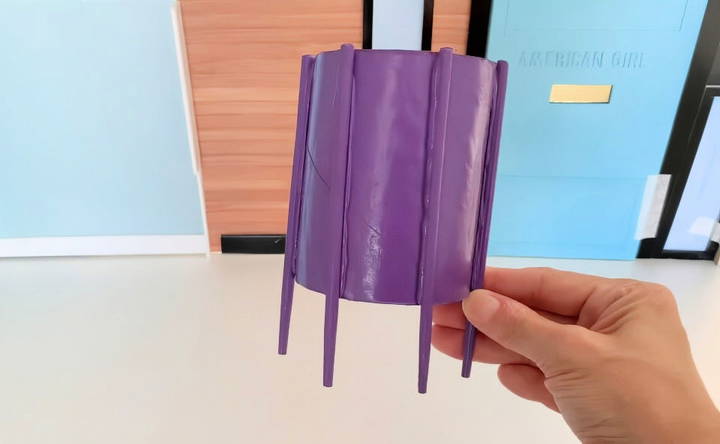
The left side of Panel A will be the bedroom wall, so cover it with light blue scrapbook paper and add crown molding and baseboards for detail. To match AG's house design, replicate their planter using a toilet roll, and chopsticks painted purple and brown. Adhere paper die-cut leaves around the planter for greenery.
Step 3: Designing the Interior (Panel B)
Panel B will house the kitchen, living room, and additional bedrooms. Here's how to make it stand out:
Dividing and Window Placement
Panel B is divided into three areas, with a rectangle cut out of the top right for the roof. Make windows by drawing and cutting out the frames. Each window will have six panes for a classic look.
Cover the front of the house with striped paper to give it that iconic dollhouse exterior.
Adding the Final Touches
Add more scrapbook paper and trim to finish decorating the walls. In the kitchen, use a herringbone tile printable for a sophisticated backsplash, and cover the living room area with pink contact paper to brighten the space.
Step 4: Assembling the Dollhouse
Learn how to assemble the dollhouse easily. Follow the steps for making the floor and joining the panels for a perfect miniature home!
Building the Floor
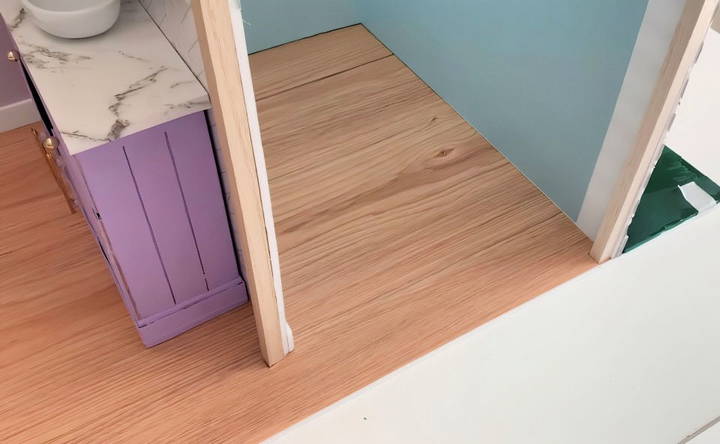
For the floor, use the last two foam boards, covering one corner in faux stone contact paper and the rest with wood-grain contact paper to replicate hardwood floors. Cut out slots to match the dowel rods on Panels A and B.
Joining the Panels
Align the slits in Panel A with the corresponding rods in Panel B, and slide them into place. These dowel rods not only support the walls but also keep the structure sturdy and secure.
Step 5: Adding Functional Elements
Now that the basic structure is complete, it's time to add the interactive features that will make your dollhouse truly special.
Making a Functional Door
Using the toothpick method, insert a half-toothpick into the foam core of the door and align it with the doorway. This will allow the door to swing open and close. Secure it into the foam board floor for added stability.
Building a Porch Light
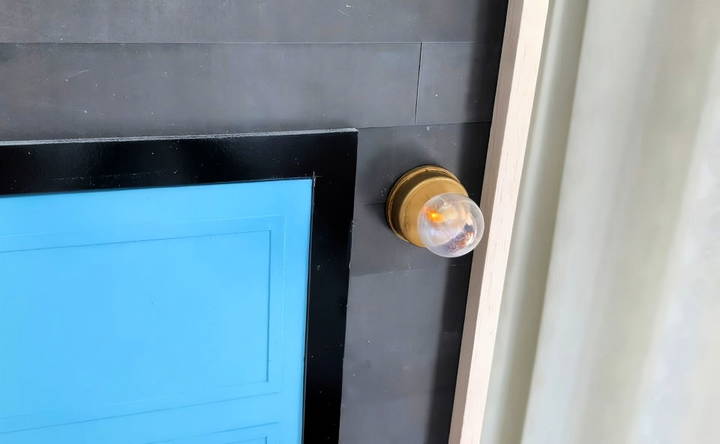
To make a porch light, use a tea candle and a clear Christmas bauble. Trace the candle onto the foam board, partially cutting through so you can access the switch to turn the light on and off.
Step 6: Decorating the Rooms
Finally, it's time to personalize the interiors to make the house feel like home.
Kitchen and Living Room
For the kitchen, use a small wooden chest as a base for a kitchen bench, covering it with wood-grain contact paper. Add more scrapbook paper for cupboards and drawers, and don't forget to add gold push-pin handles for a polished look.
In the living room, add DIY accessories like a TV or a cozy couch to make the space feel lived-in. You can use contact paper and printables to simulate wallpaper or brick features around doorways.
Customization Ideas
Customizing your American Girl dollhouse can be a fun and creative project. Here are some ideas to make your dollhouse unique and special:
Room Themes
Make different themed rooms to add variety and personality to your dollhouse. Here are some ideas:
- Bedroom: Use soft colors, a cozy bed, and tiny pillows. Add a small wardrobe and a bedside table.
- Kitchen: Include a miniature stove, fridge, and sink. Use small containers for food items and utensils.
- Living Room: Add a comfy sofa, a coffee table, and a tiny TV. Decorate with small books and plants.
- Bathroom: Use a small tub, sink, and toilet. Add tiny towels and toiletries.
Furniture and Accessories
Making your own furniture and accessories can be rewarding. Here are some DIY ideas:
- Beds: Use cardboard and fabric to build a bed frame and mattress. Add small pillows and a blanket.
- Tables and Chairs: Craft tables and chairs from popsicle sticks and glue. Paint them to match your room themes.
- Lamps: Use small LED lights and craft materials to make miniature lamps. They can add a cozy feel to any room.
- Rugs and Curtains: Use fabric scraps to make rugs and curtains. They can add color and texture to your rooms.
Personal Touches
Adding personal touches can make the dollhouse feel more like home. Here are some suggestions:
- Photos and Artwork: Print tiny photos and artwork to hang on the walls. Use family photos or build your own designs.
- Books and Magazines: Make miniature books and magazines from paper. They can be placed on tables or shelves.
- Plants and Flowers: Craft small plants and flowers from paper or fabric. They can brighten up any room.
Seasonal Decorations
Change the decorations based on the season or holidays. Here are some ideas:
- Winter: Add tiny Christmas trees, snowflakes, and holiday lights.
- Spring: Use flowers, pastel colors, and Easter decorations.
- Summer: Add beach-themed items like tiny surfboards and seashells.
- Fall: Use autumn leaves, pumpkins, and Halloween decorations.
Interactive Elements
Make your dollhouse interactive with these ideas:
- Opening Doors and Windows: Use hinges to make doors and windows that open and close.
- Movable Furniture: Make furniture that can be easily moved around. This allows for different room layouts.
- Lights: Install small LED lights in each room. They can be battery-operated and add a realistic touch.
By incorporating these customization ideas, you can make a unique and personalized American Girl dollhouse that reflects your creativity and style.
Safety Tips
Ensuring safety while building and playing with a DIY American Girl dollhouse is crucial. Here are some essential safety tips to keep in mind:
Child Safety
- Non-Toxic Materials: Always use non-toxic paints, glues, and materials. Check labels to ensure they are safe for children.
- Smooth Edges: Sand down any rough or sharp edges on the wood or other materials. This prevents cuts and injuries.
- Secure Parts: Make sure all parts are securely attached. Loose parts can be a choking hazard for young children.
- Size Appropriateness: Ensure that small parts are not too tiny, especially if the dollhouse is for younger children. Small parts can be a choking hazard.
Tool Safety
- Adult Supervision: Always supervise children when they are using tools. Some tools can be dangerous if not used correctly.
- Proper Use of Tools: Teach children how to use tools properly. For example, show them how to safely use a hammer or a glue gun.
- Protective Gear: Use protective gear like gloves and safety goggles when cutting or sanding materials. This helps prevent injuries.
- Safe Storage: Store tools in a safe place out of reach of children when not in use. This prevents accidental injuries.
Construction Safety
- Stable Work Surface: Work on a stable, flat surface to prevent accidents. A wobbly table can cause tools and materials to fall.
- Ventilation: Ensure good ventilation when using paints, glues, or other materials that emit fumes. This helps avoid inhaling harmful substances.
- Clean Workspace: Keep your workspace clean and organized. Clutter can lead to accidents and injuries.
Play Safety
- Regular Inspections: Regularly inspect the dollhouse for any loose parts or damage. Repair any issues immediately to keep it safe for play.
- Age-Appropriate Play: Ensure that the dollhouse and its accessories are appropriate for the child's age. Avoid small parts for younger children.
- Supervised Play: Supervise young children while they play with the dollhouse. This ensures they use it safely and appropriately.
Electrical Safety
- Battery-Operated Lights: If you add lights to the dollhouse, use battery-operated LED lights. Avoid using electrical wiring, which can be a fire hazard.
- Safe Battery Use: Ensure that battery compartments are secure and out of reach of young children. Batteries can be dangerous if swallowed.
Follow these tips to ensure a safe and fun play environment for children with their DIY American Girl dollhouse. Safety is key for a worry-free experience.
FAQs About DIY American Girl Doll House
Discover the top FAQs about making your own DIY american girl doll house, offering tips, materials needed, and step-by-step instructions.
A typical American Girl doll house is designed to fit 18-inch dolls. Common dimensions are around 4 feet tall, 3 feet wide, and 1.5 feet deep. You can adjust the size based on your space and needs.
Building a DIY American Girl doll house can take anywhere from a weekend to a few weeks, depending on the complexity of the design and the time you can dedicate to the project.
Absolutely! Using recycled materials like old furniture, cardboard, or leftover wood can be a great way to save money and be environmentally friendly. Just ensure the materials are clean and safe.
Use non-toxic, water-based acrylic paint for the doll house. It's safe for children and easy to clean up. You can also use spray paint for a smoother finish, but ensure it's used in a well-ventilated area.
Absolutely! Involving your child can make the project more fun and educational. They can help with painting, decorating, and even some of the simpler construction tasks. Just ensure they are supervised, especially when using tools.
Conclusion
Building your own DIY American Girl dollhouse is a rewarding project that not only saves money but also allows for endless customization. The structure is versatile, durable, and easy to disassemble, making it perfect for homes with limited storage space. With some foam board, dowel rods, and creativity, you can build a beautiful, functional space for your dolls to enjoy.
Take your time with the steps, have fun with the design, and enjoy the process of bringing your vision to life. This DIY dollhouse offers 360-degree access for play, making it the perfect addition to any doll collection.


