Making my own DIY ankle weights was incredibly rewarding. I wanted to customize my workout gear to be both affordable and functional. Using simple materials like fabric, sandbags, and velcro, I maked a personalized set that fits perfectly. It was fun to get hands-on and see the project come together.
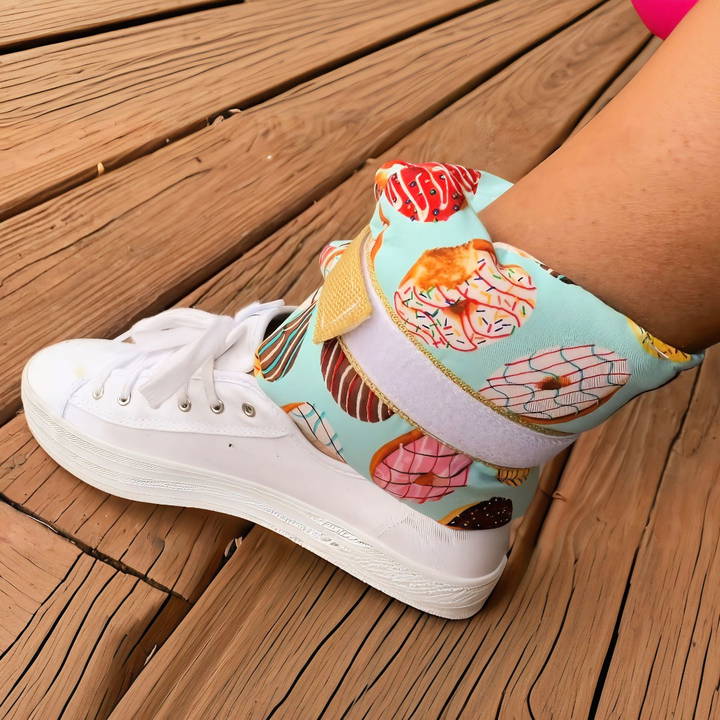
Now, I feel more engaged in my fitness routine. These homemade ankle weights are perfect for adding resistance to exercises, making workouts more effective. I encourage you to whip up your own pair. Trust me, it's simple and rewarding. I'm helping you with this tutorial. Follow the guide below to get started!
Materials Needed
Get started on your DIY project with materials like cotton fabric, felt, d-rings, webbing, velcro, sand, needle and thread, and essential tools.
1. Cotton Fabric
Cotton fabric is an excellent choice due to its comfort and breathability. I chose to use cotton for the outer layer because it would be in direct contact with my skin. Make sure to choose a fabric that's thick enough to handle the weight and stress without tearing. However, if you opt for a thinner cotton fabric, it's crucial to reinforce it with a sturdier material like felt to prevent ripping, which could cause the sand to spill out during use.
2. Felt (as backing)
If your cotton fabric is thin, felt acts as a robust backing material to add durability. This layer ensures your weights remain intact whether you're running or doing any high-intensity activity. Replace a trail of sand with assurance and durability in your handmade weights.
3. D-Rings
D-rings are essential for making the weights adjustable and easy to secure. I used 1-inch D-rings, which fit perfectly with my webbing. They are durable and provide a reliable closure system when used with webbing.
4. Webbing
Webbing is used to sew the D-rings and Velcro onto. I used half a yard to get 18 inches of webbing. Don't forget to melt the ends to prevent fraying, a crucial step for ensuring the longevity of your webbing.
5. Velcro
For a secure fastening system, Velcro is invaluable. I used 13 inches of hook and loop tape. This type of Velcro has a strong grip, ensuring your weights stay securely attached during workouts.
6. Sand
Sand serves as the filler for your weights. It's readily available and provides the necessary weight to enhance your workouts. Use a funnel to prevent a mess when filling your weights.
7. Needle and Thread / Sewing Machine
Depending on your preference and tools available, use either a needle and thread or a sewing machine to put everything together.
8. Scissors, Pins, and Clips
These tools are necessary for cutting your fabric, webbing, and Velcro, as well as securing everything in place before you sew.
Step by Step Instructions
Learn how to make your own ankle weights with our easy step-by-step instructions. Follow our guide from cutting fabric to sealing the weights.
Step 1: Cutting the Fabric
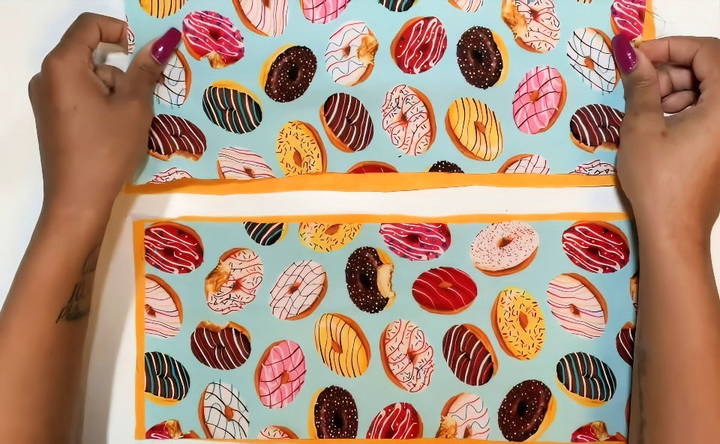
Begin by cutting your cotton fabric to the desired size. I cut mine to 6 inches by 14 inches, but adjust this depending on the size that suits you best. Remember to cut two pieces for each weight you intend to make.
Step 2: Preparing the Webbing
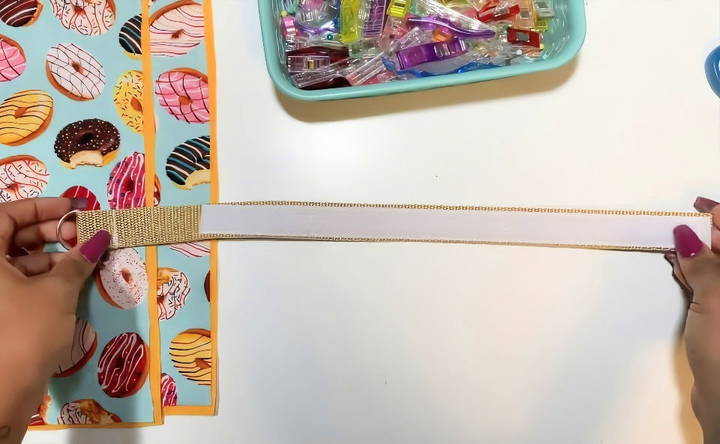
Cut the webbing to 18 inches. Melt the ends carefully using a flame to prevent fraying.
- Fold the Webbing: Fold one end of the webbing about 1 inch.
- Insert the D-Ring: Slip the D-ring into the folded end.
- Sew: Sew along the edge to secure the D-ring in place.
Step 3: Adding the Velcro
Cut your Velcro to 13 inches.
- Attach the Velcro: Place the Velcro on the webbing and pin it in place.
- Sew: Sew along the edges of the Velcro to secure it to the webbing. Ensure you sew firmly for a strong hold.
Step 4: Assembling the Fabric and Webbing
With the webbing prepared, we move on to combining it with the fabric.
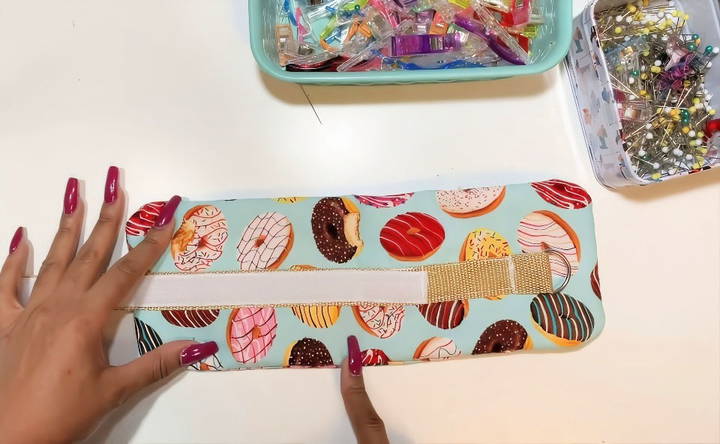
- Position the Webbing: Lay one piece of fabric flat. Place your webbing centered on this fabric.
- Sew: Sew along the dotted lines (outline) to secure the webbing to the fabric.
Step 5: Sewing the Fabric Together
Now, you need to combine the two pieces of fabric.
- Right Sides Together: Place the second piece of fabric over the first, with the right sides facing each other.
- Pin and Clip: Pin or clip the fabric together along the edges, leaving about 3 inches open for flipping the fabric inside out later.
- Sew: Sew around the edges, ensuring not to sew the 3-inch gap.
Step 6: Flipping and Dividing the Fabric
Flip the fabric inside out through the 3-inch gap so that the right sides are now facing outward.
- Sew the Center: Sew a line down the center of the fabric to make two separate compartments for the sand.
- Dividing Further (Optional): You can also make more divisions if you prefer smaller sand compartments.
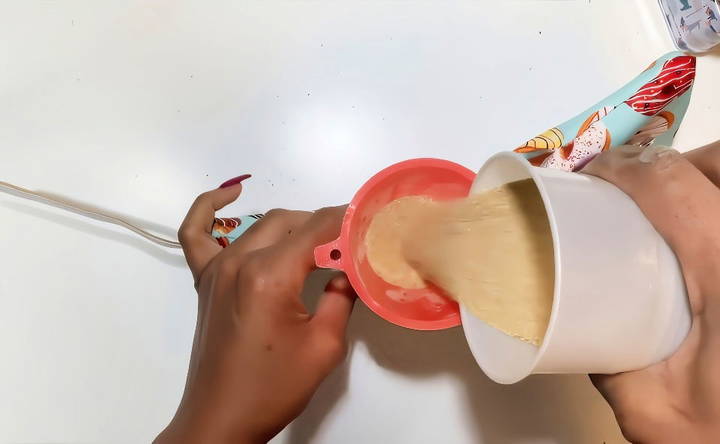
Step 7: Filling with Sand
Now comes the fun part – adding the weight.
- Use a Funnel: Use a funnel to pour sand into each compartment. This minimizes mess and ensures even distribution.
- Measure or Estimate: If you have a scale, you can measure the sand to ensure each compartment holds an equal amount. If not, estimate – I ended up with roughly a pound per compartment.
Step 8: Sealing the Weights
Finally, close up the open end.
- Sew the Opening: Carefully sew along the edge of the opening to secure the sand inside.
- Check for Any Leaks: Ensure there are no gaps or weak stitching where sand can escape.
Customization Tips
Making your own ankle weights is not just about functionality; it's also an opportunity to express your personal style and preferences. Here are some tips to help you customize your DIY ankle weights:
Choose Your Filler Wisely
The filler material you choose can greatly affect the weight and comfort of your ankle weights. Common fillers include:
- Sand: It's dense and molds well to your body, but make sure it's dry and clean.
- Rice: Less dense than sand, rice is a good lightweight option and can be easily replaced.
- Aquarium Gravel: This is a washable and non-absorbent option that comes in various colors.
Adjustable Weight
Consider making your ankle weights adjustable by making pockets that can be opened and closed with Velcro or zippers. This way, you can add or remove filler to change the weight as needed.
Fabric Choices
Select a fabric that is durable and comfortable against your skin. Neoprene is a popular choice for its cushioning effect and resistance to sweat. For a more breathable option, consider using a mesh material.
Secure Fastening
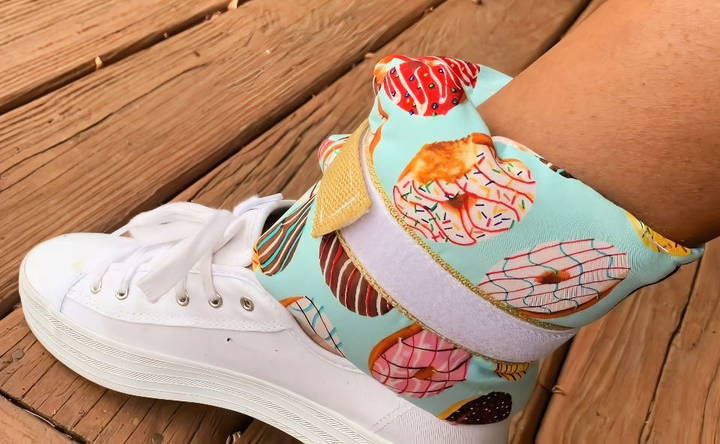
Ensure your ankle weights have a secure fastening system. Velcro straps are easy to adjust and can accommodate different ankle sizes. Make sure the straps are long enough to wrap around your ankles comfortably.
Personal Touch
Add a personal touch to your ankle weights with patterns or colors that you love. You can even embroider your initials or a motivational quote to inspire your workouts.
Reflective Elements
If you plan to use your ankle weights outdoors, especially in low-light conditions, adding reflective tape or stitching can enhance your visibility and safety.
By following these tips, you'll make a set of ankle weights that are not only functional but also tailored to your personal needs and style. The key is to make them comfortable, adjustable, and reflective of your personality.
Troubleshooting
When crafting DIY ankle weights, you might encounter a few hiccups along the way. Here's a troubleshooting guide to help you solve common issues:
Filler Leakage
- Solution: Double-check the seams of your ankle weights. If you find any holes, use a strong thread to sew them up tightly. For added protection, line the inside with a plastic bag or use a double layer of fabric.
Weights Are Too Loose or Tight
- Solution: Adjust the length of the Velcro straps. If they're still not fitting properly, consider adding an elastic band for a snugger fit that can stretch to accommodate your movements.
Fabric Irritation
- Solution: Choose a soft lining fabric like cotton or fleece for the part of the weight that touches your skin. If irritation persists, wear a thin sock or sleeve under the weight.
Weights Not Staying in Place
- Solution: Ensure the weights are evenly distributed. If they still move around, add more filler to empty spaces or make smaller compartments within the weights to keep the filler stable.
Ankle Weights Smell After Use
- Solution: Use a fabric that is machine washable and dry the weights thoroughly after washing. For a quick fix, sprinkle baking soda inside the weights and let them sit overnight before shaking it out.
Difficulty Adjusting Weight
- Solution: Make your compartments accessible and easy to open. Use zippers or Velcro closures so you can add or remove filler without hassle.
Making your own ankle weights requires patience and adjustments. Don't be discouraged by minor issues; soon, you'll have custom weights that fit well and boost your workouts.
FAQs About DIY Ankle Weights
Discover everything you need to know about DIY ankle weights. Find answers to common FAQs and make your own ankle weights at home.
DIY ankle weights are homemade weights that can be strapped to your ankles, adding resistance to your workouts. They’re a cost-effective and customizable alternative to store-bought weights, ideal for enhancing exercises like leg lifts, walking, or running. Using ankle weights can increase the intensity of your workout, improve muscle tone, and boost calorie burn.
Your DIY ankle weights should be proportionate to your body weight and fitness level. A general guideline is to start with weights that are around 1-3% of your total body weight. For example, if you weigh 150 pounds, your ankle weights can be between 1.5 to 4.5 pounds each. Always start lighter and gradually increase the weight to prevent injury.
Yes, safety is crucial when using ankle weights. Make sure the weights are securely fastened and evenly distributed around your ankles. Avoid using them for high-impact activities to prevent joint stress. Also, listen to your body and remove the weights if you experience any discomfort or pain.
Yes, one of the benefits of DIY ankle weights is the ability to adjust their weight. If you’re using a sock or fabric pouch, you can simply add or remove the filler material to reach your desired weight. For example, a 1-1/4 cup of sand weighs approximately one pound. Adjusting the amount of sand allows you to customize the weight as per your workout needs.
To prevent injuries, always ensure that the weights are not too heavy for your current fitness level. The weights should be snug but not too tight, as this could restrict circulation. It's also important to use sturdy materials to prevent the filler from leaking out during exercise. If you're using a sealable bag as a container, make sure it's securely closed and wrapped with a bandage or fabric to keep it in place. Always start with a lighter weight and increase gradually to avoid muscle strain.
Conclusion
And there you have it – custom, homemade ankle and wrist weights. This project not only saved me money but gave me a sense of accomplishment and the exact weights I needed for my workouts.
By following these steps and ensuring you use the right materials, you can make durable and effective fitness accessories. I hope this guide has been helpful, and I'm excited for you to try making your own weights.


