Building my DIY aquarium was one of the best experiences. I gathered all essential items like glass, silicone, and a sturdy frame. Following a step-by-step guide, I carefully assembled each part. Being patient and precise was crucial. The entire process felt so satisfying, seeing each piece come together. It taught me a lot about planning and execution.
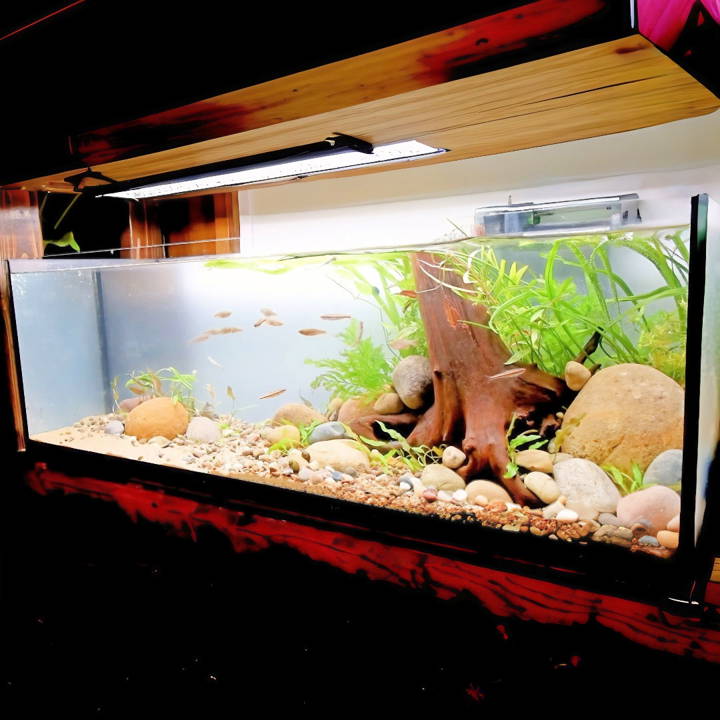
Starting my own DIY fish tank brought life and color to my living space. Choosing the right fish and plants was exciting. Watching the fishes swim around felt rewarding and peaceful. The maintenance is a bit tricky, but with proper knowledge, it's manageable. The whole process has been both fun and educational.
With this guide, I'm helping you embark on your own DIY aquarium or fish tank project. Trust the steps, and enjoy the journey.
What You Will Need
Here's a rundown of the materials I used and why they're necessary:
- Silicone Sealant: Essential for making a waterproof seal between the glass panes. I opted for black ASI silicone for aesthetic reasons.
- Caulk Gun: Needed to apply the silicone sealant evenly and with precision.
- Masking Tape: Frog tape and Scotch delicate surface tape are my go-tos for making clean silicone lines.
- Razor Blades & Paper Towels: For cleaning up excess silicone and ensuring a neat finish.
- Isopropyl Alcohol: Used for cleaning the glass surfaces before silicone application to ensure a strong bond.
- IKEA Glass Shelves: Quarter-inch thick, tempered glass shelves from IKEA are perfect for this project, requiring no glass cutting.
Step by Step Instructions on
Learn step-by-step instructions on how to set up a DIY aquarium with this easy guide. Perfect for beginners wanting to build their own beautiful fishtank.
Preparing the Glass
The first step to making your aquarium is to lay out the glass panels on a flat surface. I recommend doing this on a piece of paper or cardboard, which makes moving the assembled tank easier later on. Check and double-check your measurements, and label everything to avoid any mix-ups during assembly.
Masking for Silicone
Applying tape about 3/8 inches from the edges where the silicone will go ensures clean and professional-looking edges. It's also crucial for the sides and bottom, as this will dictate the thickness of your silicone bead. Precision isn't critical here; a good eyeball measurement works fine.
Cleaning
Before applying the silicone, wiping down all the glass edges and surfaces with isopropyl alcohol is a must. This step is critical as it ensures no dirt or oil interferes with the silicone's adhesion.
Applying Silicone
Not going to lie, this part made me a bit nervous at first. However, with a steady hand and a calm pace, I applied the silicone along the tape edges and on the glass faces where the panels would meet. Remember, consistency is key; too much or too little silicone can lead to leaks or an unsightly finish.
Assembling the Panels
With all the silicone applied, it was time to assemble the glass panels. I started with one of the larger pieces and worked my way around, pressing each panel gently into the silicone and securing it with tape as needed. The key here is not to move too fast – allow the silicone to grab onto the glass without smudging it.
Smoothing the Silicone
After the panels were in place, smoothing out the silicone beads inside the tank was essential for a clean interior look. Using a glove or your finger, gently glide over the silicone to even it out. Then, carefully remove the tape before the silicone dries to reveal those sharp, clean lines.
Cleaning and Final Touches
Once the silicone cured (which took about 24 hours), I was on to the final steps. Any excess silicone that seeped out was easily scraped away with a razor blade. For extra protection and to avoid any unevenness on surfaces that could cause stress on the glass, I made a self-leveling mat out of EVA foam to place under the tank.
Water Test
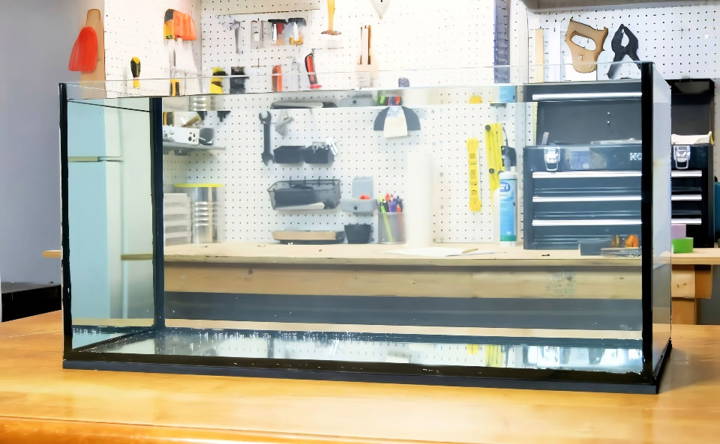
Though I felt confident in my work, doing a water test was crucial to ensure there were no leaks. Seeing it hold water without a single drop escaping was a proud moment. My DIY aquarium was not just a figment of my imagination anymore; it was a tangible, watertight reality.
Cost Analysis
Building this aquarium themselves saves a significant amount over traditional retail options. The total cost of materials for my 24-gallon tank came just under $100, a fraction of what a similar commercial aquarium would cost.
The Result
The satisfaction of making something with my own hands, tailored to my space and preferences, was unparalleled. Filled with plants and fish, my DIY aquarium became the centerpiece of my living room, garnering admiration from everyone who saw it.
Customization Ideas for Your DIY Aquarium
Building a DIY aquarium gives you the freedom to design a habitat that is as unique as the aquatic life it will host. Here are some customization ideas that can help you make your aquarium truly your own:
Choose a Theme
Start by selecting a theme that resonates with you. It could be a natural look that mimics a specific environment like a tropical riverbed or a coral reef, or something more whimsical like a sunken pirate ship or a fantasy underwater castle.
Backgrounds and Wallpapers
The background of your aquarium can dramatically change its appearance. You can use 3D backgrounds, paint the outside back glass, or apply a printed vinyl image to build depth and interest.
Substrate Selection
The bottom layer of your aquarium, known as the substrate, can vary from fine sand to gravel to specialized planted tank substrates. Each type has its own benefits and aesthetic appeal.
Plants and Decorations
Live plants not only add beauty but also contribute to the health of your aquarium's ecosystem. For decorations, consider items that won't affect the water quality, such as driftwood, rocks, and aquarium-safe ornaments.
Lighting Effects
LED lights offer a range of colors and intensities. You can simulate sunrise and sunset, or even build lightning effects during a storm simulation. This not only looks great but can also benefit the plants and fish.
DIY Equipment
For the handy DIYer, making your own filters, CO2 systems, or protein skimmers can be a rewarding project. Ensure you understand the requirements of your tank inhabitants before customizing these elements.
Personal Touches
Incorporate elements that have personal meaning to you. This could be a piece of driftwood found on a memorable vacation or a custom-made sign with the name of your aquarium.
A successful DIY aquarium is about both looks and functionality for its inhabitants. Research to ensure your customization is safe and suitable for your aquatic life.
Technology Integration in Your DIY Aquarium
Incorporating technology into your DIY aquarium can greatly enhance the functionality and enjoyment of your aquatic environment. Here's how you can integrate modern tech to build a smart, efficient, and interactive habitat for your aquatic friends:
Automated Feeding Systems
Automated feeders can dispense food at scheduled times, ensuring your fish are fed consistently even when you're away. Some models allow you to adjust feeding amounts and frequencies, catering to the specific dietary needs of your fish.
Smart Lighting
LED lighting systems can be programmed to simulate natural light cycles, including sunrise, sunset, and moonlight phases. This not only builds a visually appealing display but also supports the circadian rhythms of your fish and plants.
Water Quality Monitors
Digital water quality monitors can track parameters like pH, temperature, and ammonia levels in real time. With smartphone integration, you can receive alerts and maintain optimal conditions for your aquarium's inhabitants.
Filtration Technology
Advanced filtration systems can keep your water crystal clear without frequent maintenance. Look for options with multi-stage filtration, UV sterilization, and quiet operation to keep your aquarium healthy and serene.
Cameras and Live Streaming
Underwater cameras can be installed to monitor and enjoy your aquatic life from anywhere. Some enthusiasts even set up live streams to share their underwater world with others online.
Apps and Software
There are numerous aquarium management apps available that can help you log maintenance tasks, track growth and health of your fish, and even identify species and diagnose issues.
Utilize these tech advancements to build a top-notch DIY aquarium that's a stunning centerpiece and a healthy ecosystem, easily managed. Always prioritize your aquatic life's safety and well-being when choosing and installing tech.
FAQs About DIY Aquarium
Discover the faqs about DIY aquarium: essential tips, step-by-step guides, and expert answers for a thriving, custom-built underwater world.
To start building your DIY aquarium, you’ll need a clear plan and some essential materials. Begin with choosing the right size for your space and budget. You’ll need a glass or acrylic tank, sealant, a filter, lighting, a heater (for tropical fish), substrate (gravel or sand), and decorations. Don’t forget to include a water test kit to ensure the water is safe for your fish.
The size of your aquarium depends on where you want to place it and what type of fish you plan to keep. Generally, larger tanks are more stable and easier to maintain. A common recommendation for beginners is a 20-gallon tank, which offers enough space for a variety of fish while still being manageable.
Yes, but be cautious. Only use items that are non-toxic and won’t alter the water’s chemistry. It’s important to thoroughly clean any rocks, driftwood, or decorations before adding them to your aquarium to remove any harmful substances. Alternatively, you can purchase aquarium-safe decorations from pet stores.
Maintaining a healthy aquarium involves regular water changes (typically 10-20% weekly), monitoring water parameters with a test kit, and keeping the filter clean. It’s also crucial to avoid overfeeding and to introduce new fish gradually to maintain the balance of the ecosystem.
When building a DIY aquarium, it's crucial to use aquarium-grade glass to ensure safety and durability. Avoid using regular window glass as it may not withstand the pressure of the water. If you're cutting the glass yourself, use proper glass cutting equipment and wear safety gear. Always sand down the edges of the cut glass to prevent injuries and ensure a smooth surface for sealing. If you're not experienced in glass cutting, consider purchasing pre-cut panels from a reputable supplier. Remember, safety first!
In Conclusion
Wrapping up, making your DIY aquarium can be a rewarding and exciting project. This step-by-step guide offers essential tips and instructions for building a beautiful and healthy DIY fish tank. Dive into this fun and educational activity and enjoy your aquatic masterpiece!


