If you're like me, you enjoy DIY projects, especially when they combine creativity, problem-solving, and a touch of technical know-how. One challenge that comes up for many aquarium enthusiasts, particularly those keeping cold-water species like lobsters, is maintaining the right water temperature. I found myself in this situation while raising an American lobster named Leon. His water needed to stay cool, but commercial aquarium chillers were out of my budget. So, I decided to build my own DIY aquarium chiller.
Here's how I did it and how you can, too.
Why You Might Need an Aquarium Chiller
For many cold-water species, keeping water temperatures below 70°F (21°C) is crucial. Depending on your local climate and where your aquarium is located, maintaining these temperatures can be tough. In my case, Leon's tank is in a cool downstairs room, so I manage to keep it between 65°F and 69°F without a chiller. But this isn't always possible for everyone, and that's when a chiller becomes essential.
Purchasing a pre-made chiller can be expensive, often costing upwards of $1,200. So, I decided to build a DIY version that works for about a third of the cost.
Materials I Used
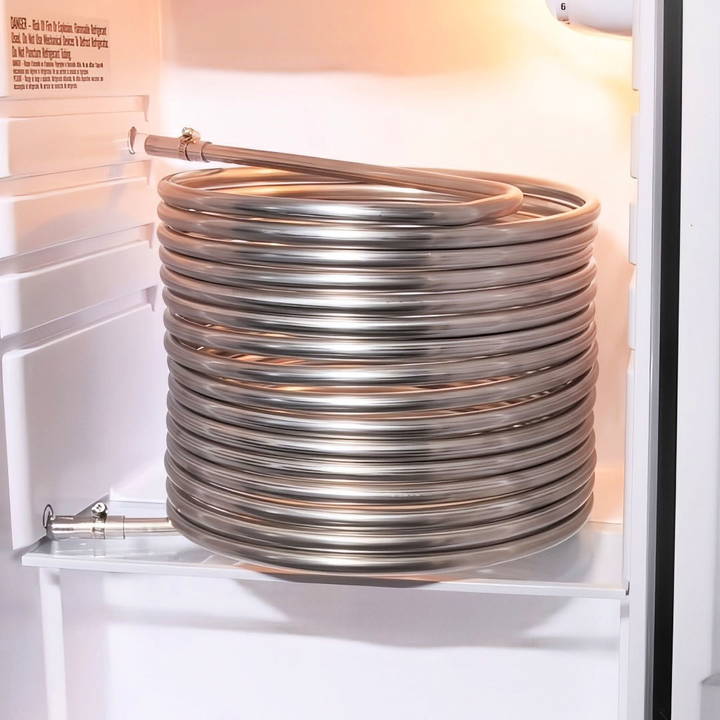
- Stainless steel coil (heat exchanger): I opted for stainless steel because it's non-toxic to aquatic life and transfers heat well. Be careful to choose the right grade. I used 304 stainless steel for freshwater, but 316 stainless steel is better if you're working with saltwater due to its corrosion resistance.
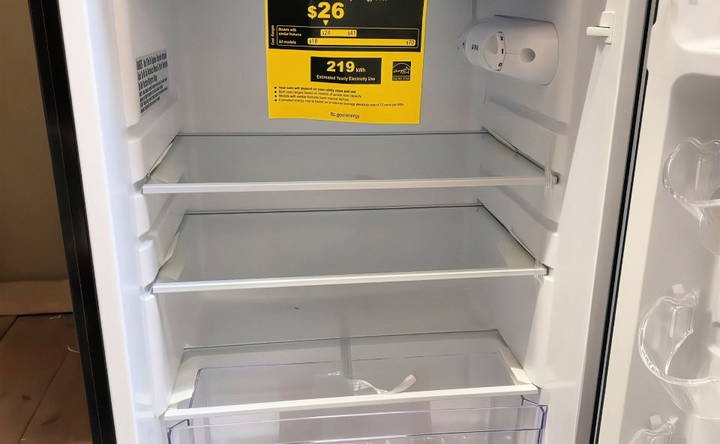
- Mini-fridge: After some searching, I found a mini-fridge large enough to house the stainless steel coil but small enough to fit in my space. I chose a 3.3 cubic foot model, which cost me around $180.
- Vinyl tubing: To transport water to and from the chiller, I used half-inch clear vinyl hose.
- DC water pump: This pump moves the water from the aquarium to the chiller and back. It's a variable speed pump, which allowed me to control the water flow.
- Miscellaneous: I also needed a few small items like clamps, drill bits, and tools for modifying the fridge and connecting everything.
Step by Step Instructions
Learn how to build a DIY aquarium chiller with these step-by-step instructions. Perfect your setup by setting up the heat exchanger and modifying a mini-fridge.
Step 1: Setting Up the Heat Exchanger
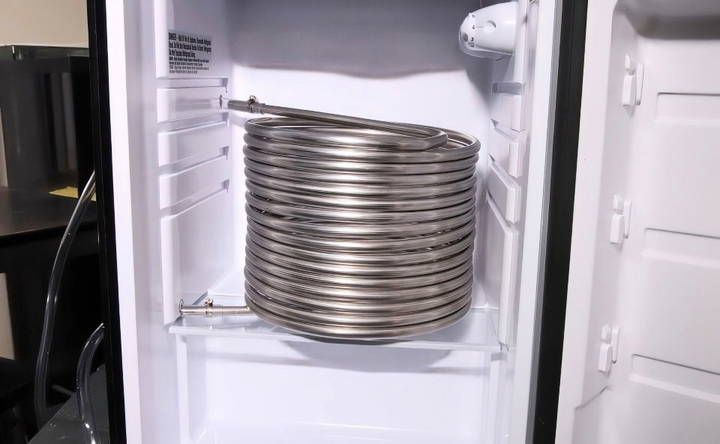
The heart of this project is the stainless steel coil, which acts as the heat exchanger. Aquarium water flows through the coil, which cools it down before returning it to the tank.
When choosing your coil, remember that certain materials, like copper, can be toxic to aquatic life. Stainless steel is the safest and most efficient option for this project. The coil I used cost about $165, but prices can vary depending on the size and quality.
Step 2: Choosing and Modifying the Mini-Fridge
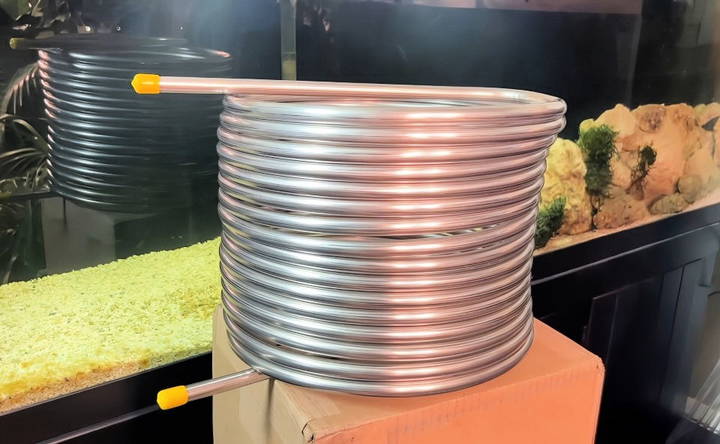
Next, I needed a way to cool the coil. A mini-fridge works perfectly for this because it's compact, efficient, and readily available. After a bit of searching, I found a 3.3 cubic foot model. This gave me enough room for the coil, plus space for other items I might want to keep cool, like fish food or even bottles of water.
Once I had the fridge, I removed any unnecessary shelves and parts to make space for the coil. Then, I needed to drill two holes through the side of the fridge for the water lines. Be very careful when doing this! You don't want to hit any wires or freon tubes. I carefully inspected the sides of the fridge and chose a spot where I was confident there were no obstructions.
Step 3: Installing the Coil
After drilling the holes, I fed the vinyl tubing through them and connected it to the stainless steel coil. The tubing fit snugly on the coil, and I used small clamps to ensure a secure connection.
The idea is simple: the water from the aquarium passes through the coil, which is chilled by the cold air in the fridge. The longer the water stays in the coil, the cooler it gets. This is where the variable speed pump comes in handy. By adjusting the pump's speed, I can control how long the water stays in the chiller, giving me more control over the water temperature.
Step 4: Testing the System
With everything set up, I filled a bucket with reverse osmosis (RO) water and ran the system overnight to flush out the pipes and check for leaks. Thankfully, everything held up well, and there were no leaks.
The water temperature in the bucket started to drop, which was a good sign. I also monitored the temperature inside the fridge, which dropped to 39°F (4°C). This confirmed that the system was working as intended.
Step 5: Fine-Tuning
Once the system was up and running, it was time to fine-tune it. The longer the water stays in the chiller, the cooler it gets, but I also wanted to avoid cooling the water too much or too quickly. Using the variable speed pump, I was able to adjust the flow rate and the fridge thermostat to find the perfect balance.
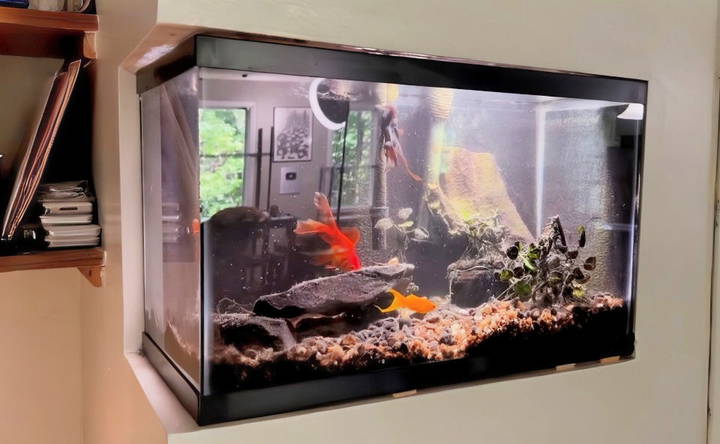
In my tests, the system was able to cool a 55-gallon aquarium by 10°F (5°C) over a few days. This setup worked perfectly for smaller tanks—10, 20, and 40-gallon aquariums were no problem. On my larger 125-gallon tank, the chiller maintained the water temperature at 68°F (20°C), but it struggled to drop it below that, especially if the room temperature was above 70°F (21°C).
Efficiency Tips
To improve the system's efficiency, I did a few additional things:
- Keep tubing short: The shorter the tubing between your aquarium and the chiller, the less opportunity the water has to warm up on its way back to the tank.
- Add frozen water bottles: By keeping bottles of frozen water inside the fridge, I buildd a more stable cold environment, which helps the fridge run more efficiently.
- Optimize fridge space: I stored items like micro feeds and frozen fish food in the fridge alongside the coil. Not only does this save space, but it also helps keep everything at a consistent temperature.
Performance Enhancements
Enhancing the performance of your DIY aquarium chiller can make a significant difference in maintaining a stable and optimal temperature for your aquatic life. Here are some practical tips to improve the efficiency and effectiveness of your chiller:
Optimize Flow Rate
- Adjust the Pump Speed: Ensure that the water pump you are using is set to an optimal speed. Too fast, and the water won't cool enough; too slow, and it won't circulate efficiently. Aim for a balanced flow rate that allows the water to cool properly while maintaining good circulation.
- Use Proper Tubing: The diameter and length of the tubing can affect the flow rate. Use tubing that matches the specifications of your pump and chiller. Avoid long or narrow tubes that can restrict water flow.
Improve Insulation
- Insulate the Chiller: Wrap the chiller unit with insulating materials like foam or thermal blankets. This helps to reduce heat exchange with the surrounding environment, making the chiller more efficient.
- Insulate the Tubing: Similarly, insulating the tubing can prevent heat gain from the ambient air. Use foam pipe insulation to cover the tubes, especially if they run through warm areas.
Enhance Heat Exchange
- Increase Surface Area: If possible, increase the surface area of the heat exchanger. This can be done by using a larger radiator or adding more fins to the existing one. More surface area allows for better heat dissipation.
- Use a Fan: Adding a fan to blow air over the heat exchanger can significantly improve its cooling efficiency. Ensure the fan is positioned to maximize airflow over the radiator or cooling coils.
Maintain the System
- Regular Cleaning: Keep the chiller and all components clean. Dust and debris can reduce the efficiency of heat exchangers and fans. Regularly clean the radiator, fans, and tubing to ensure optimal performance.
- Check for Leaks: Inspect the system for any leaks that could reduce efficiency. Tighten any loose connections and replace damaged tubing or seals.
Advanced Modifications
- Add a Temperature Controller: Installing a digital temperature controller can help maintain precise control over the water temperature. This device can automatically adjust the chiller's operation based on the set temperature range.
- Upgrade the Pump: If your current pump is underperforming, consider upgrading to a more powerful model. A better pump can improve water circulation and enhance the overall efficiency of the chiller.
Monitor and Adjust
- Regular Monitoring: Keep an eye on the water temperature and the performance of the chiller. Use a reliable thermometer and check the temperature regularly. Make adjustments as needed to ensure the system is working efficiently.
- Seasonal Adjustments: Depending on the season, you might need to adjust the chiller settings. In hotter months, you may need to increase the cooling capacity, while in cooler months, you might reduce it.
By following these tips, you can significantly enhance the performance of your DIY aquarium chiller, ensuring a stable and healthy environment for your aquatic pets.
Maintenance and Troubleshooting
Proper maintenance and troubleshooting are essential to keep your DIY aquarium chiller running smoothly and efficiently. Here are some practical tips to help you maintain your chiller and address common issues.
1. Regular Maintenance Tips
- Clean the Chiller Regularly: Dust and debris can accumulate on the chiller's components, reducing its efficiency. Clean the radiator, fans, and tubing regularly using a soft brush or compressed air. This helps maintain optimal airflow and heat exchange.
- Check Water Flow: Ensure that the water is flowing smoothly through the system. Inspect the pump and tubing for any blockages or kinks. Regularly clean the pump's intake and outflow to prevent clogs.
- Inspect Connections: Check all connections for leaks or loose fittings. Tighten any loose connections and replace damaged tubing or seals. This prevents water loss and maintains the system's efficiency.
- Monitor Temperature: Use a reliable thermometer to regularly check the water temperature. Ensure that the chiller is maintaining the desired temperature range. If the temperature fluctuates, it may indicate an issue with the chiller or the pump.
2. Common Issues and Solutions
Chiller Not Cooling Properly: If the chiller is not cooling the water effectively, check the following:
- Flow Rate: Ensure the pump is operating at the correct flow rate. Adjust the pump speed if necessary.
- Heat Exchanger: Clean the heat exchanger to remove any dust or debris that may be reducing its efficiency.
- Insulation: Check the insulation on the chiller and tubing. Improve insulation if needed to reduce heat gain from the environment.
Pump Not Working: If the pump is not functioning, try these steps:
- Power Supply: Ensure the pump is properly connected to a power source. Check for any loose wires or connections.
- Blockages: Inspect the pump for blockages. Clean the intake and outflow to remove any debris.
- Pump Replacement: If the pump is still not working, it may need to be replaced. Choose a pump that matches the specifications of your chiller system.
Leaks in the System: Leaks can reduce the efficiency of your chiller and cause water loss. To address leaks:
- Inspect Tubing: Check all tubing for cracks or damage. Replace any damaged sections.
- Tighten Fittings: Ensure all fittings are tight and secure. Use thread seal tape on threaded connections to prevent leaks.
- Sealant: Apply a waterproof sealant to any areas prone to leaks.
Noise Issues: If your chiller is making unusual noises, consider the following:
- Loose Components: Check for any loose components or fittings. Tighten them to reduce noise.
- Vibration: Ensure the chiller is placed on a stable surface to minimize vibration. Use rubber pads or mounts to absorb vibrations.
- Fan Issues: Inspect the fan for any obstructions or damage. Clean the fan blades and ensure it is securely mounted.
3. Seasonal Adjustments
- Summer Adjustments: During hotter months, you may need to increase the chiller's cooling capacity. Ensure the chiller is clean and operating efficiently. Consider adding a fan to improve airflow over the heat exchanger.
- Winter Adjustments: In cooler months, you may need to reduce the chiller's cooling capacity. Monitor the water temperature closely and adjust the chiller settings as needed.
Maintaining and troubleshooting will keep your DIY aquarium chiller efficient, extending its life and ensuring a stable environment for your pets.
FAQs About DIY Aquarium Chillers
Discover frequently asked questions about DIY aquarium chillers and learn how to maintain optimal water temperature in your aquarium setup.
A DIY aquarium chiller is a homemade device designed to cool the water in your aquarium. It helps maintain a stable temperature, which is crucial for the health of your fish and plants.
The chiller works by circulating water through a cooling coil (usually made of copper tubing) that is cooled by a fan. The cooled water is then pumped back into the aquarium, lowering the overall temperature.
Yes, DIY chillers are generally more affordable than commercial ones. They use readily available materials and can be customized to fit your specific needs.
Yes, some DIY enthusiasts use small refrigerators or coolers to house the cooling coils. This method can be very effective but requires careful setup to avoid leaks and ensure proper cooling.
Use a temperature controller to monitor and adjust the water temperature. This device can turn the chiller on or off to maintain the desired temperature range.
Final Thoughts
In total, I spent about $390 on this DIY aquarium chiller project: $165 for the coil, $180 for the mini-fridge, and the rest on tubing and miscellaneous parts. If you already have a DC pump like I did, your costs could be even lower. Compared to the $1,200 price tag on most commercial chillers, this DIY solution was a huge win.
It's not just about saving money, though. There's something incredibly satisfying about building something yourself, especially when it works as well as this did. If you're an aquarium enthusiast and a fan of DIY projects, I highly recommend giving this a try.


