Cutting arrows to precise lengths is a key step in tuning them for optimal performance. While professional arrow saws can cost upwards of $180, building a DIY arrow saw is an affordable and rewarding project for any archer. With a few tools and materials, you can create a functional arrow cutter for under $50 that rivals commercial models in performance.
Why Build a DIY Arrow Saw?
Tuning arrows involves cutting them to specific lengths, a process critical to adjusting their dynamic spine and overall performance. While professional tools exist, they can be expensive and inconsistent in quality. Building your own arrow saw offers several benefits:
- Cost Savings: A DIY arrow saw can be built for around $40, compared to $180+ for commercial models.
- Customization: Tailor the saw to your specific needs and preferences.
- Reliability: By building it yourself, you ensure quality and functionality.
- Satisfaction: The pride of using a tool you created adds a personal touch to your archery practice.
Tools and Materials Needed
To build your DIY arrow saw, you'll need the following tools and materials:
Tools:
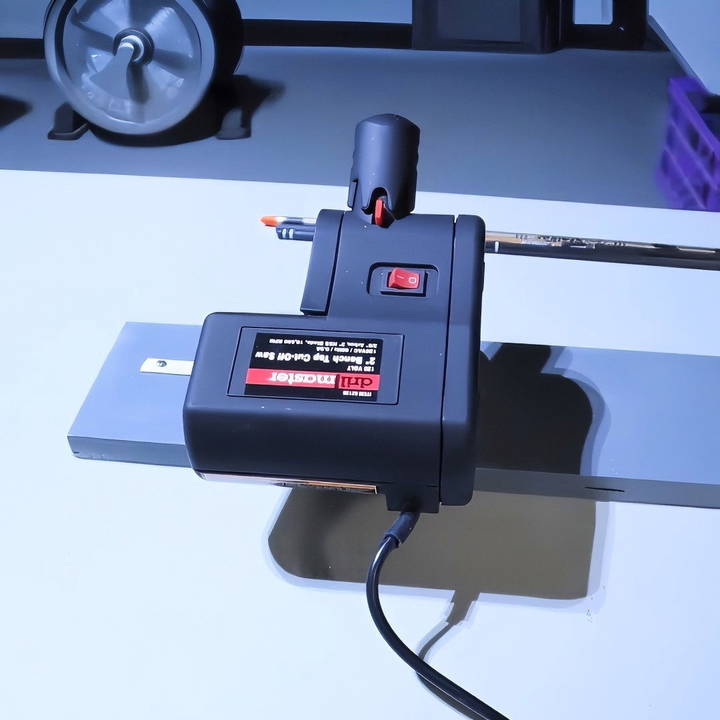
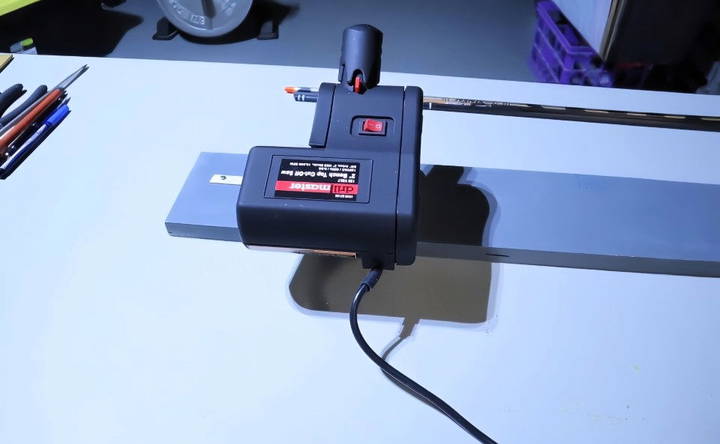
- Mini Cut-Off Saw: The Drill Master 120-volt 2-inch benchtop cut-off saw is an excellent choice, available for around $39 at Harbor Freight.
- Basic Hand Tools: Screwdrivers, clamps, and measuring tape.
- Dremel Tool (optional): For cleaning edges if needed.
Materials:
- Wooden Board: A plain pine board measuring approximately 4.5 inches wide and 1 inch thick. A 2x4 can also work.
- Dowel: A piece of wooden dowel to serve as an arrow rest.
- Aluminum Flat Stock: A thin piece (1/16 inch thick) to create a cutting guide.
- Fasteners: Screws or nails to secure components.
- Optional Abrasive Cut-Off Discs: Useful for cutting aluminum arrows.
Step by Step Instructions
Learn how to build a DIY arrow saw with step-by-step instructions, essential safety tips, precise cutting techniques, and troubleshooting guidance.
1. Prepare the Work Area
- Set up a stable, well-lit workspace.
- Gather all tools and materials to keep the process organized.
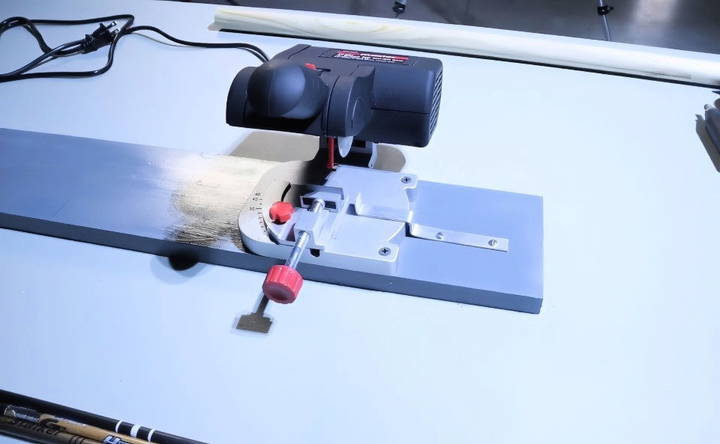
2. Mount the Cut-Off Saw
- Secure the saw to the wooden board. This base provides stability and portability.
- Ensure the saw is firmly attached to prevent movement during operation.
3. Build the Arrow Rest
- Cut a piece of dowel to serve as the arrow rest.
- Attach the dowel to the wooden board in alignment with the saw blade. Ensure the arrow rests securely without wobbling.
4. Install the Cutting Guide
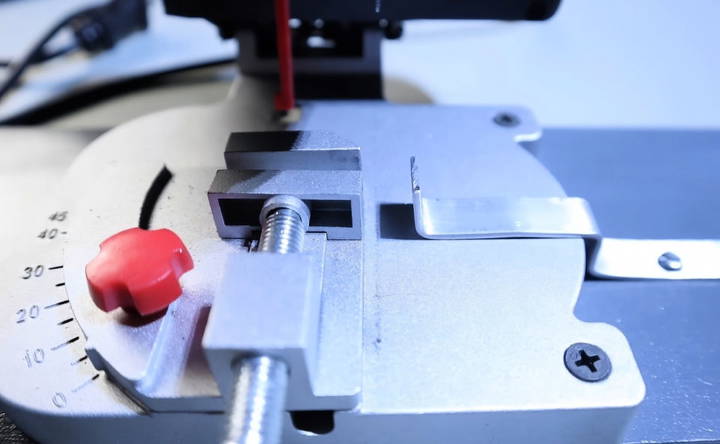
- Cut the aluminum flat stock to the desired length.
- Bend it into a shape that holds the arrow in place and provides a stop for consistent cuts.
- Mount the guide to the board, ensuring it aligns perfectly with the saw blade.
5. Test and Adjust
- Before cutting actual arrows, test the setup with scrap material.
- Make adjustments to ensure precise, clean, and repeatable cuts.
Safety Considerations
Using a DIY arrow saw requires careful attention to safety:
- Blade Awareness: The saw blade spins continuously when the saw is powered on. Always keep fingers and loose objects away from the blade.
- Protective Gear: Wear safety glasses and gloves to protect against debris and accidental cuts.
- Secure Materials: Ensure arrows are securely clamped or held in place to prevent shifting during cuts.
- Ventilation: Operate the saw in a well-ventilated area to avoid inhaling carbon dust from arrows.
Using the DIY Arrow Saw
Discover how to efficiently cut carbon and aluminum arrows with the DIY arrow saw. perfect for archers and enthusiasts alike!
Cutting Carbon Arrows
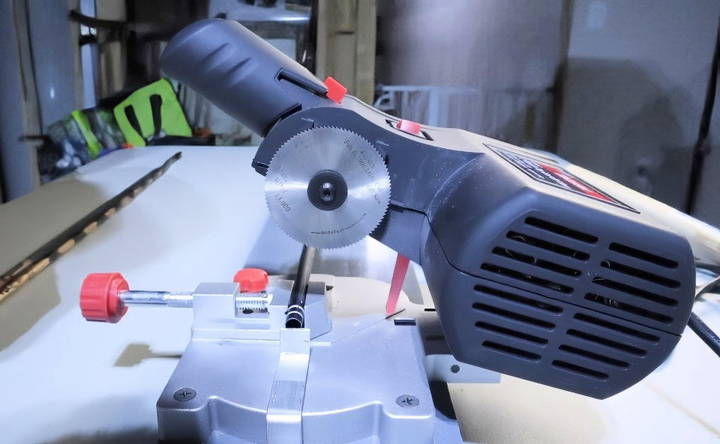
- Insert the arrow into the rest and align it with the guide.
- Power on the saw and slowly lower the blade onto the arrow.
- Allow the blade to cut gradually—forcing it can lead to uneven cuts.
Cutting Aluminum Arrows
- Aluminum arrows require a bit more care. Use an abrasive cut-off disc if available for cleaner cuts.
- Lightly file the edges to remove burrs and achieve a smooth finish.
Maintenance and Tips
- Blade Care: Regularly inspect the blade for wear and replace it as needed. Abrasive discs can improve performance, especially for aluminum arrows.
- Cleaning: Remove dust and debris after each use to maintain precision.
- Storage: Keep the saw in a dry, safe place when not in use.
Advantages of the DIY Approach
After completing this project, you'll enjoy several practical advantages:
- Repeatable Precision: The cutting guide ensures consistent arrow lengths every time.
- Clean Cuts: Fine-toothed blades produce smooth edges, reducing the need for sanding.
- Portability: The compact design makes it easy to transport and store.
Potential Enhancements
For advanced users, consider these upgrades:
- Laser Guides: Add a laser line for improved accuracy.
- Dust Collection System: Attach a vacuum to reduce airborne carbon dust.
- Adjustable Guides: Allow for varying arrow lengths without reconfiguring the setup.
Common Issues and Troubleshooting
Explore solutions for common arrow saw issues like uneven cuts, rough edges, and motor strain to enhance your arrow cutting experience.
Uneven Cuts
- Cause: Arrow shifting during cutting.
- Solution: Tighten the clamp and ensure the guide is properly aligned.
Rough Edges
- Cause: Dull blade or improper technique.
- Solution: Replace the blade or use an abrasive disc for aluminum arrows.
Motor Strain
- Cause: Forcing the blade through the arrow too quickly.
- Solution: Let the saw do the work. Lower the blade slowly and steadily.
Final Thoughts
Building a DIY arrow saw is an enjoyable project that saves money and enhances your archery setup. By following this guide, you can create a tool tailored to your needs, ensuring precise and repeatable cuts every time. Whether you're tuning carbon or aluminum arrows, this saw will be a reliable addition to your gear.
If you're new to DIY projects, this arrow saw is a great introduction. With just a few hours of work, you'll have a functional tool that simplifies arrow tuning and elevates your archery experience. Happy building and shooting!
FAQs About DIY Arrow Saw
Explore FAQs about DIY arrow saw. learn essential tips, safety guidelines, and step-by-step instructions for crafting homemade arrow saws.
Alternatives include using a pipe cutter for aluminum arrows or a belt sander with a disc for carbon shafts. Both methods require smoothing the edges after cutting to ensure clean and safe use.
Grooves inside the clamp help keep the arrow level and perpendicular to the blade. Additionally, a cutting guide ensures repeatable results. Regularly check the alignment to minimize errors.
Always wear safety goggles and a mask to avoid inhaling carbon dust. Operating outdoors or with a vacuum attachment and HEPA filter is recommended to control debris and dust.
Yes, but for aluminum arrows, using an abrasive cut-off disc is preferable for cleaner cuts. For carbon arrows, the fine-toothed blade works well without additional finishing.
This saw's motor can bog down slightly with aluminum arrows or during faster cuts. Slow and steady operation minimizes strain and ensures cleaner results.
Consider adding a movable stop for precise length adjustments or a laser guide for enhanced accuracy. A vacuum attachment is ideal for controlling carbon dust.
Yes, squaring both ends of the arrow ensures consistent performance. Use an arrow square tool to refine the cut ends.
Tuning requires a repeatable and consistent shooting form. Poor form can lead to inaccurate tuning results, as errors in arrow flight may stem from inconsistent technique.
The Drill Master mini cut-off saw operates at a maximum RPM of 10,600, which is sufficient for cutting both carbon and aluminum arrows when used properly.
For carbon arrows, fine sandpaper or a Dremel tool can smooth rough edges. For aluminum arrows, lightly file the inside to prepare for insert installation.


