Starting on a DIY asphalt driveway seemed like a big task at first. The idea of doing it myself was both exciting and nerve-wracking. I started by gathering all the materials and reading about the process thoroughly. This initial preparation gave me the confidence to move forward and turn my dream driveway into reality.
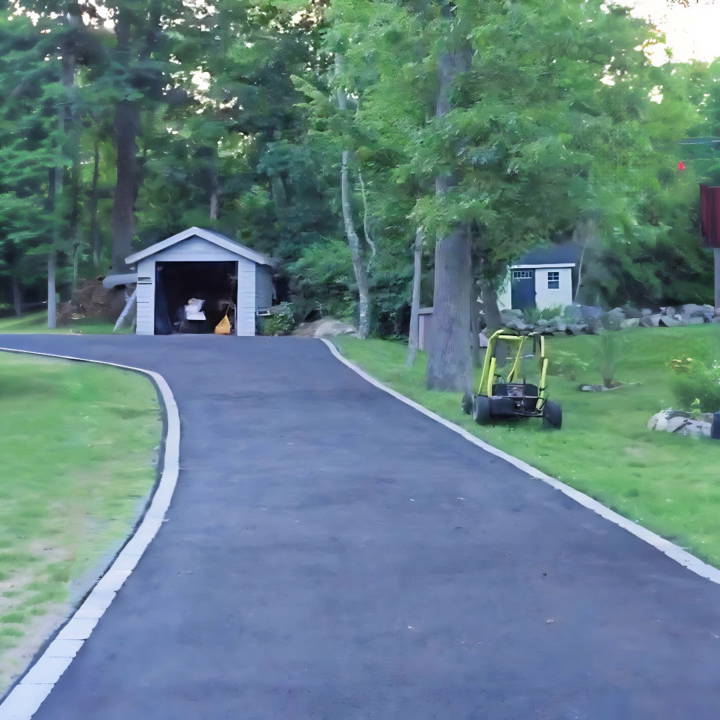
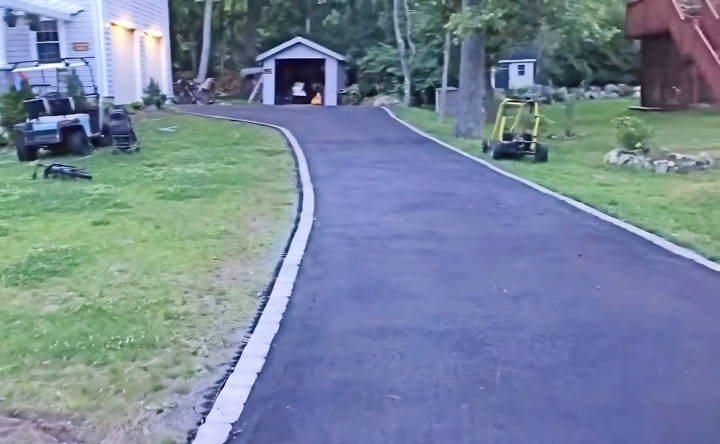
Prior planning, understanding the steps, and having the right tools made all the difference. I noticed the step-by-step methods were easy to follow when broken down. Applying this guide, which I'll get into, helped me finish the project without major setbacks. Seeing the finished driveway was a rewarding experience.
Getting started with this straightforward guide will make your project easy and efficient. These steps will help you achieve a professional-looking DIY asphalt driveway.
Why Choose Asphalt?
Asphalt driveways are favored for their cost-effectiveness and quick installation. Compared to concrete, asphalt is more flexible, making it less susceptible to cracking under the stress of temperature fluctuations. Additionally, asphalt driveways can be used within a couple of days after installation, unlike concrete, which requires a longer curing time.
Understanding the Basics
Before diving into the installation process, it's essential to understand what asphalt is. Asphalt is a mixture of aggregate (crushed stone, gravel, and sand) and bitumen, a sticky, black, and highly viscous liquid or semi-solid form of petroleum. The quality of materials and proper mixture ratios are crucial for a sturdy driveway.
Planning Your Project
A well-planned driveway installation begins with a clear understanding of the area's layout. Consider the size and slope of your driveway and how it will affect drainage. Proper drainage is vital to prevent water accumulation that can weaken the asphalt and cause potholes.
Getting Started
The first step in installing an asphalt driveway is to remove any existing driveway material and ensure the ground is stable and properly graded. This foundation, or sub-base, must be compacted to provide a solid base for the asphalt.
Materials Needed And Their Purpose
- Pavement Millings: Used as a base, these recycled asphalt pieces compact over time, making a solid foundation.
- Old Roller: Essential for smoothly compacting the asphalt.
- Pavers: Provides a neat, finished edge to the driveway.
- Stone Dust: Serves as a base for the pavers, helping them sit flat.
- Plastic Edging: Keeps the asphalt and pavers neatly separated.
- Asphalt: The primary material for paving.
- Wheelbarrows and a Tractor: For transporting asphalt from the delivery truck to the driveway.
- Rakes: These are used to spread the asphalt evenly.
- Straight Edge: Helps ensure your driveway has the proper crown and pitch to prevent puddling.
- Plate Compactor: Another tool for compacting the asphalt, especially in smaller or hard-to-reach areas.
Step by Step Instructions
Learn how to install a DIY asphalt driveway with our step-by-step guide. From base prep to final touches, achieve perfect results every time.
Prepare The Base
The project started with preparing the driveway base, which already had pavement millings as a foundation. We spent time cleaning off loose millings and ensuring the shape and size were exactly as we wanted. If you're starting from scratch, it's crucial to have a solid base layer like millings or gravel and ensure it's well-compacted.
Lay The Edges
Using pavers for the driveway edges not only looks great but also frames your work area. We laid ours atop a stone dust layer for stability and used plastic edging to keep everything in place. This step is crucial for defining the driveway's final look.
Schedule The Asphalt Delivery
Hot asphalt was our material of choice, and scheduling the delivery required precise timing. We arranged for a tri-axle truck to deliver 35 tons of asphalt, slightly more than planned. The excess worked out well, giving us about 4 inches of thickness.
Paving Day
Spread the Asphalt: Once the asphalt arrived, we used wheelbarrows and a tractor to transport it from the delivery truck to the driveway. We started at the back, working our way forward, and used rakes for an initial even spread.
Compaction Is Key
The old roller and plate compactor were indispensable. Rolling started immediately after spreading to ensure the asphalt was compact and smooth. This step is vital; proper compaction ensures the longevity and durability of your driveway.
Final Touches
We used leftover pavers at the driveway entrance for a polished look. A straight-cut line at the road boundary and well-placed pavers buildd a professional-grade finish.
What We Learned
- Plan Ahead: Every step requires coordination, especially asphalt delivery and spreading.
- Get the Right Tools: This can't be overstated. Having a roller, plate compactor, and enough wheelbarrows made all the difference.
- Teamwork Makes the Dream Work: Rallying friends, family, or neighbors for help not only makes the process faster but also more enjoyable.
- It's Doable: Before this project, we couldn't find much guidance on DIY asphalt paving, but it turned out to be entirely possible with some hard work and the right tools.
Troubleshooting Common Asphalt Driveway Issues
When it comes to maintaining your asphalt driveway, being proactive is key. However, even with the best care, issues can arise. Here's a guide to help you troubleshoot common problems and keep your driveway in top condition.
Cracks and Small Potholes
Over time, your driveway may develop cracks or small potholes. These are often caused by weather changes, heavy loads, or simply the age of the asphalt. To fix these:
- Clean out any debris from the cracks or holes.
- Use a driveway patch kit for small areas, following the manufacturer's instructions.
- For larger cracks, apply a crack filler and smooth it out with a trowel.
Drainage Problems
Water pooling on your driveway can lead to damage. If you notice standing water:
- Check the driveway's slope to ensure it's directing water away from the surface.
- Clear any blockages in your drainage system.
- Consider installing additional drainage if persistent problems occur.
Fading and Discoloration
Sun exposure and harsh chemicals can cause your driveway to fade or discolor. To restore its appearance:
- Apply a seal coat to protect the surface and improve its look.
- Avoid spilling oil, gasoline, and other chemicals on the driveway.
Edge Crumbling
The edges of your driveway are vulnerable to wear and tear. If they begin to crumble:
- Add support by backfilling the sides with soil or gravel.
- Consider installing edging materials like bricks or pavers for extra stability.
Surface Wear
Heavy usage can wear down the surface of your driveway, making it look old and tired. To rejuvenate it:
- Clean the driveway thoroughly with a pressure washer.
- Fill in any low spots with patching material.
- Sealcoat the driveway to give it a fresh, new look.
Stains and Spills
Oil and other fluid spills are common on driveways and can be unsightly. To clean them:
- Use a degreaser or detergent to break down the spill.
- Scrub the area with a stiff brush and rinse thoroughly.
Addressing issues early can prevent them from becoming bigger, more costly problems. Regular inspections and prompt repairs will keep your driveway safe and looking great for years to come.
Legal and Compliance for DIY Asphalt Driveway
When you're ready to lay down an asphalt driveway, it's not just about the materials and the hard work. There's a legal side to it as well. Here's what you need to know to make sure your project is up to code and fully compliant.
Do You Need a Permit?
Most of the time, if you're replacing an existing driveway with the same size and materials, you might not need a permit. But if you're making changes to the size, shape, or material, you'll likely need one. For new driveways or significant changes, permits are usually required.
Why Permits Matter
Permits are there for your safety. They make sure your project follows local building codes and zoning laws. This is important for:
- Safety: Ensuring the work is safe and reduces risks.
- Insurance: Some insurance policies might not cover unpermitted work.
- Resale: Future buyers could be put off by work done without permits.
- Legalities: You could face fines or have to redo the work if it's not permitted.
How to Get a Permit
To get a permit, you'll need to:
- Check with your local government about the requirements.
- Submit your driveway plans for approval.
- Pay any fees associated with the permit process.
Other Legal Considerations
- Accessibility: Make sure your driveway doesn't block public pathways or access for emergency vehicles.
- Drainage: Proper drainage is crucial to prevent water pooling on your property or your neighbors'.
- Boundaries: Stay within your property lines to avoid disputes.
Working with Contractors
If you decide to hire someone, ensure they're licensed and insured to work in your area. This protects you from liability in case of accidents or damages.
Legal and compliance steps may seem extra but are essential. They ensure safety and longevity.
FAQs About DIY Asphalt Driveway
Discover answers to FAQs about DIY asphalt driveway: cost, maintenance, installation tips, and more. Perfect guide for your home project!
The durability of an asphalt driveway hinges on three main factors:
Thick, well-compacted granular base: This is the foundation of your driveway. For poor-draining soils, an 8-inch base is recommended, while well-draining soils may only need 4 inches.
Proper asphalt thickness: A layer of asphalt, typically 2 inches, should be spread after the base has settled for a few days.
Good asphalt compaction: Compacting the asphalt with heavy rollers soon after it’s spread ensures a solid, durable surface.
To prevent water damage, your driveway should have a slope that directs water away from the surface and the sides. Never allow water to pond on or next to the driveway as it can weaken the soil underneath or cause frost heaving.
Yes, small fissures and divots can be filled to prevent water from undermining the gravel base. For minor repairs, you can use crack fillers and patching materials available at most hardware stores. Just be sure to clean the area thoroughly and apply the filler according to the manufacturer’s instructions.
An asphalt driveway typically lasts 15–20 years with regular maintenance. If you notice large areas of crumbling or deep cracks that can't be easily repaired, it might be time to replace the driveway. Always consult with a professional to assess the condition of your driveway.
When choosing a contractor, look for:
Reputation: Seek references from homeowners who are satisfied with their driveways after many years.
Experience: Ensure the contractor has experience with driveway installations and is prepared to install a good base.
Transparency: A reputable contractor will discuss the materials and techniques they use and allow you to oversee the installation process.
Conclusion
In conclusion, this DIY asphalt driveway: a step-by-step installation guide provides you with all the essential information to undertake this rewarding home improvement project. From preparation to finishing touches, following this guide ensures your driveway is durable and aesthetically pleasing. Dive into the satisfaction of completing your own DIY asphalt driveway with confidence and enjoy the results for years to come.


