If you're a music enthusiast or an audio gear collector, you know how quickly your equipment can pile up, making the need for a reliable, space-saving solution. While there are plenty of commercial audio racks available on the market, they can be expensive. But what if I told you that building your own audio rack is not only possible but also an affordable and satisfying DIY audio rack project?
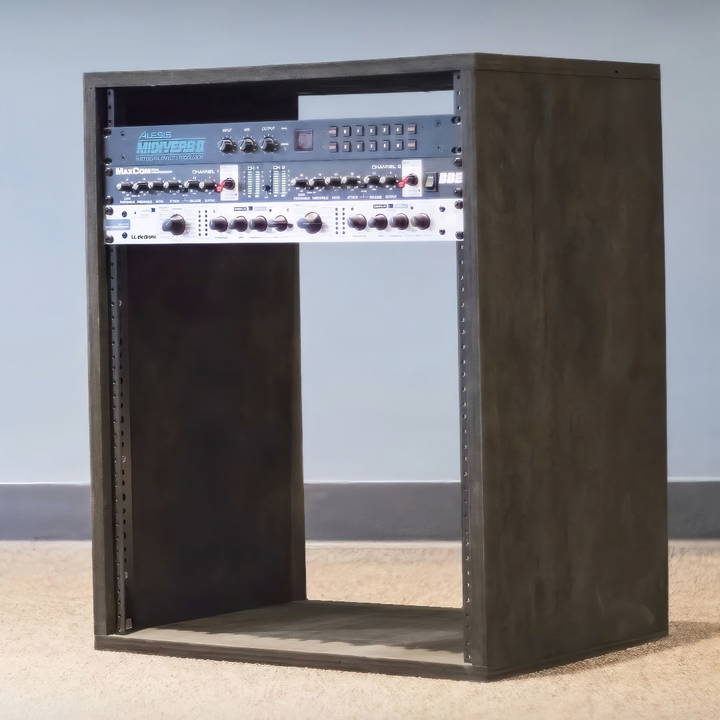
In this guide, I'll walk you through the process of building a sturdy and functional DIY audio rack for a fraction of the cost of store-bought options. With just a few tools and materials, you can build an audio rack that perfectly fits your space and gear.
Why Build Your Own Audio Rack?
Building your own audio rack offers several benefits:
- Cost-Effective: Commercial audio racks can cost hundreds of dollars. By building your own, you can save a significant amount of money—often spending less than half the price.
- Customization: When you build it yourself, you can customize the rack to fit the exact dimensions of your space and equipment. You have control over the size, number of rack spaces, and overall design.
- Satisfaction: There's something rewarding about building something with your own hands. The sense of accomplishment that comes with constructing a functional piece of furniture for your audio setup is hard to beat.
Materials Needed for Your DIY Audio Rack
Here's a list of materials you'll need to build your own equipment rack:
- Rack rails: 14-unit rails were used in the example, but the size is flexible depending on your needs. You can purchase these online or at a local music store. Prices range from $15 to $30.
- Plywood: Half a sheet of 3/4 inch plywood. This is the primary material for the frame. Plywood is sturdy and affordable, costing around $25.
- Screws: 2-inch wood screws for assembling the frame and shorter 5/8 inch screws to attach the rails.
- Spray Paint: A $1 can of black spray paint for finishing the rack.
- Wood Glue: This will help secure the pieces of the rack together.
- MDF (Medium-Density Fiberboard) Scraps: To help position the rails during assembly.
Tools Required:
- Power Drill: For drilling holes and driving screws.
- Circular Saw or Table Saw: For cutting the plywood to size.
- Sanding Block or Electric Sander: To smooth out any rough edges on the plywood.
- Measuring Tape: For ensuring accurate cuts.
- Countersink Bit: This is used when drilling holes for screws to prevent splitting in the plywood.
Now that you know what you need, let's dive into the step-by-step process for building your own DIY audio rack.
Step by Step Instructions
Build your perfect sound system with our DIY audio rack guide. Step-by-step instructions from cutting plywood to organizing equipment.
Step 1: Measure and Cut the Plywood
The first step is to cut the plywood into the necessary pieces for your audio rack. For this example, we'll build a rack that is 16 inches deep and uses 14-unit rails.
Cutting the Sides:
- Start by ripping the plywood down to a depth of 16 inches, which will be the depth of the rack.
- Next, measure and cut the sides. The rails used here are 24.5 inches long, so cut two pieces of plywood to 24 and 9/16 inches long to accommodate the rails. Adding a sixteenth of an inch gives some extra wiggle room for installing the rails.
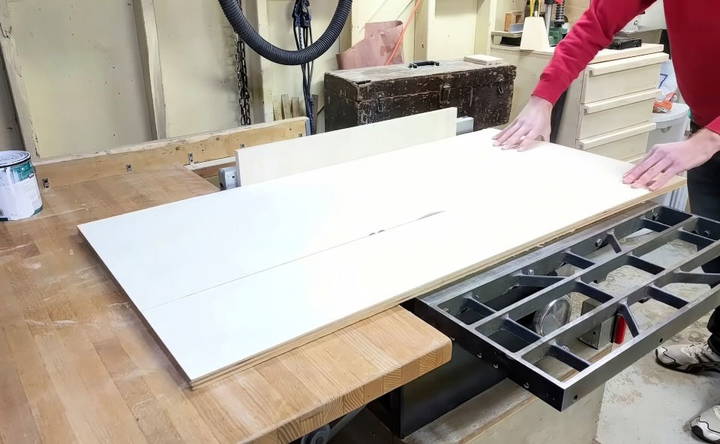
Cutting the Top and Bottom Panels:
- For the top and bottom, the standard inside width of an equipment rack is 19 inches. Again, add a sixteenth of an inch for wiggle room.
- The sides of the box are 3/4 inch thick each, so you'll need to add 1.5 inches to the inside width. This gives a total width of 20 and 9/16 inches for the top and bottom pieces.
By the end of this step, you should have:
- Two side panels, each 24 and 9/16 inches long.
- One top panel and one bottom panel, each 20 and 9/16 inches wide.
Step 2: Assemble the Box
Once you have all the pieces cut, it's time to assemble the basic structure of the rack.
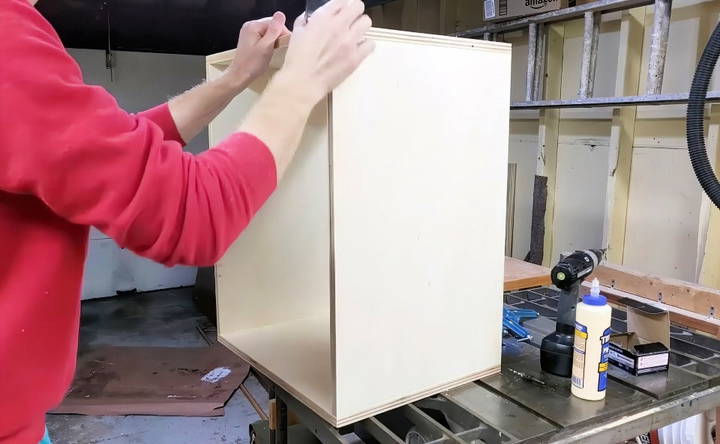
- Pre-Drill Holes: Before you start putting the pieces together, pre-drill holes in the plywood to prevent it from splitting. Use a countersink bit to ensure that the screws sit flush with the wood surface.
- Apply Wood Glue: Add a bead of wood glue to the edges of the panels where they'll meet. This helps reinforce the structure.
- Screw the Box Together: Line up the sides with the top and bottom panels and use 2-inch screws to hold them together. It's important to make sure the box is square, so take your time during this step to ensure everything lines up correctly.
Step 3: Attach the Rack Rails
With the box assembled, it's time to install the rack rails. Here's how to do it:
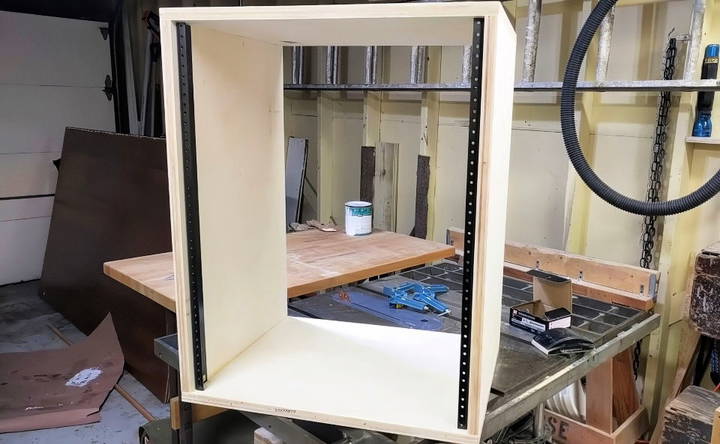
- Position the Rails: You want the rails to be set back about half an inch from the front of the box. To make sure they're positioned correctly, use a scrap of MDF as a spacer.
- Secure the Rails: Once the rails are in place, use 5/8 inch screws to attach them to the inside of the box. Ensure the rails are straight and securely fastened.
Step 4: Sand and Paint the Rack
With the rack now fully assembled, you'll want to finish it to ensure it looks professional and blends in with your space.
- Sand the Wood: Give the box a quick sanding to smooth out any rough edges. You don't need to go overboard—just enough to eliminate splinters and uneven surfaces.
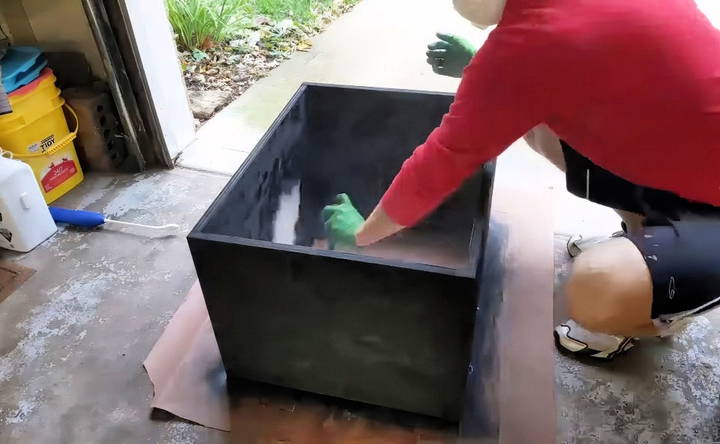
- Paint the Rack: A simple black spray paint finish works well for most audio racks. It's inexpensive and helps the rack blend into the background. Apply a few thin coats, allowing the paint to dry between each coat for a smooth finish.
Step 5: Install and Organize Your Equipment
Once the paint is dry, your DIY audio rack is ready to be loaded with equipment.
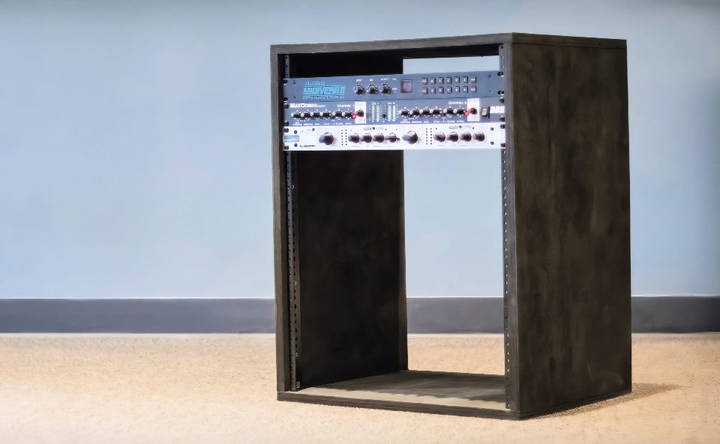
- Slide in Your Gear: The standard rack width is 19 inches, which fits most audio and AV gear. Install your equipment by securing it to the rails with rack screws.
- Organize Cables: With everything in place, make sure to manage your cables neatly. Consider using zip ties or cable management systems to keep cords organized and reduce clutter.
Customizing Your DIY Audio Rack
One of the greatest advantages of building your own audio rack is the ability to customize it to your specific needs. Here are a few customization ideas to consider:
- Height Adjustment: In this guide, we used 14-unit rack rails, but you can easily adjust the height by choosing longer or shorter rails depending on how much equipment you need to store.
- Mobility: Add caster wheels to the bottom of the rack to make it easier to move around.
- Ventilation: If your equipment generates a lot of heat, consider adding ventilation slots or fans to the sides or back of the rack to keep everything cool.
- Additional Shelving: Need space for non-rack-mountable gear? You can easily add shelves or drawers to store smaller items like cables or microphones.
Conclusion
Building your own DIY audio rack is a practical, cost-effective solution for organizing your audio equipment. Not only will you save money, but you'll also have the satisfaction of making a piece of equipment that perfectly fits your needs.
With basic tools and materials, this project can be completed in just a few hours. And while the design presented here is simple, it's highly customizable. Whether you need more rack spaces, added mobility, or better ventilation, you can tailor this build to meet your specific requirements.
FAQs About DIY Audio Rack
Explore FAQs about DIY audio racks - get answers on materials, tools, and building tips for a personalized audio setup. Perfect for audio enthusiasts!
You don’t need a table saw to cut the plywood. Most big box hardware stores like Home Depot or Lowe’s will cut plywood to your specified dimensions before you leave the store. Alternatively, you can use a circular saw, a jigsaw, or even a handsaw.
Small audio equipment like equalizers or interfaces typically only needs to be mounted to the front rails. However, heavier gear, such as amplifiers, may require rear mounts for additional support.
Yes, the rack can be adapted for servers. Just make sure to modify the height and depth based on the dimensions of your server equipment. If the equipment is heavy, consider adding rear support.
To enhance the look of the rack, you can add iron-on edge banding to cover the exposed plywood edges. This provides a cleaner, more professional finish.
This project can be completed with basic tools like a screwdriver and anything capable of cutting plywood. If you don't have power tools, consider having the store cut the wood for you. Simple hand tools will work, but it may take more time.
Make sure your box is square, and if you're using heavy equipment, secure it with rear mounts and distribute the weight evenly. You can also add a back panel or corner braces to increase stability.
For assembling the rack, 2-inch wood screws are recommended for securing the plywood together. Use shorter screws, such as 5/8-inch screws, to attach the rack rails.
Yes, you can install sliding rails for easier access to heavy equipment. Heavy-duty drawer slides or specialized rack-mount slides are available for this purpose. Just ensure that they are rated to hold the weight of your equipment.


