Starting with something helpful lets us dive into making a DIY automatic chicken coop door. One weekend, I decided it was time to upgrade the chicken coop. I had been struggling with opening and closing the coop door every day. I read about automatic doors and thought, why not try making one myself? Gathering some basic tools and materials, I was ready to get started.
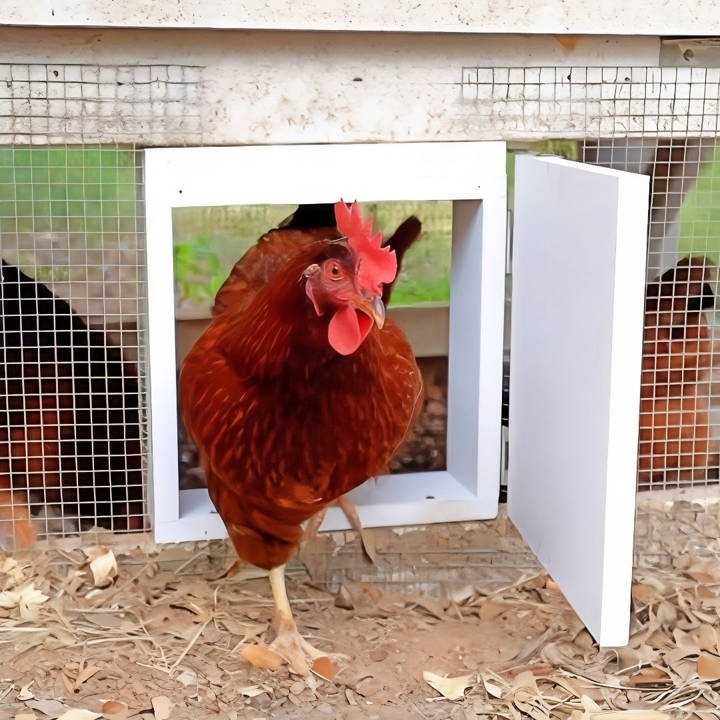
With clear instructions and a step-by-step guide, I was able to build an efficient and reliable automatic door. The chickens seemed happier and it saved me so much time. Now, I no longer worry about being away from home. I believe this simple project will help others as well.
I'm helping with this: Give it a go, and enjoy more free time while your chickens stay safe.
Materials Needed
- Wood scraps: For constructing the door and the frame. I chose wood for its availability and ease of handling. Painting them ensured durability against the elements.
- Linear actuator: This device was pivotal, acting as the muscle opening and closing the door. I opted for a ‘Progressive Automations' model for its reliability and customer support.
- Photocell: The brain of the operation, detecting light to control the actuator's movements.
- Relay: To reverse the actuator's polarity, allowing it to open and close.
- Miscellaneous: Including hinges for the door, L brackets for attaching the actuator, a solar panel and battery for power, and a fuse for safety.
Step by Step Instructions
Learn how to build a DIY automatic chicken coop door with step-by-step instructions on constructing, wiring, and installing the door.
Constructing the Door
First, I followed Wilkerson's method by crafting a simple wooden door, armored with several paint coats for weather resistance. I built a small frame where the door would fit inside the coop, ensuring it was snug and secure.
Hooking Up the Actuator
The key to automation was installing the linear actuator. After securing it with L brackets, I made sure it was perfectly aligned to push the door open fully and pull it closed tightly. A temporary power supply helped me test its motions, adjusting as needed to ensure smooth operation.
Wiring the Electronics
The more intimidating part was dealing with the electronics connecting the photocell, relay, and actuator. But, as I learned, it was just about making a straightforward circuit where the photocell signals the relay to either power the actuator open or close based on the light level. Ensuring each connection was secure and protected from the elements was crucial.
Installation
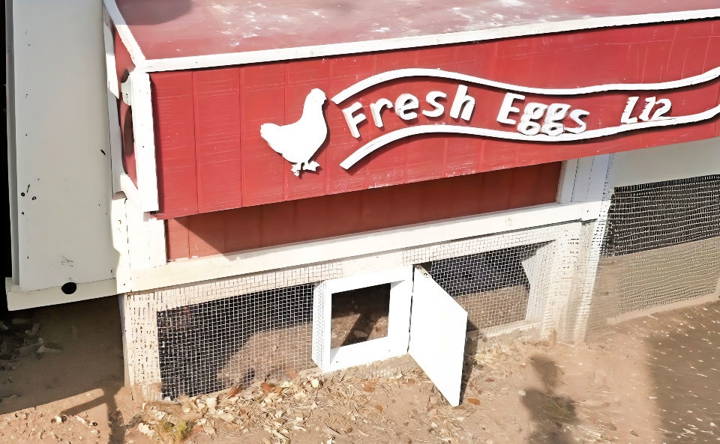
Equipped with understanding and materials, I began installing everything under the coop to shelter it from rain. The door was set in place, cutting through the coop's wire to fit it before securing it with screws. The photocell found its home higher on the coop's west-facing side, capturing the perfect amount of daylight to function accurately.
Customization Ideas for Your DIY Automatic Chicken Coop Door
When it comes to making a DIY automatic chicken coop door, customization is key to meeting the specific needs of your chickens and making the coop uniquely yours. Here are some ideas to inspire your project:
- Choose the Right Size: Measure your coop's entrance carefully. The door should be large enough for your largest chicken to pass through comfortably but not so large that it compromises the coop's structure or warmth.
- Select Appropriate Materials: Use materials that are durable and weather-resistant. For example, treated wood or aluminum can withstand the elements, while a heavy-duty plastic cover can protect against predators.
- Add a Manual Override: Incorporate a manual override switch. This allows you to control the door manually in case of a power outage or if the automatic mechanism fails.
- Incorporate Safety Sensors: Install sensors that detect if a chicken is in the way of the closing door. This prevents injury to your flock and ensures their safety.
- Personalize with Paint: Paint the door in colors that match your coop or your house. Non-toxic, weatherproof paint can add a personal touch and help the door blend in or stand out.
- Use Solar Power: Consider powering your door with a solar panel. This is eco-friendly and ensures the door operates even during a power cut.
- Remote Operation: If you're tech-savvy, set up a system that allows you to open and close the door remotely using a smartphone app.
- Decorative Elements: Add decorative elements like trimmings or patterns to the door. This won't affect its functionality but will make it more aesthetically pleasing.
- Security Features: For added security, install a sturdy lock or bolt that can be fastened at night to keep your chickens safe from predators.
Adjust these aspects to build a functional and personalized auto chicken coop door, ensuring safety and ease for your chickens.
Troubleshooting Common Issues with DIY Automatic Chicken Coop Doors
Encountering problems with your DIY automatic chicken coop door can be frustrating. Here's a straightforward guide to troubleshooting some common issues:
- Door Won't Open or Close: Check the power supply first. Ensure batteries are charged or the power cord is plugged in. Next, inspect the motor and gears for obstructions or debris.
- Door Opens at Wrong Times: If the door operates at incorrect times, recalibrate the timer or light sensor. Make sure the sensor isn't obstructed and receives the correct light levels to function properly.
- Door Stops Midway: This could be due to resistance or an obstruction. Ensure the tracks are clean and the door isn't too tight. Adjust if necessary to allow smooth movement.
- Motor Makes Noise but Door Doesn't Move: The gears might be stripped or the motor could be disengaged. Examine the connection between the motor and the door. Replace any worn parts.
- Sensor Issues: If the door isn't responding to your chickens, check the sensor's range and sensitivity settings. Adjust them according to the size of your chickens and coop.
- Weather Affects Operation: Extreme cold or heat can affect the door's materials and electronics. Use weather-resistant materials and consider insulation to protect the mechanism.
- Remote Control Problems: If you're using a remote system and it's unresponsive, check the signal strength and battery. Ensure there's no interference blocking the signal.
- Safety Mechanism Fails: Safety features should stop the door if a chicken is in the way. Test these regularly and adjust the sensitivity as needed to prevent harm to your flock.
Regular maintenance prevents issues. Lubricate and clean moving parts, check the system regularly. Stay proactive to keep your chicken coop door working smoothly for years.
FAQs About DIY Automatic Chicken Coop Door
Find answers to frequently asked questions about DIY automatic chicken coop doors, including setup, benefits, maintenance, and troubleshooting tips. Keep your chickens safe effortlessly!
A DIY automatic chicken coop door is a door that opens and closes on its own, based on a timer or light sensor, to let chickens in and out of their coop. It’s a handy tool for chicken owners because it automates the daily task of opening and closing the coop door, ensuring the chickens are safe at night and can roam freely during the day.
Most automatic doors work using a timer or a light sensor. A timer can be set to open and close the door at specific times, while a light sensor will open the door at dawn and close it at dusk. The door usually operates on a motor or actuator system that moves the door up and down or sideways.
The main benefits include:
Safety: Protects chickens from predators at night.
Convenience: Eliminates the need to manually open and close the coop.
Flexibility: Allows you to sleep in or be away from home without worrying about the coop door.
Routine: Maintains a consistent schedule for your chickens, which is essential for their well-being.
Yes, you can build your own door if you’re handy with tools. You’ll need a few materials like a motor, a power source (like a battery or solar panel), a timer or light sensor, and some basic hardware. There are many tutorials and guides available that provide step-by-step instructions.
Before starting your project, consider the following:
Size and weight of the door: Ensure it's suitable for your coop and easy for the motor to move.
Power source: Decide whether you'll use electricity, batteries, or solar power.
Type of sensor: Choose between a timer or a light sensor based on your location and routine.
Weather resistance: Make sure all components are weatherproof and durable.
Safety features: Consider adding a manual override or safety sensors to prevent harm to your chickens.
Lessons Learned and Closing Thoughts
Building something useful from scratch is rewarding. Following this easy guide to making a DIY automatic chicken coop door has transformed my chicken-keeping routine. Try it, and simplify your life, too.


