Constructing a DIY automatic dog feeder was an exciting project for me. My dog's feeding schedules were inconsistent, causing some stress. So, I decided to take on this project. First, I gathered all the materials, ensuring they were safe and sturdy for my furry friend. With careful planning and simple tools, I was ready to start building.
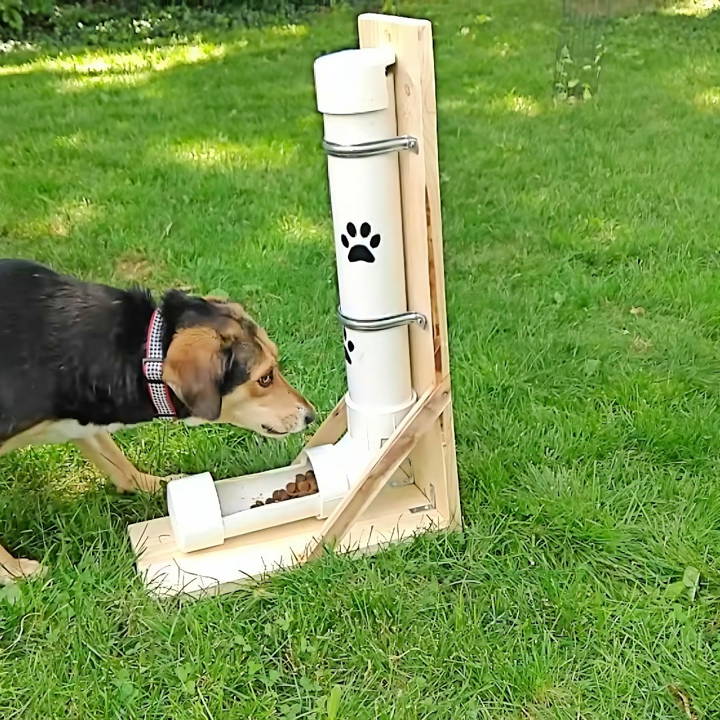
Setting up the automatic dog feeder was rewarding. I used a timer to dispense food at regular intervals, ensuring my dog got his meals on time even when I was busy. It was amazing to see how smoothly it worked.
I'm thrilled with the outcome and confident it can make your life easier, too. Give it a try because these easy steps can truly help.
Understanding Your Pet's Needs
When it comes to feeding your furry friend, understanding their unique needs is crucial. Every dog has its own dietary requirements, which can depend on various factors such as breed, size, age, and activity level. Here's how you can ensure that your DIY automatic dog feeder meets these needs effectively.
Breed and Size Considerations
Different breeds have different energy levels and metabolism rates. For instance, a Border Collie might require more calories compared to a Shih Tzu due to its high energy levels. Similarly, large breeds like Great Danes need more food than smaller breeds like Chihuahuas.
Age and Activity
Puppies and active adult dogs generally need more nutrients to support their growth and energy expenditure. On the other hand, senior dogs may require fewer calories but more of certain nutrients to maintain their health.
Health and Dietary Restrictions
Some dogs may have health issues that necessitate special diets, such as low-fat food for those prone to pancreatitis or hypoallergenic food for dogs with allergies. It's important to consider these when setting up your feeder.
Portion Control
Automatic feeders are excellent for managing portion sizes, which is essential for preventing obesity—a common problem in pets. You can program your feeder to dispense the right amount of food for your dog's needs.
Feeding Schedule
Consistency is key for dogs. They thrive on routine, so having a feeder that dispenses food at the same times every day can help maintain their circadian rhythm and overall well-being.
Technology Integration
Modern automatic feeders can be programmed for multiple feedings throughout the day, which is especially helpful for dogs that require small, frequent meals. Some feeders even come with smartphone connectivity, allowing you to monitor and adjust feeding times remotely.
Consider these aspects to customize your DIY automatic dog feeder for your pet's needs, ensuring their health and happiness. Aim for a reliable, efficient feeding solution that prioritizes your dog's well-being.
Why an Automatic Dog Feeder?
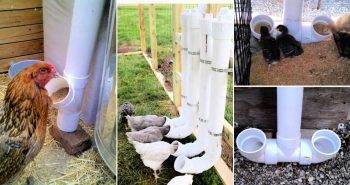
With unpredictable work hours, ensuring my dogs had access to their meals at regular times became a worry. The solution? A DIY gravity feeder. A gravity feeder gradually dispenses food as your dog eats, allowing them to snack whenever they please.
Materials and Tools Required
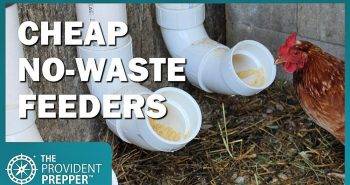
Before I dived into the project, I gathered the necessary materials and tools. Among these were a 1x1 strut, a 5 ft. 1x8 board, PVC pipes, and fittings, paint, and wood screws, to name a few. Why these specific items? The PVC pipes would form the feeding mechanism, while the wood frame would provide stability and aesthetics. Tools like a saw, drill, and sandpaper would ensure precision in crafting the feeder.
Step by Step Instructions
Learn how to make an automatic dog feeder with our step-by-step DIY guide. From cutting pvc to crafting a wood frame, follow our easy instructions!
Step 1: Choosing a Design
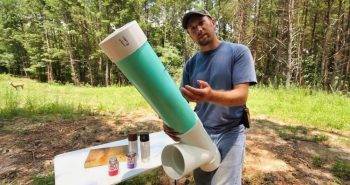
The design I went for was simple yet functional. Opting for a 3-inch PVC pipe mounted on a 1x8 wood frame, this design was stable, easy to fill, and perfect for my medium-sized dogs. The wood frame offered the base, adding weight to prevent tipping, and the PVC pipes were cut and adjusted to build the feeding mechanism.
Step 2: Cutting the PVC
After measuring the necessary lengths, I cut the PVC to build the feeder's body and the opening for the food. This step required careful measurement to ensure the feeder would hold an adequate amount of food and function correctly.
Step 3: Assembling the PVC
Deburring and cleaning the PVC was essential to avoid any potential injuries to my dogs or contamination of their food. Although optional, I decided against gluing the pieces together for easier cleaning and refilling.
Step 4: Crafting the Wood Frame
Using the assembled PVC as a guide, I cut the wood to form the feeder's frame. Precision was key to ensure the frame would perfectly house the PVC pipes. I also made sure to sand down any rough edges for a smooth finish.
Step 5: Frame Assembly and Support
The assembly involved attaching the cut wood pieces with L-brackets and securing the struts for extra stability. This provided a solid base for the feeder, crucial for when my enthusiastic dogs would eat.
Step 6: Decorative Touches
Although optional, I chose to add a bit of personality to the feeder with stencil art and left the wood in its natural state for a rustic look. The decoration process allowed me to tailor the feeder to my home's aesthetic.
Step 7: Combining PVC Feeder with Wood Frame
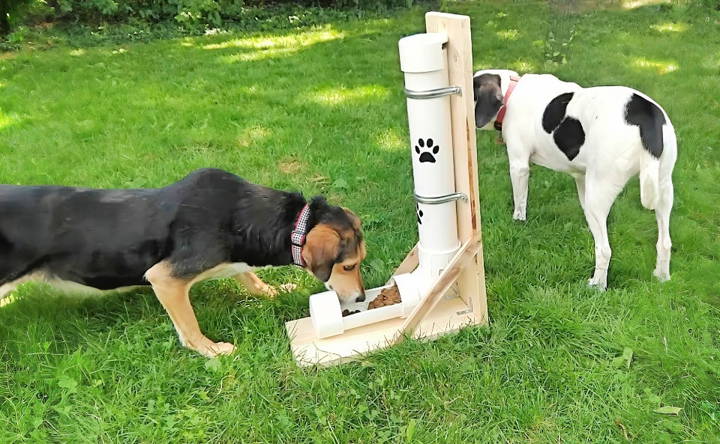
Attaching the PVC feeder to the wood frame involved using pipe straps and ensuring the structure was secure. I wanted to make sure the feeder was sturdy and wouldn't come apart while in use.
Step 8: The Final Product
After combining all the parts, it was time to introduce the feeder to my dogs. Watching them adapt to their new feeding station was a moment of pride and joy.
Advanced Features for DIY Feeders
Building a DIY automatic dog feeder is not just a fun project, but it's also a way to ensure your pet is fed regularly, even when you're not home. Let's explore some advanced features that can make your DIY feeder not only functional but also smart and adaptable to your dog's needs.
Programmable Timers
A programmable timer is a must-have for any advanced DIY feeder. It allows you to set specific times for food to be dispensed, ensuring your dog eats on a regular schedule. This is particularly helpful if you have a busy lifestyle or if your dog needs to eat at the same time every day for health reasons.
Portion Control
To keep your dog healthy, it's important to control their portions. Advanced DIY feeders can have mechanisms that allow you to adjust the amount of food dispensed each time, preventing overfeeding and helping to maintain your dog's ideal weight.
Remote Monitoring and Control
With the integration of Wi-Fi modules, you can monitor and control your feeder from anywhere using your smartphone. This feature lets you make adjustments on the fly and check in to ensure your dog has been fed, giving you peace of mind.
Voice Recording and Playback
Some advanced feeders include the option to record a message for your dog that plays at mealtime. Hearing your voice can provide comfort to your pet and build a more engaging feeding experience.
Backup Power Supply
In case of a power outage, a backup power supply, like batteries, ensures that your feeder continues to operate and your dog doesn't miss a meal.
Food Level Sensors
Sensors can be added to alert you when food levels are low so you can refill the feeder before it runs out. This is especially useful for maintaining a consistent feeding schedule.
Customizable Design
The beauty of a DIY project is that you can customize the design to fit your home's decor and your dog's size. Whether you want a sleek, modern look or a rustic feel, you can choose materials and colors that match your style.
Adding these features to your DIY dog feeder makes it both useful and customized for your pet, combining creativity and practicality.
Troubleshooting Common Issues
When you've put your heart into building a DIY automatic dog feeder, you want it to work perfectly. But sometimes, things go awry. Here's a guide to help you troubleshoot common issues so that your pet's meals are always on schedule.
Feeder Doesn't Dispense Food
If your feeder isn't dispensing food, first check for any blockages in the dispenser. Make sure the food you're using is the right size and shape for your feeder. If everything looks clear, check the feeder's programming to ensure it's set correctly.
Inconsistent Portion Sizes
For feeders that are giving too much or too little food, recalibrate the portion control settings. It might take a few tries to get it just right, so be patient and make adjustments as needed.
Feeder is Jamming
A common cause of jamming is using a type of food that's not compatible with the feeder. Stick to the recommended food types and sizes. If the problem persists, there might be a need for a design tweak in the dispensing mechanism.
Connectivity Issues
If your feeder is Wi-Fi enabled and you're having trouble with connectivity, ensure that the feeder is within a good range of your router. Sometimes, moving the feeder to a different location can solve the problem.
Power Problems
Always have a backup power source, like batteries, especially if your feeder runs on electricity. This will keep the feeder operational even during a power outage.
Unusual Noises
Some noise is normal, but if your feeder starts making unusual sounds, it could indicate a mechanical issue. Check for loose parts or signs of wear and tear that may need repairing.
Maintenance Challenges
Keep your feeder clean and well-maintained. Regular cleaning prevents food buildup, which can lead to mold or clogs. Follow the manufacturer's instructions for the best cleaning practices.
Keep these tips in mind, and your DIY automatic dog feeder will stay reliable. Most problems have simple fixes, so don't be discouraged if something goes wrong.
Maintenance and Cleaning Tips
Keeping your DIY automatic dog feeder clean is essential for your pet's health and the longevity of the feeder. Here are some straightforward tips to maintain and clean your feeder:
Regular Cleaning Schedule
Set a regular cleaning schedule for the feeder. Depending on usage, a weekly clean might be necessary to prevent food buildup and bacteria growth.
Disassembly for Cleaning
If your feeder has removable parts, disassemble them for a thorough cleaning. Make sure to refer to any manufacturer instructions or tutorials to ensure you're disassembling and reassembling the unit correctly.
Safe Cleaning Materials
Use pet-safe cleaning materials. Avoid harsh chemicals that could harm your pet. Warm soapy water is often enough to clean the feeder parts. For tougher grime, a vinegar and water solution can be effective.
Drying Parts Completely
After washing, ensure all parts are completely dry before reassembling to prevent mold and mildew. Air drying is best, but you can also use a clean, dry cloth to wipe down parts.
Checking for Wear and Tear
Regularly inspect your feeder for any signs of wear and tear. Look for cracks, chips, or other damage that could harm your pet or affect the functionality of the feeder.
Food Storage
Store dog food in a cool, dry place to keep it fresh. If your feeder has a storage compartment, make sure it's sealed properly to prevent pests and maintain the food's quality.
Sensor Cleaning
If your feeder has sensors or electronic components, gently wipe them with a dry cloth to remove dust and ensure they function properly.
By following these simple maintenance and cleaning tips, you can ensure that your DIY automatic dog feeder remains a safe and reliable way to care for your furry friend.
FAQs About DIY Automatic Dog Feeder
Discover answers to common questions about DIY automatic dog feeders. Learn how to build, benefits, and tips for an efficient pet feeding solution.
A gravity feeder uses the weight of the food to automatically refill the bowl as your dog eats. The food is stored in a vertical container, and when the dog eats from the bowl below, more kibble naturally falls down to replenish it.
Yes, you can adjust the size of the feeder to accommodate larger dogs. Instead of a 3-inch PVC pipe, you might use a 4-inch pipe or a larger container to hold more food and ensure the bowl is at a comfortable height for your dog.
While there is some debate about the safety of PVC due to the presence of BPA, the FDA has not recommended against using PVC for short-term food storage. However, it’s important to do your research and decide what’s best for your pet.
If you want to control when your dog eats, you can add a dispensing element regulated by a timer. This can be achieved using an Arduino kit, which allows you to build electronically controlled devices. Keep in mind that working with Arduino requires some technical skills.
To make sure your feeder is pet-friendly, use non-toxic materials and smooth edges to prevent any injury. For easy cleaning, design the feeder with detachable parts and use materials that are dishwasher-safe or easy to wipe down. Consider using stainless steel for the bowl, as it's durable and resists bacteria. Also, make sure that any electronic components are waterproof or encased to prevent damage during cleaning.
Conclusion
Witnessing how a DIY automatic dog feeder can bring convenience and joy is amazing. Start building one today to see the benefits yourself. Trust me; it's worth the effort!


