Building an axe-throwing target was an adventure. I remember deciding one day that I wanted to try something new. So, I gathered all the materials and followed a simple guide. It was exciting to work with my hands, measuring and cutting the wood. The sense of satisfaction I felt when I finally assembled the target was incredible.
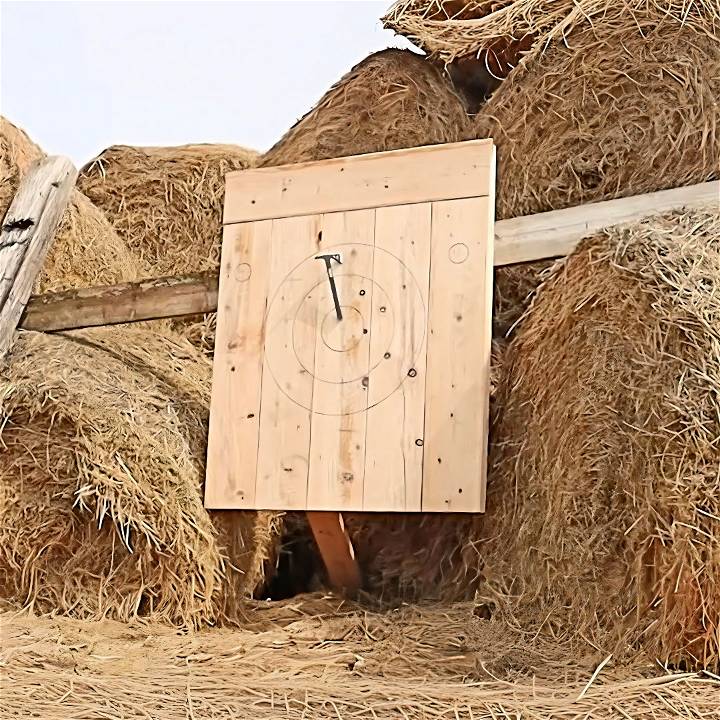
I couldn't wait to try it out. My friends and I spent hours throwing axes at the target, improving our skills, and having a blast. Making the target myself made it all the more rewarding. If you want to build something fun and practical, try building an axe-throwing target.
I hope my story helps inspire you to get started on your project. Building your DIY axe-throwing target will not only give you a fun activity, but also a great sense of accomplishment.
Materials Needed and Their Purpose
- Two 2x4s (Eight Feet): These provide the frame's structure, giving the target rigidity and height.
- Two 2x6s (Eight Feet): These boards add width to the frame, ensuring the target has enough space for the axe to land.
- Three 2x10s (Eight Feet): The main target area, these boards will bear the brunt of your axe throws.
- Screws: To hold everything securely together, preventing any wobbling or parts from coming loose upon impact.
- Measuring Tape, Saw, Screwdriver or Drill: Essential tools for measuring, cutting, and assembling your target.
Step by Step Instructions
Build your own DIY axe-throwing target with our easy, step-by-step instructions. Perfect for backyard fun and improving your skills!
Step 1: Preparing the Wood
After gathering all the materials, I started by cutting the 2x10s in half. Given lumber is rarely perfectly straight, I measured and cut mine to 47 inches to ensure they would fit snugly together. This initial step is crucial for setting up the base of your target.
Step 2: Assembling the Base
With the wood cut, align five of your 47-inch 2x10 pieces side by side. I used a level as a guide to maintain a straight line, ensuring the structure would be stable. It's also a good idea to fasten these temporarily to your worktable to prevent them from moving as you work.
Step 3: Crafting the Frame
Measure and cut the 2x6 boards to fit the width of your assembled 2x10s, which should be about 47.5 inches, plus the thickness of the 2x10s. Attach these to either side of your 2x10 stack, ensuring they're flush and secure. This builds a more solid base and adds width to your target structure.
Step 4: Ladder Support
Using the 2x4s, build a ladder-like structure on the back of the 2x6s and 2x10s. This technique offers additional support and keeps the boards tight against each other, reducing gaps where throws could potentially miss or damage the target. I placed a 2x4 at the bottom, middle, and top for balanced support.
Step 5: Final Touches and Target Circles
For the target circles, I employed a simple DIY compass. Inserting a screw in the center, I attached a string at 7 inches, 17 inches, and 27 inches to mark the concentric circles. These serve as your aim points.
For those interested in more complex games, measure additional points 39 inches from the base and 4.5 inches from the sides to mark smaller target points.
Step 6: Ready, Set, Throw!
Once your target is assembled, marked, and secured, it's time to test your aim. Setting up the target at a safe distance, free from any potential mishaps, ensures a fun and safe axe-throwing experience.
Customization Ideas
Building a DIY axe-throwing target is not just about functionality; it's also an opportunity to express your personality and style. Here are some customization ideas that will make your target uniquely yours while keeping the design practical and safe.
- Choose Your Wood Wisely Start with the right kind of wood. Softwoods like pine or cedar are ideal because they're durable yet forgiving when an axe strikes. Consider the grain pattern, too; it can add a natural artistic touch.
- Paint and Stain: Give your target a splash of color with paint or stain. Use bright colors to mark the bullseye and scoring rings, making them easy to see from a distance. You can also apply a weather-resistant stain to protect the wood and enhance its natural beauty.
- Personal Touches: Add personal touches like your initials, a logo, or a favorite quote around the edges of the target. Use stencils for a professional look or freehand if you're confident in your artistic skills.
- Light It Up For evening throws, install some outdoor-friendly LED lights around the target. Not only does this make it usable after dark, but it also builds a dramatic effect.
- Scoreboard: Mount a small chalkboard or whiteboard nearby to keep track of scores. This adds a competitive edge to your axe-throwing games and is a convenient way to display the rules for any newcomers.
- Protective Backing Safety is paramount, so consider adding a protective backing behind the target. This could be a sheet of plywood or a layer of old carpet to catch any stray throws.
- Themed Designs If you're passionate about a particular theme, like medieval times or a favorite sports team, incorporate that into your target's design. Just ensure that any added elements don't interfere with the safety or functionality of the target.
Use these customization ideas to boost your axe-throwing target's look and experience. Aim for a safe, functional, and fun space that shows your personal touch.
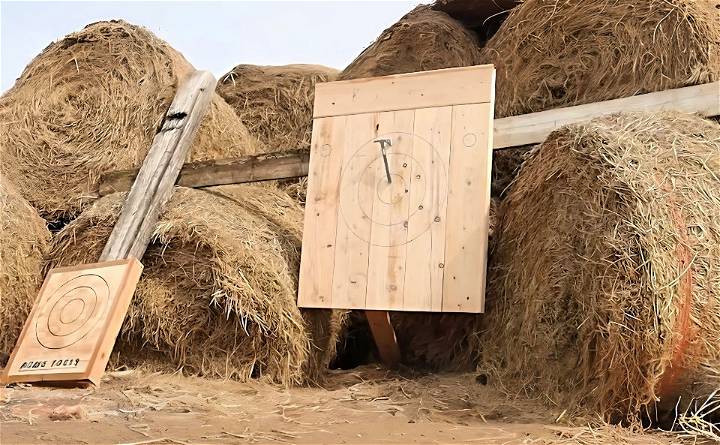
Axe Throwing Techniques
Axe throwing is a skill that requires practice and technique. Whether you're a beginner or looking to refine your skills, understanding the basics of axe throwing techniques is essential. Here's a guide to help you throw with confidence and precision.
- The Basic Grip Hold the axe handle with a firm, but not tight, grip. Your thumb should wrap around one side while the rest of your fingers secure the other side. For a two-handed throw, place your dominant hand below the non-dominant one, lining up the thumbs.
- Stance is Key Position your feet shoulder-width apart, with one foot slightly ahead of the other for balance. Lean slightly forward, but keep your weight evenly distributed.
- Aiming Focus on a point on the target where you want the axe to land. Keep your eye on this spot throughout the throw. It's like aiming a dart; your aim should be consistent and focused.
- The Throw Bring the axe back over your head, keeping your elbows straight. In one fluid motion, bring the axe forward and release it when your hands are about eye level. The axe should rotate once before hitting the target.
- Consistency is Crucial Practice throwing with the same force and technique each time. Consistency leads to accuracy. Adjust your distance from the target if the axe is over-rotating or under-rotating.
- Safety First Always ensure the area is clear before you throw. Never retrieve your axe until all axes have been thrown and are at rest.
- Advanced Techniques Once you've mastered the basic throw, you can explore more advanced techniques like the one-handed throw or adjusting your grip for different axe weights.
Axe throwing is about finesse, not strength. It's the technique that allows the axe to do the work. With these tips and regular practice, you'll be hitting bullseyes in no time.
Troubleshooting Common Axe Throwing Issues
When it comes to DIY axe throwing, you might encounter a few hiccups along the way. Here's a straightforward guide to troubleshoot common issues, ensuring your axe throwing experience remains safe and enjoyable.
Axe Doesn't Stick to the Target
- Check the Axe: Ensure the blade is sharp enough to stick but not dangerously sharp.
- Examine the Target: If the wood is too hard, consider replacing it with a softer wood like pine.
- Adjust Your Throw: Release the axe at eye level and ensure it rotates evenly in flight.
Axe Bounces Back
- Distance Matters: Stand at the correct distance where the axe completes one full rotation before hitting the target.
- Throwing Force: Use a consistent force when throwing; not too hard, not too soft.
Target Deterioration
- Regular Maintenance: Inspect and replace worn sections of the target to prevent the axe from bouncing off.
- Weatherproofing: Apply a weather-resistant sealant to protect the target from the elements.
Inconsistent Scoring
- Clear Markings: Make sure the scoring zones on your target are well-defined and visible.
- Scoring System: Establish a clear set of rules for scoring to avoid confusion among players.
Safety Concerns
- Secure Area: Ensure the target area is securely set up and that the safety zone is respected by all participants.
- Equipment Checks: Regularly inspect axes and the target for any signs of wear or damage.
By addressing these common issues, you can maintain a high-quality axe throwing setup. Remember, the key to a successful throw lies in the details. Keep practicing, stay safe, and most importantly, have fun!
Maintenance and Upkeep
Keeping your DIY axe throwing target in top condition is crucial for safety and performance. Here's a comprehensive guide to maintaining your target, ensuring it remains a reliable and enjoyable part of your axe throwing practice.
Regular Inspection
- Check for Damage: Before and after each use, inspect the target for any signs of wear, such as splinters or loose wood.
- Surface Smoothness: Sand down any rough patches to prevent axes from bouncing back.
Wood Care
- Moisture Control: Keep the wood hydrated by lightly spraying it with water before use, which helps the axes stick better.
- Sealant Application: Apply a wood sealant annually to protect against weather damage, especially if the target is kept outdoors.
Blade Maintenance
- Axe Inspection: Regularly check your axe for dullness and nicks. A well-maintained axe is safer and performs better.
- Sharpening: Use a file to maintain the edge of the axe, keeping it sharp enough to stick to the target but not razor-sharp.
Replacement Schedule
- Target Boards: Replace the boards when they become too chopped up for the axe to stick reliably.
- Backing Material: Check the backing material for wear and replace it when it no longer provides adequate protection for missed throws.
Cleaning
- Debris Removal: Keep the target area free of debris, such as wood chips, which could affect footing and safety.
- Surface Cleaning: Wipe down the target surface with a damp cloth to remove dirt and grime.
Storage
- Proper Storage: Store the axe in a dry place to prevent rust and handle rot.
- Target Protection: Cover the target when not in use to shield it from the elements and extend its life.
Regular maintenance ensures your axe-throwing target stays safe and enjoyable. Consistent care extends its life and enhances your axe-throwing experience.
FAQs About DIY Axe Throwing Target
Discover essential faqs about DIY axe-throwing targets. Get expert tips, materials, and step-by-step guidance to build your own backyard target.
You should replace or resurface your target when:
The wood becomes too chopped up for safe throwing.
The target circles and points become indistinct due to wear. Regular inspection and maintenance will ensure safety and longevity.
When using your DIY axe throwing target, always:
Ensure no one is in the line of fire or near the target while throwing.
Wear appropriate safety gear, like closed-toe shoes.
Inspect the target and structure regularly for any signs of wear or damage.
Practice in a clear area to avoid any accidents with missed throws.
To maintain the quality of your target:
Sand the surface lightly to remove burrs and splinters.
Apply a light coat of water to the wood before throwing to help the axe stick.
Avoid using the target in wet conditions to prevent rot and warping.
The best wood for an axe throwing target is softwood, such as pine. It should be:
Soft enough to allow the axe to stick.
Durable enough to withstand repeated throws.
Free of knots to provide a smooth surface.
While traditional targets are made of wood, you can use alternative materials such as:
End-grain wood blocks: They provide a durable surface and self-heal after each throw.
Foam boards: These are lighter and easier to replace but may not offer the same experience as wood.
Rubber mats: They can be used for practice but won't provide the same stickiness as wood.
Final Thoughts
In conclusion, building a DIY axe-throwing target is an exciting and fulfilling project that brings fun and skill right into your backyard. By following these axe-throwing target plans, you'll build a sturdy and safe setup for endless entertainment. Gathering the right materials, adhering to safety guidelines, and putting in some effort will ensure your success.


