Crafting has always been a soothing and fulfilling experience for me. There's something about turning simple materials into something beautiful that never fails to bring me joy. When my friend announced her baby shower, I decided to make a memorable DIY baby shower corsage for her. Here's a step-by-step guide to making your own, inspired by my experience.
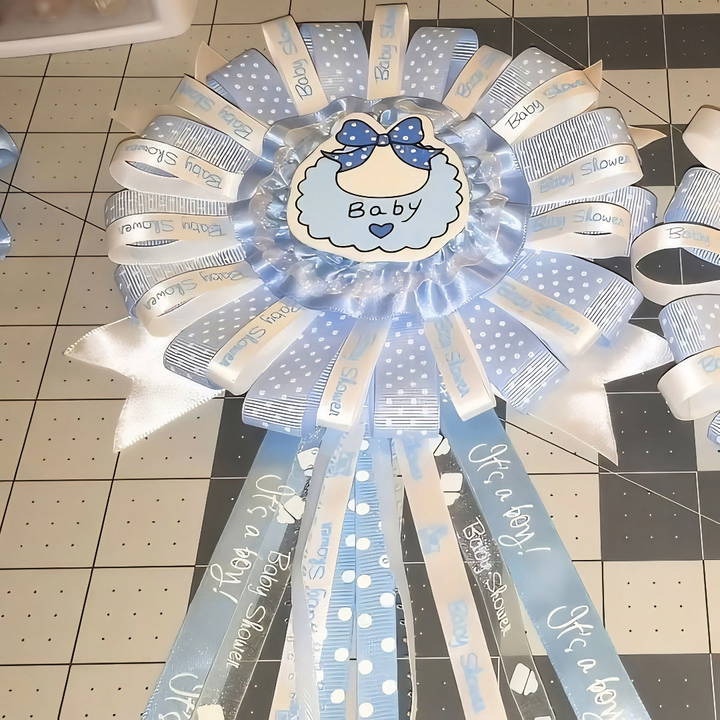
Materials Needed and Their Importance
Before diving into the creation process, gathering the right materials is crucial. Each one has a specific purpose that contributes to the final look of the corsage.
- Cardboard Base: Serves as the sturdy foundation of the corsage. It must be thick enough to hold everything firmly yet not too bulky to wear comfortably.
- Felt Fabric: This will be attached to the back of the corsage, providing a smooth surface to prevent irritation against the wearer's skin.
- Different Ribbons: I chose a combination of baby blue, polka dot, and white ribbons that say “Big Shower” to add layers and texture. The addition of a shiny trim ribbon adds a touch of elegance to the design.
- Wooden Embellishments: A wooden pacifier was my choice, giving a cute thematic touch. You could also use other symbols like baby bottles or teddy bears.
- Hot Glue Gun: An essential tool for anchoring all the elements securely in place.
- Scissors: For cutting ribbons to the desired lengths.
Step by Step Instructions
Make a personal touch with our step-by-step DIY baby shower corsage guide! Perfect for unique and beautiful baby shower decorations.
Step 1: Preparing the Base
The base is crucial for the corsage, as it supports all other elements. Here's how to get started.
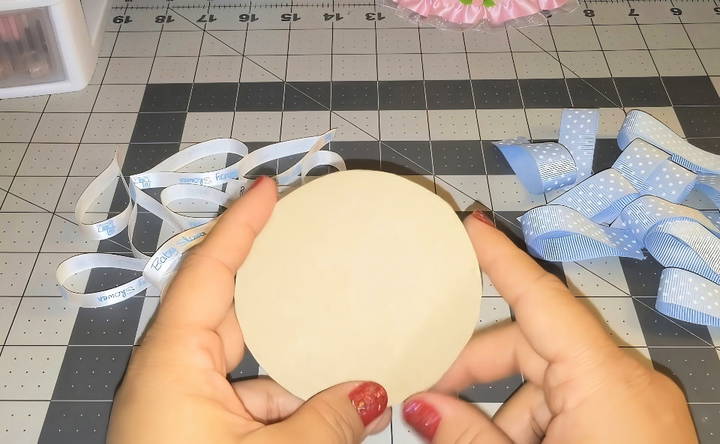
- Cutting the Cardboard: Cut a piece of cardboard into a circle or any shape of your choice. Mine measured about four inches in diameter, which I found to be a good size for a noticeable yet wearable corsage.
- Felt Backing: Cut a piece of felt slightly larger than the cardboard. This will be glued to the back at the end to cover the rough edges and make it comfortable to wear.
Step 2: Decorating the Base with Ribbons
The ribbons are where the corsage's design really comes to life.
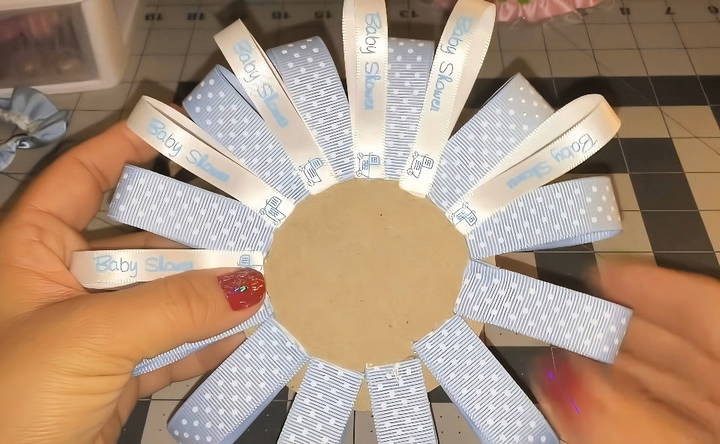
- Glue the First Layer: Begin by folding the polka dot ribbon in half and securing it with a drop of hot glue. Attach these in a circular pattern around the cardboard, ensuring they overlap slightly. This makes the ruffled base. Tip: Leave a small space in the center for the next steps.
- Adding the White Ribbon: The white ribbon with "Big Shower" printed on it adds a celebratory touch. Follow the same folding and gluing process as before, making a second layer over the polka dot.
Step 3: Middle Decoration
This step focuses on adding detail to the center of your corsage.
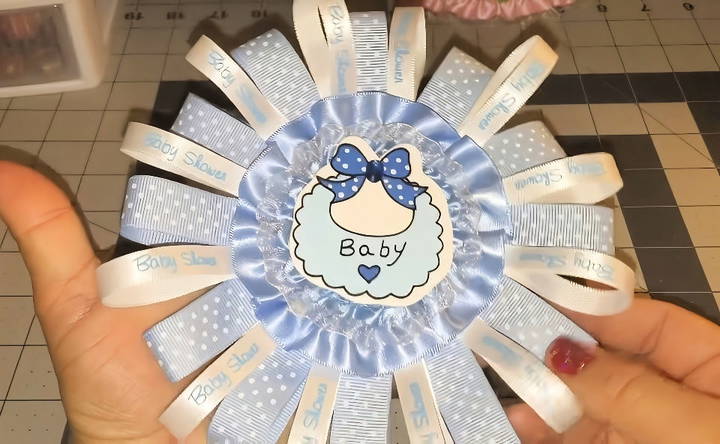
- Central Ribbon: Lay a length of blue ribbon across the center to cover both the cardboard and previous ribbon layers. Secure it with a glue gun. This blue ribbon acts as a ground for the added embellishments.
- Shiny Trim Ribbon: Add an extra layer using a narrow shiny trim ribbon. It should lie neatly between the blue layers, adding depth and elegance to your creation.
Step 4: Adding Embellishments
Now it's time to give your corsage that personal touch with some embellishments.
- Wooden Embellishment: I chose a wooden pacifier, which I placed right in the center. You can select other wooden figures based on your preference. Secure it with hot glue.
- Final Touches: At this point, you can also add little bows or additional trims if desired. I added a small floral trim to one side for extra flair.
Step 5: Attaching the Backing
The final step is to ensure your corsage is comfortable to wear.
- Gluing the Felt: Attach the felt circle to the back using hot glue. This covers any exposed cardboard and adds a soft finish.
- Pin Attachment: If you want to pin the corsage to clothing, a small safety pin can be attached to the back. I found that this makes it easier to wear and doesn't damage the outfit.
Personal Insights and Tips
Having completed the corsage, here are some insights to enhance your experience:
- Experiment with Colors: While my theme was baby blue, consider the baby's gender or the shower's color theme to choose your ribbons accordingly. Pink, purple, or even neutral tones can work beautifully.
- Patience is Key: Don't rush the glue setting in between steps. Allowing adhesive to dry thoroughly ensures each element stays secure.
- Customization Options: Personalize your corsage with the baby's initial or a tiny name tag using alphabet beads if time permits. It adds a heartfelt touch that is sure to be appreciated.
Creative Ideas and Variations
Making baby shower corsages can be a fun and personalized way to celebrate the upcoming arrival. Here are some creative ideas and variations to inspire you:
Themed Corsages
Themed corsages add a special touch to the baby shower. Here are a few ideas:
- Jungle Theme: Use small animal figurines, green leaves, and bright flowers to make a jungle-themed corsage.
- Nautical Theme: Incorporate blue and white ribbons, small anchors, and seashells for a nautical look.
- Princess Theme: Use pink ribbons, tiny crowns, and glittery accents to make a princess-themed corsage.
Personalized Corsages
Adding personal touches makes the corsage even more special. Here are some ways to personalize:
- Names and Initials: Use alphabet beads or charms to spell out the baby's name or initials.
- Special Charms: Include charms that represent the parents' hobbies or interests, like a tiny book for book lovers or a small musical note for music enthusiasts.
- Birthstone Colors: Use ribbons and flowers in the color of the baby's birthstone.
Unique Materials
Experimenting with different materials can make unique and memorable corsages:
- Baby Socks: Roll up baby socks to look like flowers and attach them to the corsage.
- Pacifiers: Use colorful pacifiers as the centerpiece of the corsage.
- Baby Toys: Small baby toys like rattles or teething rings can be incorporated into the design.
Seasonal Corsages
Match the corsage to the season of the baby shower:
- Spring: Use pastel colors, fresh flowers, and butterfly accents.
- Summer: Bright colors, tropical flowers, and beach-themed elements like tiny flip-flops.
- Autumn: Warm colors, leaves, and small pumpkins or acorns.
- Winter: Cool colors, snowflake charms, and silver or white ribbons.
Eco-Friendly Options
For those who are environmentally conscious, consider these eco-friendly ideas:
- Reusable Materials: Use materials that can be reused, like fabric flowers and ribbons.
- Biodegradable Items: Choose biodegradable items like paper flowers and natural twine.
- Upcycled Elements: Incorporate upcycled elements like buttons, old jewelry, or fabric scraps.
Corsages for Special Guests
Make special corsages for important guests like grandmothers and godmothers:
- Grandmother Corsages: Use elegant flowers and add a charm that says “Grandma.”
- Godmother Corsages: Include a special charm or ribbon that signifies the godmother's role.
Tips for Making Corsages
Here are some helpful tips to ensure your corsages turn out beautifully:
- Choose Durable Materials: Select materials that will hold up well throughout the event.
- Secure Attachments: Make sure all elements are securely attached to avoid any pieces falling off.
- Comfortable to Wear: Ensure the corsage is comfortable to wear and not too heavy.
By incorporating these creative ideas and variations, you can make unique and memorable baby shower corsages that will delight the mother-to-be and guests alike.
FAQs About DIY Baby Shower Corsages
Discover answers to common questions about DIY baby shower corsages, including materials, steps, and design ideas for your special event.
While hot glue is ideal because it dries quickly and holds items securely, you can experiment with other adhesives like fabric glue or tacky glue. Just remember that drying times may vary.
Absolutely! You can use thick felt or a sturdy foam circle as an alternative base, offering similar stability and comfort.
Consider using eco-friendly ribbons made from natural fibers, or attach reusable embellishments that can be repurposed after the event.
Fresh flower corsages: Make them within 24 hours of the event to ensure they stay fresh.
Silk flower or baby sock corsages: These can be made well in advance since they don't wilt.
You can attach the corsage in two main ways:
Lapel corsage: Use a pin to secure the corsage to the clothing.
Wrist corsage: Attach the corsage to a wristband or ribbon that can be tied around the wrist.
Conclusion
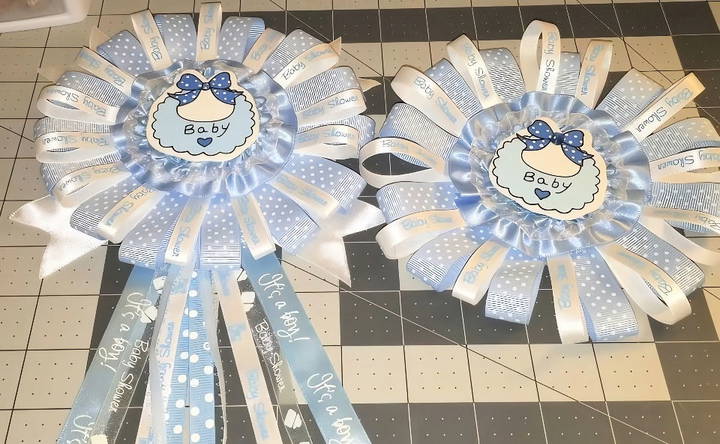
Making a blue baby shower corsage was not only a fun project but also a meaningful gift for my friend and her upcoming bundle of joy. The DIY process allows for creativity and personalization, making it a memorable keepsake. Whether you're crafting for your own event or for a friend, following this guide will help you design a beautiful, unique corsage that stands out.


