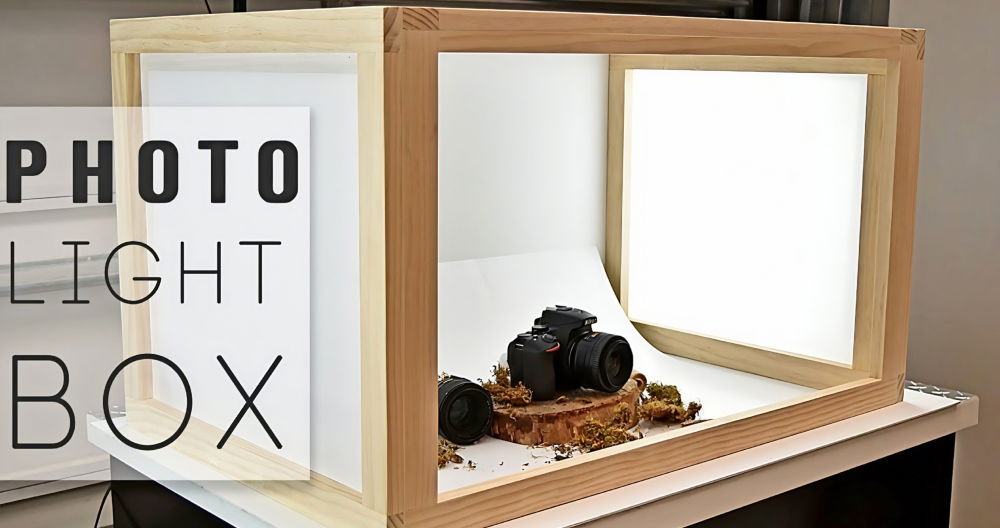
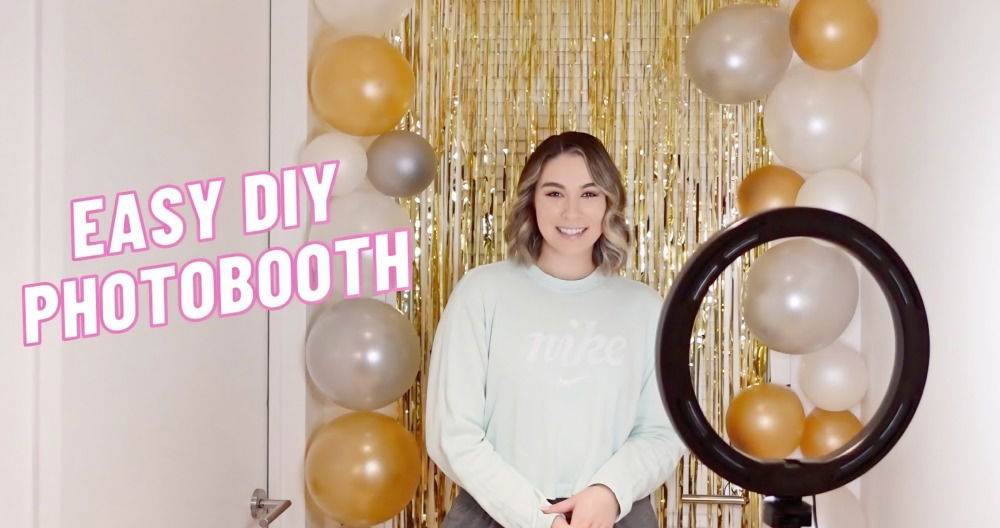
Making captivating images is key in photography, and DIY photo backdrops are a brilliant way to add uniqueness and depth to your photos. Whether you aim to enhance your photography portfolio or elevate an event's ambiance, crafting your own backdrops is a rewarding journey. This guide is designed to demystify the process, offering straightforward steps and creative ideas to help you start with confidence.
Diving into the world of DIY photo backdrop creation not only saves money but also unleashes your creative potential. From selecting the perfect idea to gathering materials and the final assembly, we'll walk you through the essentials for making backdrops that capture the eye. Let's move towards turning your visions into stunning photographic realities, encouraging you to explore the next section filled with tips and tricks for DIY photo backdrops.
Why DIY Photo Backdrops?
Making your own DIY photo backdrops offers numerous benefits that can enhance your photography sessions, events, and personal projects. Here's why you should consider diving into these creative endeavors:
- Cost-Effectiveness: Purchasing pre-made backdrops or renting them can quickly become expensive, especially if you need a variety of styles. DIY options allow you to make stunning backdrops at a fraction of the cost, using affordable materials.
- Customization: When you make your own backdrops, you have complete control over the colors, themes, and sizes. This flexibility ensures that you can tailor each backdrop to perfectly match the aesthetic of your event or photography session.
- Versatility: A DIY backdrop can be as simple or complex as you wish. Whether you're aiming for a minimalistic look or an elaborate scene, the ability to adjust and modify your backdrop means it can be reused and repurposed for various occasions.
- Personal Touch: Adding a handmade element to your event or photography project introduces a unique, personal touch that can't be replicated with store-bought items. It reflects your creativity and effort, making the occasion even more special.
- Fun Project: Crafting a backdrop can be a fun and rewarding project. It's an opportunity to explore your artistic side and possibly learn new skills. Plus, involving friends or family in the creation process can turn it into a memorable bonding experience.
By choosing the DIY route for your photo backdrops, you not only save money but also gain the satisfaction of making something beautiful and customized to your needs.
Certainly! Here’s the revised section without hyperlinks:
Tips for High-Quality Backdrop Creation
Creating a high-quality DIY photo backdrop doesn’t have to be complicated. Here are some tips to ensure your backdrops look professional and are camera-ready:
- Choose the Right Materials: Opt for materials that won’t wrinkle easily and can hold vibrant colors, such as muslin or canvas.
- Pay Attention to Lighting: Ensure your backdrop is well-lit to avoid shadows and uneven lighting in your photos.
- Iron Out Wrinkles: If your backdrop material does get wrinkled, use a steamer or iron to smooth it out before your photoshoot.
- Securely Mount Your Backdrop: Use a sturdy frame or backdrop stand to keep your backdrop taut and in place.
Innovative Backdrop Ideas
To add originality to your photography, try these innovative backdrop ideas:
- Chalkboard Paint: Use chalkboard paint on a large board to create a customizable backdrop that you can draw or write on for each photoshoot.
- Hanging Decor: Create depth by hanging items like leaves, flowers, or even crumpled paper for a textured effect.
- Light Patterns: Experiment with different light sources behind sheer materials to create interesting patterns and bokeh effects.
Maintenance and Storage Solutions
Proper maintenance and storage of your backdrops are crucial for their longevity. Here’s how to keep them in top condition:
- Clean Gently: Spot clean your backdrops when necessary and avoid harsh chemicals that can fade colors.
- Roll, Don’t Fold: To prevent creases, roll your backdrops on a tube for storage.
- Control the Climate: Store your backdrops in a cool, dry place to prevent mold and mildew.
- Stay Organized: Use labeled bins or racks to organize your backdrops, making them easy to find for your next shoot.
By following these guidelines, you'll ensure that your DIY photo backdrops are not only unique and eye-catching but also durable and easy to maintain.
How to Get Started with DIY Photo Backdrops
Making DIY photo backdrops can transform your photography sessions, events, or home décor with a personal touch that reflects your creativity and style. Here's a straightforward guide to help you begin this rewarding project. Whether you're aiming for a lush greenery wall, a vibrant paper poppy display, or a charming fringe background, these steps will set the foundation for your creative journey.
Choosing Your Backdrop Idea
First, consider the purpose and theme of your backdrop:
- For photography sessions, think about the mood or aesthetic you want to capture. Soft, textured backdrops like dyed cheesecloth can add a romantic atmosphere, while colorful fringe or paper flowers bring energy and fun.
- For events, match the backdrop to your theme. A cascading flower backdrop might suit a wedding, while an oversized paper chain could be perfect for a birthday party.
- For home décor, decide on a backdrop that complements your space. A greenery wall can bring life to a dull corner, and a watercolor paper square backdrop can add a pop of color.
Gathering Materials
Once you've settled on a backdrop design, list the materials you'll need. Most projects require basic supplies, such as:
- For paper crafts: colored paper, cardstock, scissors, glue, and a template if necessary.
- For fabric backdrops: textiles like cheesecloth or tulle, dye for coloring, and rods or strings for hanging.
- For floral or greenery walls: artificial or fresh flowers, greenery mats, and securing tools like hooks or tape.
You can find most of these items at craft stores or online. Remember, the beauty of DIY is in customization, so feel free to adapt materials based on what is available or fits your budget.
Crafting Your Backdrop
- Plan your design. Sketch or outline what you want your final backdrop to look like. This helps in determining the size and arrangement of your materials.
- Prep your workspace. Make sure you have enough room to work and cover surfaces if you're using paint or dye.
- Take your time. Whether you're cutting petals for a floral backdrop or dyeing fabric, work patiently and enjoy the process. The quality of your backdrop will reflect the care you put into it.
Assembly and Display
- Securely assemble. Whether you're tying flowers to a string, gluing paper cut-outs, or arranging fabric folds, make sure everything is securely attached to avoid accidents during your event or photo shoot.
- Test the hanging method. Before the final display, test how your backdrop hangs. Adjust the height and secure it well to ensure it stays in place and looks great throughout your event or photography session.
Final Touches
- Add lights or accessories. For an extra wow factor, incorporate string lights, crystals, or other decorative elements.
- Inspect and adjust. Take a step back and look at your backdrop from a distance. Make any necessary adjustments to ensure it looks perfect for your event or photos.
Following these steps puts you on track to create a unique, stunning DIY photo backdrop. Have fun, be creative, and your personalized backdrop will elevate your photos or event, leaving a memorable mark.
DIY Photo Backdrop FAQs
Making your own photo backdrops can elevate your photography and add a personal touch to any event. Here, we cover some of the most frequently asked questions to help you get started.
What materials do I need for a DIY photo backdrop?
The materials you need can vary greatly depending on the type of backdrop you're creating. Common materials include:
- For paper backdrops: Colored paper, cardstock, scissors, glue, and possibly a template.
- For fabric backdrops: Cheesecloth or tulle, dye (if you wish to color the fabric), and a rod or string for hanging.
- For floral or greenery walls: Artificial or fresh flowers, greenery mats, and securing tools like hooks or tape.
How can I make my DIY backdrop stand out?
To make your backdrop unique, consider:
- Customizing colors to match your event or photo session theme.
- Incorporating textures for a more dynamic look.
- Adding lights or other decorative elements like crystals for an extra wow factor.
- Using layers to make depth.
Can I make a photo backdrop if I'm not crafty?
Absolutely! Many DIY backdrop ideas are beginner-friendly and require minimal skills. Start with simpler designs like a fabric or paper backdrop and gradually move to more complex projects as you gain confidence.
How do I make a backdrop stand?
For a basic backdrop stand, you will need:
- PVC pipes or lightweight metal rods for the frame.
- Elbow joints and T-joints to connect the pipes.
- Sandbags or weights to stabilize the stand.
Assemble the pipes into a rectangular frame using the joints, and secure the base with weights for stability.
How do I store my DIY backdrop?
To store your backdrop:
- Roll fabric backdrops around a cardboard tube to prevent wrinkles.
- Keep paper or delicate backdrops flat in a protective sleeve or folder.
- Dismantle larger backdrops like greenery walls into smaller sections for easier storage.
Can I reuse my DIY photo backdrop?
Yes, most DIY backdrops can be reused if stored properly and handled with care. Some materials, like paper, may wear out faster than more durable materials like fabric or artificial greenery.
How do I choose the right backdrop for my photography or event?
Consider the following:
- Event theme: Ensure the backdrop complements the overall theme of your event or photo session.
- Color scheme: Match or contrast colors appropriately to make the desired mood.
- Size and space: Make sure the backdrop is the right size for your space and purpose.
With these FAQs, you're well-equipped to start your DIY photo backdrop project, adding a personal and creative touch to your photography or events.
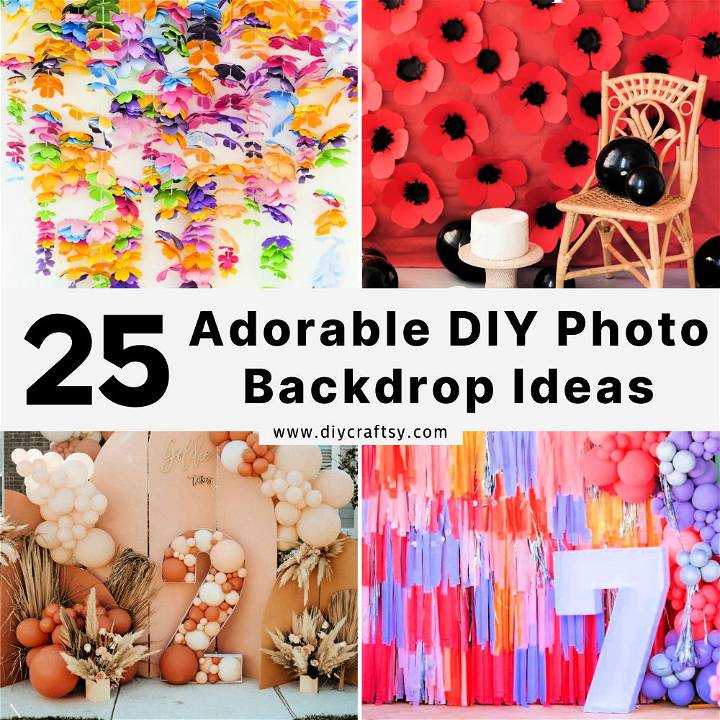
25 Easy DIY Photo Backdrop Ideas for Photography
Discover 25 easy DIY photo backdrop ideas for photography. Elevate your photos with these creative and budget-friendly backdrop options.
1. DIY Paper Poppy Photo Backdrop
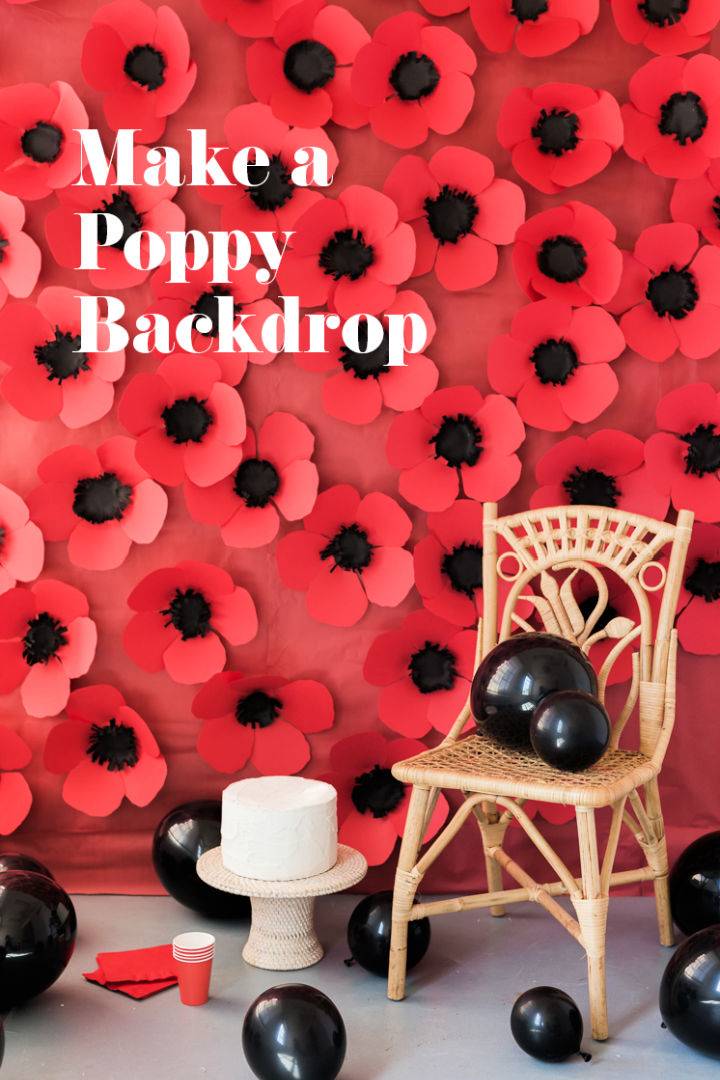
Make a touching tribute with a DIY paper poppy backdrop, perfect for honoring service members on Memorial Day or any commemorative occasion. The house that lars built Offers a simple, step-by-step guide that brings a solemn yet beautiful symbol to life. You'll need red and black paper, scissors, and a glue gun.
Start by cutting out petals and a center using the provided template, shape them with a hot glue gun for a realistic look, and assemble them into a stunning poppy. Displaying 30 of these handcrafted flowers can transform any wall into a space of remembrance and respect. Dive into crafting this meaningful decoration and add a poignant touch to your next gathering.
2. Making a Cascading Flower Backdrop
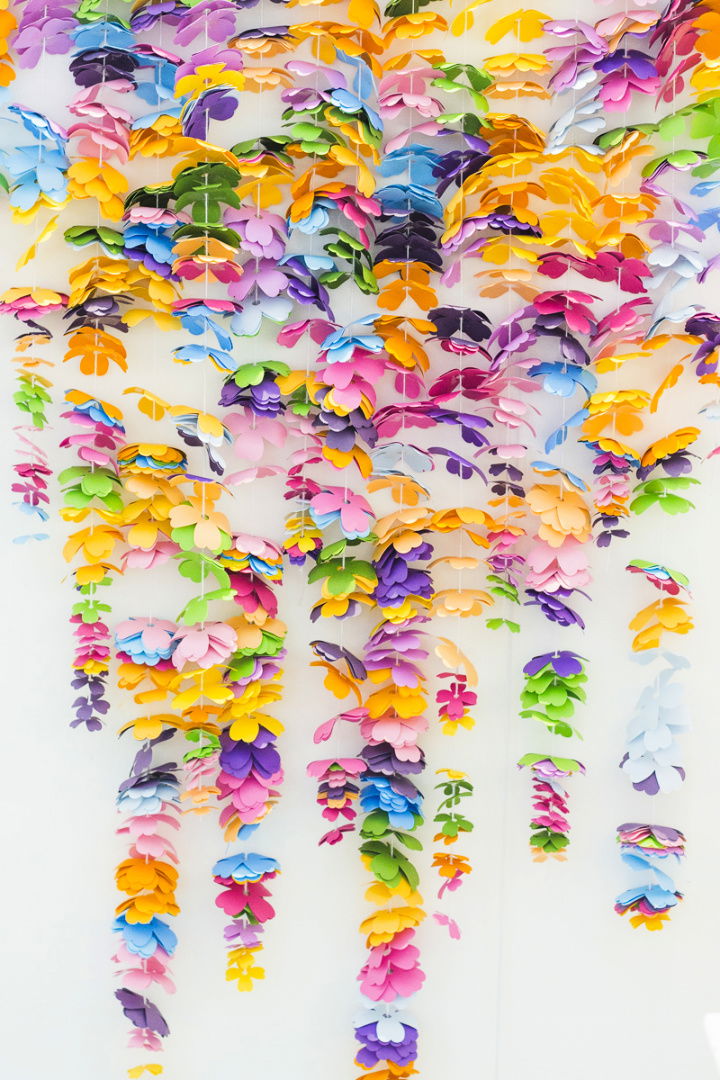
Looking to make a vibrant and eye-catching flower backdrop for your next event? Bespoke-bride: wedding blog Offers a step-by-step guide for crafting a DIY cascading flower backdrop that's perfect for weddings, photo booths, or any festive occasion.
This tutorial simplifies the process with clear instructions on using a Cricut Machine for cutting numerous colorful cardstock flowers, assembling them into strings, and setting up the backdrop to suit various spaces. Dive into this engaging DIY project to add a pop of color and a touch of handcrafted charm to your celebration.
3. How to Make a Greenery Wall Backdrop
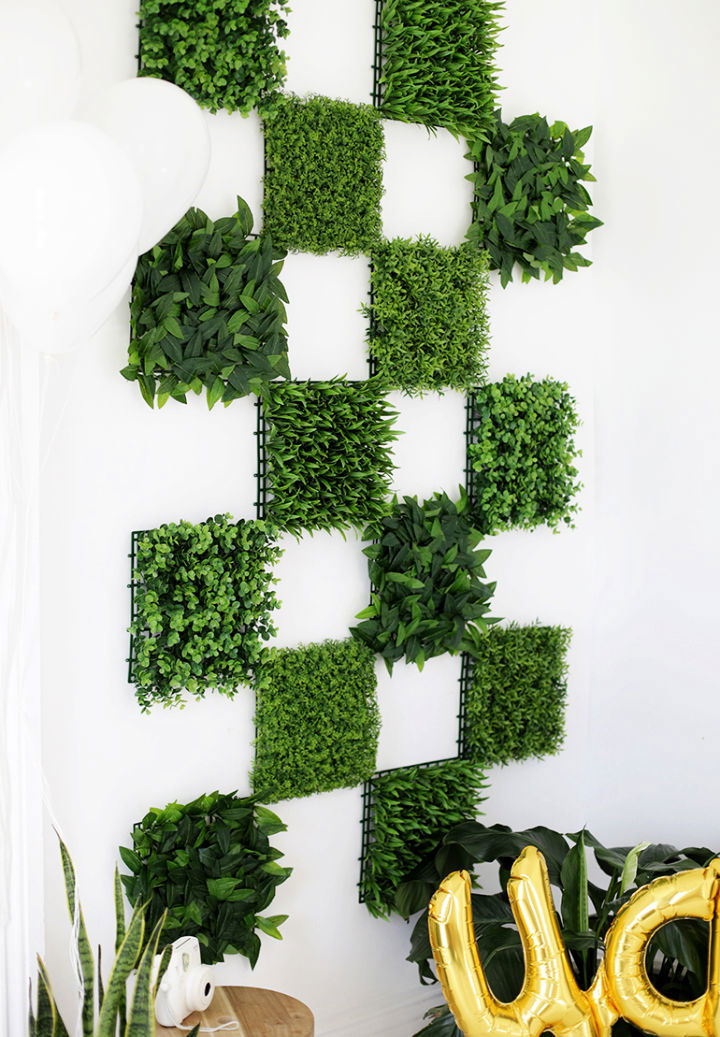
Transform any room into a lush oasis with a DIY greenery wall, a project that's both simple and striking. Perfect for sprucing up your gatherings, this wall also serves as an enchanting photo backdrop. The merrythought Guide lays out a straightforward process—gather your greenery mats, available at craft stores like michaels, and secure them with easy-to-remove command hooks.
Measure your space, arrange a pleasing pattern, and hang the mats to make an inviting botanical display. This delightful addition to your home is not just a visual treat but also a source of cherished memories, allowing guests to capture and take home snapshots of shared moments.
4. Wisteria Trellis Ceremony Backdrop
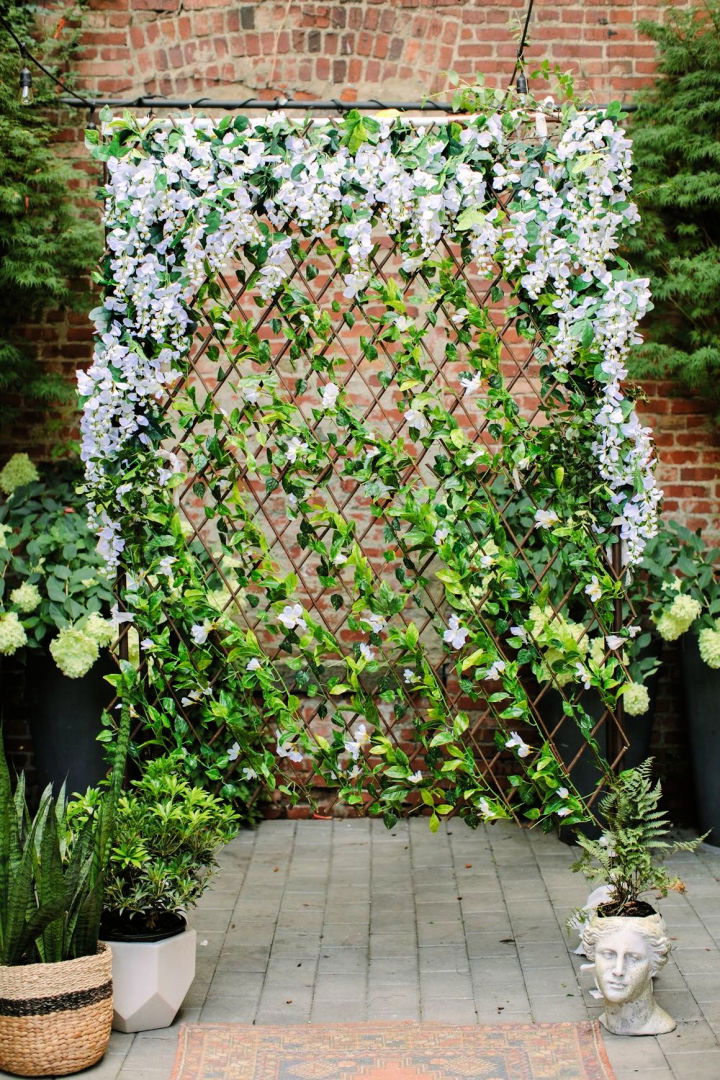
Ready to add a touch of elegance to your special day with a handcrafted wisteria trellis ceremony backdrop? Ruffled offers an inspiring guide that equips you with the know-how to make an affordable and stunning floral arrangement that's sure to impress your guests.
With clear instructions and a manageable materials list, including silk wisteria, PVC pipes, and common tools, you'll be on your way to crafting a beautiful, wind-resistant backdrop ideal for ceremonies, sweetheart tables, or even a photo booth. Emphasizing a balance between creativity and budget, this DIY project is designed to be simple enough for anyone to undertake, with room for customization to fit your wedding style. Dive into the step-by-step process and make a memorable feature for your celebration.
5. DIY Dyed Cheesecloth Backdrop
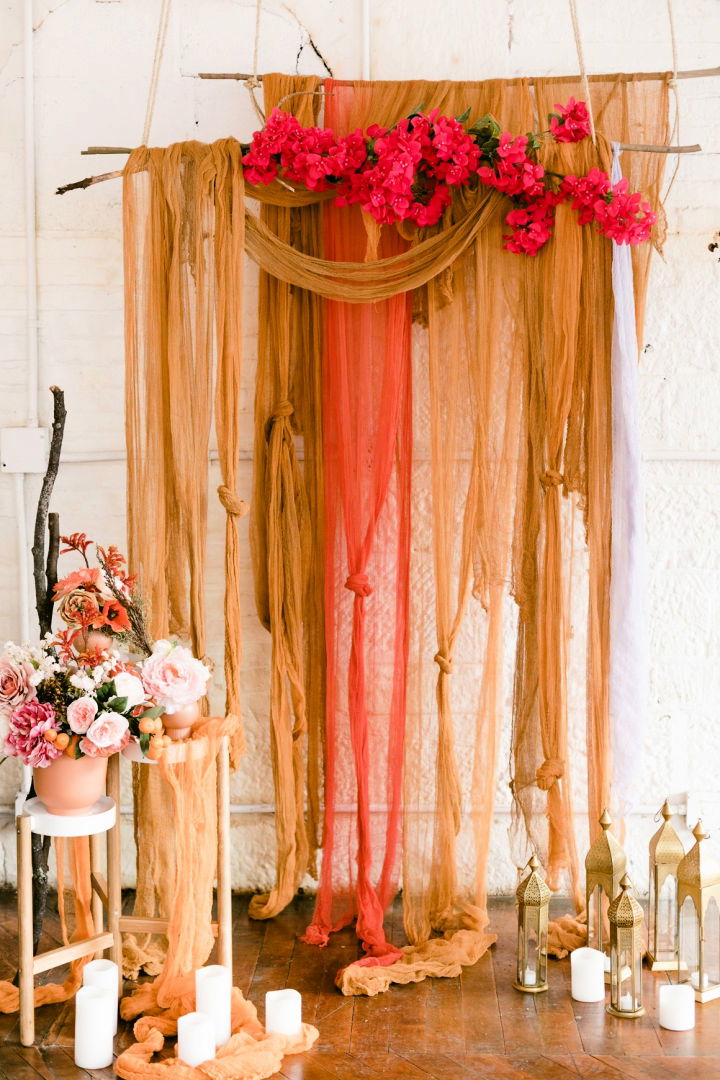
Transform your wedding space with the charm of a DIY cheesecloth backdrop, beautifully tinted with Rit Dye's extensive color palette. Ruffled provides a step-by-step guide to making this gauzy, sheer decor element that promises to add a touch of organic elegance to your special day.
With simple materials like cheesecloth, dye, and a few household items, you can customize the ambiance to fit your theme. From deep caramel tones to soft pastels, the dyeing process is straightforward and offers room for creativity. The final result? A stunning, handcrafted backdrop that enhances the romantic atmosphere of your wedding, effortlessly crafted by you.
6. How to Make an Arched Backdrop
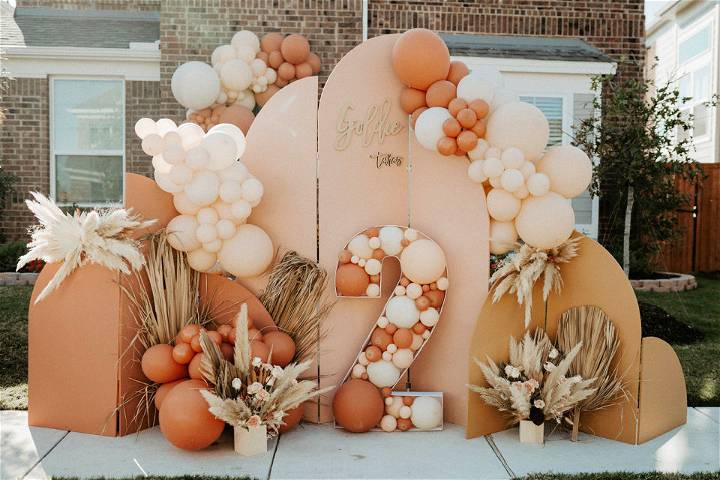
Transform any event space with a touch of personal flair using this DIY arched backdrop guide from Goldie Wylde. Step-by-step instructions lead you through making an elegant curved structure, perfect for photo ops or as a decor feature. All you need is a Pex tube for sketching curves, a sanded plywood panel, a trusty jigsaw for cutting, and a few more accessible materials.
Sanding and painting bring a polished finish, while hinges assemble the structure into a supportive and impressive display. Ideal for birthdays, weddings, or any celebratory occasion, your handcrafted backdrop will impress guests and set the scene for memorable moments.
7. DIY Tissue Paper Circle Photo Booth
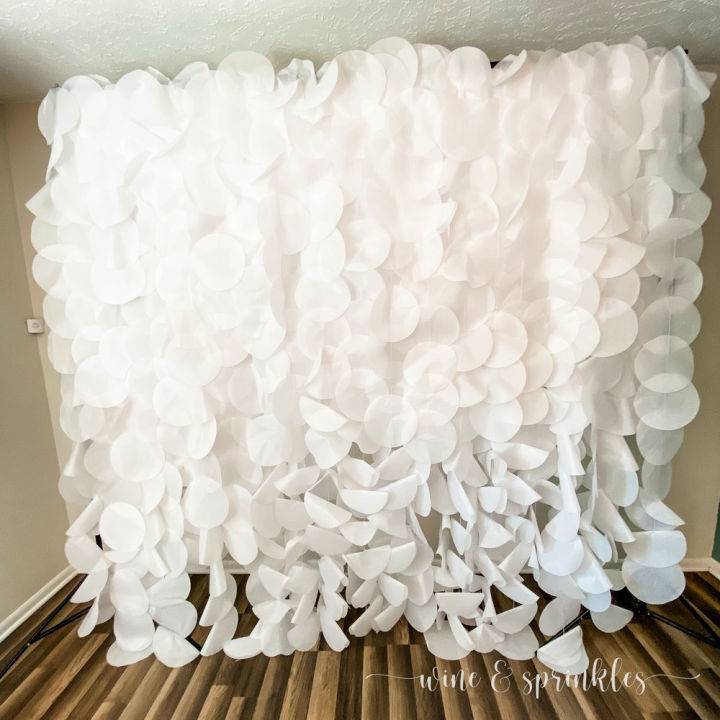
Making a tissue paper circle photo booth backdrop is a fun and cost-effective way to add pizzazz to your next event. At Wine & Sprinkles, you can learn how to assemble a vibrant and textured backdrop that's perfect for parties, showers, and more. Gather your tissue paper, string, and a photo booth frame to start crafting.
Cutting and gluing tissue paper circles onto string may be time-consuming, but the result is a reusable, charming decoration. The backdrop not only serves as a lively photo spot but also as a talking point for your guests. Follow the straightforward instructions to bring a personalized touch to your celebrations.
8. Homemade Photo Booth Backdrop
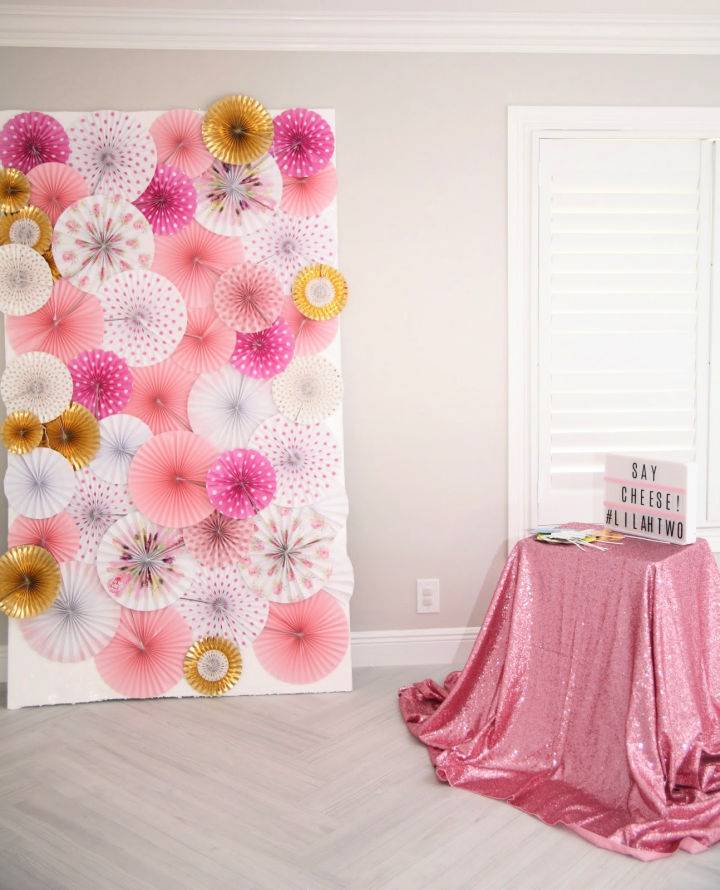
Making a photo booth backdrop can add a fun and personalized touch to any party. Celebration Stylist provides an easy-to-follow guide for crafting a stunning backdrop with just a few supplies from your local hardware store and some creative flair. To start, secure a foam insulation board as a sturdy base.
Attach an array of colorful hanging paper fans using hot glue for a vibrant and eye-catching design. Remember to let the fans overlap the board's edges for a seamless look. Enhance the party experience by setting up props near the backdrop, ensuring guests have a memorable time snapping photos. Follow these steps for a DIY photo booth that's sure to impress at your next event.
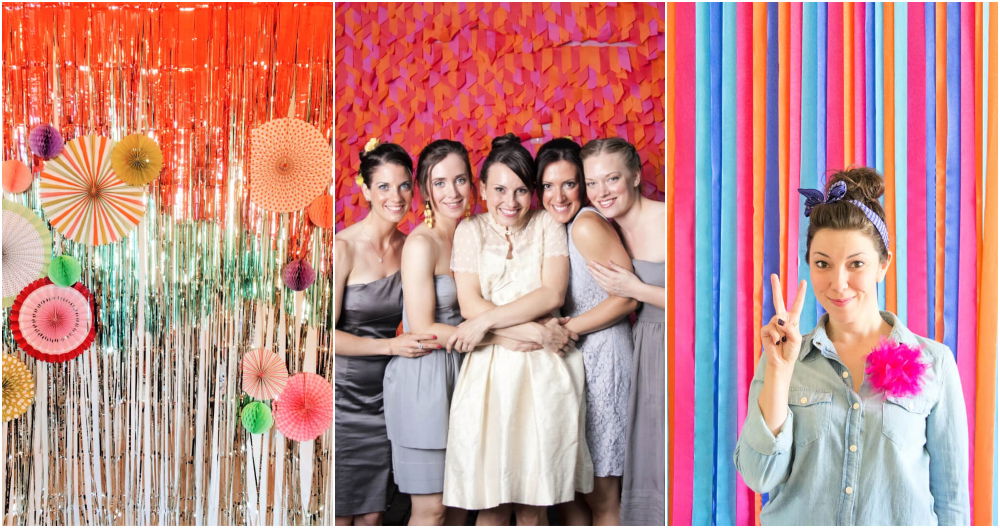
9. Easy DIY Fringe Backdrop
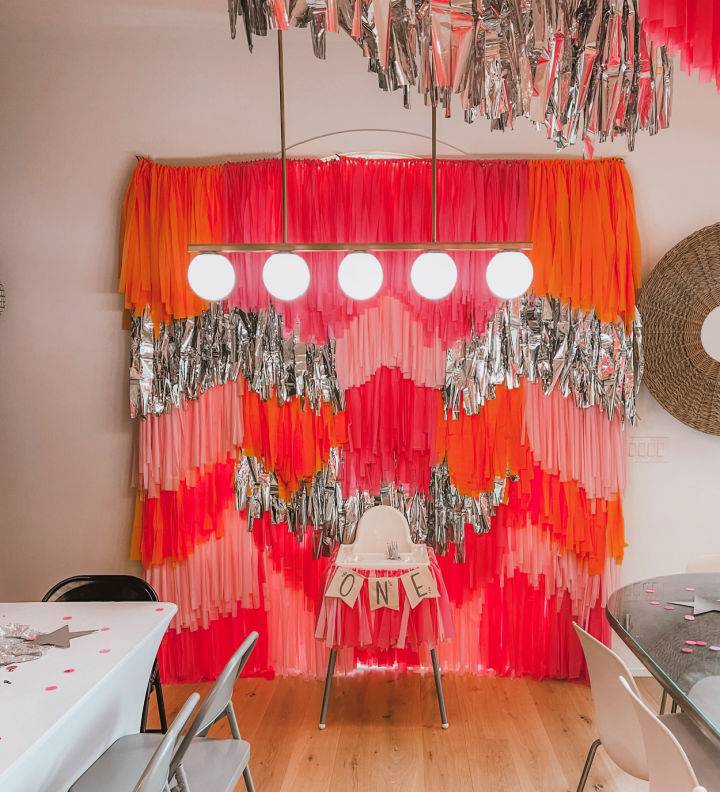
Make an enchanting DIY fringe backdrop to elevate your next event! Perfect for photo booths, dessert tables, or adding a splash of whimsy to any celebration, this backdrop is both simple and cost-effective.
You'll need crepe paper rolls or metallic foil curtains in your desired colors, scissors, clear tape, or a staple gun. Cut strips to your preferred length, layer them, and attach them to a rod or string. Hang it with care and watch as your space transforms, ensuring your guests are charmed and your photos pop with vibrancy and fun. Life with Mae
10. How to Make a Tablecloth Party Backdrop
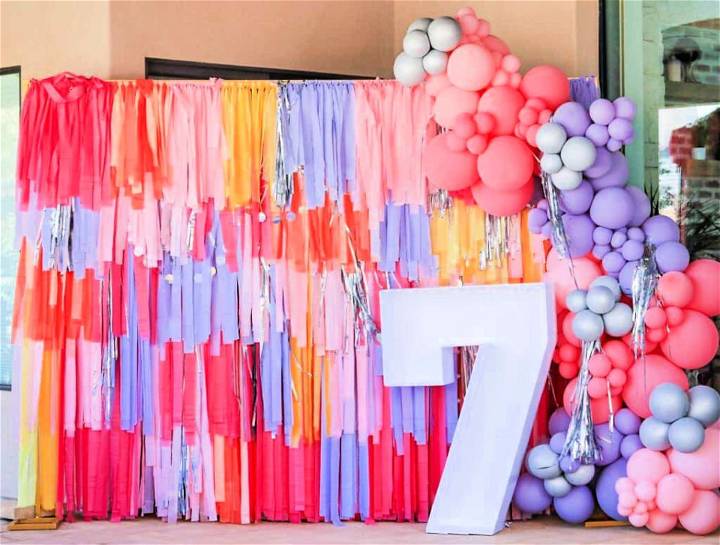
Step into the world of DIY with Sweet Red Poppy's guide on making a tablecloth party backdrop. Perfect for personalizing celebrations, this budget-friendly project transforms any event with a pop of color and texture. It's an ideal match for birthday parties, baby showers, or graduations. You'll need items like mesh fencing, tablecloths in various colors, and zip ties.
With a clear breakdown of supplies and costs, as well as alternative suggestions for backdrop stands, you'll be equipped to craft a stunning focal point for your next gathering. Plus, you can save money by crafting this yourself and potentially rent it out later. Follow our engaging, step-by-step tutorial to elevate your party décor game!
11. DIY Pinata Fringe Photo Backdrop
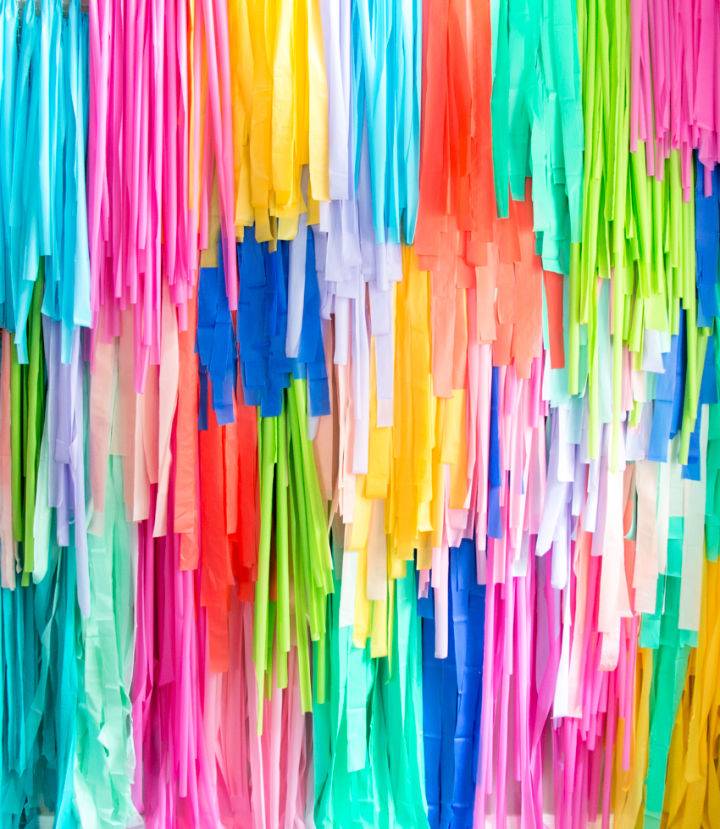
Transform your party space into a vibrant spectacle with a DIY pinata fringe photo backdrop! A Kailo Chic Life offers an engaging and easy-to-follow guide on making this colorful decoration. All you need are plastic table cloths and a piece of plastic fencing to start crafting a backdrop that matches your event's theme.
Cutting the cloths into strips and assembling them onto the fencing, you'll craft a playful and eye-catching piece perfect for guest photos. While it may require a few hours, the outcome is well worth the effort. Invite friends to join in the fun of making it, and your festive backdrop will come to life in no time. Get ready to elevate your celebration with a touch of handmade charm!
12. Make Your Own Fringe Backdrop
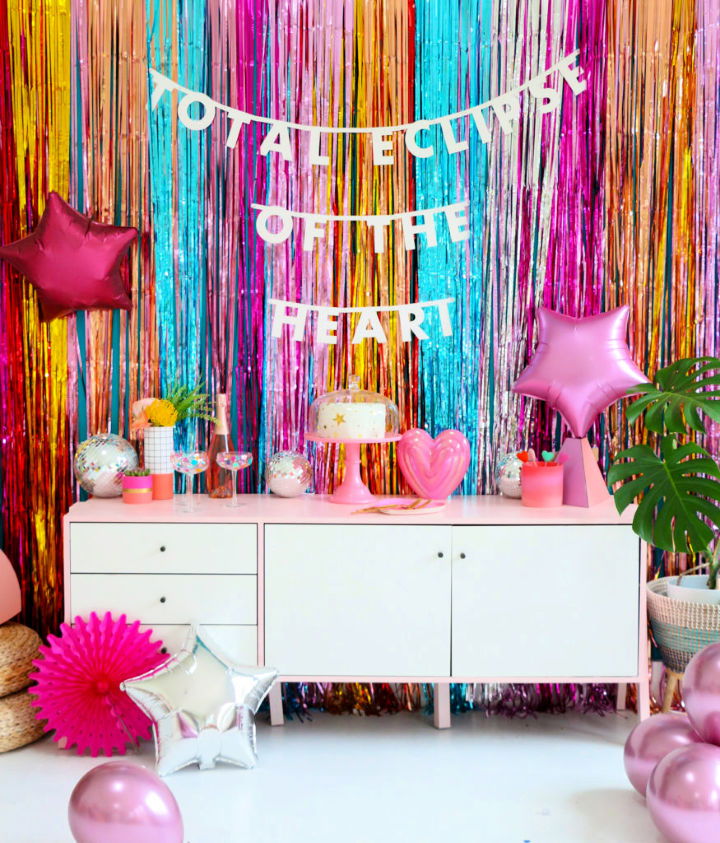
If you're aiming to add a dash of sparkle to your next celebration, A Kailo Chic Life's guide on making an easy fringe backdrop is a treasure trove of tips. Ideal for parties or photo sessions, this DIY project transforms spaces with a vibrant fringe curtain made from metallic streamers.
The process is refreshingly straightforward: simply cut the curtains into strips, adhere them in a layered pattern, and watch as the wall turns into a festive mosaic of color. Tailor the palette to match your theme, and in less than 30 minutes, you'll have a dazzling display ready to impress your guests. With clear, step-by-step instructions, it's never been easier to elevate your party decor with a handmade touch.
13. DIY Crepe Flower Wedding Backdrop
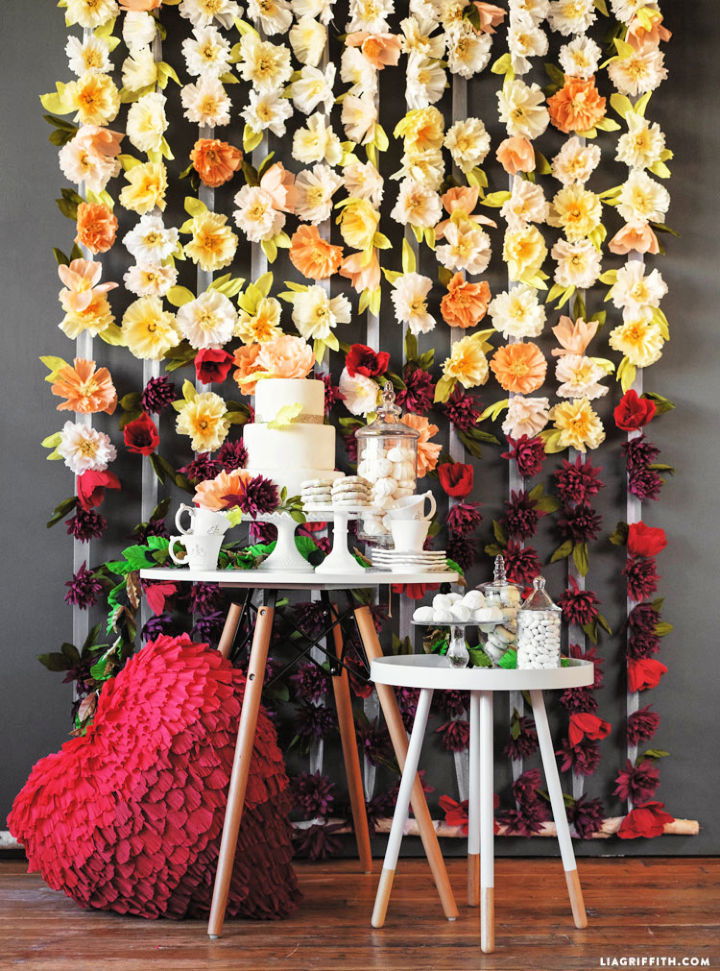
Planning a DIY wedding? Lia Griffith offers a stunning crepe flower wedding backdrop tutorial that's perfect for your special day. It's an easy-to-follow guide that allows you to make a beautiful, handcrafted decoration, tailored to your taste. From selecting your color palette to arranging the blooms, every step is designed to be user-friendly and enjoyable.
Once completed, the backdrop can become a cherished piece of decor in your home, evoking memories for years to come. Crafting these elegant flowers is a project that could also involve friends and family, making it a fun and collaborative effort. With Lia Griffith's tutorial, you're set to make your celebration uniquely memorable.
14. Make an Oversized Paper Chain Backdrop
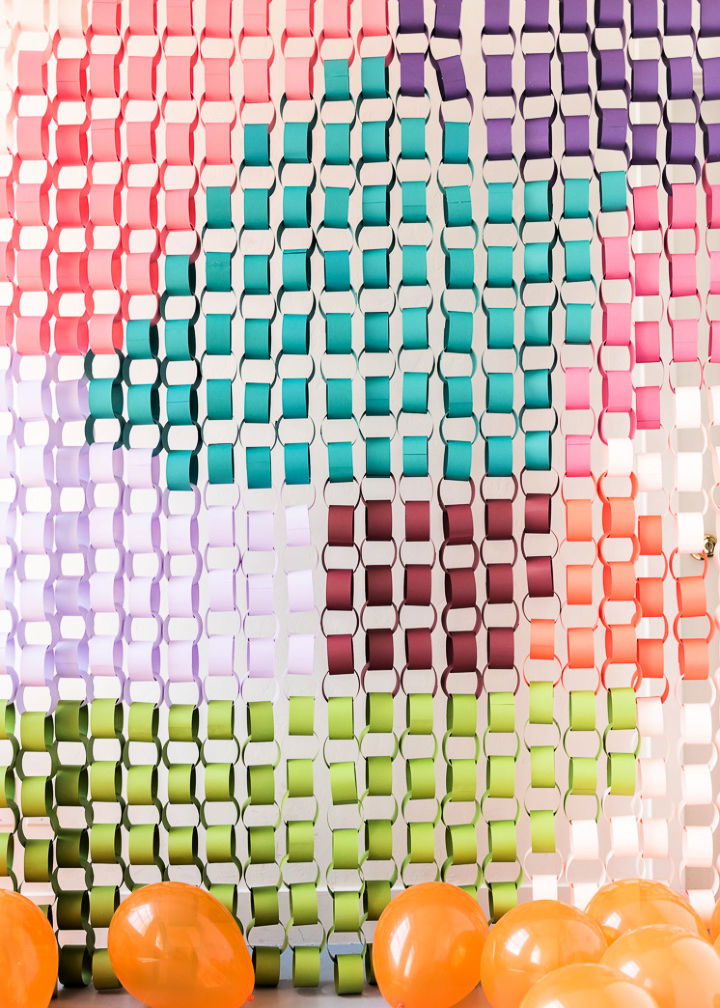
Make a stunning oversized paper chain mural with The house that lars built's easy-to-follow guide. Perfect as a party backdrop or a dynamic art piece for larger spaces, this craft project brings color and fun to any room. You'll need 12 x 12" cardstock in various colors, a paper cutter, and a hot glue gun.
Simply cut the paper into 11" by 2" strips, follow the provided graphic, and secure the strips with hot glue to form an interlocking chain. Hang your finished mural on a dowel, curtain rod, or directly from the ceiling to add a whimsical touch to your home decor. Get crafting and transform your space with this playful, oversized paper chain.
15. Homemade Mermaid Backdrop

Planning an under-the-sea-themed event? Dive into crafting a stunning DIY mermaid backdrop with jordan's easy entertaining tutorial. The guide is simple to follow and requires basic supplies like foam poster boards, cardstock, glue sticks, and a dash of glitter.
With a Cricut machine, you'll cut out beautiful mermaid scales and a centerpiece mermaid figure, layering them to make a dazzling effect. Ideal for outdoor or indoor parties, this backdrop will be a hit with guests and add a magical touch to your celebration. Visit Jordan's easy entertaining for the full step-by-step guide and more creative party ideas.
16. DIY Patterned Fan Backdrop
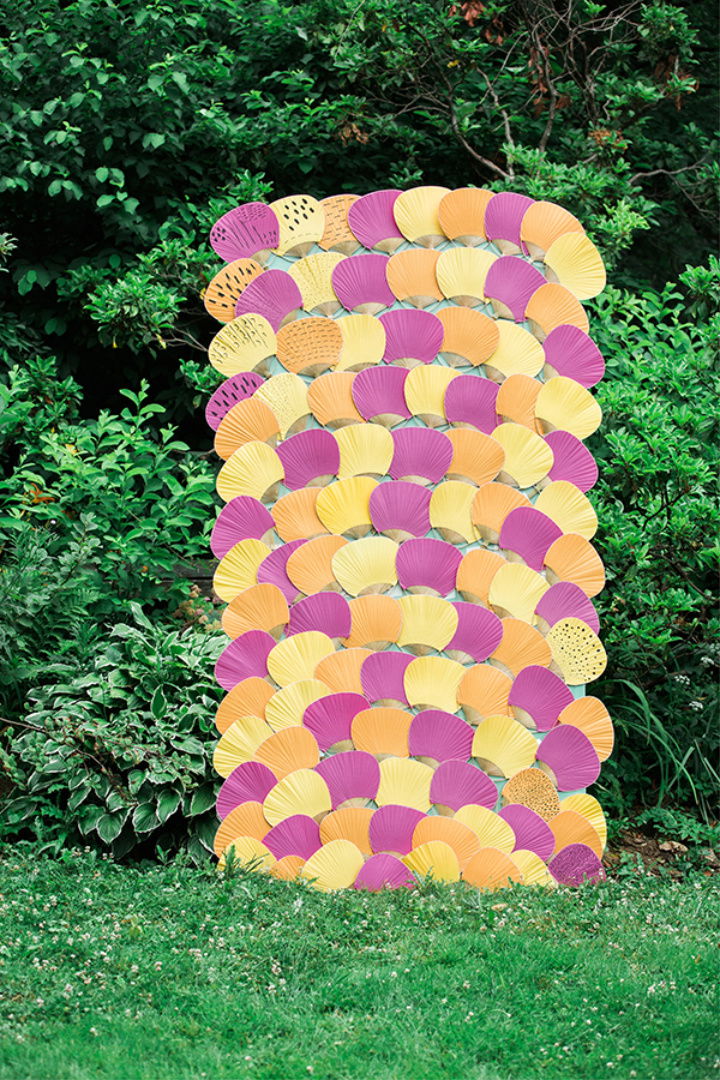
For a creative touch to summer wedding decor, learn how to craft a vibrant fan backdrop with inspiration from Ashley Goldberg's artwork. A dream team from New Jersey showcases an easy DIY project using bright paddle fans from Beau-coup, paired with common materials like foam board insulation and masking tape.
This step-by-step guide on Ruffled will help you add a personal and breezy flair to any event. With simple tools like scissors and markers, you can transform a space with this eye-catching piece, and for more wedding inspirations and supplies, Beau-coup is a handy resource. Keep it engaging and fun as you infuse your celebration with color and charm.
17. How to Make a Coffee Filter Wedding Backdrop
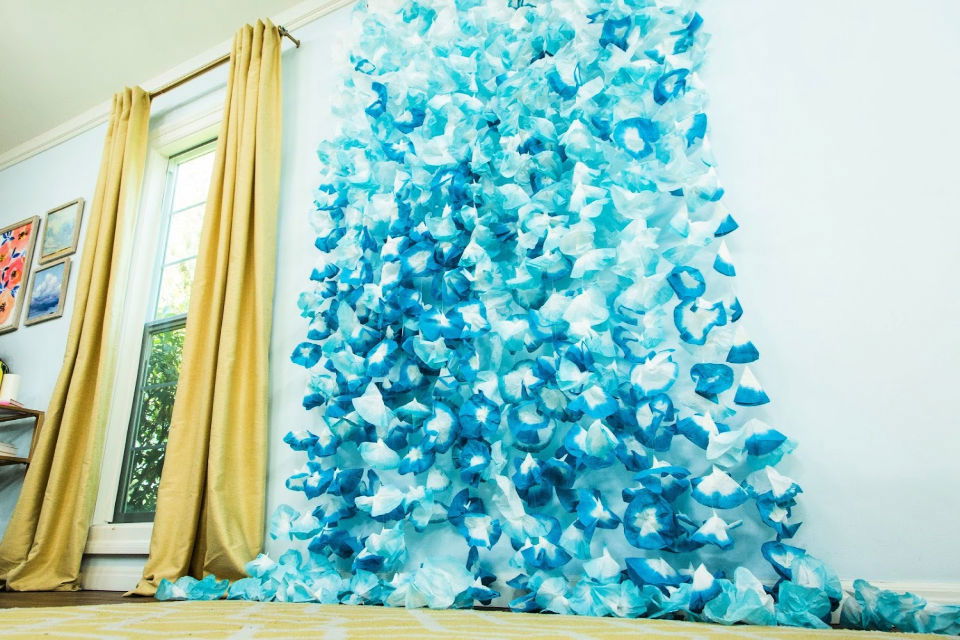
Make a charming wedding backdrop with Page Hemmis' DIY guide from Hallmark Channel. This craft transforms 900 coffee filters into an enchanting decorative piece for your special day. Start by dyeing batches of filters to match your wedding palette.
Once dry, thread each one onto the fishing line, securing with knots and adding small metal washers for weight. Attach the strands to a wooden board, and your backdrop is ready to hang! This easy-to-follow, step-by-step project adds a personal touch to your wedding ambiance, delighting guests and making memories that last a lifetime.
18. DIY Floral Wall Backdrop
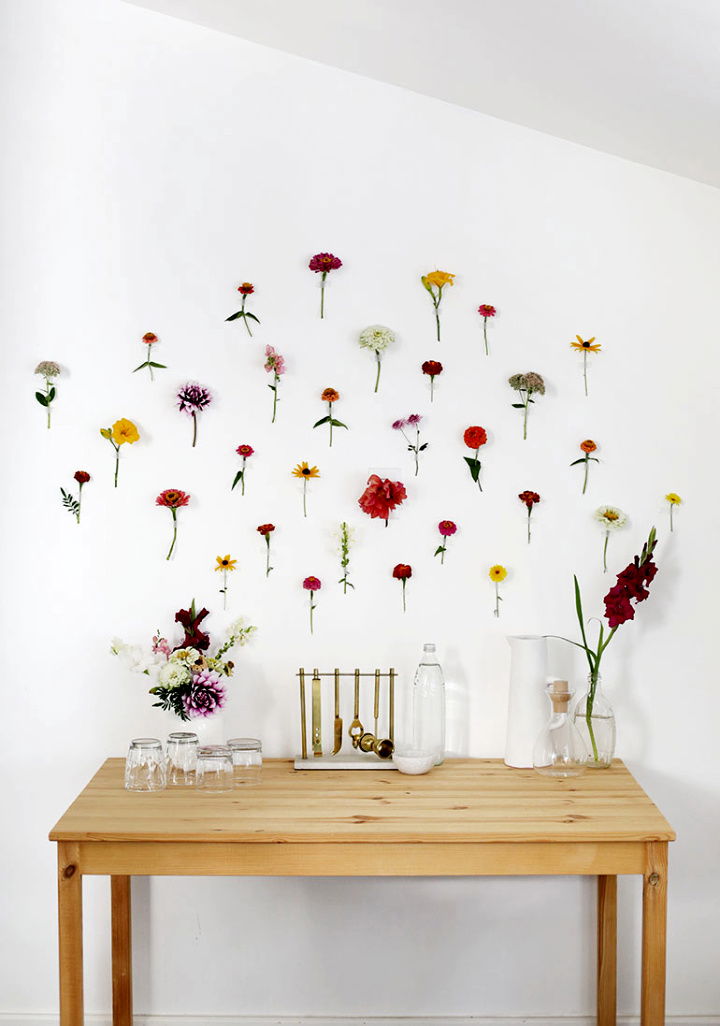
Make a stunning floral wall backdrop for any event with this easy-to-follow guide from The Merrythought. Perfect for showers, parties, or as a charming addition to your photo booth, this DIY project transforms any space with the beauty of fresh or faux flowers.
Grab some pruning shears, washi tape, and your choice of blooms to start crafting a picturesque setting. Dive into the video tutorial for detailed instructions and tips on putting together this eye-catching feature. Enhance your next celebration with a personal touch that's both simple and impactful.
19. DIY Ombre Magnolia Leaf Backdrop
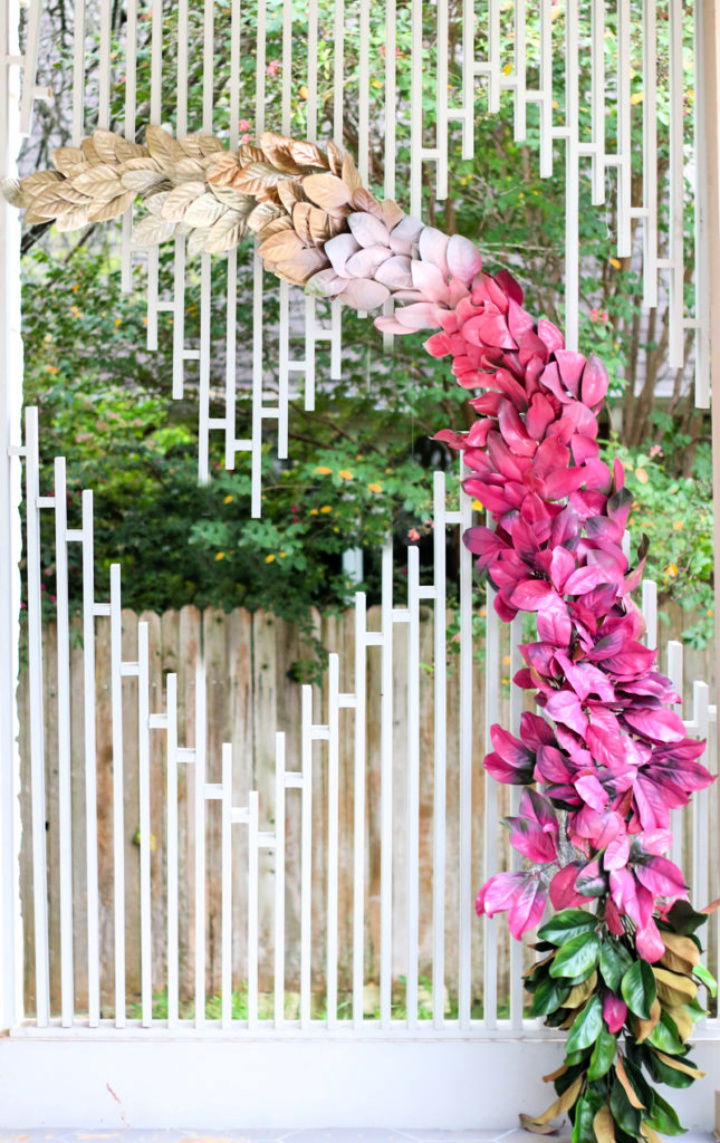
Make a magical backdrop for your special day with A Kailo Chic Life's DIY ombre magnolia leaf wedding backdrop guide. Perfect for adding a personal touch to wedding ceremonies, this project combines vibrant shades of pink and gold spray paint to transform faux magnolia leaves into a stunning visual element.
Follow simple, step-by-step instructions to assemble this eye-catching piece, learning to paint, arrange, and secure the leaves to an arch or trellis. Tailor the colors to match your theme and enjoy a one-of-a-kind decoration that's sure to enhance your wedding photos and leave a lasting impression on your guests.
20. Watercolor Paper Squares Backdrop
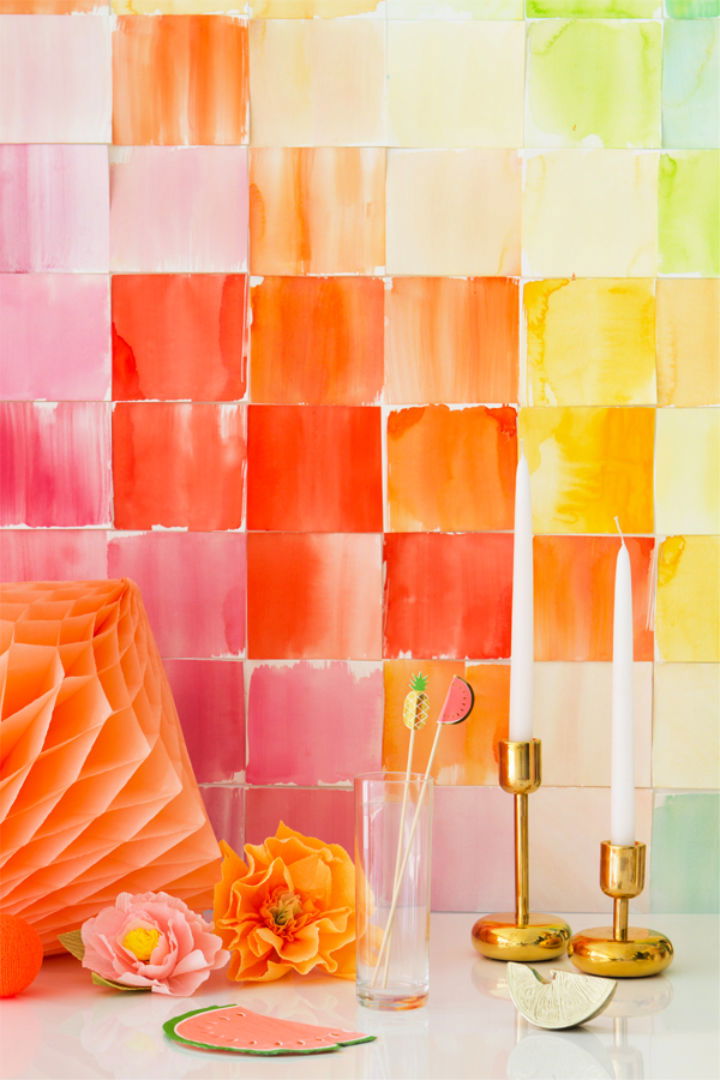
Making a vibrant watercolor paper squares backdrop is an ingenious and straightforward way to add a pop of color to your celebrations. Gather some cold-press watercolor paper, a sharp X-acto knife, and your favorite shades of watercolor paint. Begin by slicing the paper into small rectangles, then let your creativity flow as you paint each piece with broad, bold strokes.
Once dry, arrange the painted swatches in a gradient pattern for an eye-catching effect. Finally, secure the swatches to your wall using painter's tape, starting from the center and working outward. This DIY backdrop is perfect for enhancing a buffet display or jazzing up a photo booth, ensuring your party decor stands out with a personal, artistic touch. Oh Happy Day
21. Making an Under the Sea Bubble Backdrop
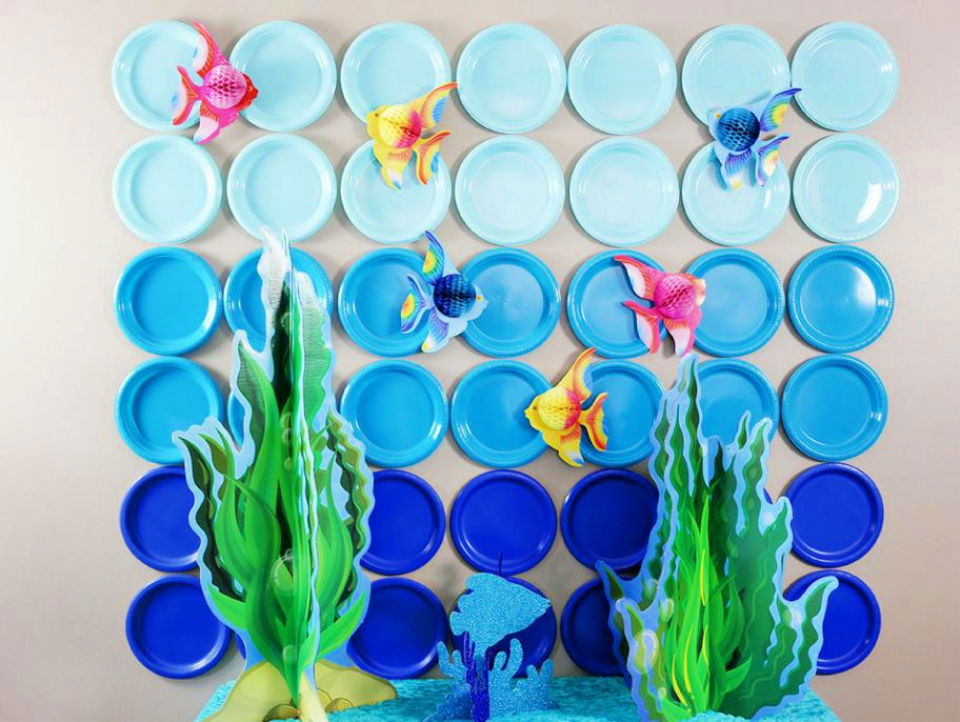
Transform your party space into an underwater wonderland with a DIY ombre bubble paper plate backdrop, as showcased on FUN365. The step-by-step guide ensures a straightforward process, utilizing cobalt blue, turquoise, and light blue dinner plates to make a captivating ombre effect.
To add whimsy, tropical fish decorations are interspersed, giving the illusion of a lively aquatic scene. Perfect for bubble guppies-themed parties or any sea-inspired gathering, this craft is both easy to assemble and conveniently disposable. Engage in this creative endeavor to elevate your event's ambiance with a handmade, sea-themed artistic touch.
22. DIY Omber Yarn Backdrop
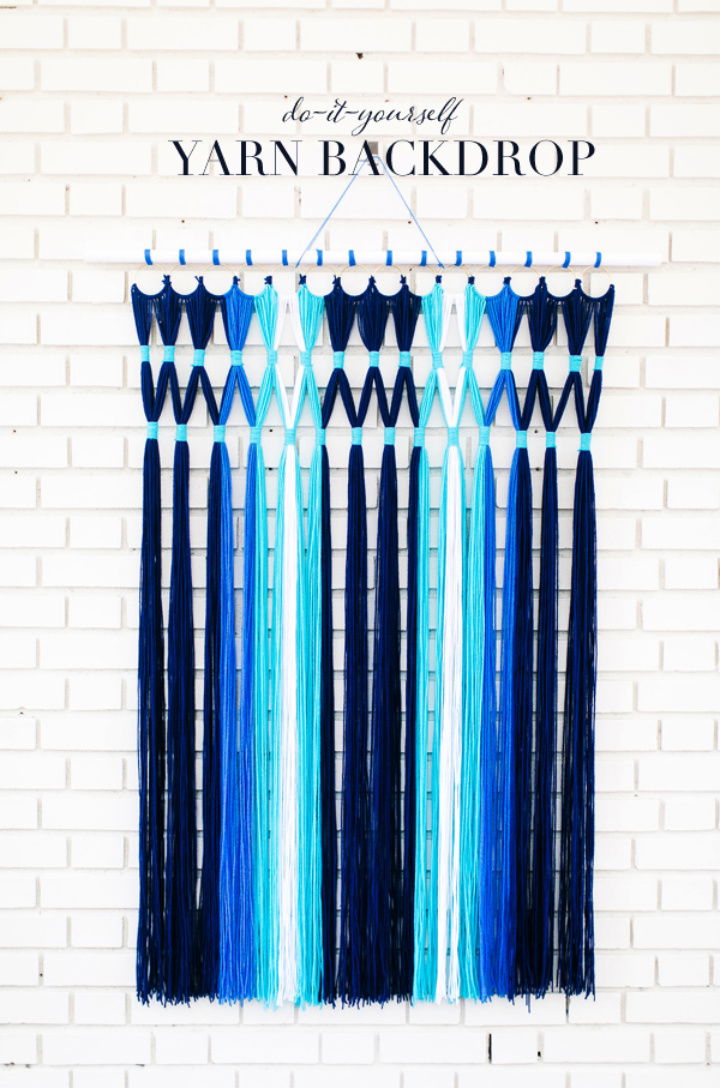
Making a stunning yarn backdrop is easier than you might think! Ruffled brings you a DIY guide to fashion a faux macramé decoration, perfect for sprucing up any event space or home interior. Gather some yarn, macramé rings, scissors, and a dowel to get started. You'll be tying knots, cutting yarn to length, and making a beautiful lattice design. With straightforward steps and a little bit of creativity, you can craft an eye-catching piece that adds a personal touch to your surroundings. So, grab your materials, and let's make something beautiful today!
23. DIY Paper Daisy Backdrop
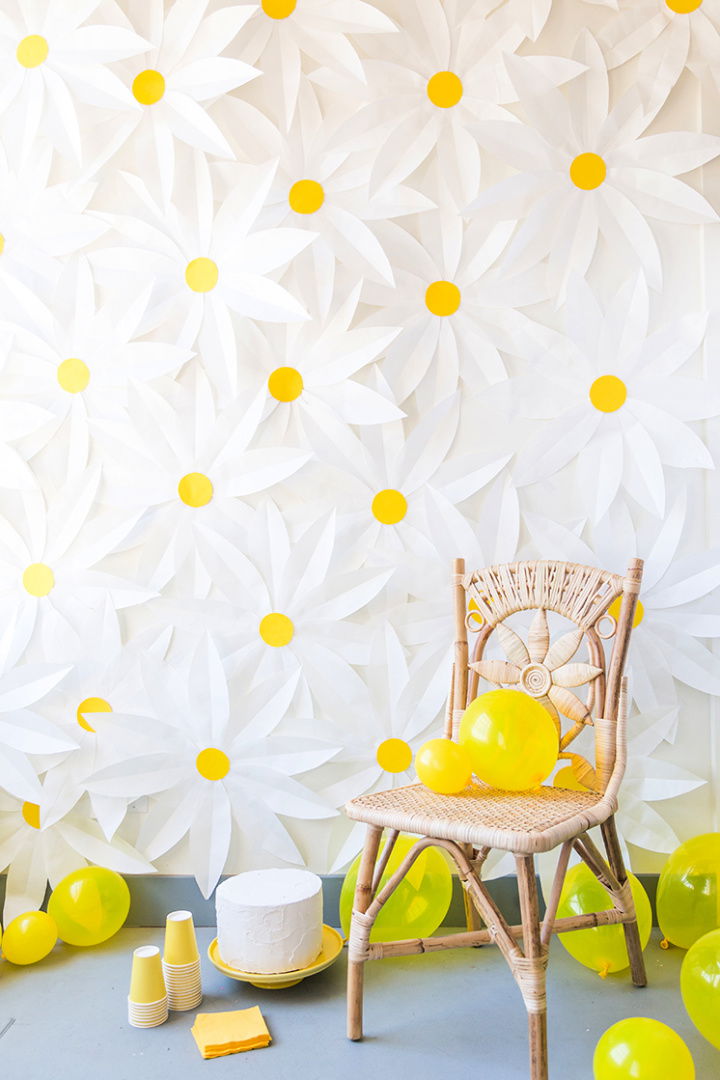
Make a charming summer fest backdrop with DIY paper daisies—a simple and cost-effective craft idea from The House That Lars Built. You'll need minimal supplies, such as white butcher paper, yellow cardstock, and a glue gun, to bring these blooms to life.
Follow the straightforward tutorial to cut and assemble the daisy petals, secure them with a hot glue gun, and affix a yellow center for a pop of color. Once your paper daisies are ready, use scotch tape to arrange them on your wall for an enchanting floral display. Perfect for parties or home decor, this craft is an easy yet stunning way to add a touch of handmade beauty to any space.
24. Floral + Greenery Backdrop
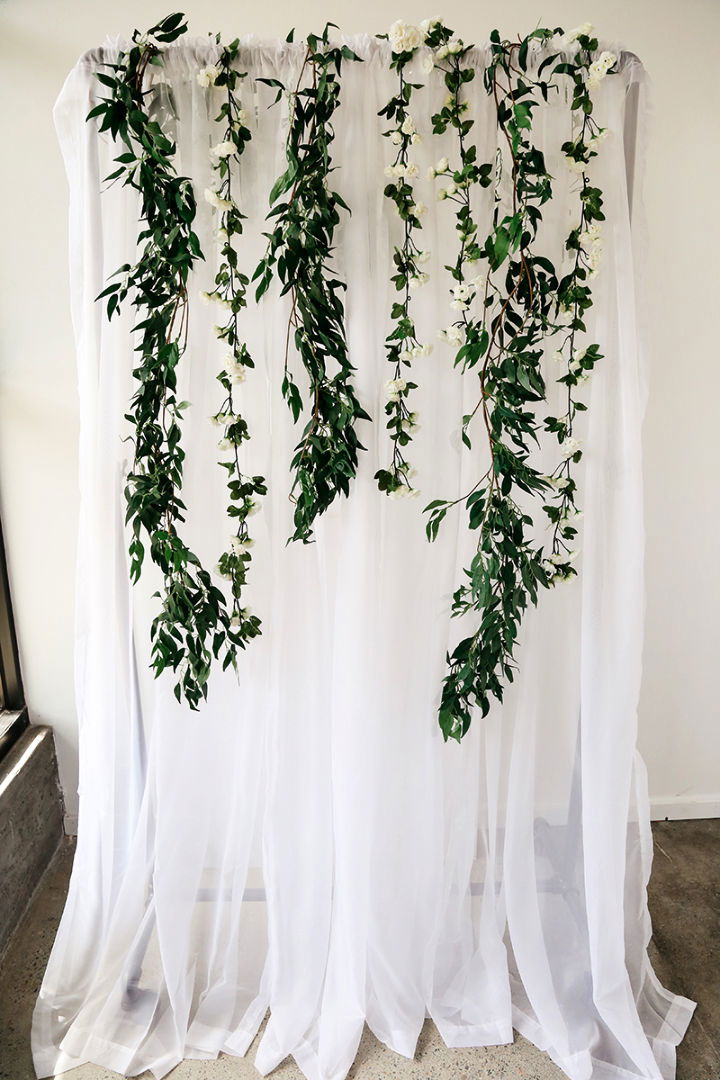
Elevate your special occasion with stylish DIY photo backdrops that bring life to every celebration. At Lulus.com Fashion Blog, we offer three chic, easy-to-make designs ranging from romantic floral and greenery settings to modern geometric patterns and shimmering metallic fringes.
These eye-catching backdrops not only enhance your party decor but also provide the perfect setting for guests to capture memorable photos. With clear instructions and a list of simple supplies, you can craft a personalized photo booth that adds a touch of charm to your festivities. Make your own beautiful photo backdrop and make your event truly unforgettable.
25. DIY Fresh Flower Wall Backdrop
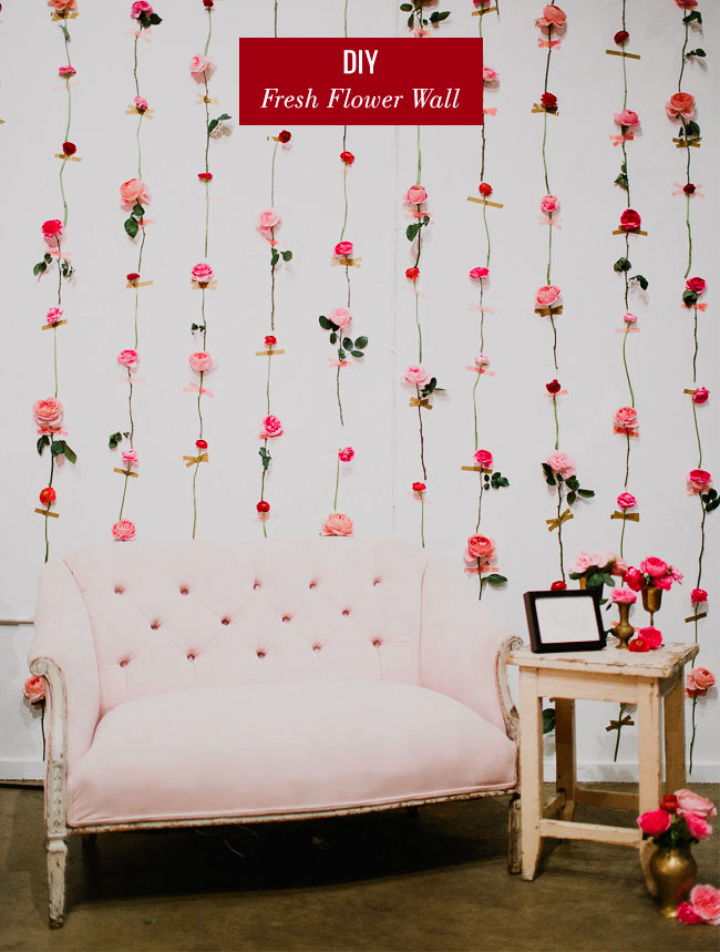
Make a stunning fresh flower wall with this easy-to-follow DIY guide from Green Wedding Shoes. Ideal for a ceremony backdrop or photo booth, the article outlines the essential materials, including hot pink ranunculus, garden roses, and washi tape, and provides practical tips for assembly and maintenance. Learn to strip stems, measure spacing, and effectively tape flowers for a whimsical, lasting display.
Transform your event with a beautiful, handcrafted floral arrangement that's sure to impress. With helpful hints like using stronger Scotch brand tape and hydrating blooms, your flower wall will be both gorgeous and durable. Dive into crafting with this engaging and informative tutorial that simplifies the process, ensuring a delightful outcome for your special occasion.
DIY Wedding: Planning your wedding can be tough. There are so many little details to keep track of, and you only get one chance. Get inspired with these quick and cheap DIY wedding ideas for everything from decorations to food to apparel.
Conclusion
In conclusion, exploring 25 easy DIY photo backdrop ideas for photography equips you with the tools and inspiration needed to elevate your photography or event. From crafting to assembly, each step is an opportunity to inject your personal style and creativity into your projects. This guide aimed to make the process approachable, ensuring you feel confident to tackle DIY backdrops regardless of your craft skill level. Remember, the perfect backdrop is key to capturing breathtaking photos or making memorable event atmospheres. So, why wait? Start making your standout backdrops today and watch your photographic visions come to life.


