Transforming your backyard into a kid-friendly oasis doesn't have to break the bank. I recently took on the challenge of making a fun, safe and engaging outdoor space for my three kids. This DIY backyard playground project became more than just an adventure—it became a lesson in creativity, resourcefulness, and finding joy in simple things. If you're looking to revamp your backyard for your little ones, here's my experience step-by-step, packed with tips and tricks to help you build an outdoor play area that's both budget-friendly and loaded with fun.
Why Build a Kids' Play Area in Your Backyard?
When the weather starts to warm up, nothing beats the joy of sending the kids outside to play. As a mom of three—ages 1.5, 7, and 12—I can tell you that finding activities that all three kids enjoy is like hitting a moving target. But having a dedicated backyard play area tailored to their varying interests and ages has been a game-changer. A good backyard setup encourages outdoor play, sparks imagination, and—let's be real—gives parents a much-needed break from the constant chorus of, “Mom, I'm bored!”
Goals for the Backyard Makeover
When planning this makeover, I knew I wanted a space that was:
- Safe: Especially for my adventurous toddler who is constantly exploring.
- Engaging: Something that would appeal to all three of my kids, even with their different interests.
- Organized: A designated area for toys and activities to keep things from getting scattered across the yard.
- Contained: A fenced-in space to keep my youngest safely within view.
- Budget-Friendly: I needed to build this space without spending a fortune.
Step by Step Instructions
Make a fun and safe DIY backyard playground with our step-by-step guide. Learn how to gather essentials, set the foundation, and build play structures!
Step 1: Gathering the Essentials
I partnered with Cway, a fantastic online retailer that specializes in unique kids' furniture and decor, to bring this vision to life. They provided some key pieces that set the foundation for this project, including:
- A Kid-Sized Picnic Table with an Umbrella: Perfect for outdoor snacks and crafts.
- A Mud Kitchen: Ideal for imaginative play, especially for my 7-year-old.
- A Zipline: A thrilling addition for my older kids.
- Snap-Together Decking Tiles: Easy to install and great for keeping areas clean and mud-free.
Why I Chose These Items
From my experience, having a mix of different play structures and accessories helps keep kids of various ages entertained. The zipline, for instance, was a wild addition, but it has been a huge hit, especially with the older kids. Meanwhile, the mud kitchen has been a creative outlet for my middle child, who loves pretend play and making “soups” out of leaves and water.
Step 2: Setting the Foundation
The first thing I needed to do was clear out an area in the backyard. I chose a spot that was relatively flat and close to the house, which is important for keeping an eye on the little ones.
- Clear and Level the Area: I cleared away debris, rocks, and anything else that could be a tripping hazard. With my 1.5-year-old being so active, I wanted to minimize any dangers.
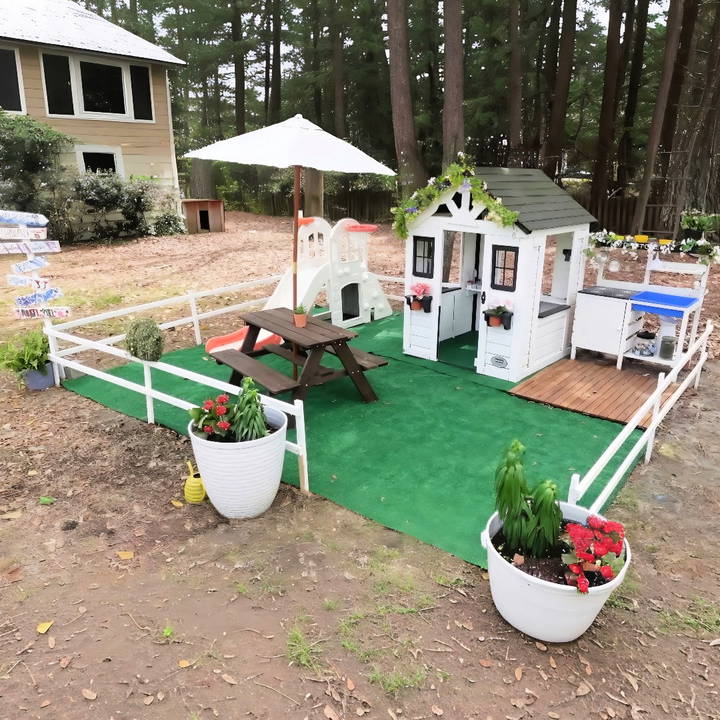
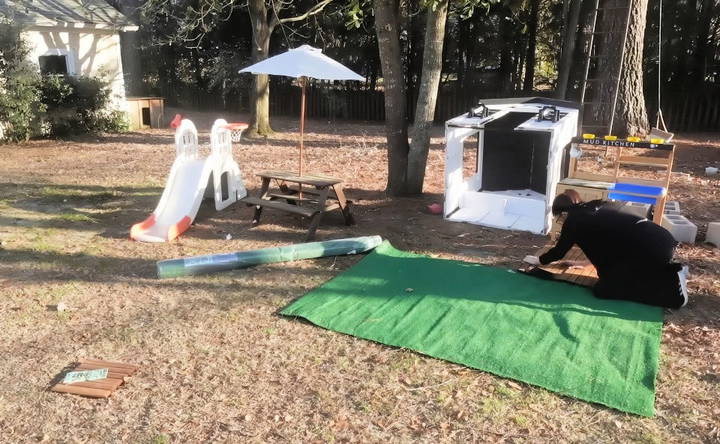
- Lay Down Turf: I decided to use artificial turf for the main play area. It's easy to clean, soft underfoot, and prevents the dreaded “muddy mess” scenario.
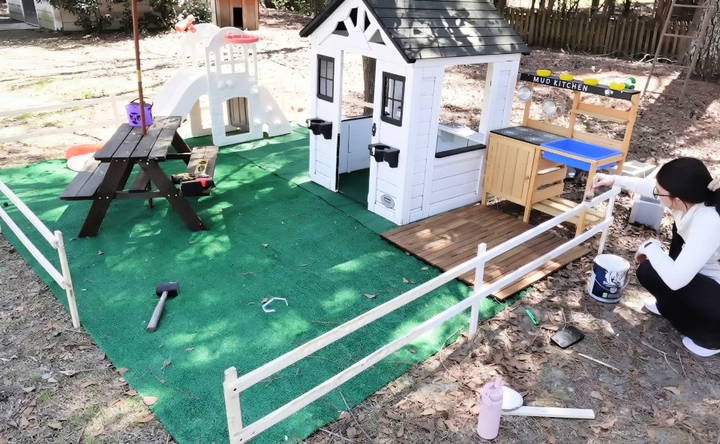
- Install the Decking Tiles: The snap-together decking from Cway was perfect for making a raised, dry area for the mud kitchen. It took some moving around to get the layout just right, but it was worth it. This setup prevents water from pooling and turning into a muddy disaster.
Pro Tip: Planning and Flexibility
Don't expect to get it right on the first try. I spent a good amount of time moving things around, trying different layouts. It's part of the process. Don't let social media fool you—making an ideal layout takes time and patience!
Step 3: Building and Assembling the Play Structures
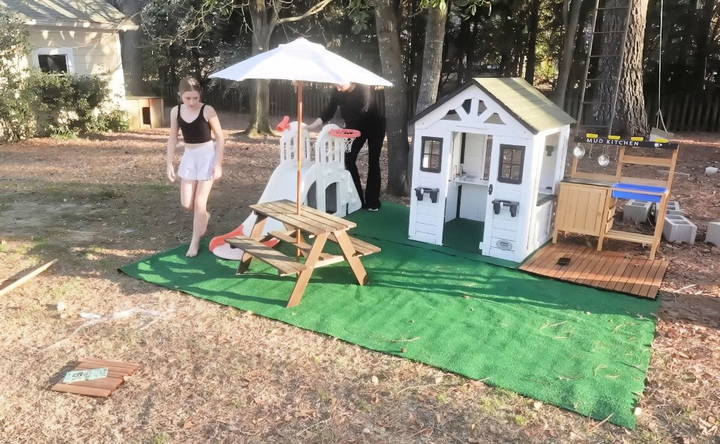
Next came the fun part—building the various play structures! My husband and I spent a weekend putting everything together. I won't lie—there were moments of frustration, especially with some parts being tricky to assemble, but we powered through.
- Set Up the Picnic Table and Mud Kitchen: These were relatively straightforward to assemble. I also painted the mud kitchen white to match the overall aesthetic. Using outdoor fence paint should help it withstand the elements.
- Installing the Zipline: Now, this was an adventure! After some trial and error (and a very humbling moment where it didn't hold my weight the first time), we finally got it set up securely. The kids love it, and it has become a central feature of our backyard.
- Creating a Simple Fence: To keep the play area contained, I decided to build a simple fence using 1x2s. It was an affordable option that cost less than $40. We painted it white to match the rest of the setup, and it's sturdy enough to withstand the occasional bump or grab from a child.
Step 4: Adding the Finishing Touches
Once the main structures were in place, it was time for my favorite part—decorating and adding those final touches that bring the whole area to life.
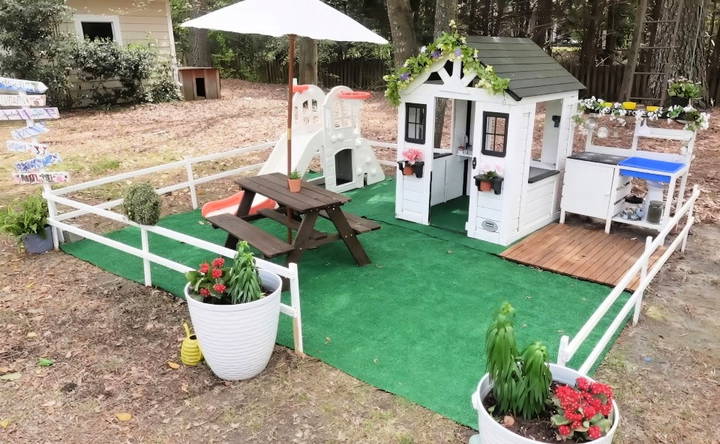
- Add Flowers and Decorative Elements: Since it's spring, I added some colorful flowers and greenery around the area. I'm already planning how I'll decorate for different seasons!
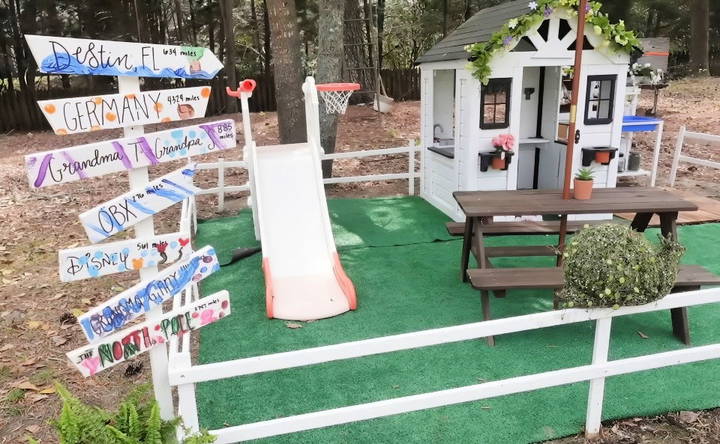
- Build a Direction Sign Post: I made a cute little signpost pointing to various family members' homes and fun places like “Disney World” and “The North Pole.” It was a fun, personal touch that the kids helped decorate.
- Accessorize the Playhouse and Mud Kitchen: Adding a flowery garland, some jars filled with faux flowers, and other little touches made these spaces feel magical and inviting.
Keeping the Area Clean
One of the best decisions I made was choosing turf for easy cleanup. A quick once-over with a leaf blower keeps it looking fresh and clean!
Step 5: The Outcome—Do the Kids Actually Use It?
After all the planning, building, and decorating, you might wonder if the kids actually use the space. The answer is a resounding yes! To my surprise, all three of my kids, despite their age differences, have been spending a lot of time in this new play area. The zipline has brought my older two closer together, and they've been having a blast. My toddler loves the mud kitchen and exploring the space safely within the fence.
Interactive and Educational Elements
Creating a backyard playground that is both fun and educational can greatly benefit children's development. Here are some ideas to incorporate interactive and educational elements into your playground:
Learning Through Play
- Chalkboard Wall: Install a chalkboard wall where kids can draw, write, and practice their letters and numbers. This encourages creativity and helps with fine motor skills.
- Mini Garden: Set up a small garden area where children can plant flowers, vegetables, or herbs. This teaches them about nature, responsibility, and the basics of gardening.
Sensory Play
- Water Table: A water table can provide hours of fun and learning. Kids can explore concepts like volume, buoyancy, and cause and effect while playing with water.
- Textured Paths: Build paths with different textures such as pebbles, sand, and grass. Walking on these paths can enhance sensory experiences and improve balance and coordination.
Science and Nature
- Bug Hotel: Build a bug hotel to attract insects. This can be a great way for kids to learn about different types of bugs and their habitats.
- Weather Station: Set up a simple weather station with a thermometer, rain gauge, and wind vane. Children can record daily weather conditions and learn about meteorology.
Creative Arts
- Art Station: Provide a space with easels, paints, and other art supplies. Encourage kids to express themselves through painting and drawing.
- Music Wall: Build a music wall with pots, pans, and other items that make noise. This can help children explore different sounds and rhythms.
Physical Activities
- Obstacle Course: Design an obstacle course with various challenges like tunnels, balance beams, and climbing structures. This promotes physical fitness and problem-solving skills.
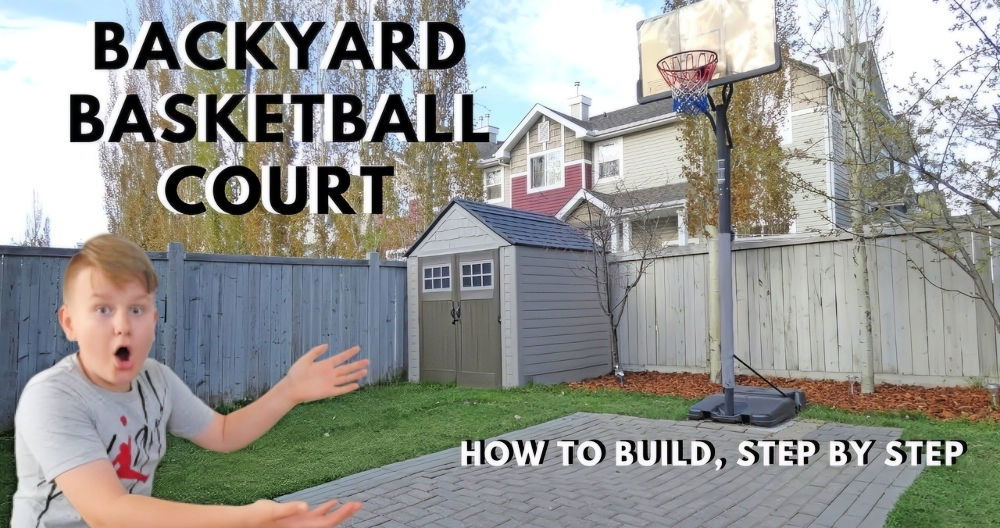
- Sports Area: Include a small area for sports like soccer, basketball, or even a mini-golf course. This encourages teamwork and physical activity.
Cognitive Development
- Puzzle Corner: Set up a corner with different types of puzzles and brain games. This can help improve problem-solving skills and cognitive development.
- Storytelling Area: Build a cozy corner with books and seating where kids can read or listen to stories. This fosters a love for reading and enhances language skills.
Integrating interactive educational elements makes a playground fun and aids learning and development, making helpful and user-friendly content.
Seasonal Play Ideas
Creating a backyard playground that adapts to different seasons can keep kids engaged and active all year round. Here are some ideas to make your playground fun and safe, no matter the weather.
Summer Fun
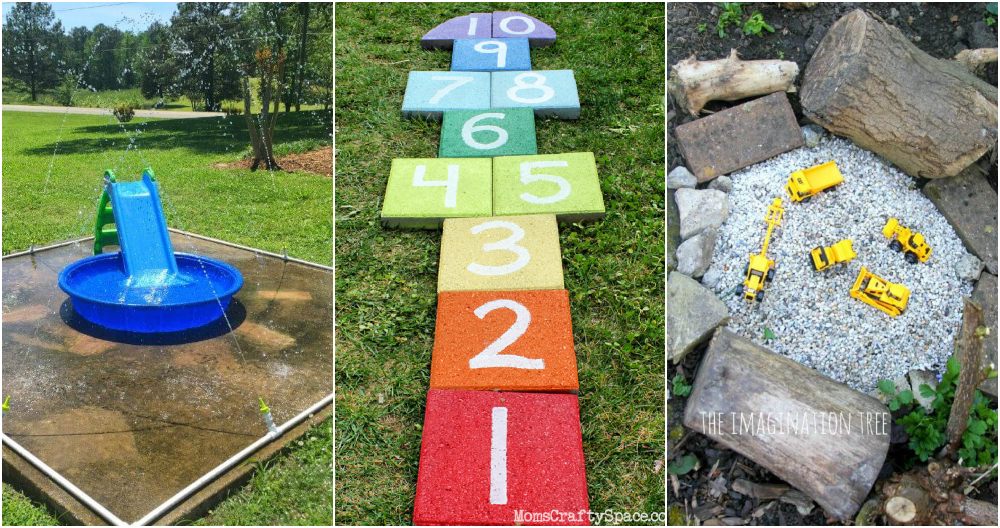
- Water Play: Set up sprinklers or a DIY splash pad. Kids can cool off and have fun with water games. Ensure the area is slip-resistant to prevent accidents.
- Shade Solutions: Install shade sails or umbrellas to protect children from the sun. This makes the playground usable even during the hottest parts of the day.
- Outdoor Crafts: Build a craft station with summer-themed activities like painting rocks or making leaf prints. Use washable materials for easy cleanup.
Autumn Activities
- Leaf Pile Jumping: Rake leaves into big piles for kids to jump into. This simple activity provides hours of fun and helps with yard cleanup.
- Nature Scavenger Hunt: Organize a scavenger hunt for items like acorns, pinecones, and colorful leaves. This encourages kids to explore and learn about nature.
- Pumpkin Decorating: Set up a pumpkin decorating station. Use non-toxic paints and markers for a safe and creative activity.
Winter Wonderland
- Snow Play: If you live in an area with snow, build a snow play zone. Build snowmen, have snowball fights, or make snow angels. Ensure kids are dressed warmly and take breaks to avoid frostbite.
- Ice Skating Rink: If space allows, build a small ice skating rink. This can be a fun and unique winter activity. Always supervise children and ensure the ice is thick enough to be safe.
- Winter Crafts: Set up a sheltered area for winter crafts like making bird feeders or decorating pinecones. Use materials that can withstand cold temperatures.
Spring Adventures
- Gardening Projects: Spring is a great time to start a garden. Kids can plant flowers, vegetables, or herbs. This teaches them about growth and responsibility.
- Bug Hunting: Provide magnifying glasses and bug containers for kids to explore insects. Teach them about different bugs and their roles in the ecosystem.
- Rainy Day Fun: Set up a covered area with activities like painting or building with blocks. Use waterproof materials to keep everything dry.
General Tips for All Seasons
- Safety Checks: Regularly inspect playground equipment for wear and tear. Make necessary repairs to ensure everything is safe.
- Weather-Appropriate Clothing: Encourage kids to dress appropriately for the weather. This includes hats and sunscreen in summer, and warm layers in winter.
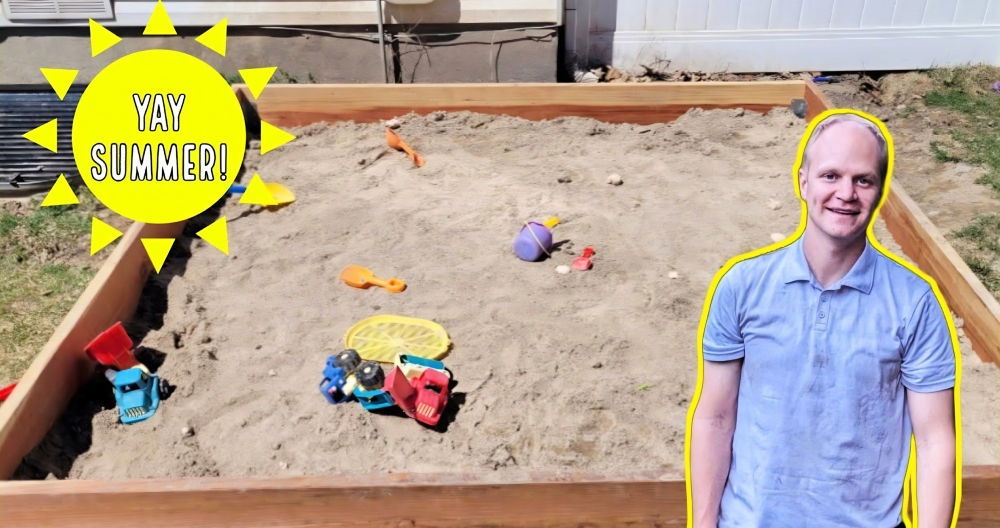
- Flexible Play Areas: Design play areas that can be easily adapted for different activities. For example, a sandbox can be covered and used as a craft table in winter.
Incorporate seasonal ideas to keep your playground fun and educational year-round.
FAQs About DIY Backyard Playgrounds
Discover all you need to know about DIY backyard playgrounds with these essential faqs, ensuring a fun and safe play area for your kids.
The time required to build a DIY backyard playground depends on the complexity of the design and your experience level. For a basic setup, it might take 1 to 2 weekends. More elaborate designs with multiple features could take several weeks.
Absolutely! One of the benefits of a DIY playground is the ability to customize it to fit your specific space and needs. You can adjust the size, shape, and features to make the best use of your backyard. Consider making a layout plan before starting to ensure everything fits well.
To make your playground more exciting, consider adding:
Zip Line: For a thrilling ride.
Treehouse: A fun hideaway for kids.
Water Features: Like a splash pad or water table.
Obstacle Course: For physical challenges.
Musical Instruments: Outdoor xylophones or drums for creative play.
A DIY backyard playground can be tailored to suit various age groups:
Toddlers: Include low slides, sandboxes, and simple swings.
Preschoolers: Add climbing structures, small rock walls, and interactive features.
Older Kids: Incorporate more challenging elements like zip lines, taller slides, and obstacle courses.
Involving your kids can make the project more fun and educational:
Design Input: Let them help design the layout and choose features.
Simple Tasks: Assign age-appropriate tasks like painting or handing you tools.
Safety Lessons: Teach them about safety and the importance of regular maintenance.
Final Thoughts
Creating this backyard play area was more than just a project; it was about giving my kids a place to explore, imagine, and play freely. The space is functional, fun, and—most importantly—gets my kids outside more often. It's not just about having a pretty yard; it's about making memories.
I encourage you to get creative with your own backyard space. Whether you have a small or large yard, there are always ways to add a touch of magic that can make all the difference for your kids. Remember, it doesn't have to be perfect or expensive; it just needs to be a place where your kids can be themselves.


