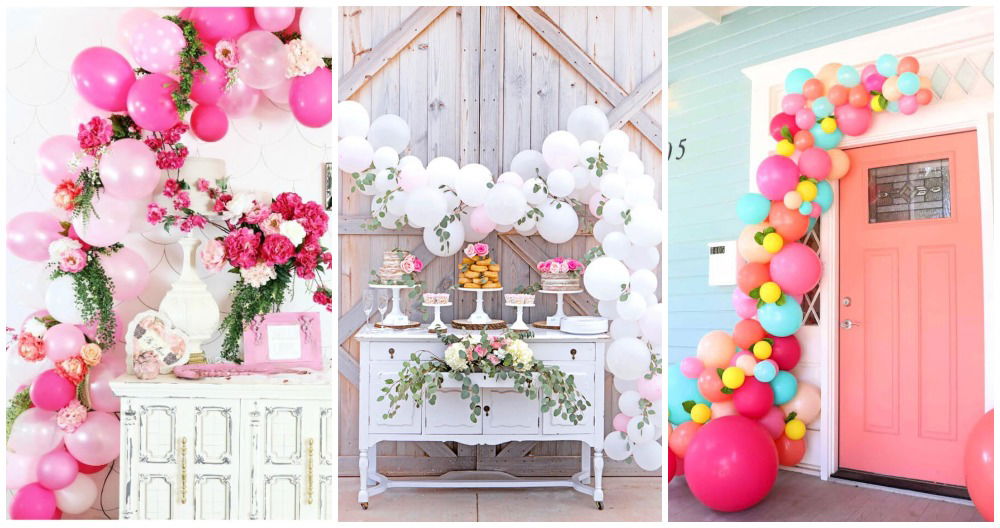
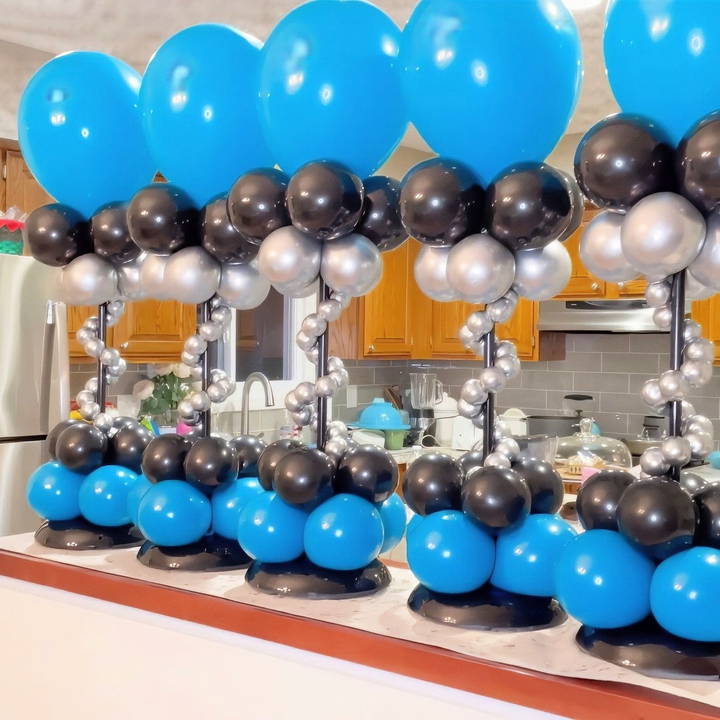
Making beautiful, custom balloon centerpieces can elevate any event, from birthdays and weddings to corporate parties. These DIY balloon centerpieces are an affordable, customizable, and fun way to add a pop of color and whimsy to your decor. This step-by-step tutorial shows you how to create a balloon centerpiece built for outdoor settings, with a design that's versatile and customizable.
Materials You'll Need
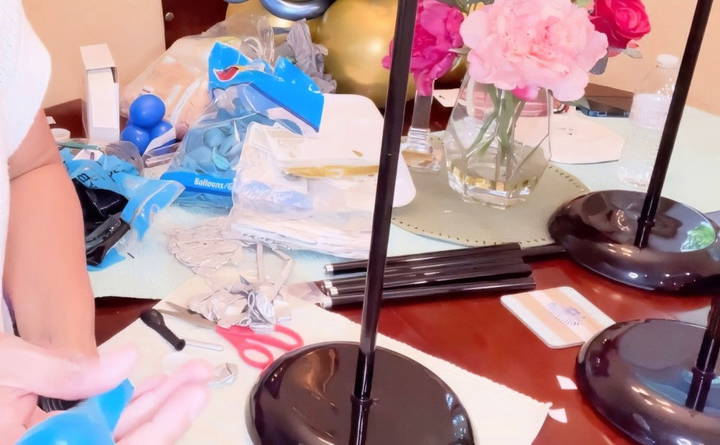
Before diving into the steps, gather these materials to ensure your project goes smoothly:
- Sturdy Lamp Base: Mainstay lamps or similar heavy bases are ideal. These are durable, inexpensive, and provide a strong foundation for the centerpiece.
- Balloons: 11-inch balloons in your desired colors (e.g., teal, black, or chrome).
- 5-inch balloons for additional accents.
- 260Q long balloons for making decorative spirals and bubble effects.
- Balloon Hand Pump or Electric Balloon Inflator for consistent balloon sizes.
- Balloon Calibrator (optional) for precise balloon measurements.
- Glue Dots or Glue Dashes for attaching balloons to one another or to secure them in place.
By organizing your materials ahead of time, you'll ensure that assembly is quick, efficient, and enjoyable.
Step by Step Instructions
Learn to craft stunning DIY balloon centerpieces with our step-by-step guide, complete with tips for personalization and creative variations.
1. Prepare the Base
The foundation of a balloon centerpiece is critical, especially if it will be used outdoors. A heavy, stable base, such as a lamp stand, prevents the arrangement from toppling in windy conditions.
- Select Your Base: Use a sturdy lamp base with some weight to it. Mainstay lamps work well and are easy to find at stores like Walmart or Target. You can assemble the base to the desired height by adding or removing extension poles.
- Secure the Base: If you intend to reuse the centerpiece base, consider telling clients they can keep it as part of the arrangement cost. This base provides enough stability, but if you plan to place it in a very windy environment, consider adding extra weight for reinforcement.
2. Inflate and Arrange Balloons
Making balanced layers in your centerpiece will add visual interest and ensure a professional look.
A: Make the Bottom Quad Layer
- Inflate Four Balloons to equal size using a hand pump. For this guide, four pumps of air will make a base that's small but stable.
- Pair and Tie two balloons together to form a “duplet.”
- Repeat to make a second duplet.
- Make a Quad by twisting the two duplets together, ensuring they are firmly interlocked. This will serve as the base layer of your centerpiece.
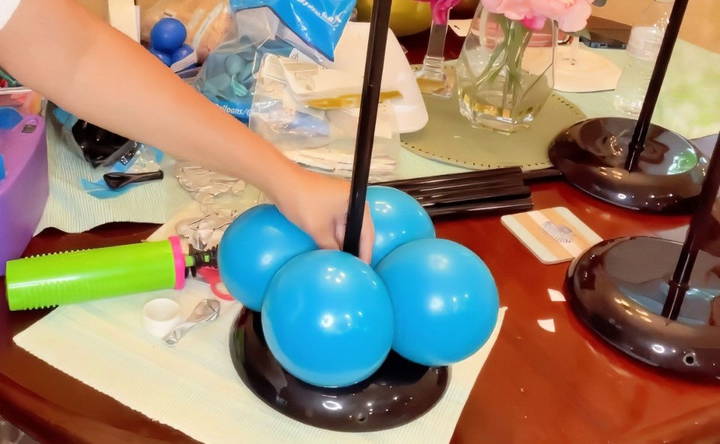
Attach the Quad to the Base
- Slide the quad down over the top of the base stand, then twist the balloons around each other on the base to ensure they are snug and secure.
Inflate the Second Layer
- Use Smaller Balloons for the next layer. Inflate them to a slightly smaller size (two pumps for a 5-inch balloon).
- Make Another Quad using the same steps as above, and twist it onto the stand just above the first layer.
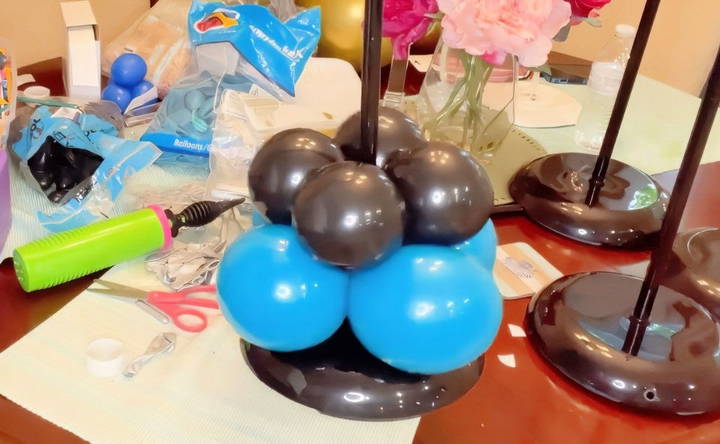
Add Friction for Stability
- Inflate a small balloon to insert near the top of the stand. This makes friction, preventing higher layers from slipping down.
Finish with Larger Balloons for a Gradual Increase
- Inflate additional balloons to a larger size (four pumps for 11-inch balloons) and repeat the steps to make another quad layer.
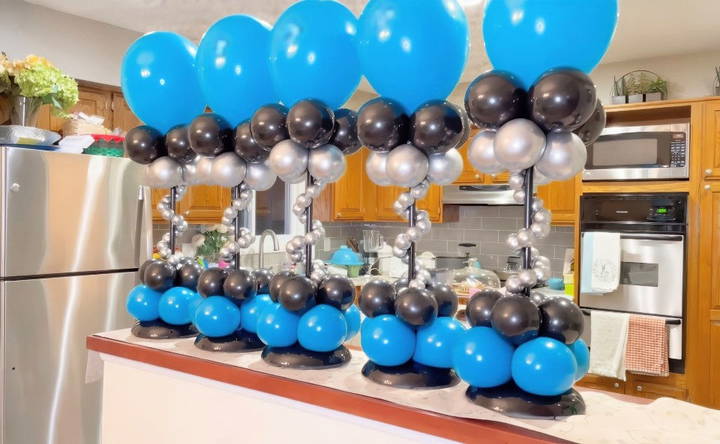
- Place this larger quad at the top of the arrangement, giving the piece an hourglass shape for a more sophisticated design.
3. Add the Topper Balloon
To complete the main structure, add a focal balloon at the very top.
- Inflate a Large 11-Inch Balloon and calibrate it to around 10 inches for an even and polished look.
- Attach a Stretchy Balloon: Use a 260Q long balloon to tie around the neck of the topper balloon and secure it to the stand.
- Place and Adjust the topper balloon by wrapping the 260Q around the structure and securing it tightly. This topper balloon adds height and drama to the centerpiece.
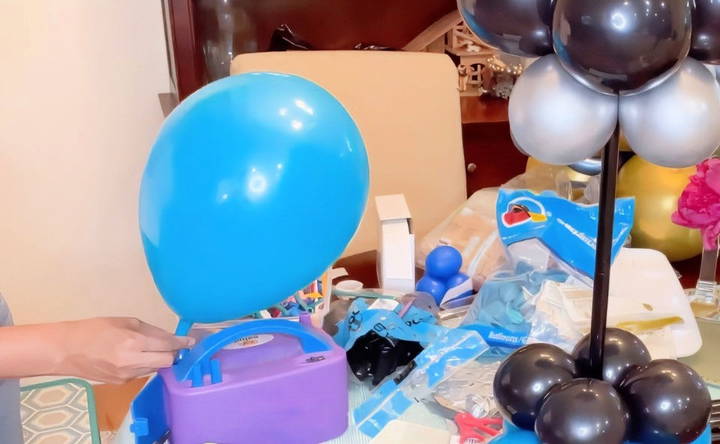
4. Decorate with Balloon Spirals and Bubble Chains
Adding decorative details like spirals and bubble chains can bring an extra layer of creativity and flair to your centerpiece.
Step A: Make Bubble Chains
- Inflate the 260Q Balloons slightly (about three pumps), then pinch and twist small sections to make “bubbles” or “beads.”
- Continue twisting to make a chain long enough to wrap around the structure from top to bottom.
- Secure the chain by tucking it into the balloon arrangement, or use glue dots if needed.
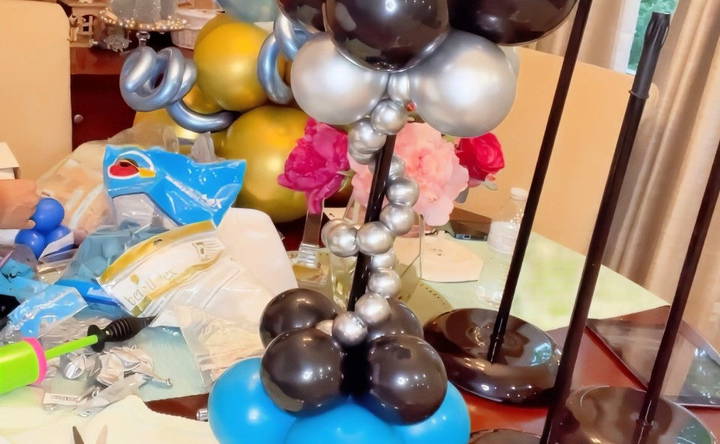
Step B: Add Spiral Details
- Inflate a 260Q balloon slightly and twist it to make a spiral effect.
- Wrap it around the main structure for a fun, curly accent.
5. Final Adjustments
Once your centerpiece is assembled, step back and assess the arrangement. Adjust any balloons that seem out of place, ensuring everything is even and balanced.
- Use Glue Dots to hold any parts in place.
- Hide Ties and Seams: Tuck or conceal any balloon ties or 260Q ends to keep the look polished.
Tips for Personalizing Your Balloon Centerpiece
- Color Customization: Choose balloon colors that match the theme of your event. For example, using school colors for a graduation party or red and white for a romantic occasion.
- Theme Elements: Add themed accessories like small flags, flowers, or even mini LED lights inside clear balloons to make your centerpiece more eye-catching.
- Varied Balloon Sizes: Experiment with different balloon sizes to make a dynamic and layered effect.
- Balloon Finishes: Choose from matte, pearlized, or chrome-finished balloons depending on the desired look.
Pricing and Professional Tips
If you're making these centerpieces for an event or as a side business, here are a few tips on pricing and client satisfaction:
- Price Range: Since these centerpieces use a sturdy lamp base, price them accordingly. Ensure that the cost of materials and labor is covered, and adjust pricing based on whether the client intends to keep or return the base.
- Client Minimums: Set a minimum order quantity (e.g., five centerpieces) to ensure each project is worth the time and materials investment.
- Set Clear Expectations: For outdoor events, remind clients that while these centerpieces are stable, extreme weather can impact them.
Creative Variations to Try
Once you've mastered the basics, consider experimenting with these ideas:
- Mini Balloon Garlands: Make a garland effect by connecting multiple small quads and wrapping them around the centerpiece.
- Floating Balloon Effect: Use a clear rod to attach smaller balloons above the main centerpiece for a “floating” look.
- Seasonal Themes: Adapt the design to fit different seasons. Use pastel balloons and flower decorations for spring events, or metallic and jewel tones for holiday gatherings.
Conclusion
Making DIY balloon centerpieces is an excellent way to add customized, eye-catching decor to any event. With the right materials, patience, and attention to detail, you can design a centerpiece that will impress guests and fit perfectly with any theme or color scheme. Whether you're decorating for a personal event or starting a balloon decor business, these centerpieces are a versatile, affordable, and fun project that will make any celebration memorable.
Balloon centerpieces are just the beginning—once you master this craft, the possibilities are endless.
FAQs About DIY Balloon Centerpieces
Discover answers to your FAQs about DIY balloon centerpieces. Learn tips and tricks to make stunning decorations for any event.
Use high-quality, thick balloons and avoid overinflating them. Consider adding UV protectant spray if the arrangement will be outside for an extended time.
Inflate balloons on the same day as the event for optimal freshness. Store balloons in a cool, shaded area until it’s time to set up.
Consider adding additional weight, like sandbags, around the base to ensure it remains stable outdoors.
Yes! If you plan to reuse the lamp bases, ensure they are returned in good condition. Balloons, however, are single-use and should be properly disposed of after the event.
You can make these centerpieces 2-3 days ahead of time for best results. If kept indoors and away from direct sunlight, the balloons will maintain their appearance for up to a week.
Avoid placing balloons in direct sunlight or using dark colors that absorb heat. Dark colors can cause balloons to pop faster in the sun, so choose lighter shades or cover the setup if possible.
Make sure to twist each bubble in the same direction and secure the first bubble tightly. This consistent twisting helps maintain tension and prevents unraveling.
These bases are standard lamp stands, often found in the home decor section of stores like Walmart, Target, and Amazon. Look for brands like Mainstay, which provide affordable options.
You can easily replace the topper balloon with any lightweight decoration. Simply remove the current topper and attach your new item in the same way, ensuring it's balanced on the structure.
If the beads tend to loosen, you can add glue dots between them for extra security. This will hold each bubble in place and prevent movement along the spiral or chain.
Balloons are available through various distributors, often found online. Qualatex is a popular brand, and you can locate local distributors by visiting their website or searching for party supply shops near you.


