Building stylish and affordable DIY bar stools is my favorite weekend project. I remember the first time I decided to make my own bar stools. With just some basic tools, a few pieces of wood, and a well-detailed bar stool plan, I crafted something amazing. The feeling of accomplishment was immense and the stools fitted perfectly in my kitchen.
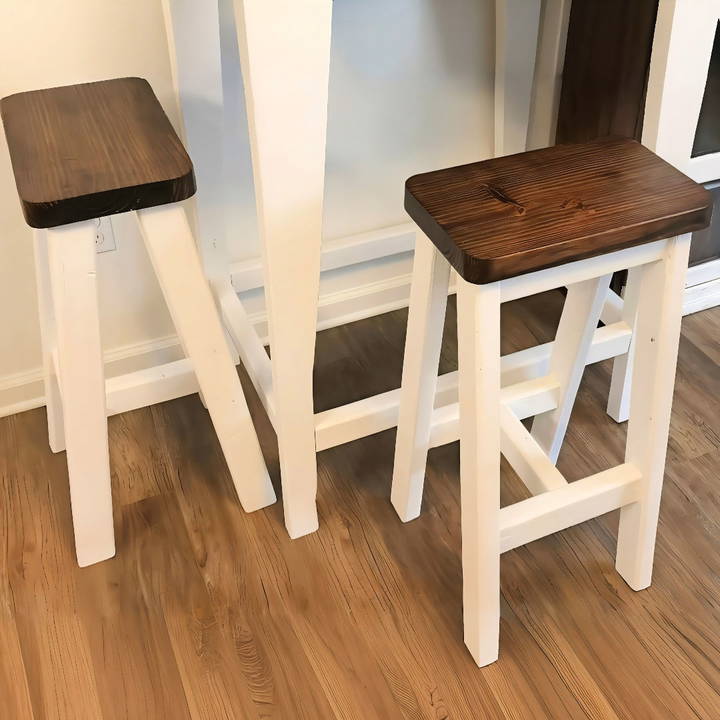
Starting this project is easier than you think. Using simple bar stool plans, I shaped and assembled the DIY bar stools methodically. Sanding and painting the stools to match my decor was the final touch. By following these steps, you will have functional and beautiful stools that add style to your home. I'm here to help you get started with these practical tips.
So, start your DIY bar stool project today with confidence. You will find it both fulfilling and helpful.
Materials You'll Need and Why
Before we dive into the building process, let's talk about what you'll need:
- 2 by 10 for the seat: A 15-inch long piece will form the base where you'll sit. It's the perfect width for comfort.
- 2 by 3s for the legs and braces: These will support the weight and ensure your stool stands sturdy.
- Jigsaw and miter saw: These are necessary for cutting your wood to the correct sizes and angles.
- Pocket hole jig: Essential for attaching the legs securely to the seat.
- Wood glue and screws: These will hold everything together tightly.
- 3/8 inch dowel rod: To fill in the screw holes neatly.
- Sandpaper, stain, and polyurethane (or paint): For finishing touches that make your stool not only look great but also protect it from wear and tear.
The reason behind each material and tool choice lies in their contribution to building a stable, aesthetically pleasing, and durable bar stool. For instance, the choice of wood dimensions ensures a comfortable seat size and sturdy legs, while the finishing products elevate the stool's appearance and longevity.
Step by Step Instructions
Learn how to build your own bar stools with our step-by-step instructions. From preparing the seat to crafting the legs and final touches, DIY made easy!
1. Preparing the Seat
First off, I took the 2 by 10 piece and cut it 15 inches long. A pro tip here: to add a bit of flair, I used a round object to trace curves on each corner of the rectangle and then cut these out with my jigsaw. Sanding the edges smooth was crucial for the polished look and safety to avoid splinters.
2. Crafting the Legs
The leg-making process seemed daunting at first, but here's how I simplified it: I measured and marked my 2 by 3s for the legs, ensuring each had a slight angle (approximately 8 degrees) for stability. Using my miter saw, I cut four legs, each 28 inches long, with the angled cuts to ensure they splayed outwards properly.
3. Assembling the Stool
Connecting the legs to the seat involved drilling pocket holes in the top of each leg, applying wood glue, and then securing them with screws. For added support, I measured and cut additional 2 by 3s to brace between the legs. Drilling and attaching these braces not only solidified the structure but also provided a convenient footrest.
4. Finishing Touches
Hiding screw holes was next, and for this, I drilled slightly larger holes to insert cut pieces of the 3/8 inch dowel rod with a bit of wood glue. Once the glue dried, I trimmed the excess dowel and sanded the areas smooth.
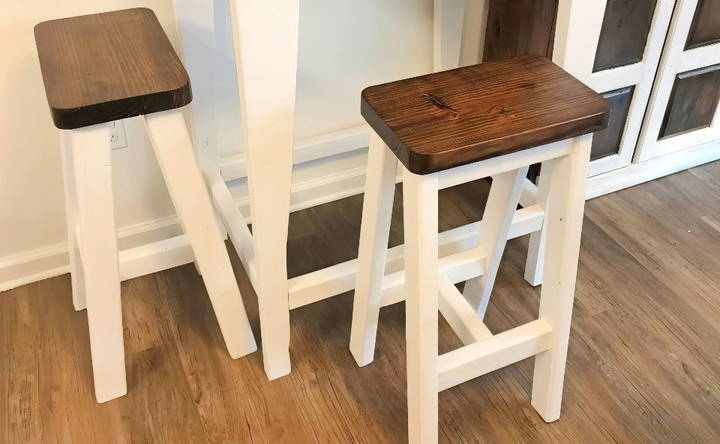
I chose to stain the seat of my stool with an espresso stain for a warm, inviting look and protected it with a layer of polyurethane. The legs, treated with a coat of white paint, offered a lovely contrast.
Personal Insights and Tips
- Staining First: I recommend staining and applying polyurethane to the seat before fully assembling. This makes it easier to reach all the nooks and crannies without the legs getting in the way.
- Customization: Feel free to adapt the design to match your decor. Changing the stain color, paint, or even the leg angles can give your stool a unique look.
- Safety First: Don't skip on safety wear, especially when cutting and sanding. Goggles and a dust mask are your best friends.
Design Customization Ideas
When it comes to making DIY bar stools, the beauty lies in the ability to tailor them to your personal style and the decor of your space. Here are some design customization ideas that can help you make your bar stools not only functional but also a reflection of your personality:
- Choose Your Theme: Start by deciding on a theme that resonates with your space. Whether it's rustic, modern, industrial, or vintage, your theme will guide the choice of materials and design elements.
- Selecting Materials: The material you choose can drastically change the look of your bar stools. Consider using reclaimed wood for a rustic feel, sleek metal for a modern touch, or even repurposed pipes for an industrial vibe.
- Color It Up: Paint is a powerful tool in customization. Go for a bold color to make a statement, or choose a subtle hue that complements your room. You can also experiment with patterns or designs to add a unique touch.
- Fabric Choices: If your bar stool design includes a cushion, select a fabric that adds comfort and style. Think about durability, especially if the stools will be used frequently, and don't shy away from vibrant patterns or textures.
- Adjustable Height: Incorporating an adjustable height mechanism can make your bar stools versatile and accommodating for all users. This is particularly useful if children will be using them.
- Footrests for Comfort: Adding a footrest not only provides comfort but also stability. You can design the footrest to match the overall aesthetic of the stool, using the same or complementary materials.
- Personalized Details: Personal touches like engraving initials, embedding tiles, or adding decorative nails can make your bar stools stand out and feel more personal.
- Finishing Touches: The finish on your bar stools can protect the material and enhance the look. Consider different types of finishes, such as varnish, stain, or wax, depending on the material and desired effect.
Use these design tips to make bar stools that are practical and show your creativity.
Troubleshooting Common Issues
Building your own bar stools can be a rewarding DIY project, but sometimes you might run into a few snags along the way. Here's a helpful guide to troubleshoot some common issues you may encounter:
- Wobbly Stools: If your stool isn't stable, check all the joints. Tighten any loose screws and ensure that all legs are even. If a leg is shorter, consider adding a felt pad to balance it out.
- Squeaky Joints: A squeaky stool can be annoying. This usually occurs due to friction in the joints. Apply a lubricant like WD-40 to the joints, or if it's a wood-on-wood joint, some beeswax or soap can help.
- Sticking Drawers: If your stool has a drawer that sticks, the humidity might have caused the wood to swell. Sand down the edges of the drawer slightly and apply a clear finish to prevent swelling in the future.
- Finish Flaws: If the finish on your stool isn't smooth, it could be due to dust or debris in the varnish or paint. Sand it down lightly and apply another coat for a smooth finish.
- Uneven Stain: Staining wood can sometimes result in an uneven color. To fix this, sand the area lightly and reapply the stain, making sure to wipe off any excess.
- Cracks in Wood: Small cracks can appear in wood over time. You can fill these with wood filler that matches the color of your stool, then sand and reapply the finish.
- Loose Cushions: If the cushion on your stool becomes loose, check if the attachment hardware is intact. If screws are missing, replace them. If the cushion is glued, apply more adhesive and clamp it until it's dry.
Patience and attention to detail can solve most DIY bar stool issues. If unsure, step back and review your work. With these tips, fix problems and enjoy your handicraft for years.
FAQs About DIY Bar Stools
Discover everything you need to know about DIY bar stools with our comprehensive faqs, including tips, materials, and step-by-step guides.
To ensure sturdiness:
Use quality, durable wood
Ensure all joints are securely fastened with screws and wood glue
Add braces or supports under the seat
Test the stool for stability before regular use
Yes, you can customize the height by:
Cutting the legs to your desired length before assembly
Adding adjustable feet or extensions after the stool is built
While power tools make the job easier, you can build a bar stool using hand tools. It will require more effort and time, but it’s doable with:
A handsaw for cutting wood
A hammer for nails or a manual screwdriver for screws
Manual sanding blocks instead of a sander
Personalize your bar stool by:
Choosing a unique color or stain for the wood
Adding cushions or upholstery for comfort
Incorporating design elements like engravings or patterns
To prevent your bar stool from wobbling:
Ensure all legs are cut to the exact same length
Use a level to check the seat is perfectly horizontal before securing it
If the floor is uneven, consider adding adjustable feet to the legs
Regularly check and tighten any loose screws or joints
Conclusion
In conclusion, building your own stylish and affordable DIY bar stools can be a rewarding experience. With detailed bar stool plans and commitment, you can enhance your home decor without breaking the bank.


