Building a DIY barbell is a great way to save money and build a custom piece of workout equipment tailored to your needs. Whether you're an experienced DIYer or just starting, this guide will show you the step-by-step process. Following these instructions, you'll be able to build a durable, affordable barbell with materials from your local hardware store.
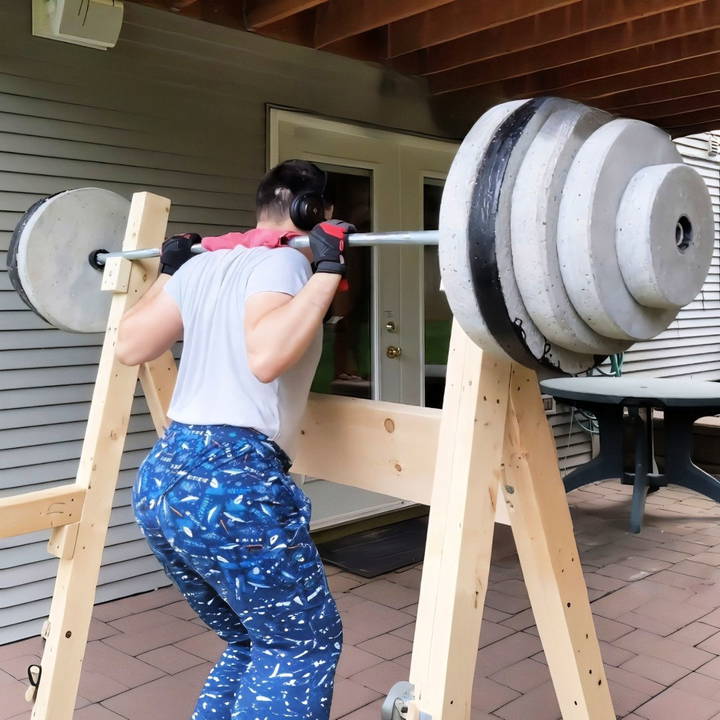
Materials and Tools You'll Need
Before diving into the construction, gather the necessary materials and tools. Most items are affordable and readily available at hardware stores or online.
Materials
- Steel Pipe (3/4 in x 7 ft) – This will form the main shaft of the barbell.
- PVC Pipes – These will form the sleeves and collar:
- 1 in x 32 in PVC Pipe
- 1 1/4 in x 32 in PVC Pipe
- 1 1/2 in x 36 in PVC Pipe
- ABS or PVC Pipe (2 in x 2 in) – Acts as the collar to prevent weights from sliding.
Tools
- Measuring Tape – For precise measurements.
- Hammer – To help fit pipes together.
- Drill with a 1/8 Drill Bit – To secure the collars.
- Hacksaw – Essential for cutting the pipes to size.
- Large Flat Head Screwdriver – Used to pry open PVC for a snug fit.
- Permanent Marker – For marking measurements.
- 220 Grit Sandpaper – To smooth sections of the bar for grip.
Step by Step Instructions
Learn how to build your own barbell with our step-by-step guide. From preparation to testing, build a safe, effective DIY barbell at home.
Step 1: Preparing the Cutlist
Begin by cutting the pipes to the specified lengths to ensure everything fits together correctly:
- Steel Pipe: 7 ft x 3/4 in (no additional cutting needed).
- PVC Pipes: 1 in PVC Pipe: 32 inches
- 1 1/4 in PVC Pipe: 32 inches
- 1 1/2 in PVC Pipe: 32 inches
- ABS or PVC Collars: (2) 2 in x 2 in pieces
Tip: For smoother cuts, use a circular saw with a 140-tooth blade installed backward.
Step 2: Constructing the Sleeves
The sleeves are crucial parts of the barbell, where the weights will be loaded. Here's how to layer PVC pipes to make strong sleeves:
- Layering the Pipes: Each PVC layer needs to fit around the steel shaft tightly.
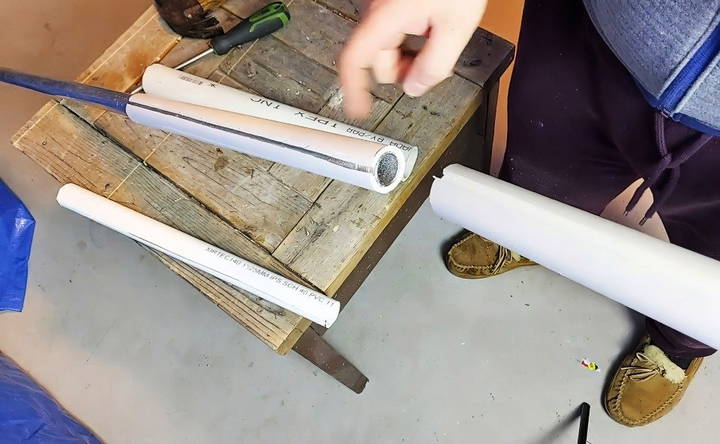
- Start by making a straight cut down one side of the 1 in and 1 1/2 in PVC pipes. This cut will allow you to spread the PVC slightly and fit it over the steel shaft.
- Assembling the Sleeves: Slide the 1 in PVC pipe onto the steel shaft and use a hammer to ensure it's snug.
- To build a secure fit with the 1 1/2 in PVC, insert the 1 1/4 in PVC pipe first by prying open the cut slightly with a screwdriver, then twist it over the 1 in pipe. Hammer it down until it's firmly in place.
- Repeat the process for the other side of the barbell.
Step 3: Adding the Collars
Collars are small pieces that prevent weight plates from sliding along the sleeves. Here's how to secure them:
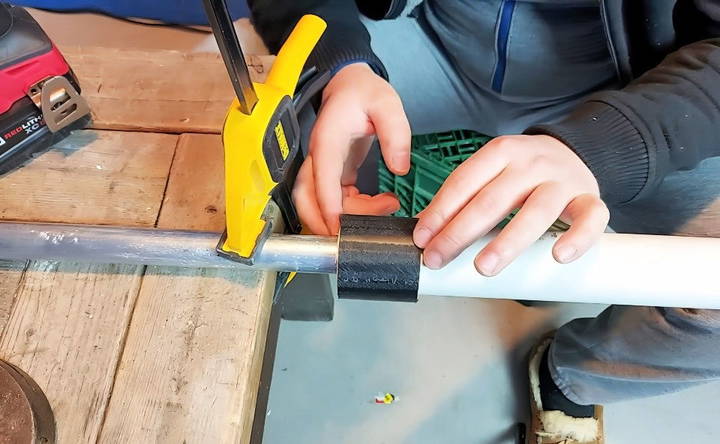
- Slide the 2 in PVC or ABS Pipe (pre-cut into 2 in sections) over each end of the sleeves.
- Drilling Pilot Holes: With your drill and a 1/8 in drill bit, make a pilot hole through the collar and sleeve. This will allow the screws to hold the collar in place.
- Insert 1-inch metal screws into the holes to secure the collars tightly. If a screw breaks, it's fine, as this indicates a tight fit.
Step 4: Adding Grip and Hand Position Markings
Markings and grip areas improve comfort and precision when lifting. Adding these features helps align your hands and avoid scraping your legs on deadlifts.
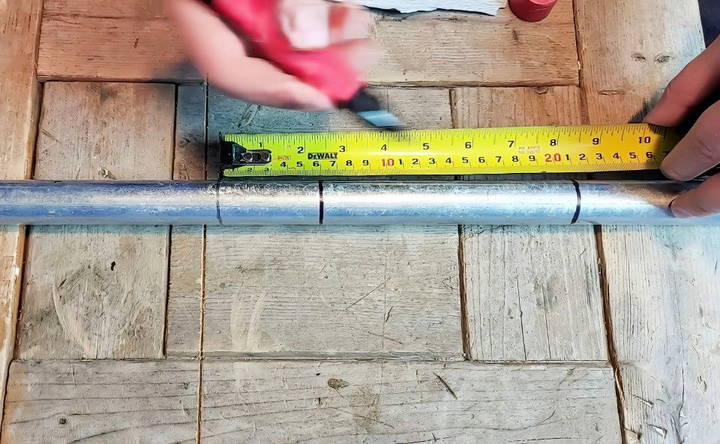
- Marking the Center and Hand Positions: Measure the distance from one end of the collar to the other, and mark the center with a pencil.
- Mark hand positions based on typical Olympic barbell standards:
- 32 inches apart for bench press.
- Use these marks to identify comfortable grip points for deadlifts and squats.
- Sanding for Grip: Use 220-grit sandpaper to build smooth sections where you marked. Move the sandpaper up and down along the bar for an even, smooth finish.
Step 5: Testing the Barbell
Now that your barbell is fully assembled, it's time to test its weight and stability:
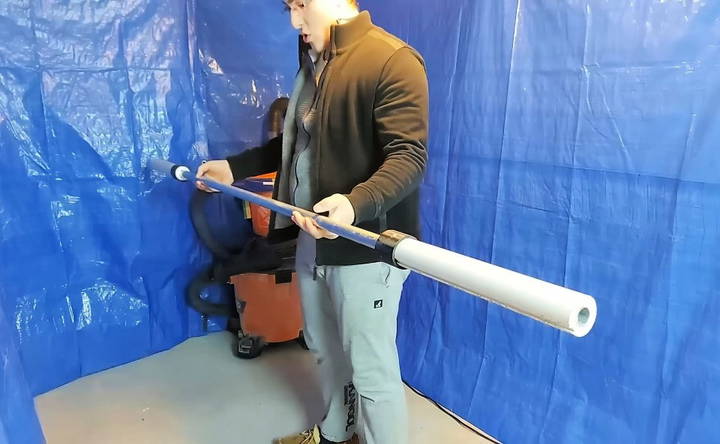
- Weighing the Bar: The finished DIY barbell should weigh around 11.3 pounds.
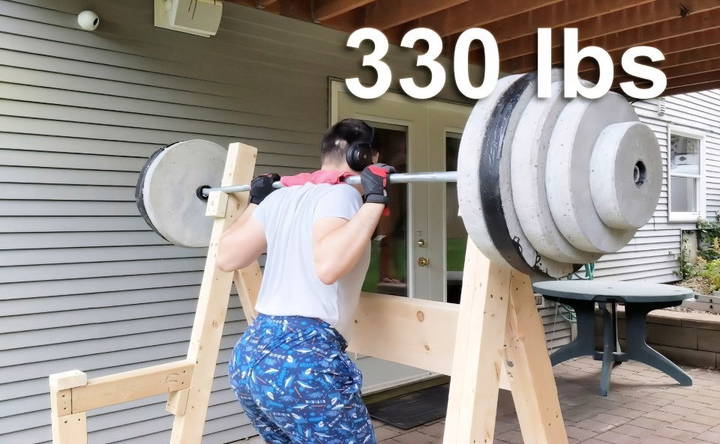
- Testing Weight Capacity: This design holds up to 330 pounds without noticeable bending, making it perfect for general strength training.
Tips for Building a Safe and Effective DIY Barbell
- Work Outdoors: When cutting PVC, do it outside to avoid making a mess indoors.
- Layer Securely: Make sure each layer of PVC fits tightly over the previous one to avoid wobbling.
- Double-Check Measurements: Precise measurements ensure that your sleeves and collars align and prevent weights from moving unexpectedly.
Benefits of a DIY Barbell
Building a barbell from scratch is not only cost-effective but also allows for customization. Some key benefits include:
- Cost Savings: Commercial barbells can be expensive. By building your own, you save money while still achieving excellent functionality.
- Personalization: You can modify lengths, markings, and grip areas based on your personal needs.
- Portability: This barbell is lighter than most commercial ones, making it easier to move around your workout space.
Common Challenges and Troubleshooting
- Tight Fits: If a pipe is too tight, try using the screwdriver method to widen the opening gradually.
- Breaking Screws: This can happen during collar installation. If a screw breaks, it's likely that the fit is secure, and you may not need another screw.
- Alignment Issues: Make sure each layer of PVC is correctly aligned before hammering, as misalignment can lead to wobbling.
Additional Enhancements to Your DIY Barbell
After you've mastered the basic barbell, consider these upgrades to further improve your experience:
- Knurling: You could wrap sandpaper or textured tape around the grip areas to simulate knurling, which provides extra grip during lifts.
- Weight Plate Collars: To prevent weight plates from sliding, purchase or build additional collars that fit over the sleeves.
- End Caps: Adding PVC end caps to the ends of your sleeves can give your barbell a more finished look and prevent debris from entering the bar.
Safety Considerations
- Weight Limits: Be mindful of the weight capacity of your barbell to prevent bending or breakage.
- Regular Inspection: Periodically check the bar for loose screws, cracks, or wear, especially if you use it frequently.
- Secure Area: Make sure your workout space is clear of any obstacles that might cause the bar to fall or tip over unexpectedly.
Final Thoughts
Building a DIY barbell is an incredibly rewarding project. Not only do you get a functional piece of equipment, but you also gain the satisfaction of having built it yourself. Whether you're just starting your home gym or looking to add new equipment without breaking the bank, this homemade barbell offers strength, durability, and versatility for a variety of exercises.
FAQs About Building a DIY Barbell
Discover essential tips and answers in our FAQs about building a DIY barbell. Perfect your home workouts with expert guidance.
If you lack a drill, you can consider using a 1.75" PVC pipe as a collar by hammering it tightly over the steel shaft. Layering a 1.75" pipe under a 2" PVC pipe may also work as a makeshift collar without screws.
Yes, filling the steel pipe with materials like concrete or sand can add weight and durability. Concrete provides stability but is permanent, while sand can be adjusted for weight but may shift slightly.
Loose fittings can sometimes occur with PVC pipes due to varying diameters. Wrapping tape around the pipes before inserting them can help achieve a tighter fit and prevent unwanted movement.
This barbell design is primarily for lighter training purposes. While it can handle around 100-150 lbs, exceeding that may lead to bending. If you require a barbell for heavy lifting, this design may not be ideal.
This DIY barbell is generally more suited for basic lifts, as it lacks the durability and spin required for high-impact Olympic movements. Snatches or clean-and-jerk exercises could cause the bar to bend or fail over time.
Yes, you can adapt the dimensions to metric by converting each measurement. For example, the 7 ft steel pipe would be about 2.13 meters, and the 32 in PVC pipe would be around 81.3 centimeters.
Steel pipes are commonly available at hardware stores, plumbing suppliers, or online. Look for 3/4 in galvanized steel pipes, which are durable and widely used for this type of DIY project.
Achieving a 45 lb weight would require additional modifications, such as using denser material or adding internal weight with concrete or steel. This build is designed as a lightweight training bar, so increasing the weight may compromise its structure.
The overall cost varies based on your location and material prices. Many DIYers report that a homemade barbell is still cheaper than purchasing new, but prices can range from $30 to $50 depending on local availability.


