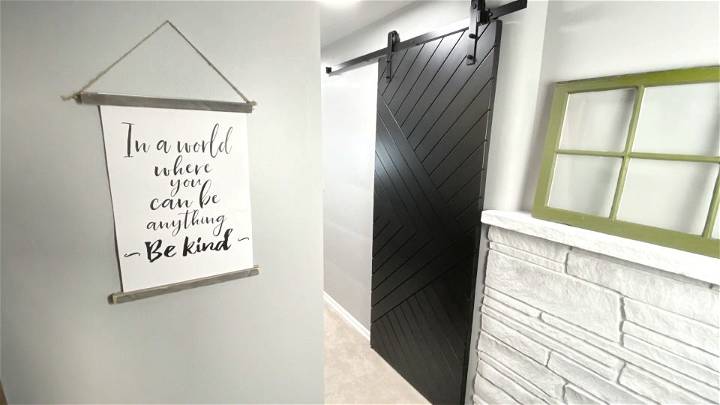
As a DIY enthusiast, the idea of making something elegant and functional for my home is always exhilarating, and my latest project, a DIY barn door, was no exception. My goal here is to guide you through the process, sharing valuable insights and practical advice based on my personal experience. Embarking on this project, I wanted to enhance the aesthetic appeal of my space while adding a touch of modernity through a chevron-patterned barn door. Here's a step-by-step account of how I went about it, making the process straightforward and rewarding.
Materials Needed and Their Purpose
- Three-Quarter Inch Plywood: Serves as the sturdy base of the door.
- 1x4 MDF Trim: Selected for the trim, ensuring straight edges and easy priming.
- Titebond II Wood Glue: To securely attach the trim to the plywood.
- Finish Nailer and Nails: Provides additional hold for the trim on the plywood.
- Paint Roller & Foam Brushes: For evenly applying the glue and paint.
- Bondo: Used for making a seamless finish on the door edges.
- Primer & Paint: To protect and beautify the door.
- Barn Door Hardware Kit: Contains all necessary fittings for hanging the door.
Step by Step Instructions
Learn how to build your own stylish barn door with step-by-step instructions. From cutting to painting, this DIY project is easy to follow.
Step 1: Cutting the Base and Trim to Size
Firstly, I measured and cut the plywood to the desired size, allowing for a two-inch overlap around the door opening. Using a straight edge and a skill saw for the plywood and setting my miter saw to 45 degrees for the MDF trim ensured precise cuts. Remember, the quality of your base and trim cuts directly influences the door's final look.
Step 2: Designing the Chevron Pattern
Laying out the chevron pattern required patience and precision. Starting from the center, I placed each piece of trim at a 45-degree angle, gradually working my way out to build the vibrant, modern design I envisioned. This process was surprisingly straightforward, thanks to the consistency of the trim pieces.
Step 3: Attaching the Trim
Using Titebond II wood glue and a finish nailer, I began securing the trim pieces onto the plywood. A foam paint roller proved invaluable for evenly spreading the glue. It's crucial this step is done carefully, as the positioning of these pieces sets the foundation for your door's design.
Step 4: Trimming the Excess and Smoothing Edges
With all pieces glued and nailed, I trimmed the excess using a circular saw, revealing the barn door's shape. Then, I filled any gaps and nail holes with Bondo, sanded down for a smooth finish, and used a round-over bit on the edges for a soft, professional look.
Step 5: Priming and Painting
After diligently sanding the door and applying primer, I moved on to painting. Opting for a black satin finish, I found that using a high-quality paint sprayer achieved an evenly coated and visually appealing surface. Adding water to the paint helped attain the desired consistency for a smoother application.
Step 6: Installing the Hardware
The barn door hardware installation was possibly the most technical part of the project. Carefully measuring and aligning the track ensured the door would hang straight and slide smoothly. I found the installation instructions included in the hardware kit easy to follow, and securing the track to a sturdy header above the doorway provided the needed support.
Step 7: Hanging and Finishing Touches
Finally, hanging the door on the track and installing a floor guide to prevent swinging brought this project to its close. These last steps were immensely satisfying, as I saw my vision come to life. The contrast of the black door against my home's interior buildd a stunning focal point, complementing the space beautifully.
Customizing Your Barn Door
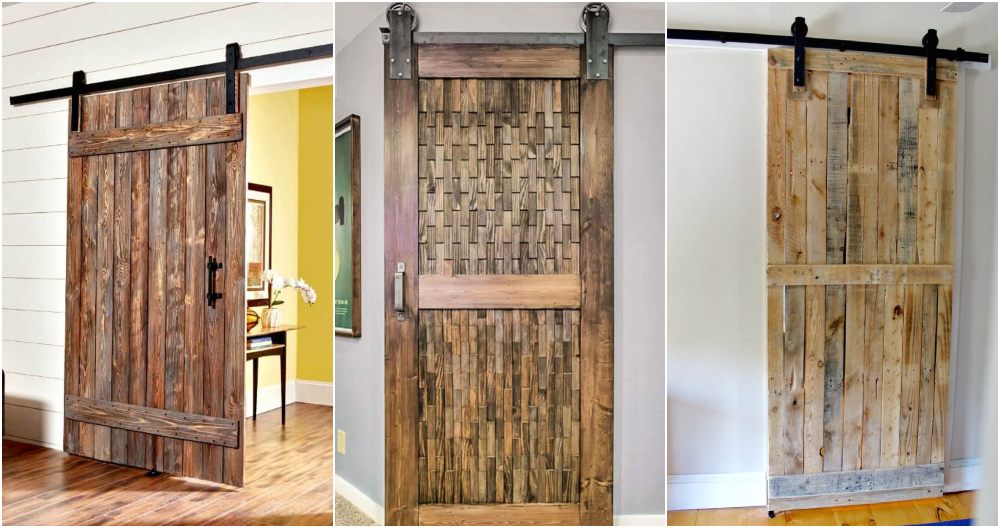
When it comes to making a unique and eye-catching barn door, there are plenty of ways to add your personal touch. Whether you're a seasoned DIY enthusiast or a beginner, these customization ideas will help you transform a simple wooden door into a statement piece for your home.
Decorative Trim and Molding
Adding decorative trim or molding to your barn door instantly elevates its appearance. Here's how:
- Crown Molding: Install crown molding along the top edge of the door for an elegant touch. It builds a finished look and draws attention to the door's design.
- Baseboard Trim: Attach baseboard trim to the bottom edge of the door. This not only adds visual interest but also protects the door from wear and tear.
- Picture Frame Effect: Build a picture frame effect by adding trim around the perimeter of the door. Paint the trim in a contrasting color for a striking effect.
Distressing Techniques
If you love the rustic, weathered look, consider distressing your barn door. Follow these steps:
- Sand and Roughen: Sand the door's surface to remove any smooth finish. Focus on edges, corners, and areas that would naturally wear over time.
- Hammer and Chains: Gently tap the door with a hammer or use a chain to build dents and dings. Be strategic—focus on areas where real wear would occur.
- Stain or Paint: Apply a stain or paint to highlight the distressed areas. Wipe off excess stain for an authentic aged appearance.
Staining and Painting Options
Choose the right finish for your barn door:
- Natural Wood Stain: If you want to showcase the wood's natural beauty, opt for a clear or light wood stain. It enhances the grain and adds warmth.
- Dark Stain: For a more dramatic look, go with a dark stain like walnut or espresso. It pairs well with modern or industrial interiors.
- Chalk Paint: Chalk paint is forgiving and easy to work with. Use it to achieve a shabby chic or farmhouse-style finish.
- Bold Colors: Don't be afraid to paint your barn door in a bold color. Reds, blues, and greens can make a statement and add personality.
Hardware Accents
The hardware you choose can significantly impact your barn door's overall style:
- Handles and Pulls: Select handles or pulls that complement your door's design. Rustic iron handles work well for a farmhouse look, while sleek metal pulls suit modern spaces.
- Hinges: Visible hinges add authenticity. Choose strap hinges or decorative hinges that align with your door's aesthetic.
- Rolling Hardware: Sliding barn doors require rolling hardware. Opt for classic black or explore unique designs like horseshoe-shaped rollers.
Paneled Designs
Experiment with different panel layouts:
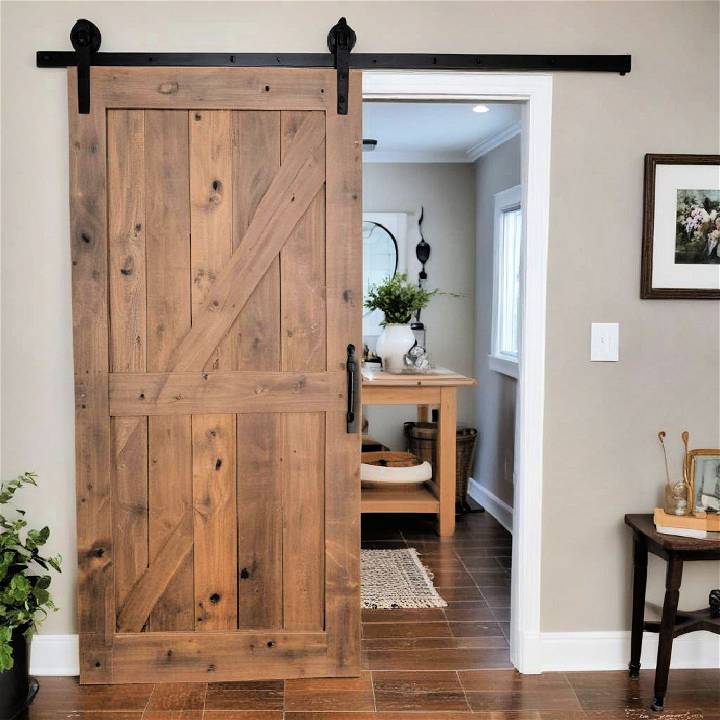
- X-Brace: The classic X-brace design adds stability and visual interest. It's perfect for rustic and farmhouse-style doors.
- Z-Brace: Similar to the X-brace, the Z-brace features diagonal boards. It's simple yet effective.
- Vertical or Horizontal Panels: Build a clean and modern look by arranging vertical or horizontal panels. Paint each panel a different color for a playful twist.
DIY Barn Door FAQs
If you're considering building a barn door for your home, you probably have some questions. Let's dive into the most common FAQs about DIY barn doors to help you get started on this fun and practical project!
What Size Should My Barn Door Be?
Measure the width of your door opening from the outside edges of the casing. Barn doors should at minimum cover the door opening and extend a few inches past the door when fully open. The barn door will hang about 1/2 to 1 inch off the floor and extend above the top of the door opening.
What Materials Do I Need?
To build a barn door, you'll typically need wood planks or plywood for the door itself, wood for the frame (such as 2x4s), screws and nails, wood glue, and a sliding barn door hardware kit.
How Do I Build a Barn Door?
Follow these steps to build your own barn door: Cut the wood planks to the desired size, assemble the door using screws and wood glue, add the frame using 2x4s, sand the door and apply your chosen finish (paint or stain), and attach the sliding barn door hardware according to the manufacturer's instructions.
Can I Customize the Design?
Absolutely! Barn doors allow for complete customization. You can choose the materials, colors, and sizes that match your home's decor. Get creative with different styles, from rustic to modern.
Where Can I Use Barn Doors?
Barn doors are versatile and can be used in various spaces such as closets, pantries, as room dividers, or to close off home offices.
Remember, building your own barn door is not only cost-effective but also a rewarding DIY project. Enjoy the process and build a unique piece that reflects your style!
Final Thoughts
This DIY barn door project not only enhanced my home's aesthetic but also imbued it with a personal touch, reflecting my style and effort. The process, from conceptualization to completion, was a valuable learning experience. I hope sharing my experience, enriched with practical advice and insights, inspires and guides you through making your DIY barn door. Remember, taking your time, measuring twice, and cutting once are the keys to a successful DIY project. Happy DIY-ing!


