Building DIY baseboard heater covers can greatly improve the look of any room. My living room had an old, rusty heater that really stood out. I decided to cover it myself, and it made a big difference. Using just a few basic supplies, I built a neat and attractive cover. It was easier than I thought and really made my space feel cozy and updated.
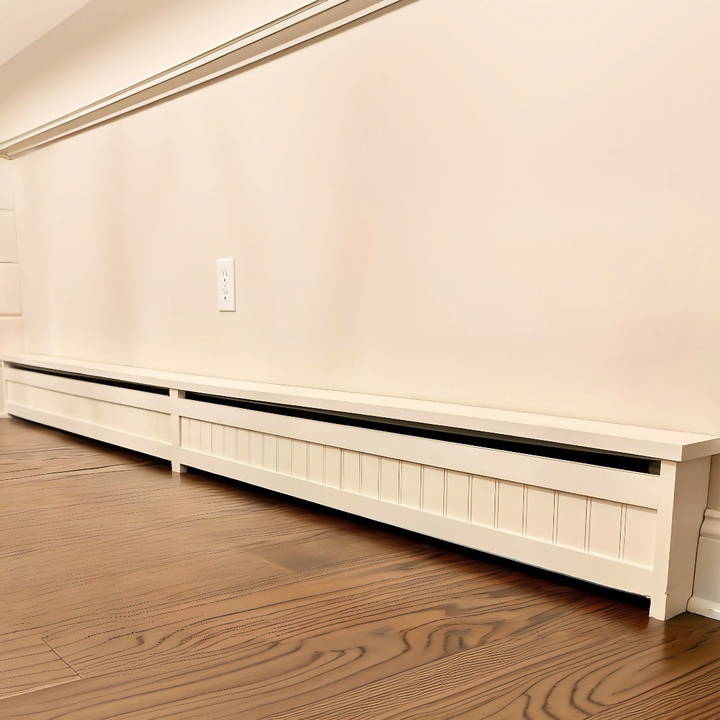
With this guide, you can do it too. Following these steps will help you build baseboard radiator covers that suit your home. I'm helping with this to show you it's possible. If I can do it, you can too. Get your tools ready and start improving your home today!
Materials Needed
- Poplar Wood: I chose this for its smooth texture and durability. You'll need it for the top piece, legs, and rails of the cover.
- Power Tools: A router (preferred), miter saw, and table saw are essential for cutting and shaping the wood.
- Straight Edge & Right Angle: Crucial for ensuring all your cuts are straight and angles are perfect.
- GRK Fasteners: These screws are amazing for attaching pieces without splitting the wood.
- Wood Filler: To seamlessly hide any screw holes.
- Clamps: For holding pieces together securely as you work.
- Safety Gear: Don't forget your eyewear and gloves to protect yourself during the project.
- Tape Measure: Accuracy is key, so a reliable tape measure is a must.
Why These Materials?
Choosing the right materials and tools is essential for the success of the project. Poplar wood, in my experience, provided the perfect balance of ease of work, durability, affordability, and finish quality. Specialty tools like the router and miter saw make the job much easier and more professional-looking, although there are workarounds if you have limited access to tools.
Step by Step Instructions
Learn how to build DIY baseboard heater covers with our step-by-step guide. From measuring to fine-tuning, we cover all the essentials for a perfect finish.
Step 1: Measuring Your Radiator
Measure the length, depth, and height of your radiator. Add an extra half-inch to each dimension to ensure the cover doesn't restrict heat flow.
Step 2: Cutting the Top Piece
Start with an 8-inch wide poplar board. Determine the depth of your radiator cover, then add ⅛-inch for a slight overhang. This aesthetic touch makes the cover look more finished. Rip the top piece to your determined width using a table saw.
Step 3: Building Legs and Rails
For the legs, consider the height of your radiator and add * ¾-inch for the top overlap. Rip two pieces of poplar for the legs to this width. For the rails, aim for 1½-inch width to support the wainscoting or front panels effectively.
Step 4: Assembling the Frame
Use the right angle and clamps to attach the legs to the top piece first. Then, measure and cut the rails, ensuring they fit snugly between the legs. Pre-drill and fasten with GRK screws for a tight, secure build.
Step 5: Adding Wainscoting
Rip the MDF wainscoting panels to fit within the rails, allowing room for them to expand with temperature changes. I left a 1-inch gap at the bottom for aesthetic balance and additional airflow.
Step 6: Fine-Tuning and Finishing Touches
Router grooves in the rails to fit the wainscoting panels, ensuring they slide in snugly. After assembling, fill any screw holes with wood filler, sand as needed, and apply your choice of paint or finish.
Tips & Tricks
- Clamps Are Your Friend: A good set of clamps makes the assembly process much easier, especially when you're working alone.
- Measure Twice, Cut Once: This adage holds especially true in woodworking. Double-check your measurements before cutting.
- Router Usage: If you're new to using a router, practice on scrap wood first. It's a powerful tool that can make or break your project.
- Customization: Feel free to tweak the dimensions to suit your taste or the specific needs of your space. The process I've outlined is adaptable.
Design Customization
Customizing baseboard heater covers lets you match your personal style and home decor. This guide offers practical and stylish options to ensure your DIY project is both functional and visually appealing.
Choose Your Material Wisely
The material you select for your baseboard heater covers can have a significant impact on both their appearance and functionality. Here are some popular options:
- Wood: Offers a classic look and can be painted or stained to match your room.
- Metal: Provides a modern touch and is typically durable and long-lasting.
- MDF (Medium Density Fiberboard): An affordable alternative that's easy to work with and paint.
Color and Finish
The color and finish of your heater covers can transform the look of a room. Consider these ideas:
- Neutral Tones: Blend seamlessly with the surroundings and give a clean, minimalistic feel.
- Bold Colors: Make a statement and add a pop of color to your space.
- Varnish or Sealant: Protects the material and adds a polished finish.
Decorative Touches
Add some decorative elements to make your heater covers unique:
- Cut-Out Patterns: Build patterns with a jigsaw for a decorative touch that also allows heat to escape.
- Trim and Moldings: Use trim or moldings to add a sophisticated edge to the covers.
Functionality Meets Style
Remember, the cover must allow for proper heat distribution and easy access for maintenance:
- Ventilation: Ensure there are sufficient gaps or openings for heat to circulate effectively.
- Hinged Tops or Removable Fronts: Make it easier to clean and maintain the heaters.
DIY Tips for a Professional Look
- Measure Twice, Cut Once: Always double-check your measurements before cutting materials.
- Sand Edges: Smooth out all edges and surfaces to prepare for painting or staining.
- Test Fit: Assemble your cover in place before finalizing to ensure a perfect fit.
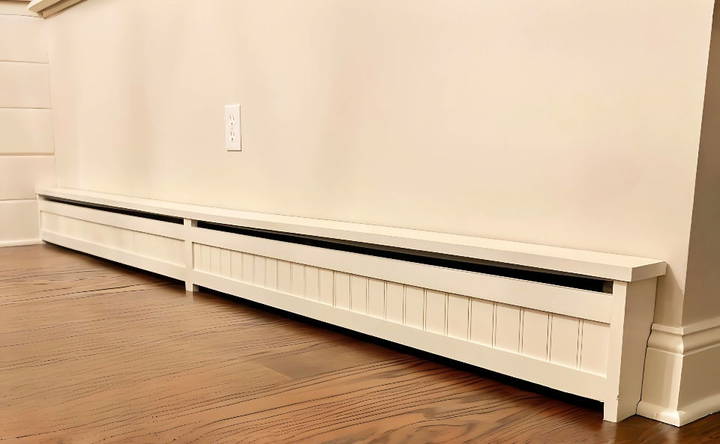
Customize baseboard heater covers for both function and home charm, balancing looks and practicality for your DIY project.
Troubleshooting Common Issues
When undertaking a DIY project like making baseboard heater covers, you might encounter a few hiccups along the way. This section aims to address those potential issues with straightforward solutions, ensuring your project stays on track.
Incorrect Measurements
- Solution: Always use a reliable tape measure and double-check your dimensions. If you cut a piece too short, consider using it for a smaller section of the cover or as an internal support piece.
Material Warping or Damage
- Solution: Store your materials flat and in a dry area before use. If warping occurs, try to gently bend the material back into shape. For minor damages, wood filler or similar products can be used to repair before painting or finishing.
Difficulty in Fitting Covers
- Solution: Ensure you've left enough clearance for the covers to fit over the baseboard heaters. It's better to measure the space a bit larger than too tight. Sand down any edges if necessary for a smoother fit.
Paint or Finish Not Adhering
- Solution: Properly sand and clean the surface before applying any paint or finish. Use a primer suitable for your material to ensure better adhesion of the topcoat.
Covers Overheating
- Solution: Make sure there's adequate ventilation in your design to allow heat to escape. Avoid using flammable materials and check that the covers are not too close to the heating elements.
Difficulty in Maintenance
- Solution: Design your covers with maintenance in mind. Consider making sections removable or adding hinges for easy access when cleaning is needed.
Anticipate issues and prepare solutions to tackle your DIY baseboard heater confidently covers project. Patience and planning are vital to overcoming challenges.
Safety Tips
Building DIY baseboard heater covers can be a rewarding project, but it's crucial to prioritize safety to protect yourself and your home. Here are some essential safety tips to follow:
Material Selection
Choose materials that are non-flammable and can withstand high temperatures without melting or emitting fumes. Materials like metal, certain woods, and MDF are commonly used for their durability and heat resistance.
Proper Ventilation
Ensure your design allows for adequate airflow. This prevents overheating and ensures that the heater operates efficiently. Consider adding grilles or perforations in your design to facilitate this.
Clearance
Maintain a safe distance between the cover and the heater elements. This space acts as a buffer zone, reducing the risk of materials overheating or catching fire.
Easy Access
Design your covers so they can be easily removed or opened for maintenance. This will help you regularly check the condition of the heaters and perform any necessary cleaning or repairs.
Secure Installation
Make sure your covers are securely attached and won't shift or fall, which could pose a risk. Use appropriate fasteners and check them periodically to ensure they remain tight.
Regular Inspections
Inspect your heater covers regularly for signs of wear, damage, or any other safety concerns. Promptly address any issues you find to maintain a safe heating system.
Following these safety tips will ensure your DIY baseboard heater covers are both safe and attractive. Prioritize safety to enjoy warmth and comfort without concern.
FAQs About DIY Baseboard Heater Covers
Discover answers to common questions about DIY baseboard heater covers! Learn installation tips, benefits, and more to enhance your home heating.
Safety is paramount when dealing with heat. Use materials that can withstand high temperatures, like high heat spray paint and angle iron for reinforcement. Always leave enough clearance for proper airflow and prevent materials from touching the heater directly.
Yes, you can! A modern baseboard heater cover with clean lines can be made using 1x2s, 1x4s, wood screws, nails, and rivets. This project is suitable for both experienced DIYers and beginners, as it doesn’t require complex cuts or ornate details.
The easiest type to install is one that requires minimal tools and materials. For instance, a cover made with 1x2s, plywood backing, and high heat spray paint can be assembled quickly. It's versatile and can fit nearly any style, providing a crisp, defined look.
There are many online resources that offer detailed instructions. Websites like House Grail provide walkthroughs for various styles, including shaker and modern designs. They also offer tips for planning, measuring, and avoiding common mistakes.
Measuring and cutting are critical steps in making your DIY baseboard heater cover. First, measure the length, height, and depth of your baseboard heater to determine the size of the cover. Use a tape measure for accuracy. When cutting materials, such as 1x6s or plywood, use a table saw or circular saw for straight cuts. Always measure twice before cutting to ensure precision. For detailed instructions, you can refer to resources like House Grail, which provide step-by-step guides for various styles. Remember, accurate measurements and cuts will lead to a better fit and a more professional-looking end result.
Conclusion
Making your own DIY baseboard heater covers will give your home a fresh, updated look. Get started now with this helpful guide and watch your space transform!


